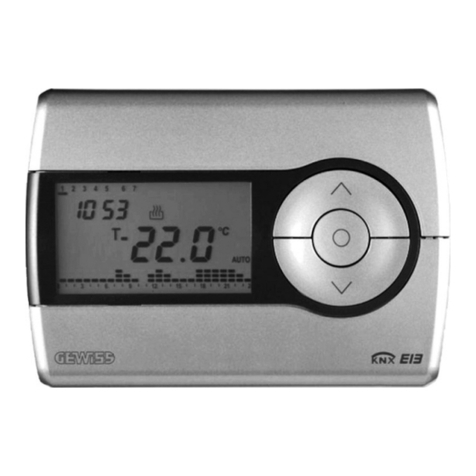
NOBOCOOL NTB-2T User manual

10kΩ-25°C
2kΩ-25°C
Deutsch
Français
Italiano
Polski
Nederlands
Deutsch
Français
Italiano
Polski
Nederlands
Technical data:
Rated voltage: 230V~
Rated current: 16 A
Protection class: IP21
Floor sensor (included): NTC,22kOhm at 25˚C
Cut-o function: 1-pole
Ambient temperature-operation: -40˚C to +40˚C
1 2 3 4
N L
Load
Sensor
NTB-2T
Elektrisk installasjon må kun utføres av
autorisert installatør!
Powermodulen kobles i henhold til diagrammet på
baksiden. Produktet er forberedt for følgende sensorer:
1: Romsensor (intern temperatursensor i
termostaten)
2: Gulvsensor (Ekstern temperatursensor)
22kOhm ved 25˚C (standardinnstilling)
Andre kompatible gulvsensorverdier:
47kOhm v/25˚C 10kOhm v/25˚C
15kOhm v/25˚C 2kOhm v/25˚C
12kOhm v/25˚C
Termostaten oppdager automatisk om en gulvsensor er
tilkoblet og bruker da standardinnstillingen Gulvsensor
(22kOhm ved 25˚C). Ved bruk av sensor med annen
motstandsverdi kan innstillingene endres via veiviseren
eller menyen. En eventuell skjerm på sensorkabelen skal
ikke tilkobles/jordes.
Montering:
1. Monter powermodulen i veggboksen.
2. Sett på plass rammen på powermodulen.
3. Betjeningsmodulen klikkes på plass inni rammen.
Pass på at betjeningsmodulen går i lås mot
powermodulen både øverst og nederst.
Demontering:
Sørg for at kursen er strømløs før produktet
demonteres!
For å demontere betjeningsmodulen, bruk et att
skrujern til å løsne låsen oppe og nede. Trekk så
betjeningsmodulen rett ut. Rammen er nå løs og kan
tas av.
Løsne skruene på veggboksen og trekk ut
powermodulen.
2.
3.
3.
Innhold
1. Betjeningsmodul
2. Ramme
3. Powermodul
4. Gulvsensor - 22kOhm v/25˚C
Viktig:
Gulvføler skal ligge i rør som er forseglet i enden.
Produktet må kun benyttes i anlegg som for øvrig
tilfredsstiller alle krav i gjeldende forskrifter og
direktiver.
Ved bruk av andre følere enn medfølgende, vær
oppmerksom på at følerinngangen ikke er galvanisk
skilt fra spenningsførende fase.
Contents
1. Interface unit
2. Frame
3. Power unit
4. Floor sensor - 22kOhm at 25˚C
Important:
The oor sensor must be installed in a tube that is
sealed at the end.
The product must only be used in installations that are
in accordance with current National regulations.
If a oor sensor, other than the one included in the
package, is used in the installation, please note that the
sensor connector is not isolated from live phase.
The product must only be installed by a
certied electrician!
Connect the power unit according to the instructions at
the back. Available sensor options are:
1: Room sensor (Integrated in the thermostat).
2: Floor sensor (External temperature sensor).
22kOhm at 25˚C (default setting)
Other compatible oor sensor values:
47kOhm at 25˚C 10kOhm at 25˚C
15kOhm at 25˚C 2kOhm at 25°C
12kOhm at 25˚C
The thermostat automatically detects if a oor sensor is
connected, and will then use the default settings Floor
sensor (22kOhm at 25˚C). The settings can be changed
via the setup wizard or the menu if a sensor with a
dierent value is applied. If the sensor cable has a
shield, do not terminate the shield to ground.
Assembly:
1. Mount the power unit in the wall connection box.
2. Place the frame on top of the power unit.
3. The interface unit clicks into place inside the frame.
Make sure the locking mechanisms are fastened
both at the top and the bottom.
Disassembly:
Make sure the product is disconnected from mains
before disassembly!
The interface unit can be removed using a at
screwdriver. Loosen the locking mechanism both at the
top and bottom, and pull out the interface unit. The
frame is now loose and can be removed.
Loosen the screws on the wall connection box and pull
out the power unit.
Barn Road, Dunleer, Co Louth, A92 EH7P, Ireland
www.glendimplex.no, email@glendimplex.no
Produktet skal leveres til gjenvinning ved endt levetid.
Declaration of Conformity (DoC)
Glen Dimplex Nordic AS declares that the equipment described in
this user guide, is in compliance with the essential requirements
and other relevant provisions of EU Directive 2014/53/EU. If you
require a copy of the original signed DoC, please send an e-mail to:
1.
30
Samsvarserklæring (DoC)
Glen Dimplex Nordic AS erklærer herved at utstyret som er beskrevet i
denne anvisningen oppfyller alle vesentlige krav og andre relevante
bestemmelser i EU-direktiv 2014/53/EU. Ved behov for kopi av DoC kan
At the end of its service life, the product must be recycled.
Advarsel
Produkter med elektronisk termostat kan ikke gi garanti
mot frostskader. Sørg for tilleggssikring av
utsatte installasjoner.
Warning
Products with an electronic thermostat cannot guarantee
protection against frost damage. Provide
extra protection for exposed installations.
Installasjonsveiviser
Hvis termostaten skal benyttes i et anlegg hvor
standardinnstillingene ikke kan brukes, er veiviseren et
nyttig hjelpemiddel.
Gå til“Meny > Avansert > Start veiviser” for å gå
trinnvis gjennom termostatens innstillinger.
Innstillingene kan senere endres via menyen, eller ved
å bruke veiviseren igjen.
Setup wizard
In the case of an installation where the default settings
are not appliccable, the setup wizard can be a useful
tool.
Go to“Menu > Advanced > Start wizard” to edit the
thermostat settings step by step.
The settings can later be altered via the menu, or by
running the wizard once more.
Gulvsensor / Floor Sensor
Romsensor
Room sensor
Sensorfunksjoner
Termostaten har re mulige sensorfunksjoner.
Gulvsensor:
Måler temperaturen i gulvet.
Temperaturinnstilling 7-40°C.
Romsensor + gulvsensor (Parkettbeskytter):
MÅ BRUKES ved tregulv og andre typer gulvmateriale som
ikke tåler høy varme. Måler luft- og gulvtemperatur.
Temperaturinnstilling 7-40°C, men gulvtemperaturen
begrenses til maks. 27°C.
Romsensor:
Måler lufttemperaturen i rommet.
Temperaturinnstilling 7-40°C.
Eektregulator:
Brukes i tilfeller hvor man ikke kan benytte gulv- eller
romsensor. Lasten kobles prosentvis inn/ut innenfor en
tidssyklus på 20 minutter.
Innstilling: 0 - 10 ( 0 = 0%, 5 = 50%, 10 = 100% )
Tekniske data:
Merkespenning: 230V~
Merkestrøm: 16 A
Kapslingsklasse: IP21
Gulvsensor (inkludert): NTC, 22kOhm v/25˚C
Bryterfunksjon: 1-polt
Omgivelsestemperatur-drift: -40˚C til +40˚C
Sensor functionality
The thermostat has four dierent sensor functions:
Floor sensor:
Measures the temperature in the oor.
Temperature setting 7-40°C.
Room sensor + oor sensor (Wooden oors):
MUST BE USED for wooden oors and temperature
sensitive materials. Measures air and oor temperatures.
Temperature setting 7-40°C, however the oor
temperature is limited to max. 27°C.
Room sensor:
Measures the air temperature in the room.
Temperature setting 7-40°C.
Power regulator:
Intended for cases where a room or oor sensor is not
applicable. The load is switched on/o between 0-100%
within a cycle of 20 minutes.
Settings: 0 - 10 ( 0 = 0%, 5 = 50%, 10 = 100% )
22
22kOhm
22
Åpne meny
Open menu
Trykk og hold og i 5 sekunder.
Weekly program Setting a weekly program
Ukeprogram Programmering av uketimer
Set the time Set the current day and time
Still klokke Innstilling av dag og klokke
Backlight Set backlight level.
Bakgrunnslys Innstilling av lysstyrke
Standard-
innstilling
Menyoversikt
Language
Norsk
English
Menu overview Default
settings
Keylock Press and hold and for 5 sec.
Språk
Avansert
Norsk
English
Sensor
Sensorverdi
(vises kun når
gulvsensor er
tilkoblet)
Gulvsensor
Rom+Gulv
Romsensor
Eektregulator
47kΩ-25°C
22kΩ-25°C
15kΩ-25°C
12kΩ-25°C
Start veiviser
Tastelås
Kalibrering (ikke mulig ved eektregulator)
Advanced
Sensor
Sensor value
(available when
oor sensor
is connected)
Floor sensor
Room+Floor
Room sensor
Power regulator
47kΩ-25°C
22kΩ-25°C
15kΩ-25°C
12kΩ-25°C
Start wizard
Calibrate (disabled in power reg.mode)
A
Betjening
Termostaten skrus på og av ved hjelp av skyvebryteren
på venstre side. (A)
Opp = På
Ned = Standby.
Termostaten har re knapper, en i hvert hjørne, med
følgende symboler:
Brukes til å stille ønsket temperatur.
I menyen brukes disse knappene til å bla opp og
ned i menyvalg.
Brukes til overstyring av aktiv status.
I menyen leder denne tilbake til forrige nivå.
Åpner menyen.
Inne i menyen vil denne knappen bekrefte valg
og innstillinger.
User interface
Switch the thermostat on and o by using the slider on
the left side. (A)
Up = On
Down = Standby.
The thermostat has four buttons, one in each corner,
with the following symbols:
Set the desired temperature.
Inside the menu, these buttons are used for
scrolling up and down.
Will override the current status.
Inside the menu, this button takes you back to
the previous level.
Opens the menu.
Inside the menu, this button will conrm a
selection or setting.
22
08/83297/0-1
Svenska
Suomi
Svenska
Suomi
Installation and user guide
Monterings- og bruksanvisning
Room & Floor Thermostat
Rom- & Gulvtermostat
10kΩ-25°C
2kΩ-25°C

Add a new time period
Go to“Menu > Weekly program” to add a new time
period to the weekly program. Select“+ Add new” to
create a new period.
First, select the day(s) for which the new time period
should be active. A group of days (Mo - Fr, Sa - Su, Mo -
Su), or a single day can be selected. Conrm by
pressing .
Next, set the time for when the desired temperature
must be reached. Set the hour and minutes using
and . The minutes can be set at 15 min intervals.
Conrm with .
Finally, the mode for the time period is selected. This can
be either Comfort or Eco. Conrm with .
The new time period can now be found in the list of
active periods in the weekly program.
Kalibrering av innstilt temperatur
Innstilt temperatur kan avvike noe fra oppnådd
temperatur avhengig av isolasjon, ventilasjon, plassering
av termostaten osv. Dersom innstilt temperatur avviker
mye fra målt rom- eller gulvtemperatur, er det mulig å
kalibrere den innstilte temperaturen med opptil +/- 5° C.
Viktig:
Temperaturen i rommet/gulvet må ha stabilisert seg i
Komfort eller Øko før man kalibrerer innstilt temperatur.
Når temperaturen er stabil, gå til menyen og velg
“Avansert > Kalibrering”.
Den nåværende temperaturinnstillingen vil da vises på
skjermen. Trykk på eller for å justere innstillingen slik
at den stemmer bedre med målt temperatur.
Bekreft kalibreringen med .
16
Hovedskjerm
A: Viser innstilt temperatur. *
Ved eektregulator vises innstilt eektnivå.
B: Ikonet viser nåværende status:
Komfort (Rød bakgrunn)
Øko (Grønn bakgrunn)
C: Termometersøyle som viser målt temperatur på
sensoren. Markøren (D) tilsvarer den innstilte
temperaturen.Termometersøylen vil stige eller synke
i samsvar med målt gulv- eller romtemperatur. Når
varmeelementet er på, vil søylen pulsere.
* Se også“Kalibrering av innstilt temperatur”.
22
A
B
C
D
Main screen
A: Displays the set temperature. *
When operating as a power regulator, the set power
output is displayed.
B: Icon showing the current mode:
Comfort (Red background)
Eco (Green background)
C: Thermometer bar showing the measured temperature
on the sensor. The small arrow (D) corresponds with
the set temperature. The thermometer bar will rise and
fall according to the measured room or oor
temperature. When the heating element is on, the
bar pulsates.
*Also see“Calibrate the set temperature”.
22
Calibrate the set temperature
The set temperature may deviate from the actual
temperature depending on thermal insulation,
ventilation, thermostat position etc. If the set temperature
deviates signicantly from the measured room or oor
temperature, the set temperature can be calibrated up to
+/- 5° C.
Important:
The temperature in the room/oor must be stabilized in
Comfort or Eco mode before calibrating the set
temperature.
When the temperature is stable, enter the menu and
select: “Advanced > Calibrate”.
The current set temperature is shown in the display.
Press or to adjust the set temperature according to
the measured temperature.
Conrm the calibration by pressing .
Bakgrunnslys
Bakgrunnslyset i displayet lyser opp når man trykker på
knappene på termostaten. Etter en liten stund vil lyset
dimme ned igjen til et lavere nivå.
Avhengig av lyset ellers i rommet, kan det noen ganger
være ønskelig at bakgrunnslyset dimmes helt ned. I
andre rom kan man ønske sterkere bakgrunnslys.
Velg“Meny > Bakgrunnslys”for å stille dimmet lysstyrke
til ønsket nivå. Velg mellom: Maks, Lys, Normal eller
Mørk.
Backlight
When the thermostat is operated, the display will light
up to improve visibility. After a little while, the light will
dim back down.
Depending on the room’s brightness, one may wish to
adjust the dimmed backlight level of the thermostat.
Some rooms may require more light than others.
To adjust the dimmed level of the backlight, select
“Menu > Backlight”and then choose between: Max,
Light, Normal, or Dark.
22
16
22
Overstyring av aktiv status
Et trykk på vil endre termostatens status fra Komfort
til Øko eller motsatt. Overstyringen varer fram til neste
statusendring i termostatens ukeprogram. Hvis
ukeprogrammet ikke har noen statusendringer vil en
overstyring avsluttes kl 0300. Trykk på igjen for å
avslutte en overstyring manuelt.
Overriding the current mode
Pressing once will change the thermostat mode from
Comfort to Eco, or vice versa. The override lasts until the
next change in the thermostat’s weekly program. In the
case of a weekly program with no changes, the override
will be terminated at 03:00. Press again to stop the
override manually.
Tastelås av/på: trykk og hold og i 5 sekunder.
Keylock on/o: press and hold and for 5 seconds
Lokalt ukeprogram
Termostaten kan programmeres med et lokalt
ukeprogram for å spare strøm i de periodene du sover
eller er borte. Ved å sette opp et ukeprogram som er
tilpasset dine behov, sparer du energi uten at det går ut
over komforten.
Local weekly program
The thermostat can be programmed with a local weekly
program to save energy during periods when you are
asleep or away. A weekly program t for your schedule
will save energy without compromising your comfort.
Stille dag og klokke
Ved første gangs oppstart vil termostaten gå rett til
innstilling av dag og klokke.
Bruk og til å bla i lista over dager.
Bekreft dag ved å trykke .
Bruk så og til å stille inn time. Bekreft med .
Gjør det samme for å stille inn minutt.
Hvis termostaten har vært uten strøm i en periode, kan
det hende at klokka må stilles på ny. Termostaten vil da
går rett til skjermen for innstilling av dag og klokke når
strømmen skrus på.
Dersom klokka er innstilt feil, gå til“Meny > Still klokke”
for å korrigere innstillingen.
Dag og klokkeslett skjules dersom tastelåsen er på, eller
når displayet er dimmet ned.
Setting the day and time
At rst startup the thermostat will ask you to set the
current day and time.
Use the and buttons to select the current day.
Conrm the selection by pressing .
Next, use the and buttons to set the hour (24H clock).
Conrm again with . Repeat to set the minutes.
After a power outage or similar, you may need to set the
day and time again. If needed, the thermostat will go
directly to the settings screen when the power is turned
back on.
To correct an incorrect day and time setting, enter the
“Menu > Set time”.
The current day and time is hidden when the keylock is
on, and when the backlight is dimmed down.
Oppsett av ukeprogram
Et ukeprogram deler uka inn i tidsperioder hvor termostaten
skal stå enten i Komfort eller Øko. En tidsperiode stilles inn
ved å velge:
1: Hvilke(n) dag(er) perioden skal gjelde for.
2: Tidspunkt for når rett temperatur skal være oppnådd.
3: Ønsket status, Komfort eller Øko
For eksempel:
Dette betyr at fra kl 06:00 hver dag fra mandag til fredag vil
det være Komfort-temperatur i rommet. Termostaten
beregner selv hvor lang tid i forveien den må begynne
oppvarmingen for å nå ønsket temperatur til rett tid. (Gjelder
ikke eektregulator.)
Hver tidsperiode varer helt til en ny tidsperiode overtar. Man
må legge inn alle perioder med starttid og status.
Det anbefales å lage seg en oversikt over ønskede
tidsperioder før de legges inn på termostaten.
Setting up a weekly program
A weekly program divides the week into time periods where
the thermostat will be in either Comfort or Eco mode. A time
period is dened by setting:
1: The day(s) the period should be active.
2: When the desired temperature should be reached.
3: The mode, Comfort or Eco.
For example:
This period makes sure the desired comfort temperature is
reached by 06:00 on Monday through Friday. The thermostat
calculates the startup time in order to reach the right
temperature at the right hour. (Does not apply when in power
regulator mode).
A time period lasts until a new time period takes over. All
periods must be dened with a startup time and mode.
It is adviced to make a plan of the time periods needed, before
programming the device.
Ma-Fr 06:00 Mo-Fr 06:00
00
01
02
03
04
05
06
07
08
09
10
11
12
13
14
15
16
17
18
19
20
21
22
23
24
Ma Ti On To Fr Lø Sø
Ma-Fr 08:00
Lø-Sø 08:30
Ma-Fr 22:00
Ma-Fr 06:00
Lø 23:30
Sø 22:00
Legg til ny tidsperiode
Gå til“Meny > Ukeprogram”for å legge inn en ny
tidsperiode i ukeprogrammet. Velg“+ Legg til ” for å
opprette en ny periode.
Først velges hvilke(n) dag(er) den nye tidsperioden skal
gjelde for. Det er mulig å velge grupper av dager (Ma - Fr,
Lø - Sø, Ma - Sø) eller en enkelt dag. Bekreft valget med .
Så stilles tidspunkt for når rett temperatur skal være nådd.
Timer og minutter stilles med og . Minutter kan stilles
i intervaller på ett kvarter. Bekreft med .
Til sist velges ønsket status for perioden som enten
Komfort eller Øko. Bekreft med .
Den nye tidsperioden ligger nå i lista over aktive perioder i
ukeprogrammet.
Endre eller slette en tidsperiode
For å endre eller slette en tidsperiode i ukeprogrammet,
gå til“Meny > Ukeprogram”. Her nnes en liste over
aktive tidsperioder i programmet. Velg tidsperioden som
skal endres eller slettes og bekreft med .
I neste meny kan man velge“Endre”eller “Slett”. Bekreft
ønsket valg med .
Velges“Endre” kommer man videre til innstilling av
dag(er), tid og ønsket status. Endre verdiene etter behov
og bekreft med .
“Slett” vil erne tidsperioden fra ukeprogrammet og den
vil ikke lenger ligge i lista over aktive perioder.
Edit or delete a time period
To edit or delete a time period in the weekly program, go
to“Menu > Weekly program”. From the list of active time
periods, select the one you want to edit or delete.
Conrm the selection with .
The next menu oers the choice to“Edit”or“Delete”.
Conrm your selection with .
Selecting “Edit” will take you to the setting of day(s), time
and mode selection. Make the adjustments needed and
conrm with .
Deleting a time period will remove it from the weekly
program and from the list of active time periods.
Eksempel - Example
Ma-Fr 15:30
22
Ma 14:23
UKEPROGRAM
22
+ Legg til
Ma-Fr 06:00
Ma-Fr 08:00
Lø-Sø 08:30
Other NOBOCOOL Thermostat manuals

