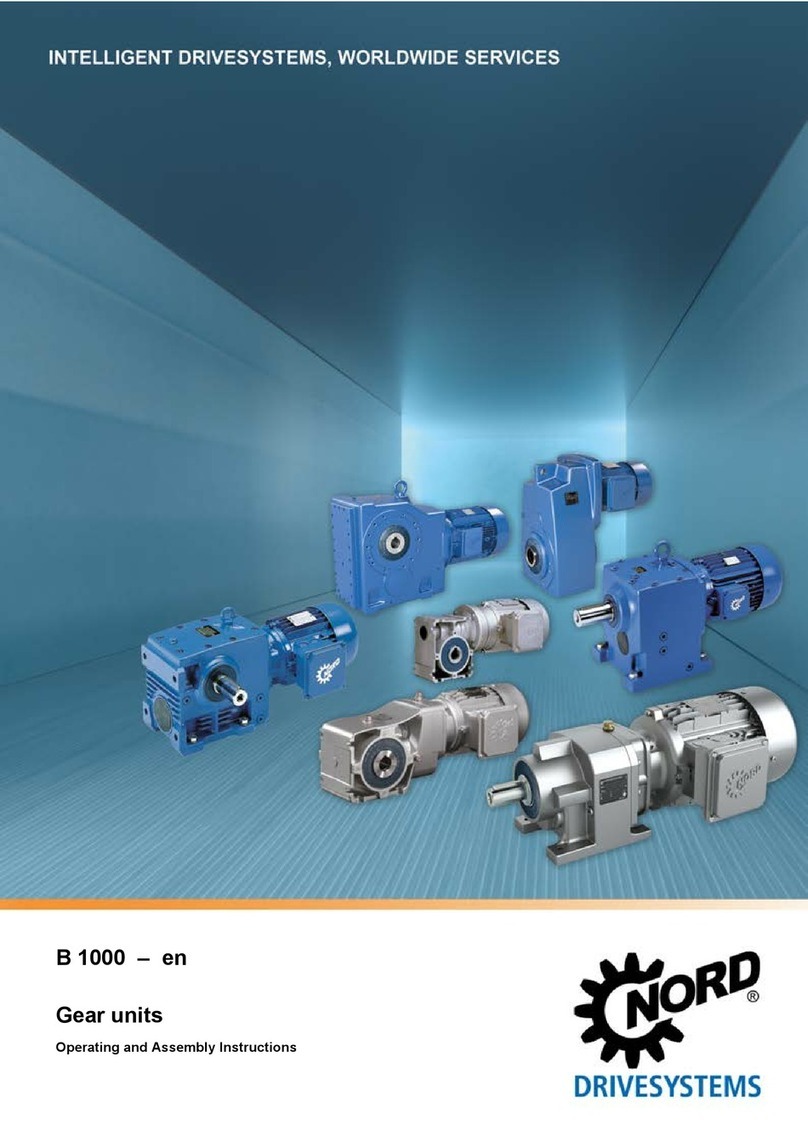
Nord Drivesystems B 1000 Specification sheet

B 1000 –en
Gear units
Manual with installation instructions

Gear units – Manual with installation instructions
2 B 1000 en-3921
Read this manual with installation instructions
Read this manual with installation instructions carefully prior to performing any work on or putting the
gear unit into operation. Always observe the instructions in this document.
Keep this document in the vicinity of the unit motor so that it is available if required.
Please also note the following documents:
• Gear unit catalogues,
• Documentation for the electric motor,
• Documentation for equipment which is attached or provided.
Please contact Getriebebau NORD GmbH & Co. KG if you require further information.

Documentation
B 1000 en-3921 3
Documentation
Designation:
B 1000
Part No.:
6052802
Series: Gear units and geared motors
Type series:
Gear unit
types: Parallel gear units
NORDBLOC helical gear units
Standard helical gear units
Parallel shaft gear units
Bevel gear units
Helical worm gear units
MINIBLOC worm gear units
UNIVERSAL worm gear units
Version list
Title,
Date
Order number /
Version Remarks
Internal code
B 1000,
February
2013
6052802 / 0713
-
B 1000,
September
2014
6052802 / 3814
• General corrections
B 1000
,
April 2015
6052802
/ 1915 • New gear unit types SK 10382.1 + SK 11382.1
B 1000,
March 2016
6052802 / 0916
• General corrections
• New bevel gear units SK 920072.1 + SK 930072.1
B 1000,
September
2016
6052802 / 3816
• General corrections
• New helical gear units SK 071.1, SK 171.1, SK 371.1, SK 571.1,
SK 771.1;
B 1000,
June 2018
6052802 / 2518
• General corrections
• New parallel shaft gear units SK 0182.1, SK 0282.1, SK 1282.1,
SK 1382,1
• New worm gear unit SK 02040.1
B 1000,
December
2018
6052802 / 5018
• General corrections
• Revision of safety and warning information
• New parallel shaft gear units NORDBLOC SK 871.1, SK 971.1, SK
1071.1

Gear units – Manual with installation instructions
4 B 1000 en-3921
Title,
Date
Order number /
Version Remarks
Internal code
B 1000,
October
2019
6052802 / 4419
• General corrections
• Addition of GRIPMAXX™ (Option M)
B 1000,
September
2021
6052802 / 3921
• Editorial revision
• General corrections and amendments
32551
Table 1: Version list B 1000

Copyright notice
B 1000 en-3921 5
Copyright notice
As an integral component of the device described here, this document must be provided to all
users in a suitable form.
Any editing or amendment or other utilisation of the document is prohibited.
Publisher
Getriebebau NORD GmbH & Co. KG
Getriebebau-Nord-Straße 1 •22941 Bargteheide, Germany •http://www.nord.com
Fon +49 (0) 45 32 / 289-0 •Fax +49 (0) 45 32 / 289-2253
Member of the NORD DRIVESYSTEMS Group

Gear units – Manual with installation instructions
6 B 1000 en-3921

Table of Contents
B 1000 en-3921 7
Table of Contents
1Safety information.....................................................................................................................................11
1.1 Intended use ....................................................................................................................................11
1.2 Do not make any modifications........................................................................................................11
1.3 Performing inspection and maintenance work .................................................................................11
1.4 Personnel qualification.....................................................................................................................11
1.5 Safety for particular activities ...........................................................................................................12
1.5.1 Check for transport damage...............................................................................................12
1.5.2 Safety information for installation and maintenance...........................................................12
1.6 Hazards............................................................................................................................................12
1.6.1 Hazards when lifting ...........................................................................................................12
1.6.2 Hazards due to rotating parts .............................................................................................12
1.6.3 Hazards due to high or low temperatures...........................................................................13
1.6.4 Hazards due to lubricants and other substances................................................................13
1.6.5 Hazards due to noise..........................................................................................................13
1.6.6 Hazards due to pressurised coolants .................................................................................13
2Description of gear units..........................................................................................................................14
2.1 Gear unit types and type designations.............................................................................................14
2.2 Name plate.......................................................................................................................................16
3Transport, storage, assembly ..................................................................................................................17
3.1 Transporting the gear unit................................................................................................................17
3.2 Storage and downtimes ...................................................................................................................17
3.2.1 General measures..............................................................................................................17
3.2.2 Storage and downtimes in excess of 3 months ..................................................................18
3.2.3 Storage and downtimes in excess of 9 months ..................................................................18
3.3 Preparing for installation ..................................................................................................................19
3.3.1 Check for damages ............................................................................................................19
3.3.2 Remove corrosion protection agents..................................................................................19
3.3.3 Check rotational direction...................................................................................................19
3.3.4 Check ambient conditions ..................................................................................................19
3.3.5 Drives with nsd tupH surface treatment..............................................................................20
3.3.6 Installing the oil expansion chamber (Option: OA)..............................................................20
3.3.7 Installing the oil reservoir tank (Option: OT) .......................................................................21
3.4 Installing the gear unit......................................................................................................................21
3.5 Installation of a hub on solid shaft (option: V, L) ..............................................................................22
3.6 Fitting push-on gear units with fastening element (option: B)...........................................................24
3.7 Fitting a hollow shaft with shrink disc (Option: S).............................................................................26
3.8 Fitting a hollow shaft with GRIPMAXX™ (Option: M).......................................................................29
3.9 Fitting the covers (option: H, H66) ...................................................................................................31
3.10 Fitting the covers..............................................................................................................................32
3.11 Fitting a standard motor (Option: IEC, NEMA, AI, AN).....................................................................32
3.12 Mounting of the cooling coil onto the cooling system.......................................................................36
3.13 Installation of the external oil/air cooler............................................................................................37
3.13.1 Connecting hoses...............................................................................................................37
3.13.2 Electrical connection...........................................................................................................37
3.14 Installation of an oil expansion chamber (Option: OA).....................................................................38
3.14.1 Installation of the sizes I, II and III ......................................................................................38
3.14.2 Installation of sizes 0A and 0B............................................................................................38
3.15 Subsequent painting ........................................................................................................................39
3.16 Electrical connection of the mounted motor.....................................................................................39
4Commissioning .........................................................................................................................................40
4.1 Checking the oil level.......................................................................................................................40
4.2 Activating the vent............................................................................................................................40
4.3 Activating the automatic lubricant dispenser....................................................................................41
4.4 Cooling coil (Option: CC) .................................................................................................................42
4.5 Running-in time for the worm gear unit............................................................................................43
4.6 Checklist ..........................................................................................................................................43

Gear units – Manual with installation instructions
8 B 1000 en-3921
5Service and maintenance .........................................................................................................................44
5.1 Inspection and maintenance intervals..............................................................................................44
5.2 Service and maintenance work........................................................................................................45
5.2.1 Visual inspection for leaks..................................................................................................45
5.2.2 Check for running noises....................................................................................................45
5.2.3 Checking the oil level..........................................................................................................46
5.2.4 Visual inspection of the rubber buffers (Option: G, VG)......................................................47
5.2.5 Visual inspection of the hoses (Option: OT, CS2-X)...........................................................48
5.2.6 Re-greasing (Option: VL2, VL3, W, AI, AN)........................................................................48
5.2.7 Replacing the automatic lubricant dispenser......................................................................48
5.2.8 Change the oil ....................................................................................................................49
5.2.9 Clean and check vent screw...............................................................................................50
5.2.10 Replacing the shaft sealing ring..........................................................................................50
5.2.11 Re-lubrication of bearings in the gear unit..........................................................................50
5.2.12 General overhaul................................................................................................................50
6Disposal .....................................................................................................................................................51
7Appendix....................................................................................................................................................52
7.1 Versions and mounting position.......................................................................................................52
7.1.1 Explanation of symbols.......................................................................................................52
7.1.2 UNIVERSAL/MINIBLOC worm gear units ..........................................................................53
7.1.3 Parallel shaft gear units with oil level tank..........................................................................54
7.1.4 Overview of mounting positions..........................................................................................55
7.2 Lubricants ........................................................................................................................................68
7.2.1 Roller bearing greases .......................................................................................................68
7.2.2 Gear oils.............................................................................................................................69
7.3 Screw tightening torques..................................................................................................................71
7.4 Troubleshooting ...............................................................................................................................72
7.5 Leakage and leak-tightness .............................................................................................................73
7.6 Repair information............................................................................................................................74
7.6.1 Repairs...............................................................................................................................74
7.6.2 Internet information.............................................................................................................74
7.7 Warranty ..........................................................................................................................................74
7.8 Abbreviations ...................................................................................................................................75

List of illustrations
B 1000 en-3921 9
List of illustrations
Figure 1: Name plate............................................................................................................................................. 16
Figure 2: Example of a simple pulling device ........................................................................................................ 22
Figure 3: Permissible application of force to drive and driven shafts..................................................................... 23
Figure 4: Applying lubricant to the shaft and the hub............................................................................................. 24
Figure 5: Removing the factory-fitted closing cap.................................................................................................. 25
Figure 6: Gear unit mounted on shaft with a shoulder using the fastening element .............................................. 25
Figure 7: Gear unit mounted on shaft without a shoulder using the fastening element ......................................... 25
Figure 8: Removal using dismantling device ......................................................................................................... 25
Figure 9: Mounting the rubber buffer (Option G and/or VG) on parallel shaft gear units ....................................... 26
Figure 10: Attaching the torque support on bevel gear and worm gear units ........................................................ 26
Figure 11: Hollow shaft with shrink disc................................................................................................................. 27
Figure 12: GRIPMAXX™, exploded diagram ........................................................................................................ 29
Figure 13: Fitting the covers, Option SH, Option H, and Option H66..................................................................... 31
Figure 14: Disassembly and assembly of the cover cap........................................................................................ 32
Figure 15: Fitting the coupling onto the motor shaft - various types of coupling.................................................... 34
Figure 16: Cooling cover ....................................................................................................................................... 36
Figure 17: Connection of the oil/air cooler............................................................................................................. 37
Figure 18: Position of the oil expansion chamber.................................................................................................. 38
Figure 19: Position of the oil expansion chamber.................................................................................................. 39
Figure 20: Activating the vent screw...................................................................................................................... 40
Figure 21: Activating the pressure vent screw....................................................................................................... 40
Figure 22: Removing the vent plug and fitting the special pressure vent............................................................... 41
Figure 23: Fitting the grease collection container.................................................................................................. 41
Figure 24: Activating the automatic lubricant sensor with standard motor mounting ............................................. 42
Figure 25: Adhesive label...................................................................................................................................... 42
Figure 26: Checking the oil level with a dipstick .................................................................................................... 46
Figure 27: Re-grease IEC/NEMA adapters AI and AN with option BRG1 ............................................................. 48
Figure 28: Switching the automatic lubricant sensor with standard motor mounting ............................................. 48
Figure 29: Parallel shaft gear units with oil level tank............................................................................................ 54

Gear units – Manual with installation instructions
10 B 1000 en-3921
List of tables
Table 1: Version list B 1000..................................................................................................................................... 4
Table 2: Gear unit types and type designations..................................................................................................... 14
Table 3: Versions and options............................................................................................................................... 15
Table 4: Permissible machine shaft tolerances ..................................................................................................... 30
Table 5: IEC and NEMA motor weights................................................................................................................. 32
Table6: Motor parallel keys ................................................................................................................................... 35
Table 7: Position of the half-coupling on the NEMA motor shaft............................................................................ 35
Table 8: Checklist for commissioning.................................................................................................................... 43
Table 9: Inspection and maintenance intervals...................................................................................................... 44
Table 10: Materials................................................................................................................................................ 51
Table 11: Roller bearing greases........................................................................................................................... 68
Table 12: Gear oils................................................................................................................................................ 70
Table 13: Screw tightening torques ....................................................................................................................... 71
Table 14: Overview of malfunctions....................................................................................................................... 72
Table 15: Definition of leaks according to DIN 3761.............................................................................................. 73

1 Safety information
B 1000 en-3921 11
1 Safety information
1.1 Intended use
These gear units are used to transmit rotary movements. They convert velocity and torque. They are
intended for use as part of a drive system in commercially used plant and machinery. The gear units
must not be operated until it has been established that the plant or machinery can be safely operated
with the gear unit. Suitable protective measures must be provided if failure of a gear unit or a geared
motor could result in a risk to persons. The machine or system must comply with local legislation and
directives. All applicable health and safety requirements must be met. In particular, the Machinery
Directive 2006/42/EC, TR CU 010/2011 and the TR CU 020/2011 must be especially observed in the
relevant areas of application.
The gear units and geared motors to which this manual with installation instructions refers to are
usually components for installation in machines according to the current EC Machinery Directive
2006/42/EG.
In certain individual cases in which the gear unit or the geared motor is considered as a ready-to-
install drive system for specific applications, this drive system is classified as a incomplete machine
according to the current EC Machinery Directive 2006/42/EG. A corresponding declaration of
incorporation is enclosed with the product.
The gear units may not be used in environments in which an explosive atmosphere can occur.
The gear units may only be used according to the information in the technical documentation from
Getriebebau NORD GmbH & Co. KG. Damage to the gear unit may result if the gear unit is not used
as intended and according to the information in the operating and assembly manual. This may also
result in personal injury.
The base or the gear unit mount must be appropriately designed for the weight and torque. All of the
fastenings provided must be used.
Some gear units are equipped with a cooling coil. These gear units may only be operated if the cooling
circuit is connected and in operation.
1.2 Do not make any modifications.
Do not make any structural modifications to the gear unit. Do not remove any protective guards.
1.3 Performing inspection and maintenance work
Due to lack of maintenance and damage, malfunctions may occur which can result in personal injury.
• Carry out all servicing and maintenance work at the specified intervals.
• Also note that servicing is necessary after long storage periods prior to commissioning.
• Do not operate damaged gear units. The gear unit must not have any leaks.
1.4 Personnel qualification
All transport, storage, installation, commissioning and maintenance work must be carried out by
qualified specialist personnel.
Qualified specialist personnel are persons who have the training and experience to recognise and
avoid any possible risks.

Gear units – Manual with installation instructions
12 B 1000 en-3921
1.5 Safety for particular activities
1.5.1 Check for transport damage
Transport damage may cause malfunctions of the gear unit, which may cause personal injury. Oil
which escapes due to leaks may cause a slipping hazard.
• Check the packaging and the gear unit for transport damage.
• Do not operate damaged gear units.
1.5.2 Safety information for installation and maintenance
Before starting work on the gear unit disconnect the drive from the power supply and secure it against
accidental switch-on. Allow the gear unit to cool down. Depressurise the cooling circuit lines.
Damaged or defective components, attachment adapters, flanges and covers may have sharp edges.
Wear work gloves and work clothing.
1.6 Hazards
1.6.1 Hazards when lifting
Persons may be injured by falling or swinging gear units. Therefore also observe the following
information:
• Cordon off a wide area around the hazard area. Take care that there is adequate space to avoid
swinging loads.
• Never stand under suspended loads.
• Use adequately dimensioned means of transport which are suitable for the purpose. The weight of
the gear unit can be obtained from the type plate.
• Only lift the gear units by the eye bolts which are provided. The eye bolts must be fully screwed in.
Only pull on the eye bolts vertically, never cross-wise or at an angle. Only use the eye bolts to lift
the gear unit without other components. The eye bolts are not designed for lifting the gear unit with
attachments. Use the eye bolts on both the gear unit and the motor to lift a geared motor.
1.6.2 Hazards due to rotating parts
Rotating parts cause a risk of entanglement. This may lead to severe injuries such as crushing or
strangling.
• Provide contact protection. In addition to shafts, this also applies to fans as well as drives and
driven elements such as belt drives, chain drives, shrink discs and couplings. Take possible run-on
of the machine into consideration for the design of protective devices.
• Do not operate the drive without covers or hoods.
• Secure the drive to prevent activation during installation and maintenance work.
• For test operation do not switch on the drive without an installed driven element or secure the
motor shaft key.
• Also observe the safety information in the operating and installation instructions provided by
manufacturers of components supplied.

1 Safety information
B 1000 en-3921 13
1.6.3 Hazards due to high or low temperatures
The gear unit may heat up to 90 °C during operation. Touching hot surfaces or contact with hot oil may
result in burns. At very low ambient temperatures freezing may occur on contact.
• Only touch the gear unit when wearing gloves after operation or at very low ambient temperatures.
• Before starting maintenance work, allow the gear unit to cool down sufficiently after operation.
• Provide a contact guard if there is a risk that persons may touch the gear unit when it is in
operation.
• Bursts of hot oil mist may be emitted from the pressure vent screw during operation. Provide a
suitable guard so that persons cannot be injured by this.
• Do not place any flammable materials on the gear unit.
1.6.4 Hazards due to lubricants and other substances
Chemical substances which are used with the gear unit may be toxic. Eye injuries may result if these
substances enter the eyes. Lubricants and adhesives may cause skin irritation.
Oil mist may escape when vent screws are opened.
Due to lubricants and conservation materials, gear units may be slippery and slip out of the hands.
There is a slipping hazard from spilled lubricants.
• When working with chemical substances wear chemical-resistant gloves and work clothing. Wash
your hands after working.
• Wear protective goggles if there is a possibility of splashed chemicals, for example when filling oil
or during cleaning work.
• If chemicals enter the eyes, rinse with large amounts of cold water immediately. Consult a
physician in case of symptoms.
• Observe the safety data sheets for the chemicals. Keep the safety data sheets in the vicinity of the
gear unit.
• Collect spilled lubricants immediately with a binding agent.
1.6.5 Hazards due to noise
Some gear units or attached components may cause hazardous noise levels during operation. Wear
hearing protection if work has to be carried out close to such gear units.
1.6.6 Hazards due to pressurised coolants
The cooling system is under high pressure. Damage or opening a cooling line which is under pressure
may result in injury. Depressurise the cooling circuit before working on the gear unit.

Gear units – Manual with installation instructions
14 B 1000 en-3921
2 Description of gear units
2.1 Gear unit types and type designations
Gear unit types/ Type designations
UNICASE helical gear units
2-stage: SK 02, SK 12, SK 22 SK 32, SK 42, SK 52, SK 62N, SK 62, SK 72, SK 82, SK 92, SK 102
3-stage: SK 03, SK 13, SK 23, SK 33N, SK 43, SK 53, SK 63, SK 73, SK 83, SK 93, SK 103
NORDBLOC.1® helical gear unit
1-stage: SK 071.1, SK 171.1, SK 371.1, SK 571.1, SK 771.1, SK 871.1, SK 971.1, SK 1071.1
2-stage: SK 072.1, SK 172.1, SK 372.1, SK 572.1, SK 672.1, SK 772.1, SK 872.1, SK 972.1
3-stage: SK 373.1, SK 573.1, SK 673.1, SK 773.1, SK 873.1, SK 973.1
STANDARD helical gear units
2-stage: SK 0, SK 01, SK 20, SK 25, SK 30, SK 33
3-stage: SK 010, SK 200, SK 250, SK 300, SK 330
UNICASE parallel gear units
2-stage: SK 0182NB, SK 0182.1, SK 0282NB, SK 0282.1, SK 1282, SK 1282.1, SK 2282, SK 3282, SK 4282,
SK 5282, SK 6282, SK 7282, SK 8282, SK 9282
3-stage: SK 2382, SK 3382, SK 4382, SK 5382, SK 6382, SK 7382, SK 8382, SK 9382, SK 10382,
SK 10382.1, SK 11382
UNICASE bevel gear units
3-stage: SK 9012.1, SK 9016.1, SK 9022.1, SK 9032.1, SK 9042.1, SK 9052.1, SK 9062.1, SK 9072.1,
SK 9082.1, SK 9086.1, SK 9092.1, SK 9096.1
4-stage: SK 9013.1, SK 9017.1, SK 9023.1, SK 9033.1, SK 9043.1, SK 9053.1
NORDBLOC.1® bevel gear unit
2-stage: SK 920072.1, SK 92072.1, SK 92172.1, SK 92372.1, SK 92672.1, SK 92772.1, SK 930072.1,
SK 93072.1, SK 93172.1, SK 93372.1, SK 93672.1, SK 93772.1
UNICASE worm gear units
2-stage: SK 02040, SK 02040.1, SK 02050, SK 12063, SK 12080, SK 32100, SK 42125
3-stage: SK 13050, SK 13063, SK 13080, SK 33100, SK 43125
UNIVERSAL SI worm gear units
1-stage: SK 1SI31, SK 1SID31, SK 1SI40, SK 1SID40, SK 1SI50, SK 1SID50, SK 1SI63, SK 1SID63, SK 1SI75
2-stage (Helical worm gear unit): SK 2SID40, SK 2SID50, SK 2SID63
UNIVERSAL SMI worm gear units
1-stage: SK 1SMI31, SK 1SMID31, SK 1SMI40, SK 1SMID40, SK 1SMI50, SK 1SMID50, SK 1SMI63,
SK 1SMID63, SK 1SMI75
2-stage (Helical worm gear unit): SK 2SMID40, SK 2SMID50, SK 2SMID63
Table 2: Gear unit types and type designations
Double gear units consist of two single gear units. The type designation of the SK 73/22 double gear
unit, for example, means that the double gear unit consists of the single gear units SK 73 and SK 22.

2 Description of gear units
B 1000 en-3921 15
Abbreviation
Description
(without)
Foot mounting with solid shaft
/31
Worm gear first stage
/40
Worm gear first stage
5
Reinforced output shaft
A
Hollow shaft
AI
Standard IEC motor attachment
AI…BRG1
Standard IEC motor attachment with manual re-lubrication
AI…RLS
Standard IEC motor attachment with integrated back stop
AL
Reinforced axial bearing
AN
Standard NEMA motor attachment
AN…BRG1
Standard NEMA motor attachment with manual re-lubrication
AN…RLS
Standard NEMA motor attachment with integrated back stop
B
Fastening element
CC
Cooling coil
D
Torque arm
DR
Pressure vent
EA
Splined hollow shaft
F
B5 flange
G
Rubber buffer for torque arm
H
Cover cap
/H10
Modular helical pre-stage for universal worm gear units
H66
IP66 cover
IEC
Standard IEC motor attachment
K
Torque bracket
L
Solid shaft both sides
M
GRIPMAXX™
MK
Motor bracket
NEMA
Standard NEMA motor attachment
OA
Oil expansion chamber
OT
Oil level tank
R
Back stop
S
Shrink disc
SCP
Screw conveyor flange
SO1
Synthetic oil ISO VG 220
V
Solid shaft (for standard helical gear units: reinforced drive)
VG
Reinforced rubber buffer
VI
Viton radial shaft seals
VL
Reinforced output bearings
VL2
Agitator version
- Reinforced bearings
VL3
Agitator version
- Reinforced bearings
- Drywell
VS
Reinforced shrink disc
W
Free drive shaft
X
Housing foot mounting
Z
B14 flange
Table 3: Versions and options

Gear units – Manual with installation instructions
16 B 1000 en-3921
2.2 Name plate
The name plate must be firmly attached to the gear unit and must not be subjected to permanent
soiling. Please contact the NORD service department if the name plate is illegible or damaged.
Figure 1: Name plate
Explanation
1
DataMatrix code
8
Weight
2
NORD gear unit type
9
Overall gear unit ratio
3
Modes of operation
10
Installation position
4
Year of manufacture
11
Rated speed of gear unit output shaft
5
Serial number
12
Lubricant type, viscosity and quantity
6 Rated torque of gear unit output shaft 13 Customer part number
7
Drive power
14
Operating factor

3 Transport, storage, assembly
B 1000 en-3921 17
3 Transport, storage, assembly
3.1 Transporting the gear unit
WARNING
Hazard due to falling loads
• The thread of the eyebolt must be fully screwed in.
• As shown in the illustration to the right, only lift on
the eyebolts vertically to the female thread and not
more oblique than 45° to the vertical.
• Note the centre of gravity of the gear unit.
Only use the eyebolts attached to the gear unit for transport. If geared motors have an additional
eyebolt attached to the motor, this must also be used.
Transport the gear unit with care. Impacts to the free ends of shafts may cause internal damage to the
gear unit.
No additional loads must be attached to the gear unit.
Use suitable aids such as cross-beams or similar to facilitate transportation of the gear unit. Gear units
may only be transported with shackles and lifting strapschains at an angle of 90° to 70° to the
horizontal.
3.2 Storage and downtimes
3.2.1 General measures
• Store the gear unit in a dry space, relative humidity less than 60%.
• Store the gear unit at a temperature in the range of – 5 °C to + 50 °C without severe temperature
fluctuations.
• Do not expose the gear unit to direct sunlight or UV light.
• There must be no aggressive or corrosive substances (contaminated air, ozone, gases, solvents,
acids, alkalis, salts, radioactivity etc.) in the immediate vicinity.
• The gear unit must not be exposed to vibration or oscillation.
• Store the gear unit in the mounting position (see chapter 7.1 "Versions and mounting position").
Secure it against falling.

Gear units – Manual with installation instructions
18 B 1000 en-3921
3.2.2 Storage and downtimes in excess of 3 months
Note the following measures in addition to Section 3.2.1 "General measures".
• Repair damages to the coating. Check if a corrosion protection agent has been applied to the
flange bearing surfaces, the shaft ends and the unpainted surfaces. If required, apply a suitable
corrosion protection agent to the surfaces.
• Seal all openings on the gear unit.
• The output shaft must be rotated by at least one revolution every 3 months so that the contact
position of the gear teeth and the roller bearings are changed.
3.2.3 Storage and downtimes in excess of 9 months
Under certain conditions, storage of 2 to 3 years is possible. The specified storage duration is for
guidance only. The actual storage duration depends on the local conditions. Note the following
measures in addition to Sections 3.2.1 "General measures"and 3.2.2 "Storage and downtimes in
excess of 3 months".
Gear units can be supplied prepared for long-term storage. The gear units are completely filled with
lubricant, have VCI corrosion protection agent mixed with the gear oil or are filled with small quantities
of VCI concentrate. The adhesive label on the housing shows the respective information.
Conditions of the gear unit and storage area for long-term storage prior to commissioning:
• Store the gear unit at a temperature in the range of -5 °C to +40 °C without severe temperature
fluctuations.
• Check if the sealing cord in the vent screw is in place. It must not be removed during storage.
• Store the gear unit in a dry space. With a relative humidity less than 60%, the gear unit can be
stored for up to two years; with a relative humidity less than 50%, storage of up to three years is
possible.
• For gear units, which are filled with VCI concentrate for long-term storage, the VCI concentrate
must be renewed after 2 years and distributed in the oil by rotating the shaft.
• In tropical regions, protect the gear unit against damage by insects.
• Gear unit components such as brakes, couplings, belt drive, and cooling units must be protected
for a long-term storage in accordance to their operation instructions.
In addition to the preparations listed in 4 "Commissioning", the following measures are necessary
before commissioning:
• Check the gear unit for external damage.
• After storage of more than 2 years, or with storage temperatures outside of the permissible range
from -5 °C to +40 °C, replace the lubricant in the gear unit before commissioning.
• If the gear unit is completely filled, the oil level must be reduced according to the mounting position.
For the lubricant quantity and lubricant type, refer to the information on the name plate.
• For gear units without oil filling, the oil level must be refilled and checked according to chapter 5.2.3
"Checking the oil level" before commissioning. The VCI concentrate may remain in the gear unit.
The VCI concentrate is not mixable with polyglycol-based lubricants (PG oils). If PG oils are used,
the VCI concentrate must be removed from the gear unit. When using VCI additive, only use the oil
types which are specified on the name plate and are approved by Getriebebau NORD (see chapter
7.2.2 "Gear oils").
• For the option with manual re-lubrication, switch the bearing grease after a storage of more than 2
years. The service life of the grease is reduced after a storage time or gearbox shutdown of more
than 9 months (see chapter 5.2.6 "Re-greasing (Option: VL2, VL3, W, AI, AN)").
• Gear units filled with VCI concentrate for long-term storage are fully closed. Take care that the vent
is fitted and released as necessary prior to commissioning.

3 Transport, storage, assembly
B 1000 en-3921 19
3.3 Preparing for installation
3.3.1 Check for damages
Please examine the delivery for transport and packaging damage immediately on receipt. Pay
particular attention to radial shaft seals and sealing caps. Report any damage to the carrier
immediately.
Do not put the drive into operation if damage such as leaks are visible.
3.3.2 Remove corrosion protection agents
All bare metal surfaces and shafts of the drive are protected with corrosion protection agents before
shipping.
Thoroughly remove corrosion protection agents and any dirt (e.g. colour residues) from all shafts,
flange surfaces and gear unit attachment surfaces before assembly.
3.3.3 Check rotational direction
If an incorrect rotational direction may result in damage or potential risk, check for the correct
rotational direction of the output shaft during a test run before attaching it to the machine. Ensure the
correct rotational direction during operation.
For gear units with an integrated back stop, switching the drive motor to the blocked direction of
rotation, may result in damage to the gear unit. Gears with integrated back stops are marked with
arrows on the drive/driven sides. The arrows point in the rotation direction of the gear unit. When
connecting the motor and during motor control, ensure, e.g. by testing the field of rotation, that the
gear unit can only operate in the direction of rotation.
For further explanations refer to Catalogue G1000 and document WN 0-000 40.
3.3.4 Check ambient conditions
Make sure that no aggressive or corrosive substances which attack metal, lubricants or elastomers
are present at the installation site or are subsequently expected during operation. If such substances
are to be expected, contact Getriebebau NORD.
The gear unit, especially its radial shaft seals should be protected from exposure to direct sunlight.
The standard permissible ambient temperature range for synthetic gear unit oils (CLP PG … and
CLP HC…) is –20 °C to +40 °C. This temperature range can be extended according to the lubricant
table (see chapter 7.2.2 "Gear oils"), if all mounted materials of the gear unit and the application-
related speed, torques and modes of operation allow this. Note the project planning documents of the
order for this. In case of doubt, ask Getriebebau NORD.
For mineral oil (CLP), the permissible ambient temperature range in accordance to the above stated
lubricant table is restricted. The lubricant type is indicated on the name plate (see chapter 2.2 "Name
plate ").
For installation altitudes above 1000 m above sea level, the permissible speed and torques may be
reduced. Note the project planning documents of the order for this. In case of doubt, ask Getriebebau
NORD.

Gear units – Manual with installation instructions
20 B 1000 en-3921
3.3.5 Drives with nsd tupH surface treatment
Drives with nsd tupH surface treatment must be electrically decoupled from other components by the
use of non-conductive intermediate layers in order to prevent galvanic corrosion.
3.3.6 Installing the oil expansion chamber (Option: OA)
Mount the oil expansion chamber (Option OA) according to document WN 0-530 04. For gear units
with a M10x1 vent screw or pressure relief vent, document WN 0-521 35 must also be observed
during installation.
Other manuals for B 1000
2
Table of contents
Other Nord Drivesystems Industrial Equipment manuals
Popular Industrial Equipment manuals by other brands
Reich Kupplungen
Reich Kupplungen R-Flex HBSX-8-RH Series Assembly instructions
Grundfos
Grundfos Oxiperm OCD-164 Installation and operating instructions

Doosan
Doosan F30i Series Maintenance manual

AIRSLED
AIRSLED AM1200 owner's manual

KAKA Industrial
KAKA Industrial TB-12 Operation manual
HSD
HSD ES327 Assembly instructions
