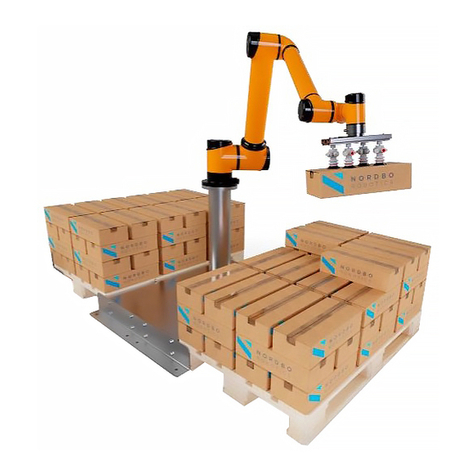
Nordbo Robotics Palletizer User manual

1 of 24
Palletizer for Universal Robots - User Manual –Ver. 1.0
Copyright
Copyright © 2020 Nordbo Robotics. All Rights Reserved. No part of this manual may be reproduced or
transmitted in any form or by any means, electronic or mechanical, including photocopying and recording,
for any purpose without the exclick written permission of Nordbo Robotics.
Disclaimer
The information provided in this documentation contains general descriptions of use, of one or more of
Nordbo Robotics’ products. Following this documents instruction for installation and use must not be
considered a substitute for making a risk assessment and testing the specific application and setup. Neither
Nordbo Robotics nor any of our affiliates or subsidiaries shall be held responsible for the consequences
that arise from misuse of –or misunderstanding–any information stated in this document.
If any instructions are considered unclear it is the user’s responsibility to contact Nordbo Robotics for
clarification of the issue(s) before making use of said unclear instructions.
If the user has any suggestions for improvements, amendments or if errors have been found in this release,
please notify Nordbo Robotics.
Nordbo Robotics reserves the right to make refinements or changes without notice.
Contact
Nordbo Robotics A/S
Agerhatten 27A Entrance 4
5220 Odense, Denmark
Phone: +45 81 81 98 81
Mail: info@nordbo-robotics.com

2 of 24
Palletizer for Universal Robots - User Manual –Ver. 1.0
Glossary
The following table explains the terms used throughout the manual.
TERMS
EXPLANATION
UR
Robot manipulator brand used when referring to the robot
URCap
Additional software that adds new capabilities to the UR robot
Manipulator
Robot consisting of several joints and motors capable of
performing programmed movements
Pallet Pattern Generator
An online tool used to develop stacking patterns for palletizers
Pattern
A series of specific product placements on a pallet
Pick up
The location from which products are picked up
Layer
A layer containing several products placed side by side on a
pallet
Stack
Several layers on top of each other placed on a pallet

3 of 24
Palletizer for Universal Robots - User Manual –Ver. 1.0
Table of Contents
1. Product Information 4
1.1. UR robot 4
1.2. Pallet Pattern Generator 4
1.3. Nordbo Palletizer URCap 5
1.4. Nordbo Palletizing installation interface 5
2. Robot Program 12
3. Installing a Palletizing Setup 14
3.1. Activating License 14
3.2. Transferring pattern files to URCap 15
3.3. Teaching pick up positions 17
3.4. Configuring the program 19
3.5. Stacking on two pallets 21
3.6. Starting the program 22
3.7. Runtime variables 22
4. Troubleshooting 23

4 of 24
Palletizer for Universal Robots - User Manual –Ver. 1.0
1. Product Information
The UR palletizer system is divided into three parts and elaborated in this section: UR robot &
grippers, Pallet Pattern Generator, and Nordbo Palletizer URCap.
1.1. UR robot
Information about the installation of the UR robot can be found in the manuals provided by your
supplier when purchasing the robot.
1.2. Pallet Pattern Generator
Pallet patterns can be created using Nordbo’s Online Pallet Pattern Generator, the online software
used to generate the stacking patterns of the UR palletizer system. The online pattern generator can
be accessed and used free of charge at pal.nordbo.io.
Figure 1: Pallet Pattern Generator interface

5 of 24
Palletizer for Universal Robots - User Manual –Ver. 1.0
1.3. Nordbo Palletizer URCap
The Nordbo Palletizing URCap is used to define the setup specifications and execute pattern files
generated by the online Pallet Pattern Generator. The combination of the URCap and the online
pattern generator enables the UR robot to pick objects from a conveyor and places these in a user-
specified pattern. The URCap contains an installation, and a program node. The installation node is
used to configure the palletizing system, while the program node is used to build programs for the
UR robot to run.
1.4. Nordbo Palletizing installation interface
The installation node contains the following six tabs:
•Patterns
•Pallet
•Pick up
•Gripper
•Lift
•General
Figure 2: Nordbo Palletizing installation interface

6 of 24
Palletizer for Universal Robots - User Manual –Ver. 1.0
Patterns tab
The patterns tab is used to import stacking patterns from a USB drive, rename patterns, or delete
patterns. The details for the selected pattern file are displayed when selecting a pattern file.
Figure 3: Patterns tab

7 of 24
Palletizer for Universal Robots - User Manual –Ver. 1.0
Pallet tab
The pallet tab is used to configure the pallet placement and the UR robot mounting. These are often
specified by the integrator during the setup and commissioning. This tab is only used if the physical
robot setup has changed. For more information about how to configure a pallet can be found in the
installation manuals section 7.
Figure 4: Pallet tab

8 of 24
Palletizer for Universal Robots - User Manual –Ver. 1.0
Pick up tab
The pick up tab is used when changing or adding new pick up positions. Several pick up positions
can be added to accommodate the use of more than one conveyor as well as different product
sizes. The process of seting up a new pick up position is described in section 3.3.
Figure 5: Pick up tab

9 of 24
Palletizer for Universal Robots - User Manual –Ver. 1.0
Gripper tab
The gripper tab is used to configure the control of the gripper. This is often done by the integrator
during the setup and commissioning. There are two types of grippers: simple or custom. When
selecting the simple gripper, the URCap controls and monitors the gripper automatically. When
selecting “custom gripper”, the user must manually insert functionality into the program tree to
control the gripper. This is useful for controlling more advanced gripper types.
Note: The gripper tab is solely used to configure the control of the gripper. The size, weight, and
mounting of the gripper must be configured using the native “TCP Configuration” installation node.
Figure 6: Gripper tab

10 of 24
Palletizer for Universal Robots - User Manual –Ver. 1.0
Lift tab
The URCap enables the use of lifts with one or two levels of elevation. The lift tab is used to configure
the control for each of these elevations. The lift tab contains a frontpage and a datapage. The
frontpage gives an overview of the configured lift, and enables the user to select which elevations
they want to configure. The datapage is used to configure the control of the selected elevation.
Figure 7: Lift tab

11 of 24
Palletizer for Universal Robots - User Manual –Ver. 1.0
General tab
The general tab is used for two purposes: license handling (license tab) and backend handling
(advanced tab).
The license tab: Shows the list of all Nordbo licenses available. To get a guide explaining how to
activate the license scan the QR-code in the upper right corner or by visiting the website
activate.nordbo-robotics.dk/howto.
Advanced tab: Is only used if the palletizing daemon needs to change port number. This will be done
if needed when installing the URCap.
Figure 8: General tab

12 of 24
Palletizer for Universal Robots - User Manual –Ver. 1.0
2. Robot Program
The program node contains the full program tree for simple palletizing applications. The flow of the
palletizer system is divided into three sections; startup, execute and reset.
Figure 9: Robot program divided by sections
Startup Section
The startup phase contains the following steps:
1. Deactivates the gripper, this is to ensure that the gripper is in the deactivated state when
starting the program.
2. Wait for an empty pallet, checks if the user wants to continue from the last palletized stack
or resetting with a new pallet.
3. Move to a safe position, this is to ensure that the robot starts in a position that is close to the
pick up position.
4. Check lowering of lift (only when lift enable), check the state of a lift and if the lift is higher
than the need elevation it is lowed to the correct elevation.
Startup
Execute
Reset

13 of 24
Palletizer for Universal Robots - User Manual –Ver. 1.0
Execute Section
The execute section is a loop running though until the pallet is complete. Before each layer it checks
if the lift should be raised to the next layer. Each layer is completed by repeating the actions shown
on figure 10.
Figure 10: Program execution loop, illustrated
Reset Section
The reset phase resets the robot position to a “safe” position and the lift elevations to the lowest
elevations.
Move to
"Safe"
position
Pick up
product
Move to
"Safe"
position
Place product
on pallet

14 of 24
Palletizer for Universal Robots - User Manual –Ver. 1.0
3. Installing a Palletizing Setup
3.1. Activating License
Before you can use the palletizer it must be licensed. This is achieved by selecting the “General” tab
and then the “License” subtab where the purchased license key is used to activate the software. To
get a guide explaining how to activate the license scan the QR-code in the upper right corner or visit
activate.nordbo-robotics.dk/howto.
Figure 11: License activation tab

15 of 24
Palletizer for Universal Robots - User Manual –Ver. 1.0
3.2. Transferring pattern files to URCap
Step 1
Generate files using the Online Pallet Pattern Generator and download these to a PC.
Step 2
Transfer the pattern to a USB flash drive
Step 3
Insert the USB flash drive into a USB port in the robot control box or on the teachpendant.
Figure 12: Universal Robots CB teach pendant USB slot

16 of 24
Palletizer for Universal Robots - User Manual –Ver. 1.0
Step 4
Navigate to the “Pattern” tab and click the “Import” button to open a file browser.
Figure 13: Patterns tab for importing files
Step 5
Navigate to the USB drive, select the pattern and click “Open”.
Note: If you are trying to import a pattern with a name that already exists in the URCap, it will not be
loaded. To overwrite a pattern the user needs to remove or rename the pattern from the URCap before
importing the new pattern.

17 of 24
Palletizer for Universal Robots - User Manual –Ver. 1.0
3.3. Teaching pick up positions
When changing product size, changing TCP configuration or adding a new conveyor input, a new
pick up position is needed. Follow these steps to teach a new pick up position.
Step 6
Navigate to the “Pick up” tab in the “Nordbo Palletizing” installation node.
Step 7
Click the “New pick up position” button.
Figure 14: New pick up position
Step 8
Insert a name to differentiate the pickup position.

18 of 24
Palletizer for Universal Robots - User Manual –Ver. 1.0
Step 9
Position the robot, such that the TCP is positioned in the products center, while the product is
positioned in the pick up location (typically on the conveyor). When done positioning, click “Ok”.
Figure 15: Conveyor pick up position
Step 10
Select which input on the robot the pick up sensor is connected to.
Figure 16: Pick up sensor input

19 of 24
Palletizer for Universal Robots - User Manual –Ver. 1.0
Step 11
Select if the pick up input is active high or low.
Step 12
Save the changes, by saving the installation file.
3.4. Configuring the program
The program needs to be configured to start palletizing. The configuration is made in the first node
of the program tree “Configure palletizing”.
Figure 17: Palletizing program tree
Step 13
Choose which pallet to configure.
Table of contents
Other Nordbo Robotics Robotics manuals

