Advanced pro rammin / Erweiterte Pro rammierun
Parameter Name Default Value Ran e / Options Description UHS5 UNLCDHS
Detector Parameters
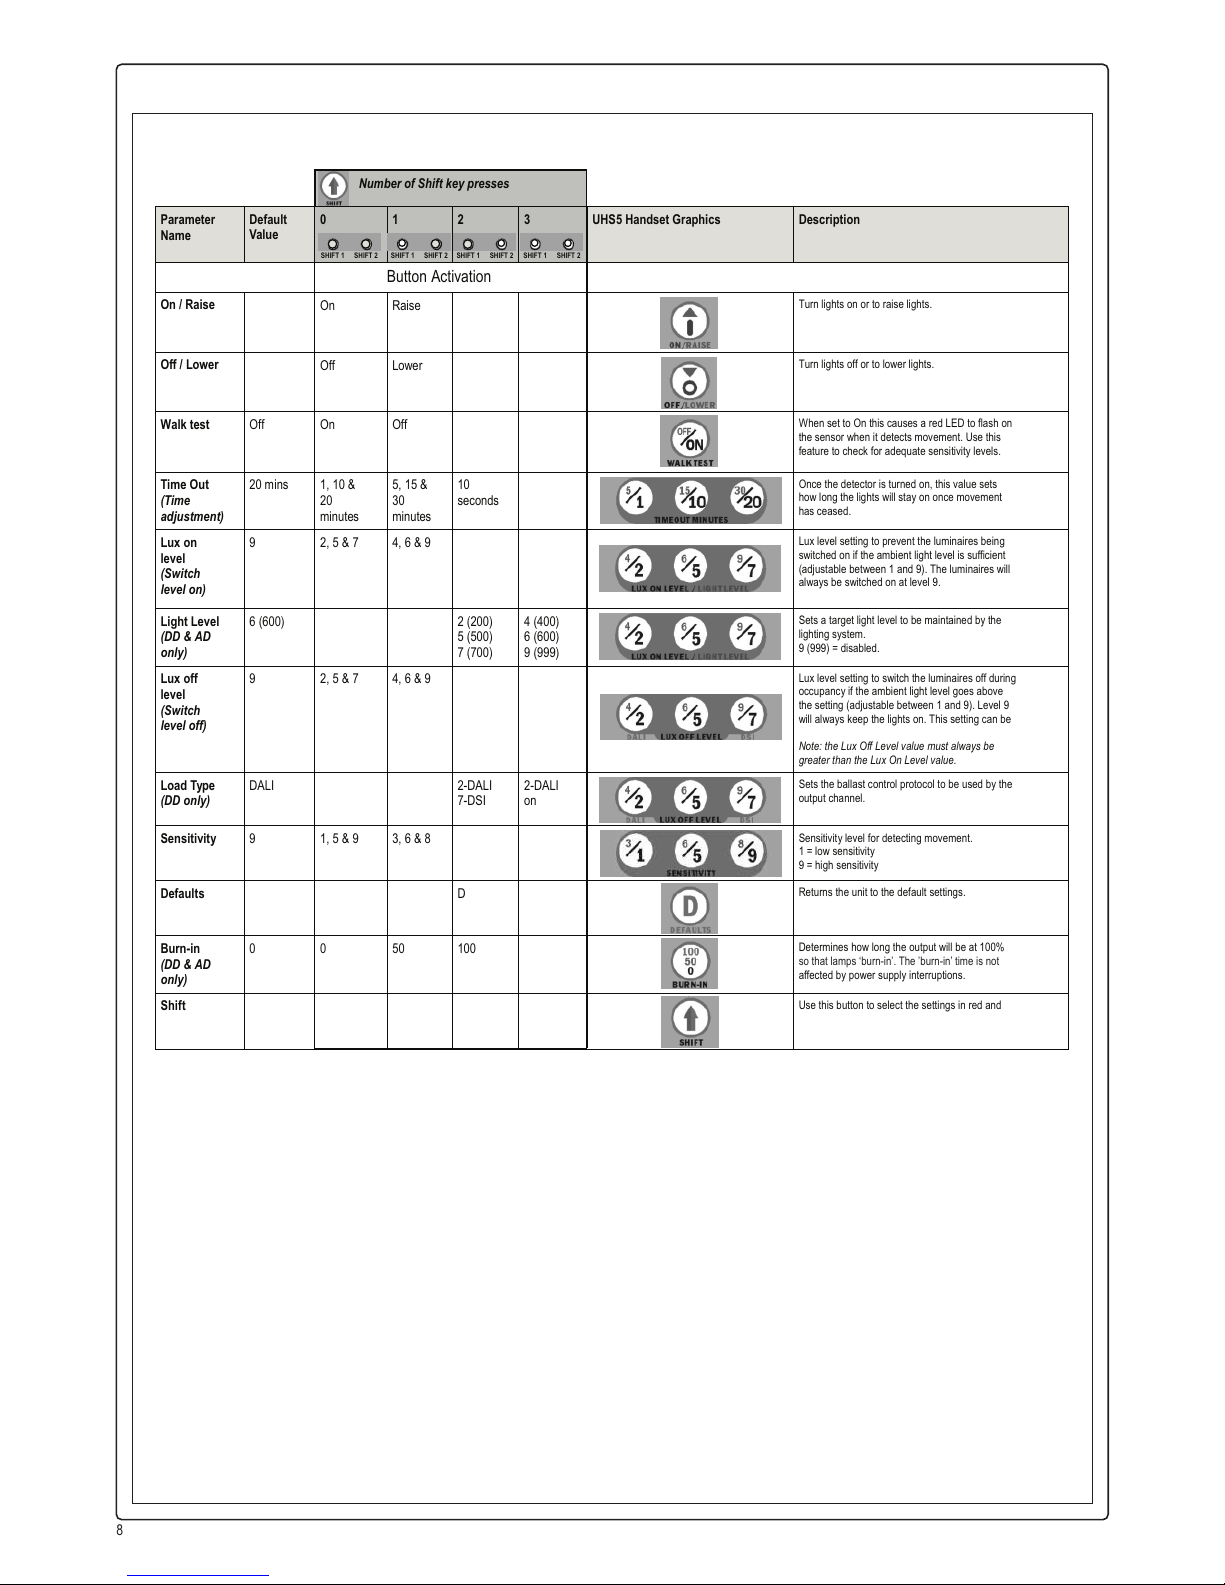
Walk Test LED Off On or Off When set to On this causes a red LED to flash on the sensor when it detects
movement. Use this feature to check for adequate sensitivity levels.
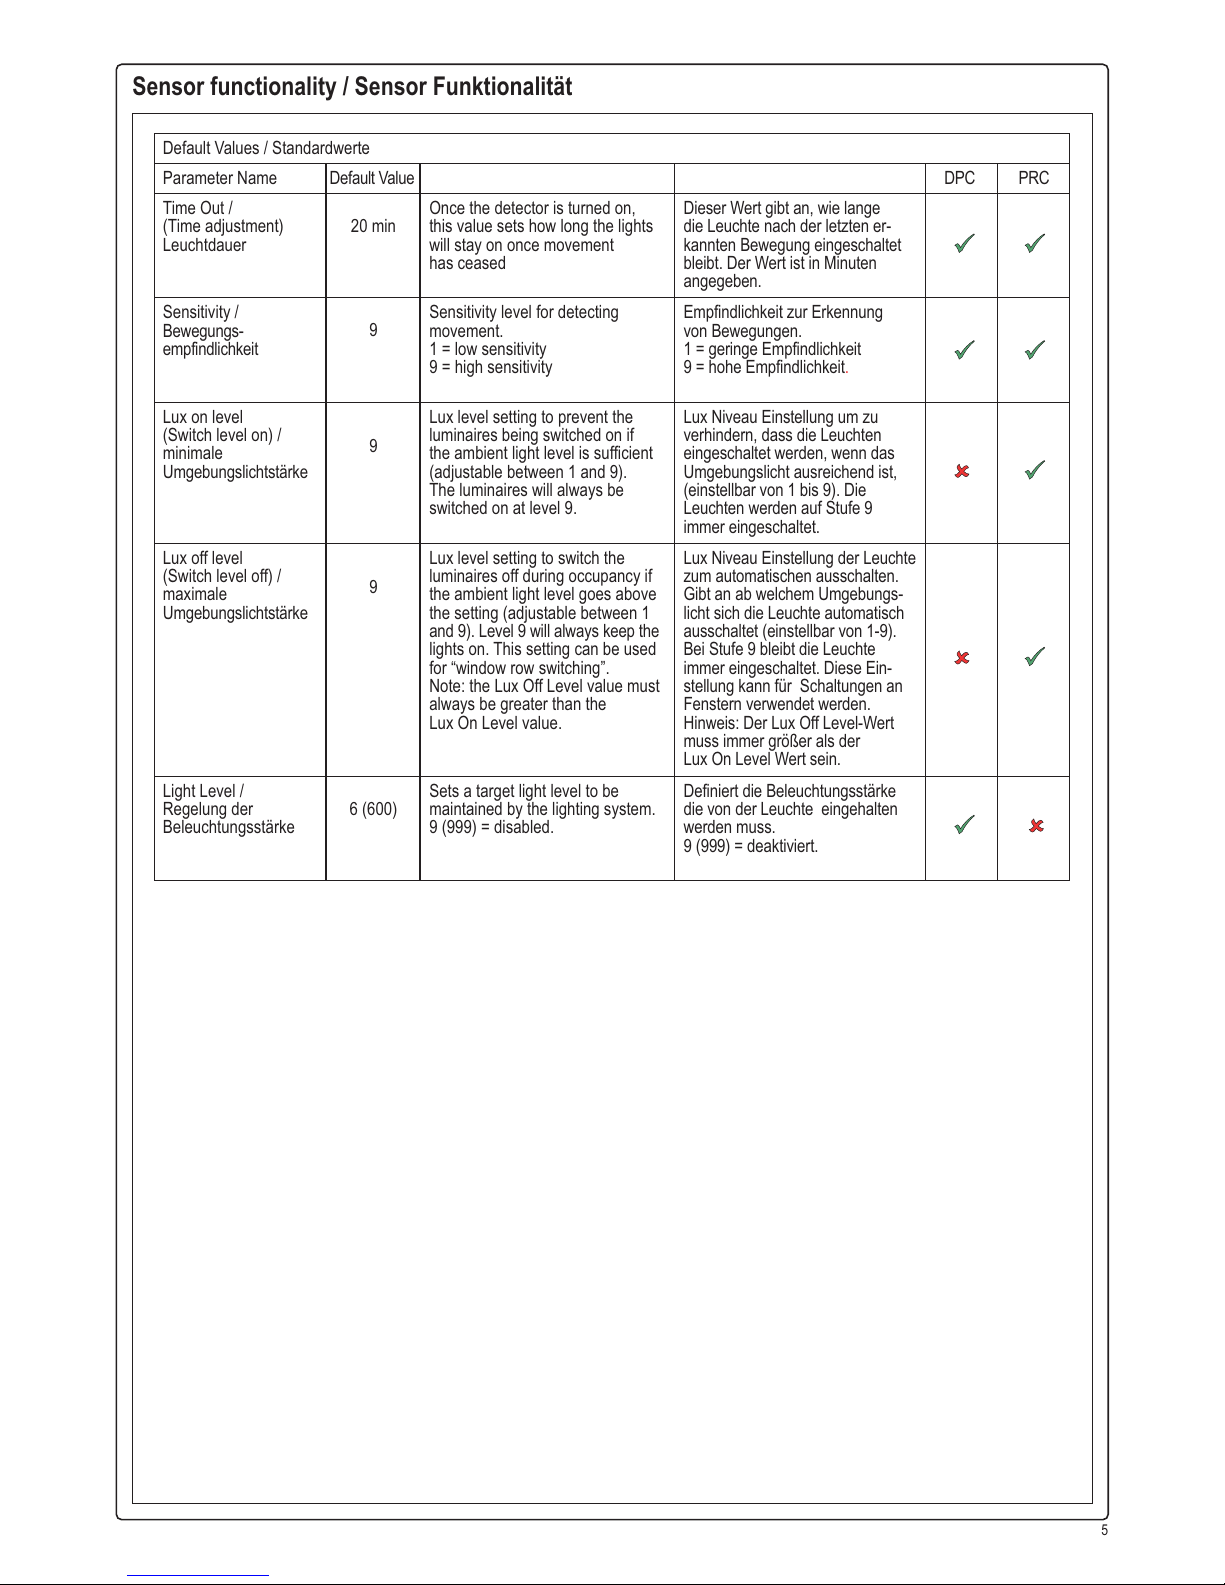
Time Out
(Time adjustment)
20 minutes 0-99 minutes Once the detector is turned on, this value sets how long the lights will stay on once
movement has ceased. Select 0 for 10 second delay - use for commissioning only.
Manual Time Out 10 minutes 0-99 minutes When a manual operation occurs, either via the switch input or the infrared, it
invokes the timeout period.
Example 1: a detector in presence mode has a detector timeout of 15 minutes and
a manual timeout of 3 minutes. When the user leaves the room they press the off
button. The sensor will revert to automatic after 3 minutes, and then walking back
in the room will turn the lights on.
Example 2: using the settings above, the user turns the lights off (say for a
presentation) but stays in the room. Every time a movement is detected, the
manual timeout period is re-triggered, but when it doesn’t pick up for the short
timeout period, the sensor will timeout and revert to automatic. This means the
lights may turn on inadvertently during the presentation, if the occupants are still
for the manual timeout period, so adjust the timing carefully.
Sensitivity On 9 1 (min) to 9 (max) Sensitivity level for detecting movement when the detector is already on. *UHS5
sets Sensitivity On and Off to the same value. *
Sensitivity Off 9 1 (min) to 9 (max) Sensitivity level for detecting movement when the detector is off. *UHS5 sets
Sensitivity On and Off to the same value. *
Lux time 0 0 (disabled)
1-99 minutes
If the detector measures the lux level and decides that the output needs switching
on or off as a consequence, the lux time must elapse first. If at any time during the
timed delay the lux change reverses then the process is cancelled.
Power Up State On On or Off Select No for a 30 second delay on start up. If Yes is selected, there will be no
delay on start up and the detector will always power up detecting.
Disable Detector N Y or N Disables detection, leaving the relay output permanently off with the dimming
output operational. This mode is used when the unit is for maintained illuminance
only.
On Delay 0 minutes 0-99 minutes The On Delay to allows the first channel to switch on after the second channel. A
typical application for this would be where a detector is controlling lighting and air
conditioning in an area. When the occupant is detected, the lighting will be turned
on immediately, whereas the air conditioning may be turned on after 15 minutes. If
the area is vacated and the detector times out before the delay, then the air
conditioning would never go on. The delay can be set only for channel 1 using the
on delay parameter.
Inhibit 4 seconds 1 to 999 seconds When the detector turns off, a delay is instigated to prevent retriggering. In certain
circumstances this delay may not be enough. This parameter allows the delay to
be changed.
Factory default --Restores factory default settings
User Modes
Raise (DD & AD
only) --
Increase light level. Reverts when occupancy cycle complete.
Lower (DD & AD
only) --
Decrease light level. Reverts when occupancy cycle complete.
Scene up --
Steps up between 6 pre-defined scenes.
Scene down --
Steps down between 6 pre-defined scenes.
Scene # --
Select the individual scene, between 0 and 6.
(1 = min. output; 2 = 10%; 3 = 25%; 4 = 50%; 5 = 75%; 6 = 100%)
Override On --
If the lights are off, sending the IR command will turn them on immediately and
revert to automatic operation using the manual timeout period.
Override Off --
If the lights are on, sending the IR command will turn them off immediately. After
the manual timeout period (described above), the sensor will revert to automatic.
Cancel --
Cancels the on or off override, returning the detector to normal operation.
9