NOVACARE ProLift Series User manual
Instructions for use
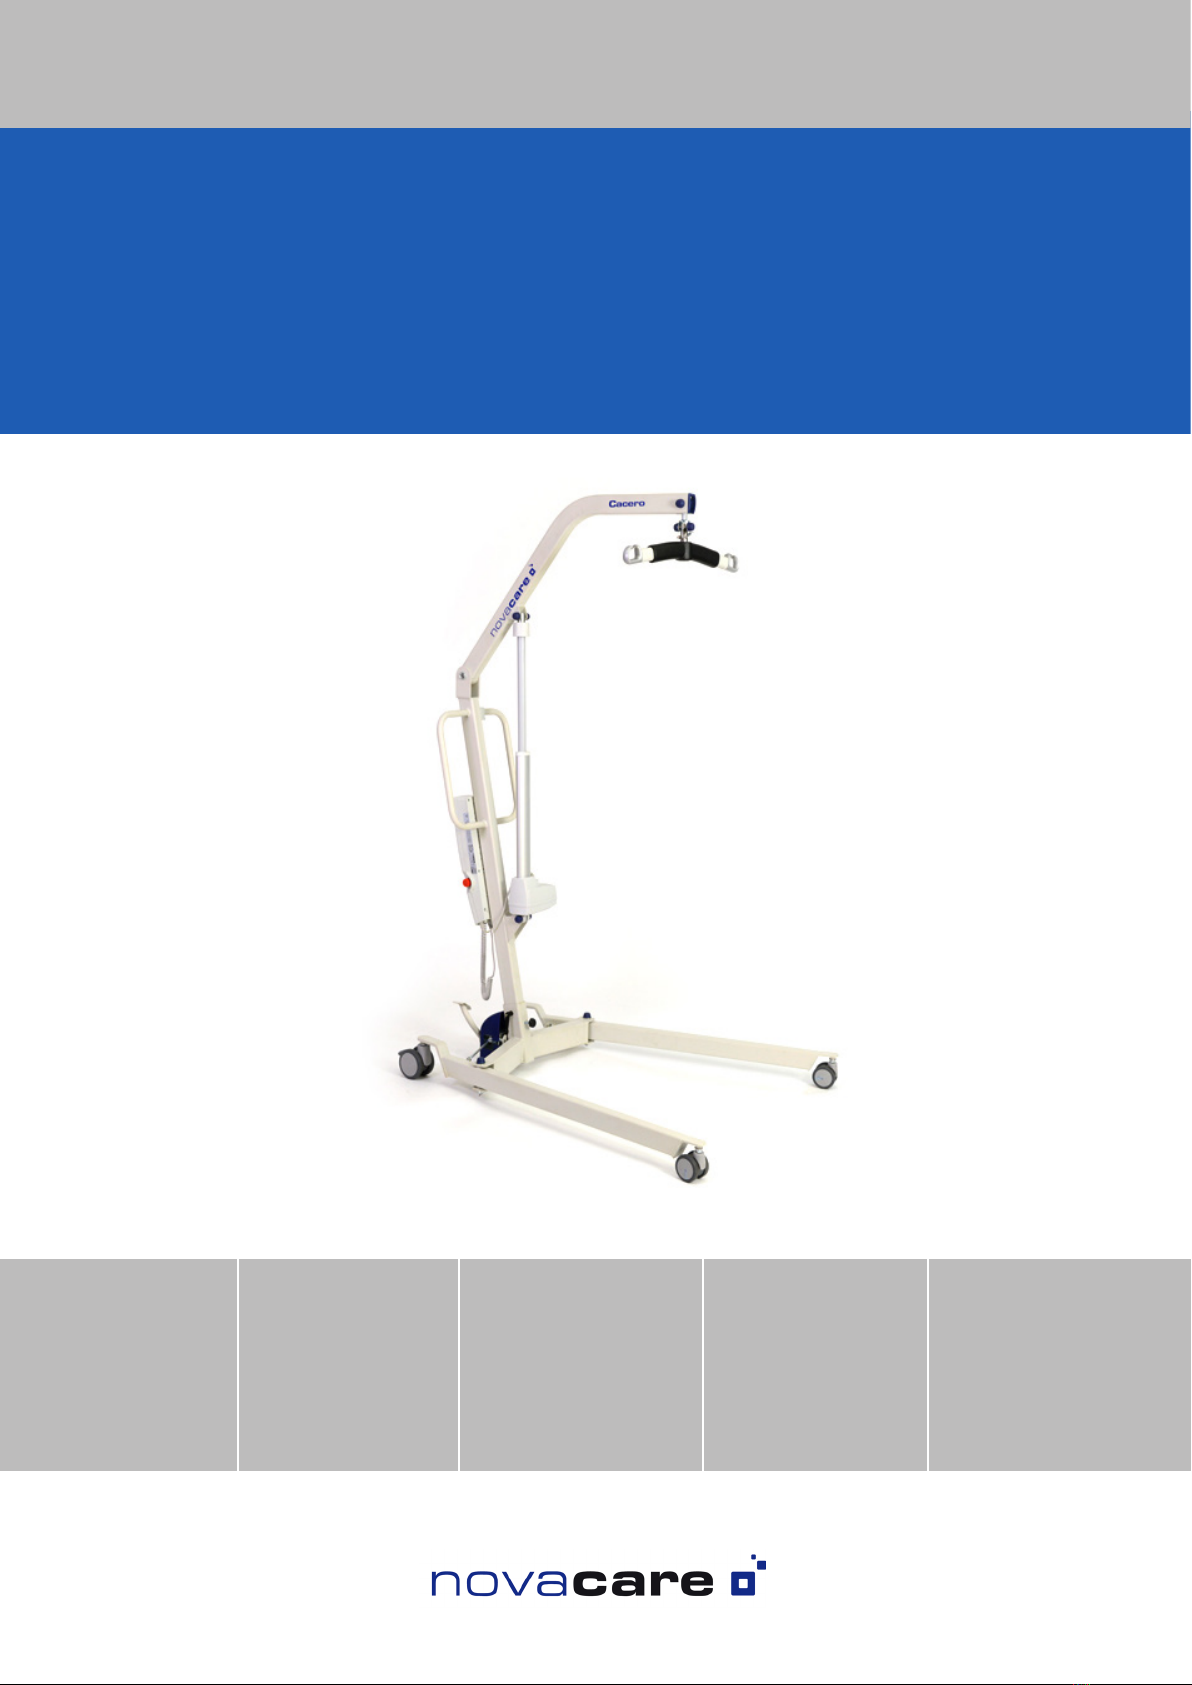
ProLift Cacero
ProLift-series: innovative patient hoist soloution made of steel
Designation
Version
Item no.
ProLift Cacero C
with Care-
electronics
960810
ProLift Cacero H
with Home-
electronics
960800
ProLift Cacero CU
with Care-
electronics/
UK version
960815
ProLift Cacero HU
CBJ Home-
electronics /
UK version
960805

The ProLift Cacero steel hoist from novacare gmbh is the perfect homecare
hoist that copes easily with every situation where lifting is required.
A good decision.
Your novacare team
Please read the following instructions for use carefully and observe the warning
notices before you use the hoist.
1. Contents of pack............................................................................................................................ 3
2. Description of product................................................................................................................... 3
3. Function and areas of application ................................................................................................ 4
4. Overview of parts.......................................................................................................................... 4
5. Safety measures to be observed before use............................................................................... 5
6. Maximum load capacity................................................................................................................ 7
7. Unpacking and disposal of packaging material........................................................................... 7
8. Installation and assembly............................................................................................................. 7
9. Safety in use/Warnings and safety notes ................................................................................. 13
10. Regular function and usage ..................................................................................................... 14
11. Warning lights ........................................................................................................................... 17
11.1 CBJH.......................................................................................................................................... 17
11.2 CHJC Maintenance warning light flashes: .............................................................................. 17
12. Batteries (charging/replacing)................................................................................................. 18
12.1 CBJ-Home................................................................................................................................ 18
12.2 Optionale external charger CHJ2 ............................................................................................ 19
13. Attaching the harnesses ........................................................................................................... 20
13.1 Attachment of harness in sitting position: ............................................................................ 20
13.2 Attachment of harness in lying position: ............................................................................ 22
14. Optional accessories.................................................................................................................. 23
14.1 Harnesses ................................................................................................................................ 23
14.2 lifting bars and scales............................................................................................................. 23
15. Faults/Troubleshooting............................................................................................................. 24
16. Storage after use/Re-packing .................................................................................................. 25
17. Ambient conditions................................................................................................................... 25
18. Classification of information..................................................................................................... 26
19. Use in combination with other products ................................................................................. 26
20. Servicing/Maintenance ............................................................................................................ 27
20.1 Hygiene ................................................................................................................................... 28
20.2 Preparation by qualified personnel........................................................................................ 29
21. Assurances and Warranty.......................................................................................................... 29
22. Disassembly and disposal......................................................................................................... 30
23. Technical Specifications/Dimensions....................................................................................... 31
23.1 Dimensions.............................................................................................................................. 31
23.2 Electrical data.......................................................................................................................... 32
24. Spezifikation der Motoren Elektronikboxen............................................................................. 32
24.1 Hoist motor LA 43 ................................................................................................................... 32
24.2 Battery - electronic (CBJ-Home)............................................................................................. 33
24.3 Battery - electronic (CBJ-Care) ............................................................................................... 33
25. EMC test values ......................................................................................................................... 33
26. Explanation of symbols............................................................................................................. 37
27. Notes.......................................................................................................................................... 39

3
ProLift Cacero H / HU
1x hoist arm and hoist column, pre-assembled
1x wheeled trolley base
1x lifting bar
1x CBJH electronic control box and
hoist motor pre-assembled
1x manual controller/charging cable/
cable cover
1x set of screws and screw caps
ProLift Cacero C / CU
1x hoist arm and hoist column, pre-assembled
1x wheeled trolley base
1x lifting bar
1x CBJC electronic control box and
hoist motor pre-assembled
1x manual controller/charging cable/
cable cover
1x set of screws and screw caps
1. Contents of pack
2. Description of product
The ProLift Cacero steel hoist from novacare®GmbH is the perfect homecare hoist that
copes easily with every situation where lifting is required.
With the ProLift Cacero, ergonomics and design are equally important. A number of
small details, such as the locking trolley wheels, complement the overall design of the
ProLift Cacero. The steel hoist with a maximum load capacity of 200 kg, weighs only
approx. 46,2 kg, so moving it into position presents no problem to care workers. The
ProLift Cacero can be combined with an extensive range of harnesses and lifting bars.
The expected service life of a ProLift Cacero series hoist is about 10 years, depending
on use.
The ProLift Cacero is available in three versions: the ProLift Cacero H with ‚home
electronics‘ pack (battery and controller in a single unit), the ProLift Cacero C with
‚care electronics‘ pack (separate battery and controller) and the ProLift Cacero CU
with ‚care electronics‘ pack (separate battery and controller with special mains plug
for UK market). Functionality, load capacity and application are identical for all three
versions.

1
3
2
4
5
6
7
8
9
11
12
10
3. Function and areas of application
In these instructions for use, the person needing assistance is generally referred to as
the „patient“. The ProLift Cacero is a mobile hoist designed for lifting patients. With
a load capacity of 200 kg, this steel hoist is the ideal homecare hoist that can cope
with almost every situation where lifting is required. The ProLift Cacero series can be
used for routine lifting and transferring of patients in the home and in an institutional
environment. Possible situations where lifting might be required include transferring
the patient between bed and wheelchair, lifting on and off the toilet seat and (access
permitting) into and out of the bath, and lifting up from the floor. The hoist can be
used in wet areas but should be protected from splashes.
4. Overview of parts
1. Handle
2. Control box with battery and emergency stop
button
3. Trolley base adjustmentTrolley frame
4. Double castors with brakes
5. Column shoe
6. Trolley frame
7. Front double castors
8. Lifting bar with quick-release lock/arm
9. Hoist motor and lift column
10. Emergency mechanical lowering device
11. Hoist column
12. Hoist arm

5
Attention!
In order to avoid damaging the hoist through incorrect operation or endangering the
patient or the user, read these instructions for use thoroughly before using the hoist.
Observe all warnings. Use the ProLift Cacero hoist and its accessories only in accord-
ance with these instructions for use.
5. Safety measures to be
observed before use
Keep these instructions for use in a safe place so that they are easily accessible at all
times. If the hoist is sold or transferred to another owner, pass on these instructions
for use. ProLift Cacero series hoists must be used only by persons who have been
instructed in their correct use. To avoid a risk of injury, the hoist and harness must be
used only as specified. Before each use, and especially after cleaning, check the lifting
harness for possible damage such as torn fabric, faulty joints and cracks. Damaged
harnesses must not be used and replaced immediately.
Novacare®GmbH accepts no liability for any use of ProLift Cacero series patient hoists
and accessories not complying with these instructions for use.
Keep children away from the hoist and accessories to avoid a risk of injury through
swallowing small parts, being strangled by the harnesses or crushing limbs on the
hoist.
Before using the hoist, check the following:
• Check that all parts are functioning correctly.
• Check that all parts are correctly attached, screwed together, joined or mounted.
• Check the hoist for external damage, in order to avoid the risk of injury. Do not use
a hoist that is defective.
• Check that any accessories to be used (e.g. lifting harness) are undamaged.
Observe the instructions for using our accessories. Use only accessories produced
or distributed by novacare®GmbH.
• All parts (hoist and accessories) must be used as specified and must not be altered
or modified.
• Check that accessories are correctly and securely attached to the hoist.

The following safety instructions should also be noted:
• Watch the patient the whole time while lifting or transferring is under way.
• When transferring a patient, the locking brakes must not be applied - risk of
tipping!
• Ensure that neither the user‘s nor the patient‘s limbs will be squashed or
crushed.
• Take particular care around strong electromagnetic sources such as MRI
equipment. Electrical devices can affect one another through their electro-
magnetic emissions. We recommend maintaining a safe distance of at least 1
metre, especially around sensitive devices (e.g. cardiac pacemakers).
• In general, legal regulations regarding medical products and their operation
must be observed.
• Do not use the hoist if:
- the hoist is defective.
- the patient is heavier than the load capacity of the hoist or harness.
- the accessories were not supplied by novacare®
gmbh or authorised by novacare®gmbh.
- the accessories are no longer safe or have not been tested.
- you are unsure of how to use the hoist.
- the patient is suffering from cramp and could fall out.
- the hoist is standing on a sloping surface and might roll away.
- there are obstacles in the way.
• Depending on the mobility of the patient, select a lifting harness of the correct
size - there is a risk of the patient slipping out of the harness if it is too large, while
too small a harness can cause pressure points and there is a risk of limbs and the
skin being crushed.
• Before first using the battery, it must be charged for a full 24 hours to ensure
correct function and a long service life.
• Settings may be adjusted only by trained care specialists or trained individuals.

7
Attention!
The upper weight limit (maximum load) of the ProLift Cacero series of hoists is
a body weight of 200 kg. The load capacity of the hoist harness (body support
system) varies from one model and load to another. Apply the limits of the
component with the lowest maximum load (on a hoist, the hoist arm and body
support system) to the entire system.
6. Maximum load capacity
7. Unpacking and disposal of
packaging material
Please check goods and packaging on delivery for any damage. If the hoist is to be
transported after use, use the original packaging. Otherwise, dispose of the packaging
according to national waste disposal guidelines.
8. Installation and assembly
Before assembly, remove all parts carefully from their packaging. Inspect the parts for
external damage. Damaged parts must not be assembled or used. Contact your dealer
or novacare®gmbh. The hoist motor, electronic control box and trolley motor are
preassembled on delivery. If this is not the case, observe the following instructions.
If not preassembled, first mount the upper end of the hoist motor on to the bracket
of the hoist arm.
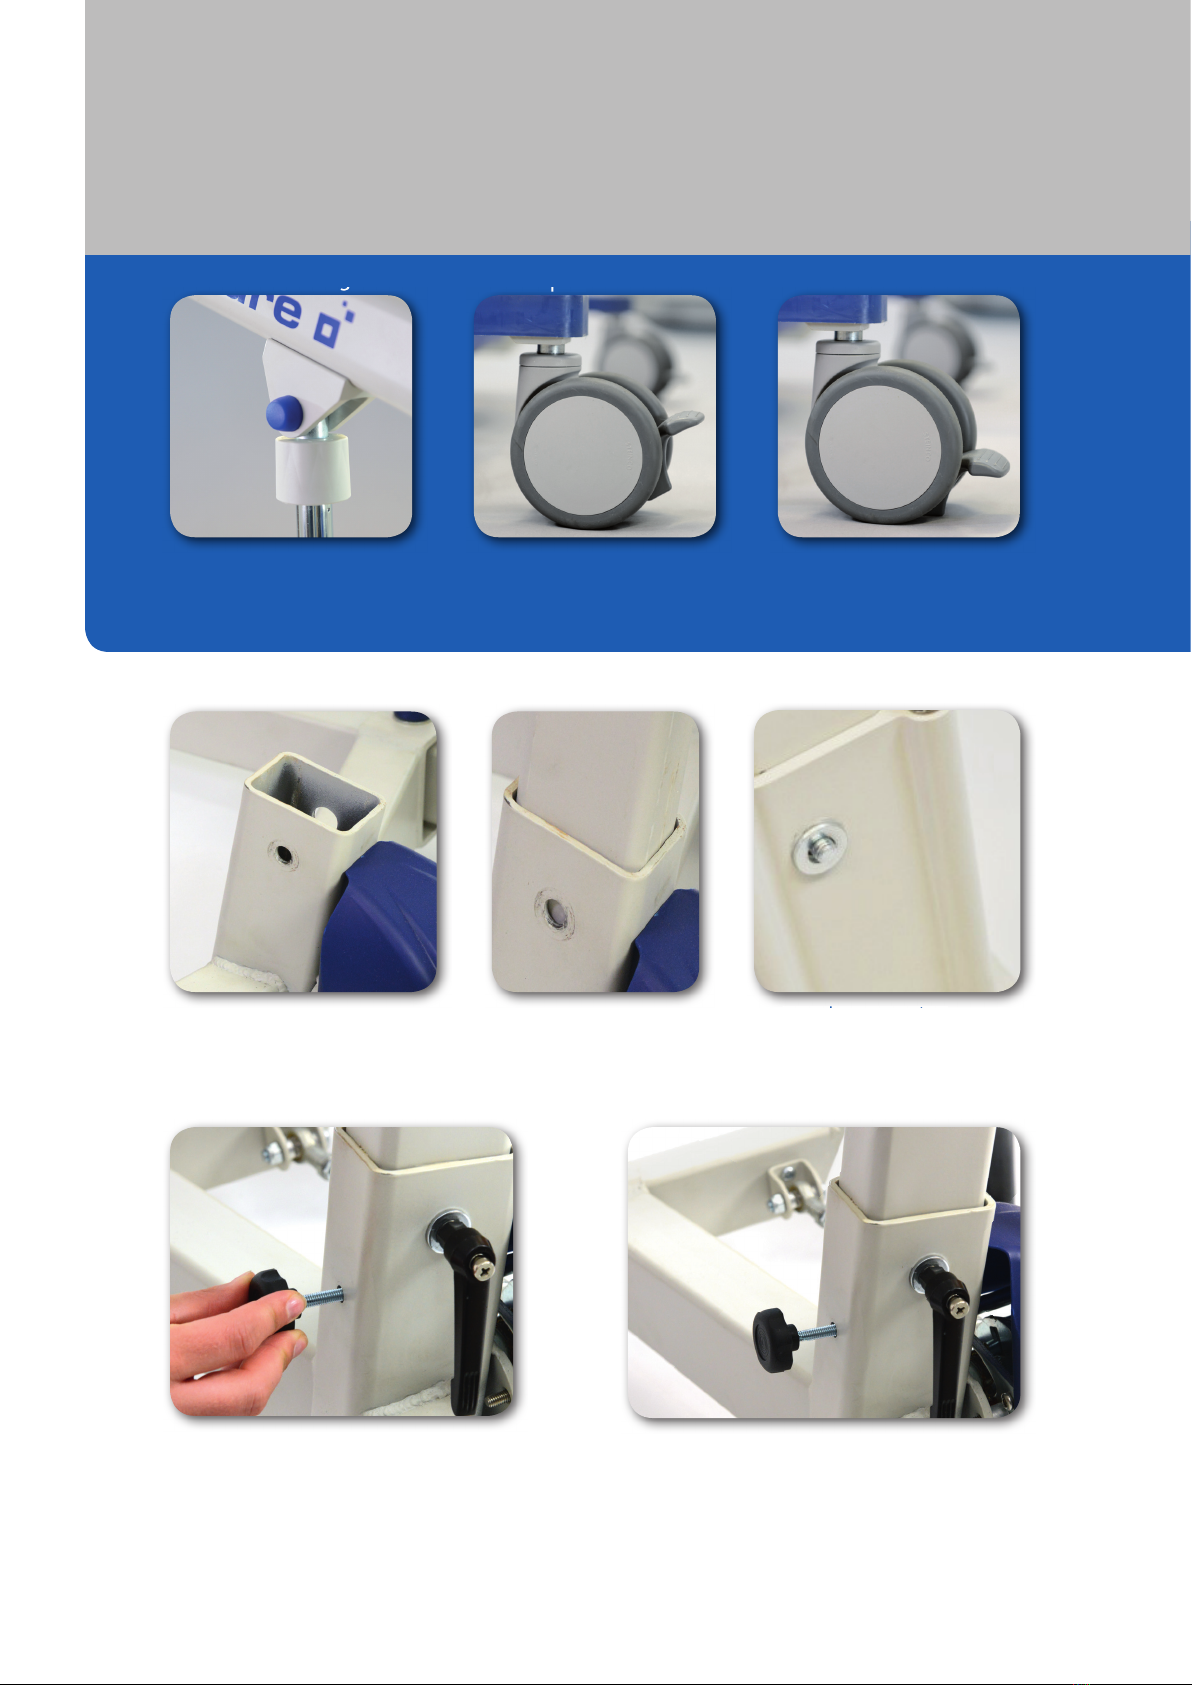
AMast support B Hoist column
CSelect height of hoist
column
D Insert lever screw into
screw hole
E Use washer
GAdjust lever screw handle, Tighten locking
screw
FAttach lever screw counterpart
Hoist motor lifting column Brake open Brake closed
Hoist motor lifting column
Brake open
Apply the locking brakes on the trolley base for all installation work. Slide the hoist
column into the column shoe and fix it in place using the enclosed lever screw.
Insert lever screw into
9
A
ABC D
DC
B
Connection socket
for mains power
cable
Connection
socket for manual
controller
CH2 connection socket
for optional trolley
motor
CH 1 connection
socket for hoist motor
Cable cover
If the hoist is equipped with a CBJH electronic control box, connect the cable of the
hoist motor to the CBJH electronic control box (socket CH1). Plug the manual controller
into the connection socket. Screw the cable cover to the underside of the electronic
control box. Connect the charger cable to the electronic control box.
CBJH electronic control box

If the hoist is equipped with a CBJC electronic control box, ensure that the electronic
control box is correctly mounted. If the CBJC is not already mounted, attach the
mounting bracket to the hoist with the supplied screws (Figure 1). Attach the electronic
control box and fix it to the mounting bracket with the black screws supplied (Figure
2). Attach the battery (Figure 3) to the mounting bracket so that it is firmly connected
to the electronic control box and the mounting bracket (Figures 4-6).
32
1
CBJC electronic control box
6
54

11
Connect the manual controller and the hoist motor as shown below. Connect the cable
of the hoist motor to the CBJC electronic control box (socket CH1, Figure 1).
Plug the manual controller into its socket and the trolley motor connector to the
appropriate socket (socket CH2, Figure 2). If your hoist has no trolley motor, seal the
socket with a filler plug (Figure 3).
Filler plug if no trolley motor
installed
1. Connection socket
for the manual
controller
2. Cable relief support
3. CH1 hoist motor
socket
4. CH2 socket Trolley
motor
5. Mains power cable
6. Not occupied
1
2
346
5

Note! Ensure that all screw joints are tight and all cable connections properly
connected. Check before first use that all parts are moving freely (hoist arm, hoisting
bar, castors, brakes, trolley base). Ensure that the required power supply is available.
Special care is advised when moving ProLift Cacero series hoists over carpet or across
wet, slippery, rough or uneven surfaces. Never use ProLift Cacero series hoists on
slopes that are too steep – you could lose control of the hoist or it might tip over. In
order to avoid the risk of injury, you should activate the emergency stop button before
assembly or disassembly.
Now attach the hoisting bar
Press the lug of the hoisting bar hook downwards. This opens the hook. Attach the
hook to the retaining bar of the hoisting bar. Release the lug - the hook is now closed
again and secured against slipping off accidentally.
1. Retaining bar of
the hoisting bar
2. Hoisting bar 3. Engage the hook
of the hoisting bar
4. Ensure hook is
seated correctly
5. + 6. Move the plug on
the hook to open and close
1
4
2
5 6
3
13
Before installation, deinstallation or troubleshooting:
• Stop the hoist motor by pressing the EMERGENCY OFF button
• Switch off the power supply and unplug the mains power cable.
• Release any load from the hoist motor and lifting column
9. Safety in use/Warnings and
safety notes
Before first use:
• Install the hoist only in accordance with the instructions for use.
• The individual elements (hoist motor, lifting column, manual controller etc.) must all be
linked together before the control unit is connected to the mains.
• Ensure that the mains voltage is correct for the product or system before connecting it.
• Connect the charger to the correct power supply (socket).
• Ensure that the hoist can be freely moved and there are no obstacles in the way.
• Check that it functions correctly after assembly.
• The load on the hoist motor and lifting column must not exceed the value given in the
Specification (see also product label).
• The maximum duty cycle indicated on the type identification plate must always be
observed, as damage to the product might otherwise occur. Exceeding the maximum
duty cycle can lead to a reduction in the service life of the system. Unless otherwise
specified on the type identification plate, the maximum duty cycle is 10%, or 2 minutes
of operation followed by 18 minutes at rest.
• The hoist motor and lifting column may be used only in areas appropriate to the type
of protection (IPX) installed. You will find the type of protection specified on the type
identification plate.
• Should individual parts appear to be defective, do not install them, but instead return
them to the manufacturer to be checked.
• Use the hoist only for transporting and lifting persons. Use for lifting other loads and
objects is not permitted.

During operation:
• Be alert to unusual noises and uneven performance. Stop the hoist motor/lifting
column immediately if anything unusual occurs.
• If the control unit starts to produce unusual noises or odours during use, disconnect
both the power supply and the external battery (if fitted).
• Ensure that the cables are not damaged.
2
3
1
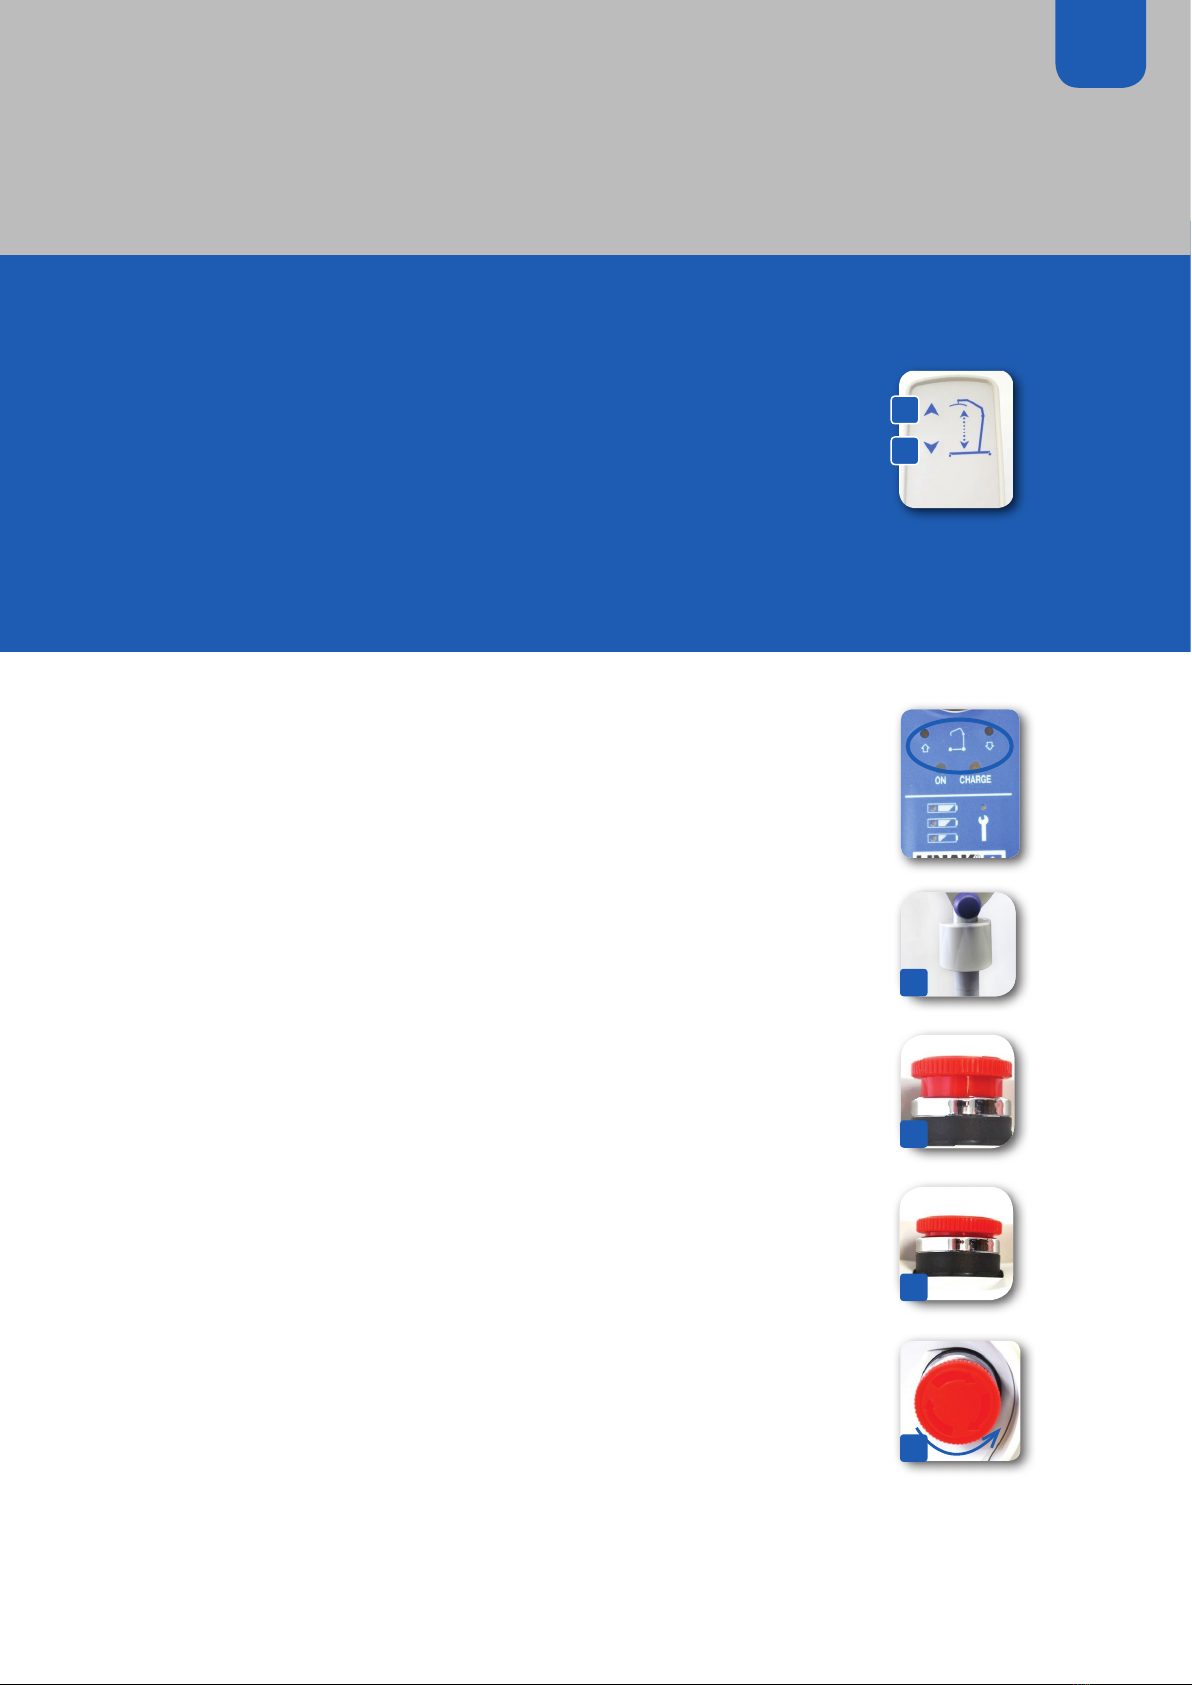
Variante CBJH
• In order to start the lifting process, press the „Up arrow“ button
(1.) on the manual controller. To start the lowering process, press
the „Down arrow“ button (2.).
• To lower the hoist electrically in an emergency, press the „Down
arrow“ button (3.) on the CBJH electronic control box.
• To lower the hoist mechanically in an emergency, pull the red
emergency lower-ing lever on the motor in the direction of the
arrow (4.). The hoist arm will lower automatically.
10. Regular function and usage
15
In order to start the lifting process, press the „Up arrow“ button (1)
on the manual controller. To start the lowering process, press the
„Down arrow“ button (2).
The CBJC control box has either buttons or recessed buttons. The
lifting arm can be raised or lowered by pressing the recessed buttons
with the tip of a pen. This is a permissible method of raising/
lowering the hoist if a manual controller is not connected. The
lifting/lowering „buttons“ function in the same way as the normal
manual controller buttons (no extended functions are available with
a low battery).
To lower the hoist mechanically in an emergency, turn the
emergency lowering lever clockwise (4). The hoist will lower
automatically.
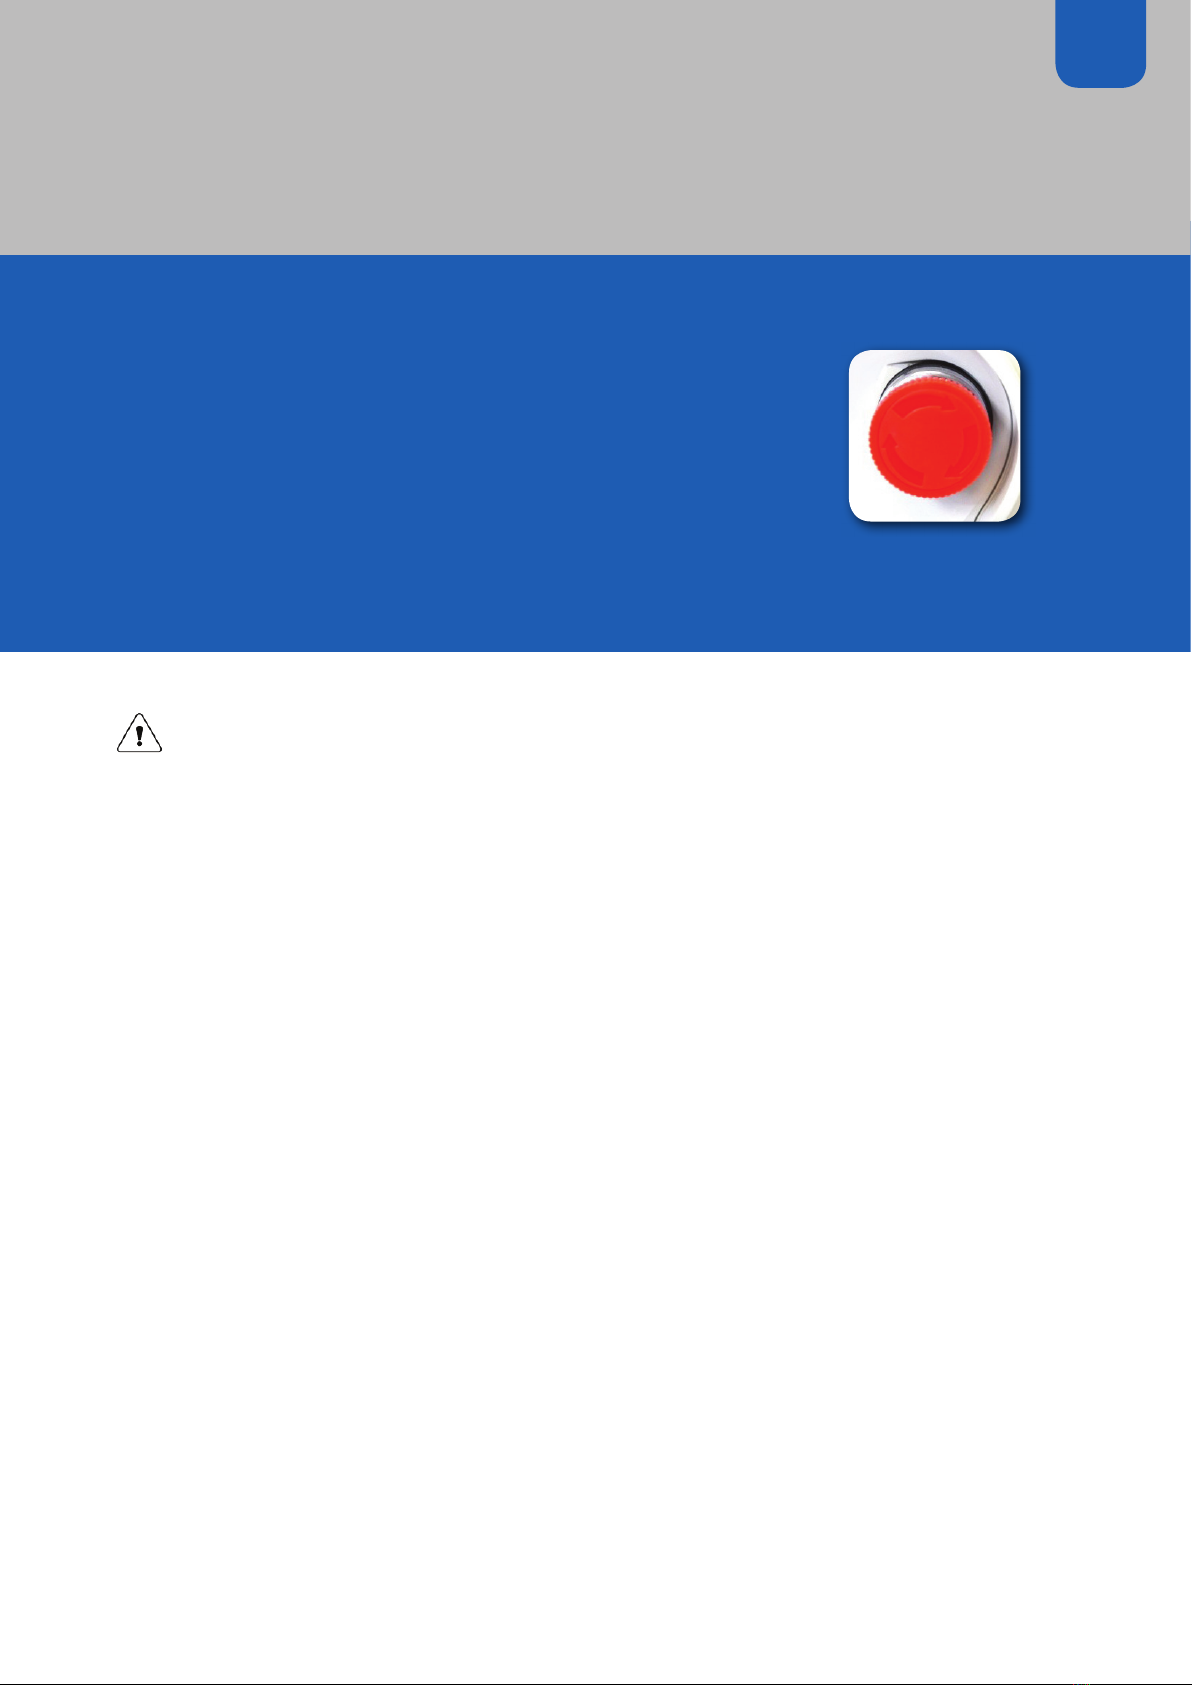
Please ensure that the red EMERGENCY STOP button is deactivated
during use (5). Activate the red EMERGENCY STOP button only in an
emergency, if the hoist has to be switched off immediately (e.g. if
the hoist is faulty or has toppled over).
If the hoist is not used for an extended period (e.g. during storage or
transport), the red EMERGENCY STOP button can also be activated. To
activate the red EMERGENCY STOP button, press the button until it locks
(6).
To deactivate the EMERGENCY STOP button, turn clockwise – this will
release the button (7). The hoist can then be used again. Note that the
cause must be located.
CBJC Version
4
5
6
7
2
1
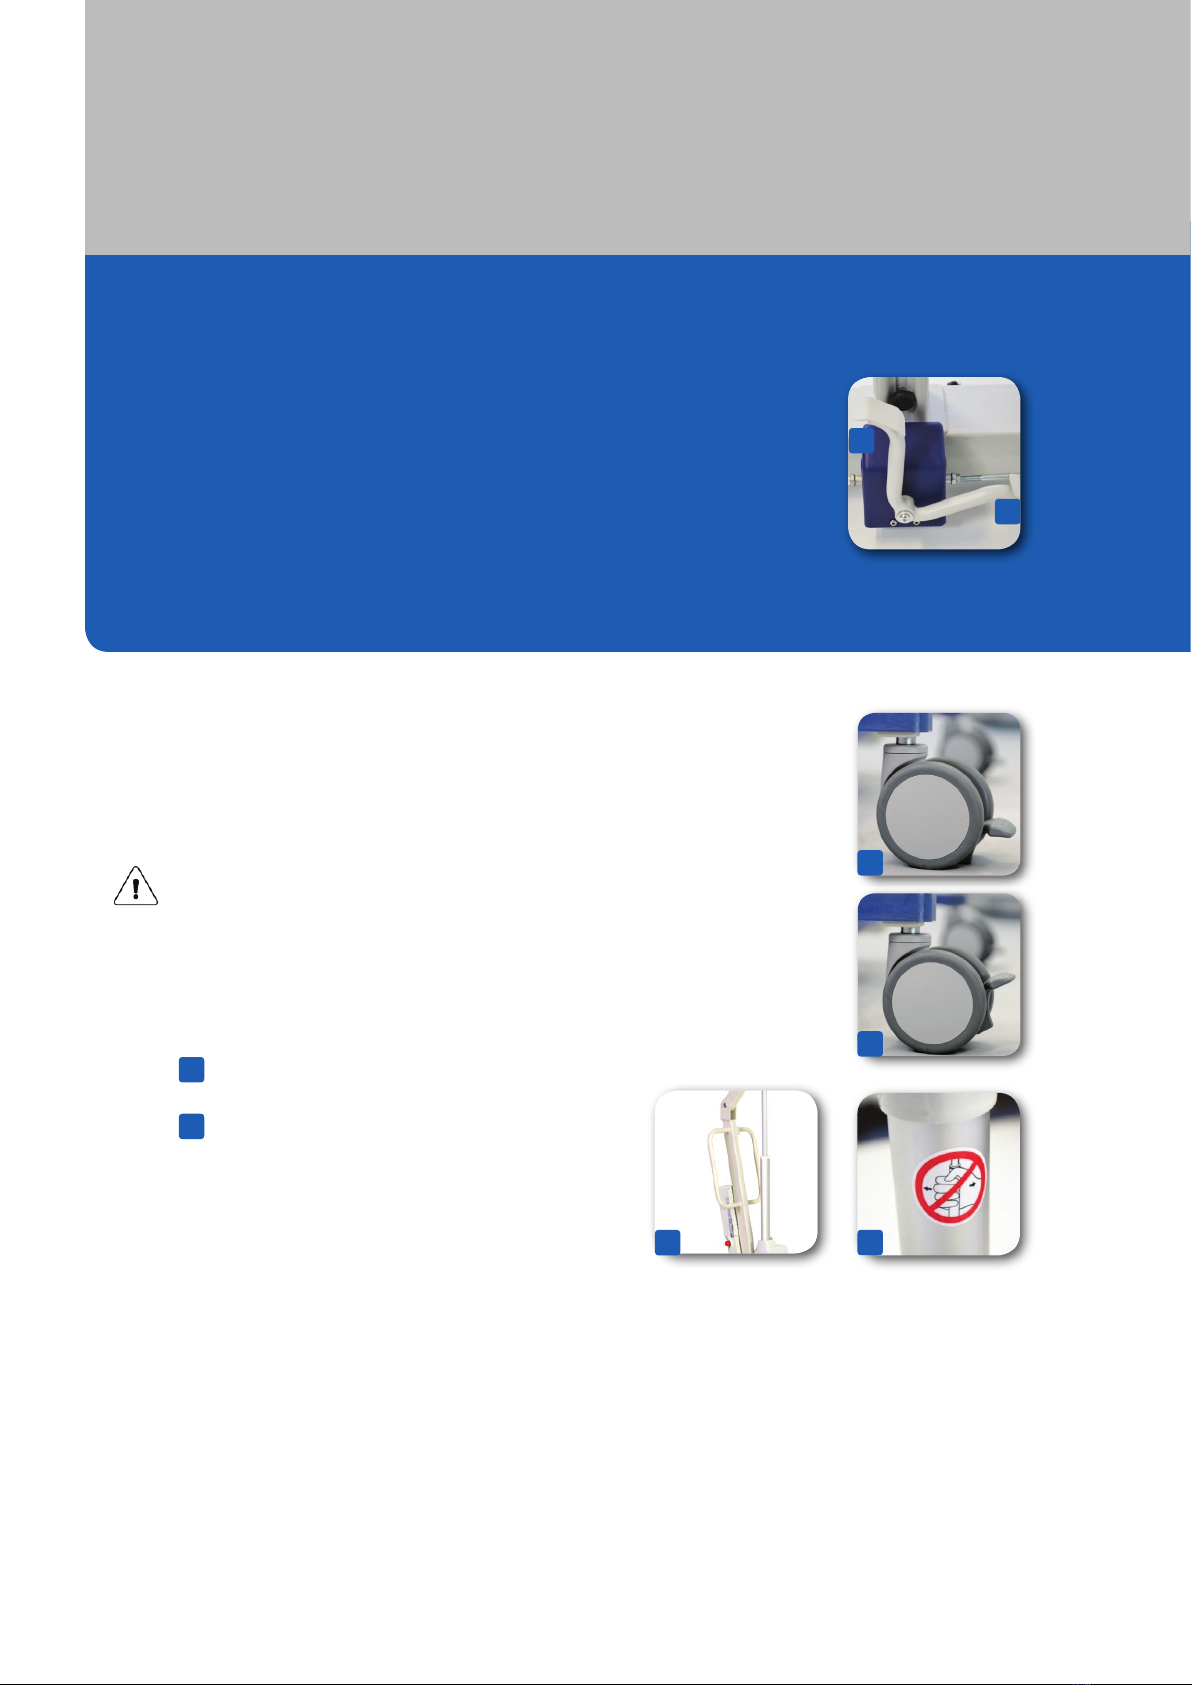
In order to set the trolley base to the required width, press the left
pedal on the trolley adjustment mechanism (9). To return it to the
standard setting, press the right pedal (10). The automatic snap-in
system prevents accidental adjustment of the trolley.
Press down (11) on the brake of the double castor in order to lock
it in place, and upwards (12) to release it. During use, ensure that
the castors are unlocked - if you attempt to move the hoist while the
brakes are engaged, it could tip over.
Attention!
The hoist must be moved and positioned only by means of the
handle. Never pull or push the hoist using the hoist arm or motor.
To ensure a safe working environment, always position the hoist so
that you can work according to ergonomic guidelines.
Only move the hoist using the handle
Observe warnings
10
11
13
14
12
9
13 14
17
11. Warning lights
11.2 CHJC Maintenance warning light flashes:
Every 12 months (in line with the recommendation contained in
EN10535) / after 8,000 cycles, whichever occurs first.
The first time the maintenance symbol lights up, the control box
produces an audible warning. Once the maintenance date is
reached, the maintenance warning light remains on for 2 minutes
after use.
The control box then switches off, in order to conserve the battery.
When the maintenance warning light is illuminated, the system
can still be operated and will work normally. Contact us or an
authorised service engineer. Compliance with the maintenance
intervals serves to protect the patients and users.
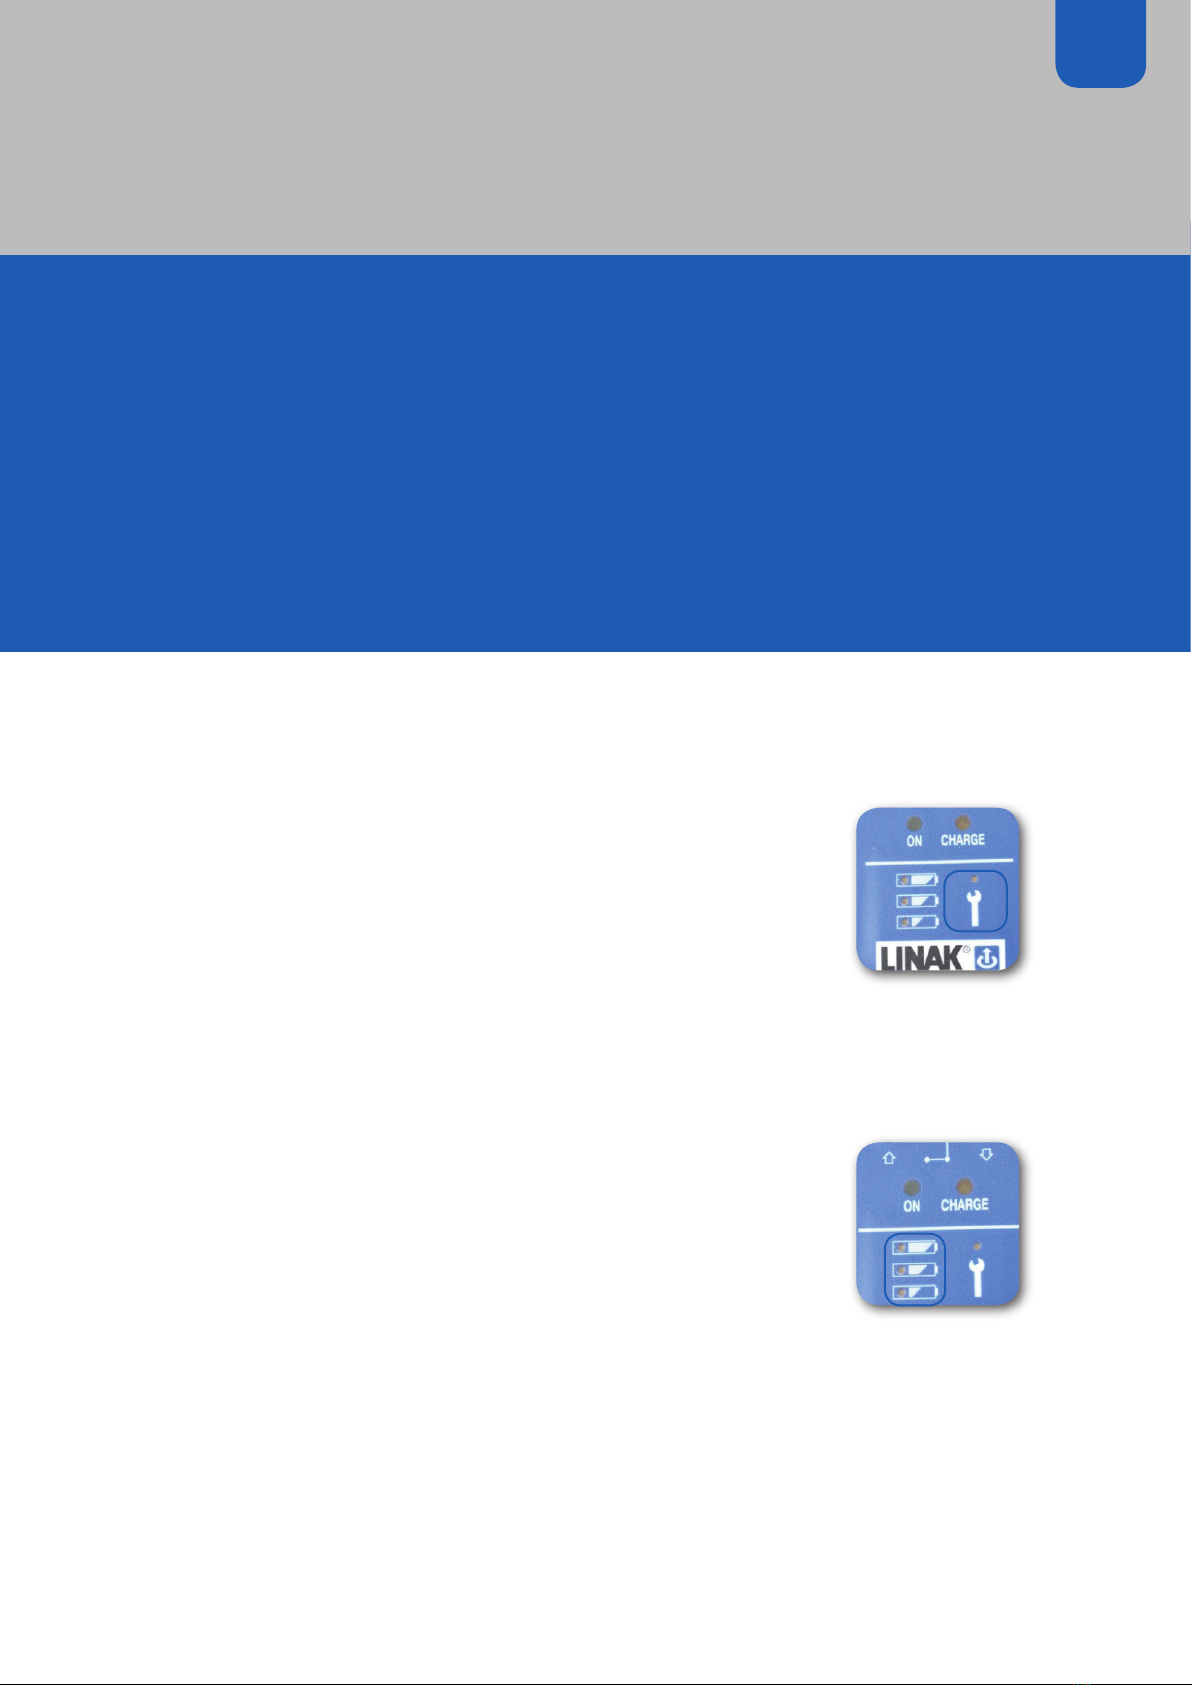
11.1 CBJH
Battery: if the battery capacity is low, a continuous alarm signal will sound when the
manual controller is operated.
Overload: if an excessive load is exerted and the CBJH drive unit is overloaded, two
audible signals will sound (power limit exceeded). The power is disconnected and the
drive unit will stop. The drive unit can be restarted as soon as the overload has been
remedied.
Battery:
3 LEDs:
- Green: the battery need not be charged
- Yellow: the battery requires charging
- Yellow: the battery requires charging,
audible signal also produced when manual controller activated
If hoist continues to be used on low battery charge, the LED will flash and will produce
a continuous audible signal. At this point, it will still be possible to lower the hoist arm
(lifting and trolley base adjustment will no longer be possible).
12. Batteries (charging/replacing)
Attention!
The batteries must be replaced after four years at the latest - possibly sooner,
depending on extent of use. Frequent and rapid discharge of the batteries reduces
their service life. For an optimal service life, the batteries should be connected to
mains power as frequently as possible. The batteries must be charged at least once
every three months, or they will be damaged by the selfdischarge process. The CBJC
electronic controller contains an electronic control box and a separate battery box.
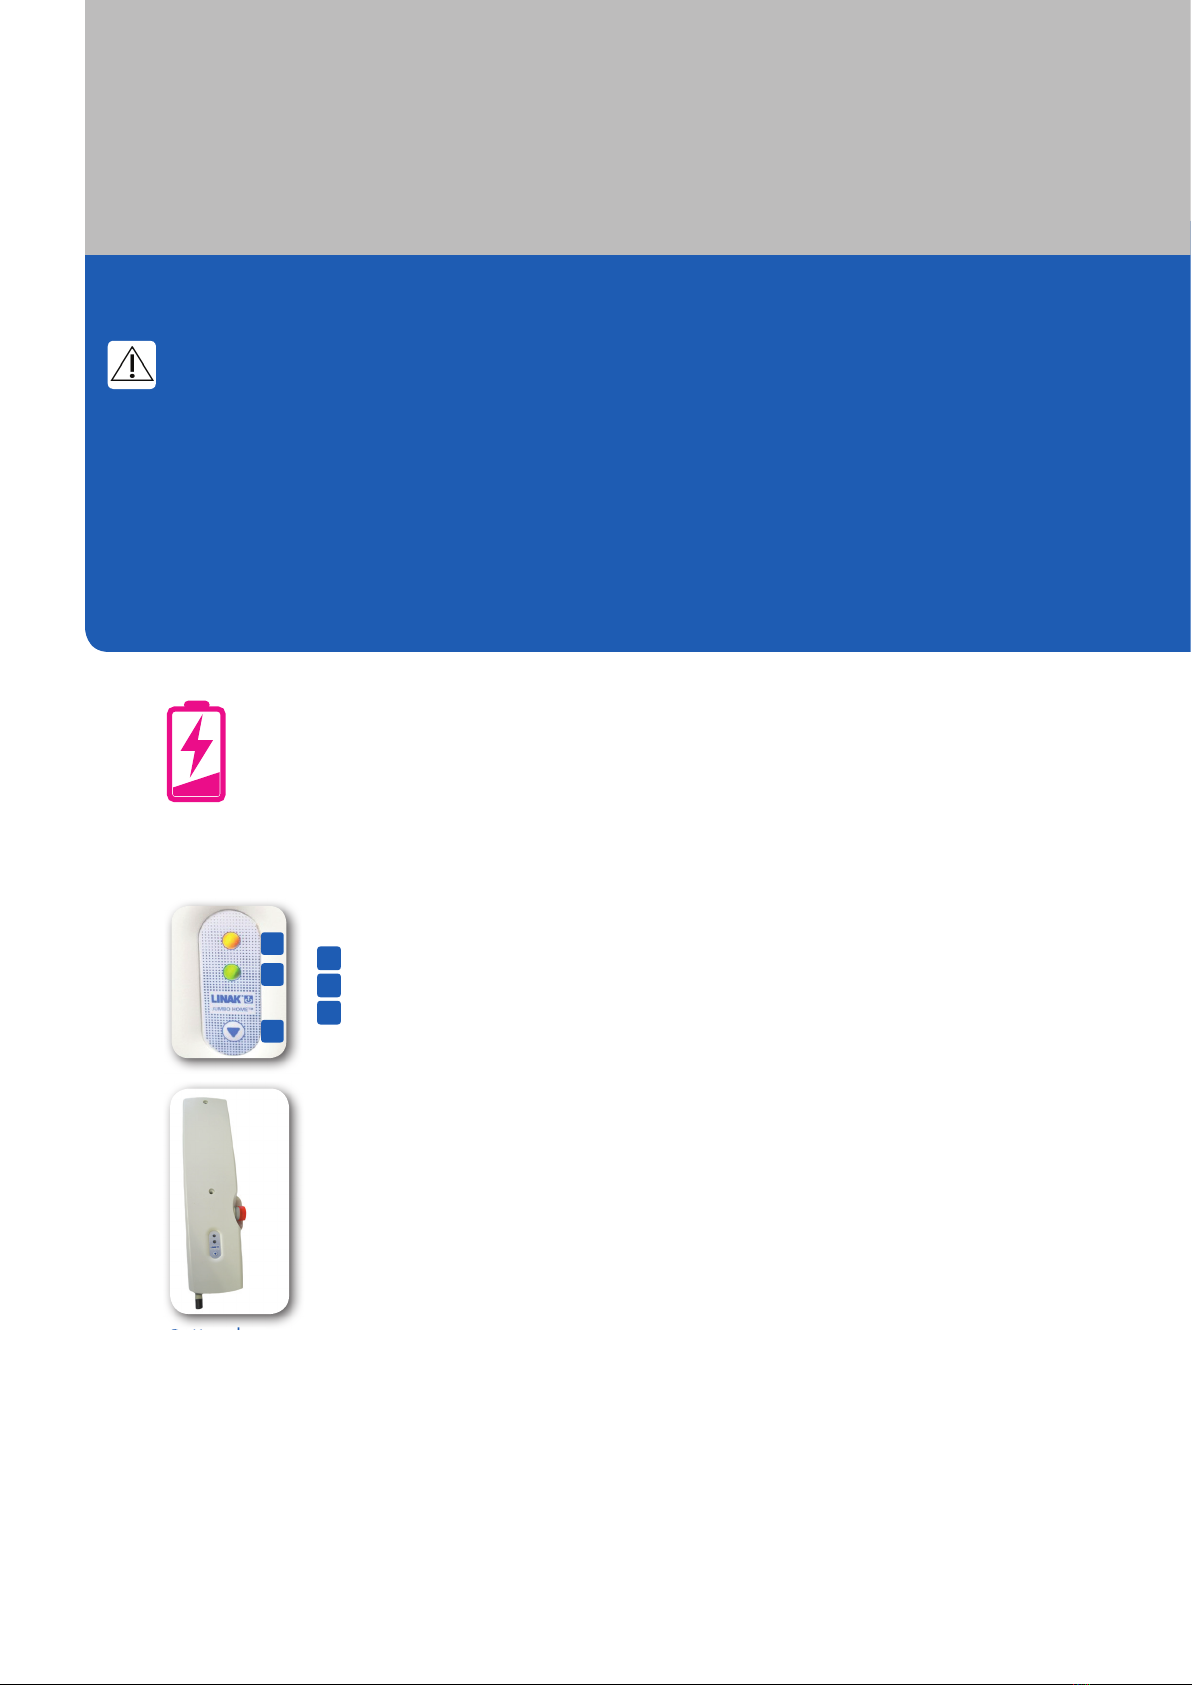
Charging light (yellow)
LED showing manual controller activated (green)
Button for emergency electrical lowering
12.1 CBJ-Home:
1
1
2
3
2
3
1. Charging can only take place if the emergency „Stop“ button
has been deactivated.
2. The indicator (1) flashes during charging.
3. The charging process is completed once both LEDs (yellow and
green) remain illuminated.
Battery box
Battery box
Fully charge before first use!
Akku vor erstem
Gebrauch vollständig
laden!
Fully charge before
first use!
¡Cargue la batería
antes de usarla por
primera vez!
Charger complète-
ment la batterie
avant premier usage !

19
Charger is connected to
mains power, battery
is charging
Plug locks in place Plug socket Wall bracket
12.2 Optionale external charger CHJ2
The charger can be mounted either between the control box and the battery on the
patient hoist or separately on a wall or elsewhere. If the charger is mounted between
the control box and the battery, the functions of the control box are deactivated when
mains power is connected to the charger.
The charger has the following properties:
• It is mains charger with an input voltage of 100-240 V AC
• Charging time: max. 4 hours for the BAJ1/BAJ2 battery set
• Replaceable power cable with retaining ring
• Green light ON illuminating: Charger is connected to mains power
• Yellow light CHARGING illuminating: Battery is charging Lights OFF means: the
• battery is fully charged
• Simple assembly of charging device on JUMBO mount (optional)
• Unless the EMERGENCY STOP button has been activated the charging process takes
place

A B C D
13.1 Attachment of harness in sitting position:
Bend the patient‘s upper body forward and support him with your hip in order to stop
him from accidentally falling out of the wheelchair. (A)
Place the lifting harness in the middle of the patient‘s back so that the label is legible
on the outside. Slide the lower end of the harness down the patient‘s back with
the palm of your hand until the point where the harness divides is level with the
wheelchair seat or the patient‘s coccyx.
To make this process better and easier, a finger-pocket is attached to the lower end
of the lifting harness. (B)
Push the Highsupport Sling sideways and down to the wheelchair seat, past the
patient‘s bottom. Pull the leg support forwards between the side of the wheelchair
and the patient‘s upper thigh (C).
Now pull with equal pressure on both leg supports, in order to position the lifting
harness around the patient with no folds (D).
Tip: While pulling the leg loop forwards with one hand, press gently with the other
hand against the patient‘s knee on the same side (D).
13. Attaching the harnesses
This manual suits for next models
9
Table of contents
Popular Lifting System manuals by other brands


morse
morse 400AM-60 Assembly & operators manual

LEGACY LIFTS
LEGACY LIFTS Passenger Lift Product owners manual

R. Beck Maschinenbau
R. Beck Maschinenbau HS 1200 FH operating manual

ARJO HUNTLEIGH
ARJO HUNTLEIGH MAXI LITE Instructions for use

John Bean
John Bean 40HP210ES instruction manual

B-TEC
B-TEC Carry Twin 3.5 Installation, operating instructions and parts list