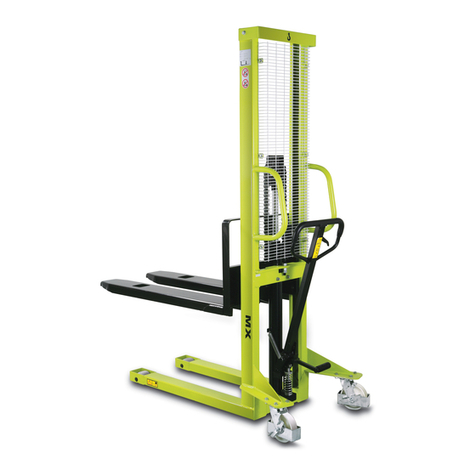
Lifter HX10E User manual


IT ISTRUZIONI ORIGINALI - PREMESSA (2.1)
Questo manuale contiene tutte le istruzioni d’uso della macchina e la conoscenza necessaria per un impiego corretto della stessa. Nel ringraziarLa per l’acquisto del nostro carrello vorremmo
porre alla sua attenzione alcuni aspetti di questo manuale: - il presente libretto fornisce utili indicazioni per il corretto funzionamento e la manutenzione del carrello a cui fa riferimento; è quindi
indispensabile prestare la massima attenzione a tutti i paragrafi che illustrano il modo più semplice e sicuro per operare con il carrello. - Il presente libretto dovrà essere considerato parte
integrante del carrello e dovrà esservi accluso all’atto di vendita. - Questa pubblicazione né parte di essa, potrà essere riprodotta senza autorizzazione scritta da parte della casa costruttrice. -
Tutte le informazioni qui riportate sono basate sui dati disponibili al momento della stampa; la casa costruttrice si riserva il diritto di effettuare modifiche ai propri prodotti in qualsiasi momento,
senza preavviso e senza incorrere in alcuna sanzione. Si consiglia pertanto di verificare sempre eventuali aggiornamenti.
FR TRADUCTION DE LA NOTICE ORIGINALE - A VANT-PROPOS (2.1)
Ce manuel contient toutes les instructions d'utilisation de la machine et la connaissance nécessaire pour un emploi correct de celle-ci. En vous remerciant pour l'acquisition de notre chariot nous
voudrions soumettre à votre attention certains aspects de ce manuel: -ce livret foumit des indications utiles pour un fonctionnement correct et pour l'entretien du chariot élévateur auquel il se
réfère; il est donc indispensable de prêter un maximum d'attention à tous les paragraphes qui illustrent la façon la plus simple et la plus sûre pour opérer avec le chariot. -ce livret doit être
considéré partie intégrante du chariot et devra être inclus à l'acte de vente. -cette publication, ni aucune partie d'elle-même, ne pourra être reproduite sans autorisation écrite de la part de la
maison de construction. -toutes les informations reportées ici sont basées sur des données disponibles au moment de l'impression; la maison de construction se réserve le droit d'effectuer des
modifications à ses propres produits à n'importe quel moment, sans préavis et sans encourir aucune sanction. Il est donc conseillé de toujours vérifier d'éventuelles mises à jour.
EN TRANSLATION OF THE ORIGINAL INSTRUCTIONS - INTRODUCTION (2.1)
This manual contains all the instructions for the use of the machine and the necessary knowledge for its correct use.While thanking you for buying our truck we would like to draw your attention
to some important aspects of this manual: -this booklet gives useful indications for the correct use and maintenance of the fork lift truck to which it refers; it is, therefore, essential to pay great
attention to all the paragraphs that illustrate the simplest and safest way of using the truck; -this booklet must be considered an integral part of the truck and should be included at the moment of
sale. -no part of this publication may be reproduced without the written authorisation of the manufacturer. -all the information contained in this booklet is based on the data available at the time of
printing; the manufacturer reserves the right to modify its products at any time, without notice and without liability. It is therefore advisable to regularly check for any changes.
DE ÜBERSETZUNG DER ORIGINALBETRIEBSANLEITUG - VORWORT (2.1)
Dieses anleitung enthält alle Gebrauchsanweisungen für das Gerät und die Hinweise für seinen einwandfreien Betrieb. Wir danken Ihnen für den Erwerb eines unserer Hubwagen und möchten
Sie auf einige Punkte dieses Handbuches hinweisen: - das vorliegende Handbuch liefert nützliche Hinweise für den einwandfreien Betrieb und die Wartung des jeweiligen Hubwagens; es ist
daher unerläßlich, all den Paragraphen die größte Aufmerksamkeit zu schenken, die die einfachste und sicherste Art beschreiben, um mit dem Hubwagen zu arbeiten; - das vorliegende Handbuch
muß als wesentlicher Bestandteil des Gerätes angesehen und daher dem Kaufvertrag beigefügt werden; - weder diese Veröffentlichung noch Teile von ihr dürfen ohne die schriftliche
Genehmigung des Herstellers nachgedruckt werden; - alle hier wiedergegebenen Informationen beziehen sich auf die beim Druck verfügbaren Daten; der Hersteller behält sich das Recht vor,
ohne Vorankündigung jederzeit Anderungen an seinen eigenen Produkten vorzunehmen, wobei er sich keinerlei Strafen zuzieht.Wir empfehlen daher immer, eventuelle Neuerungen zu beachten.
ES TRADUCCION DEL MANUAL ORIGINAL - PREMISA (2.1)
Este manual contiene todas las instrucciones para la utilización de la máquina, así como las condiciones necesarias para un empleo correcto de la misma. En el agradecerles la compra de
nuestra carretilla, deseamos someter a su atención algunos aspectos de este manual: - el presente manual proporciona indicaciones útiles para el correcto funcionamiento y para la manutención
de la carretilla elevadora a la cual se refiere; por lo tanto, és indispensable prestar la máxima atención a todos los párrafos que ilustran la manera más sencilla y segura para trabajar con la
carretilla. - el presente manual debe considerarse parte integrante de la carretilla y deberá estar incluido en el acto de venta. - ni ésta publicación ni parte de ella podrá ser reproducida sin
autorización escrita por parte de la Casa Constructora. - todas las informaciones aquí contenidas, están basadas sobre los datos disponibles al momento de la impresión; la Casa Constructora
se reserva el derecho de efecturar modificaciones a sus propios productos en cualquier momento, sin previo aviso y sin incurrir en ninguna sanción. Por lo tanto, les aconsejamos comprobar
siempre eventuales actualizaciones.
PT TRADUÇÃO DO MANUAL ORIGINAL - INTRODUÇAO (2.1)
Este manual contém todas as informações para o uso do aparelho e o conhecimento necessário para um perfeito funcionamento. Agradecendo pela compra do nosso aparelho queremos
esclarecer alguns aspectos deste manual: - Este manual contém indicações para um correto funcionamento e manutenção da carretilha; è indispensável prestar muita atenção à todos os
parágrafos que ilustram em modo simples e seguro a manipulação da carretilha. - No ato da venda observar se o manual foi entregue junto com a carretilha, pois deve ser considerado como
pare integral da mesma. - Esta publicação não pode ser reproduzida sem autorização escrita da casa de construção. - Todas as informação são baseadas nos dados disponíveis no momento
da estampa; a casa de construção tem o direito de modificar os próprios produtos em qualquer momento, sem pré-aviso e sem nenhum tipo de multa. Aconselhamos de verificar eventuais
atualizações.
NL VERTALING VAN DE OORSPRONKELIJKE GEBRUIKSAANWIJZING - VOORWOORD (2.1)
Dit boekje bevat alle gebruiksaanwijzingen van de machine en de nodige kennis voor een correct gebruik van de pallettruck. Wij bedanken u voor de aankoop van onze pallettruck en tevens
vestigen wij graag uw aandacht op enige aspecten van deze handleiding: - dit boekje verschaft nuttige aanwijzingen voor een correct gebruik en onderhoud van de betreffende pallettruck; het is
daarom noodzakelijk alle paragrafen die betrekking hebben op de meest eenvoudige en veilige manier van het omgaan met de pallettruck goed te lezen. - dit boekje dient beschouwd te worden
als een wezenlijk onderdeel van de machine en moet op het moment van de verkoop bijgeleverd worden. - deze publikatie, noch gedeeltes hieruit, mogen niet vermenigvuldigd worden zonder
schriftelijke toestemming van het constructiebedrijf. - alle informatie in deze handleiding is gebaseerd op de beschikbare gegevens op het moment van het ter druk gaan; het constructiebedrijf
houdt zich het recht voor om, op elk moment, veranderingen aan de produkten toe te brengen, zonder voorafgaand te berichten en zonder sancties op te lopen. Het is daarom aan te raden altijd
de meest recente uitgave te raadplegen.
DA OVERSÆTTELSE AF DEN ORIGINALE BRUGSANVISNING - INTRODUKTION (2.1)
Denne folder indeholder alle vejledningerne for brug af maskinen samt den nødvendige viden for korrekt brug. Med tak for købet af vores truck gør vi Dem opmærksom på nogle vigtige aspekter
af denne folder. Denne folder giver nyttige vejledninger for korrekt brug og vedligeholdelse af gaffel-trucken den beskriver; det er derfor yderst vigtigt at læse alle sektionerne grundigt da disse
forklarer den bedste of mest sikre brug af trucken. -denne folder må anses for en integreret del af trucken of skal indkluderes i salget af den. -ingen del af denne publikation må reproduceres
uden skreven autorisation fra den konstruerende virksomhed. -alt information i denne folder er baseret på data tilgængelig ved skrivende stund - den konstruenrende virksomhed reserverer
rettigheden til at modifikere dets produkter til enhver tid uden varsel og uden sanktion. Det er derfor tilrådeligt at holde sig up-til-date.
NO OVERSETTELSE AV OPPRINNELIGE INSTRUKSJONENE - PREMISSER (2.1)
Denne manualen inneholder alle veiledninger for bruk av maskinen samt den nødvendige viten for korrekt bruk. Med takk for køpet av våres maskin gjør vi Dem oppmerksom på noen viktige
aspekter i denne manualen. Denne manualen gir nyttige veiledninger for korrekt bruk og vedlikeholdelse av gaffel-trucken den beskriver; det er derfor veldig viktigt å lese alle seksjonerne grundigt
siden disse forklarer den beste og mest sikre bruk av trucken. -denne manual må anses for en integreret del av trucken og skal indkluderes i salget av den. -ingen del av denne publikasjon må
reproduseres uten skreven autorisiasjon fra den konstruerende virksomhet. -all informasjon i denne manualen er baseret på data tilgjengelig ved skrivende stund - den konstruenrende virksomhet
reserverer rettigheten til å modifisere dets produkter til enhver tid uten varsel og uten sanksjon. Det er derfor anbefalt å holde seg up-til-date.
SV ÖVERSÄTTNING AV BRUKSANVISNING I ORIGINAL - INTRODUKTION (2.1)
Detta häfte innehåller alla instruktioner för användning av maskinen samt nödvändig information omkorrekt hantering. Vi vill tacka Er för att ha valt vår truck och samtidigt göra Er uppmärksamma
på några viktiga aspekter rörande denna manual: - Detta häfte innehaller viktiga anvisningar om korrekt användning och underhåll av den truck som häftet behandlar. Det är därfor mycket viktigt
att noggrant uppmärksamma alla paragrafer eftersom de förklarar det enklaste och säkraste sättet att handskas med trucken. - Detta häfte bör betraktas som en del av trucken och bör därför
medfölja vid försäljning. - Ingen del av denna publikation får kopieras utan tillverkarens skriftliga medgivande. - All information i detta häfte baseras på data tillgänglig vid tryckningstillfället.
Tillverkaren reserverar sig rättigheten att genomföra modifikationer på sina produkter vid vilken tidpunkt som helst utan förvarning och utan skyldigheter. Det är därför rekommenderat att
regelbundet kontrollera om eventuella förändringar genomförts.
EL Μετάφραοη τον πρωτοτύπου των οδηγιών χρήοηζ - ΠΡΟΛΟΓΟΣ (2.1)
Το παρον εγχειριδιο περιεχει ολεσ τισ οδηγιεσ χρησησ τον παλλετοφορον και τισ απαιτονμενεσ γνωσεισ για τη σωστη τον χρηση. Ενχαριστωντασ σασ για την αγορα τον παλλετοφορον μασ Θα
θελαμε να επιστησονμε την προσοχη σασ σε μερικα σημεία αντον τον εγχειριδων: -Το παρον εγχειριδιο παρεχει χρησιμεσ νποδειξεισ για τη σωστη λειταυργια και χρηση τον παλλετοφορον στο
οποια αναφερεται.Ειναι λοιπον, απαραίτητο να διαβασετε με πρασοχη ολεσ τισ παραραφονσ που νποδεικννονν τον πιο εύκολο και σίγουρο τροπογια την χρηση τον παλλετοφορον. -Το παρον
εγχειριδιο Θα πρεπει να Θεωρηθει αναποσπασεο μεροσ τον παλλετοφορον και θα πρεπει να σασ θεωρηθει τη στιγμη τησ πωλησησ τον -Απαγορεύεται ηαναδημοσιενση ολικη ημερικη αντον τον
εντύπού χωρισ την γραπτη εγκριση τον κατα σκενασιικον οικον. -Ολε σοι πληροφοριε σπού παρεχονται εδω βασίζονται σε δεδομενα διαθεσιμα τη στιγμη τησ εκτυπωσησ. Οκατασκεναστικοσ
οικοσ διατηρεί το δικαιωμα αλλαγων στα προιονεα τον ανα πασα στιγμη , χωρισ προειδοποίηση και χωρισ να διατρεχει καμια κύρωση. Θαπρεπει ωσεοσο να ενημερωνεσεε για πιθανεσ
καινοτομιεσ.
FI ALKUPERÄISTEN OHJEIDEN KÄÄNNÖS - JOHDANTO (2.1)
Tämä käsikirja sisält koneen kaikki käyttöohjeet sekä tarpeellisen tiedon sen asianmukaiseen käytt n. Samalla kun kiitämme Teitä trukkimme ostamisesta haluaisimme kiinnitt huomionne tiettyihin
tämän käsikirjan näkökohtiin: -Tämä käsikirja antaa tarpeelliset ohjeet trukin oikeaan käytt n ja huoltoon; tämän takia on olennaista kiinnitt erityistä huomiota kaikkiin kuvioihin, joista käy ilmi
yksinkertaisin ja tavallisin tapa käytt trukkia. -Tämä käsikirja pit olennaisena osana trukkia ja täten sisältyä myyntisopimukseen. -Mit n osaa tästä julkaisusta ei saa uudelleentuottaa ilman
valmistajan kirjallista valtuutusta. -Kaikki tämän käsikirjan tieto perustuu painohetkellä käsillä olleeseen tietoon; valmistaja varaa itselleen oikeuden muuttaa tuotteitaan milloin tahansa ilman
ennakkoilmoitusta ja ilman vastuuta. Tämän takia on suositeltavaa s Ilisesti tarkistaa mandolliset muutokset.
CZ PŘEKLAD PUVODNÍHO NÁVODU K POUŽÍVÁNÍ - ÚVOD (2.1)
Tento návod obsahuje všechny nutné pokyny pro správné používání tohoto zařízení. Rádi bychom vám poděkovali za jeho koupi a upozornili vás na několik důležitých věcí,
týkajících se tohoto návodu: - Tento návod poskytuje užitečné rady pro správné používání a údržbu vidlicového vozíku, kterého se týká. Proto je důležité věnovat pozornost
všem bodům, které popisují nejjednodušší a nejbezpečnější způsob používání vozíku. - Tento návod musí být považován za nedílnou součást vozíku a měl by být předán
v momentě prodeje. - Žádná část této publikace nesmí být reprodukována bez písemného oprávnění výrobce. - Všechny informace obsažené v tomto návodě jsou založeny
na údajích dostupných v momentě tisku. Výrobce si vyhrazuje právo upravovat své výrobky kdykoli, bez upozornění, a bez jakékoli odpovědnosti. Doporučujeme tedy
pravidelně se informovat kvůli případným změnám.

ET ALGUPÄRASE KASUTUSJUHENDI TÕLGE - SISSEJUHATUS (2.1)
Käesolev kasutusjuhend sisaldab kõiki masina kasutamiseks vajalikke juhendeid ja vajalikku teavet selle õigeks kasutamiseks. Tänades Teid meie tõstuki ostmise eest, juhime tähelepanu
käesoleva kasutusjuhendi mõnedele olulistele aspektidele. - See brošüür annab kasulikke juhiseid kahveltõstuki õigeks kasutamiseks ja hooldamiseks. Seetõttu on oluline pöörata suurt
tähelepanu kõigile peatükkidele, mis illustreerivad masina kasutamise kõige lihtsamat ja ohutumat viisi. - Seda brošüüri tuleb käsitleda kui tõstuki lahutamatut osa ning selle peab müügi korral
masinaga kaasa andma. - Ühtegi käesoleva trükise osa ei tohi ilma tootja kirjaliku loata kopeerida. - Kogu selles brošüüris sisalduv informatsioon tugineb trükkimise ajal kättesaadavatele
andmetele. Masina tootja jätab enesele õiguse oma toodete muutmiseks mis tahes ajal sellest eraldi ette teatamata ja ühegi kohustuseta. Seetõttu on soovitatav regulaarselt kontrollida võimalike
muudatuste lisandumist.
LV INSTRUKCIJU TULKOJUMS NO ORIGINĀLVALODAS - IEVADS (2.1)
Šī rokasgrāmata satur visas iekārtas izmantošanas instrukcijas un nepieciešamo informācija par tās pareizu lietošanu. Pateicoties par mūsu autoiekrāvēja pirkumu, mēs vēlētos pievērst Jūsu
uzmanību dažiem svarīgiem šīs rokasgrāmatas aspektiem: - Šis buklets sniedz noderīgas norādes par attiecīgā dakšu iekrāvēja pareizu lietošanu un apkopi; tāpēc ir svarīgi pievērst uzmanību
visām nodaļām, kas apraksta vienkāršāko un drošāko autoiekrāvēja lietošanas veidu. - Šis buklets ir jāuzskata par iekrāvēja neatņemamu daļu un pirkšanas brīdī tam ir jābūt komplektā ar iekārtu.
- Nevienu šīs publikācijas daļu nav atļauts pavairot bez ražotāja rakstiskas piekrišanas. - Visa šajā bukletā iekļautā informācija balstās uz izdošanas brīdī pieejamiem datiem; ražotājs patur
tiesības izmainīt savus izstrādājumus jebkurā brīdī, bez iepriekšēja paziņojuma un neuzņemoties nekādu atbildību. Tāpēc ir ieteicams regulāri pārbaudīt, vai nav kādu izmaiņu.
LT ORIGINALIOS INSTRUKCIJOS VERTIMAS - ĮVADAS (2.1)
Šiose Instrukcijose yra surašyti visi nurodymai apie tai, kaip teisingai naudotis šiuo įrengimu. Dėkodami klientui už nupirktą mūsų automobilinį krautuvą, mes norėtume atkreipti jo dėmesį į kai
kuriuos svarbius šiose Instrukcijose aprašytus aspektus. - Šioje knygelėje yra pateikti svarbūs paaiškinimai apie tai, kaip teisingai naudotis ir aptarnauti automobilinį krautuvą su šakėmis. Dėl to
yra gana svarbu atidžiai perskaityti visus skirsnius, parodančius kaip pačiu paprasčiausiu ir saugiausiu būdu naudotis mūsų krautuvu.- Šią knygelę reikėtų vertinti kaip neatsiejamą automobilinio
krautuvo dalį ir pardavimo metu ji turi būti pridedama prie šios mūsų prekės. - Be Gamintojo raštiško leidimo nė vienos šio leidinio dalies negalima dauginti. - Visa šioje knygelėje sukaupta
informacija yra pagrįsta jos spausdinimo metu surinktais duomenimis. Gamintojas pasilieka sau teisę modifikuoti savo produkciją bet kuriuo metu apie tai nieko nepranešęs ir neprisiimdamas
jokios atsakomybės. Dėl to rekomenduotina pastoviai sekti bet kuriuos pakeitimus.
PL TŁUMACZENIE INSTRUKCJI ORYGINALNEJ - WSTĘP (2.1)
Niniejsza instrukcja zawiera wszelkie wskazówki dotyczące poprawnego użytkowania urządzenia. Dziękując za zakup naszego produktu, pragniemy zwrócić państwa uwagę na kilka ważnych
punktów: - Niniejsza broszura zawiera użyteczne wskazówki dotyczące właściwego użytkowania i konserwacji wózka, dlatego w szczególności należy zwrócić uwagę na paragrafy dotyczące
obsługi wózka w najprostszy i najbezpieczniejszy sposób. - Niniejsza broszura stanowi integralną część wózka, w związku z tym powinna zostać dołączona do produktu w momencie sprzedaży.
- Zadna część tejże publikacji nie może być kopiowana bez pisemnej zgody producenta. - Wszelkie informacje zawarte w niniejszej broszurze są prawidłowe na dzień publikacji; producent
zastrzega sobie prawo do dokonania zmian i modyfikacji produktu w każdej chwili bez uprzedniego powiadomienia. Producent nie ponosi z tego tytułu żadnej odpowiedzialności. W związku z
powyższym zaleca się regularne sprawdzanie, czy wystąpiły zmiany.
RU Перевод оригинальной инструкции - ВВЕДЕНИЕ (2.1)
Данное руководство содержит все инструкции по эксплуатации и сведения, необходимые для правильного использования погрузчика. Мы благодарим Вас за приобретение нашего
погрузчика и хотели бы обратить внимание на некоторые важные аспекты данного руководства: - данный проспект дает указания для правильной эксплуатации и обслуживания
соответствующей модели вилочного погрузчика; поэтому необходимо обращать внимание на все параграфы, разъясняющие самые простые и безопасные способы эксплуатации
погрузчика. - данный проспект считается неотъемлемой частью погрузчика и должен включаться в комплект в момент продажи. - без письменного разрешения производителя
запрещается любое, даже частичное вопроизведение данного издания. - все сведения, содержащиеся в данном проспекте основаны на данных, доступных на момент опубликования;
производитель оставляет за собой право внесения модификаций в любое время, без уведомления и принятия на себя обязательств. Рекомендуется регулярно осведомляться о
наличии изменений.
SK PREKLAD PÔVODNÉHO NÁVODU NA POUŽITIE - ÚVOD (2.1)
Táto príručka obsahuje všetky inštrukcie na použitie stroja a potrebné vedomosti na jeho správne použitie. Okrem poďakovania zo to, že ste si zakúpili náš vozík, by sme vás radi upozornili na
niektoré dôležité aspekty tejto príručky: - Táto príručka poskytuje užitočné inštrukcie na správnu obsluhu a údržbu vozíka, ku ktorému je priložená; preto je dôležité venovať veľkú pozornosť
všetkým odstavcom, kde sa uvádza najjednoduchší a najbezpečpečnejší spôsob používania vozíka. - Túto príručku treba považovať za neoddeliteľnú súčasť vozíka v okamihu predaja. - Žiadnu
časť tejto príručky nemožno reprodukovať bez písomného súhlasu výrobného podniku. - Všetky uvádzané informácie sa zakladajú na údajoch dostupných v čase tlače príručky; výrobný podnik
si vyhradzuje právo vykonávať kedykoľvek akékoľvek úpravy na svojich výrobkoch a to bez upozornenia a bez znášania akýchkoľvek sankcií. Preto sa odporúča pravidelne overovať všetky
zmeny.
SL PREVOD IZVIRNIH NAVODIL - UVOD (2.1)
To navodilo za uporabo vsebuje vse napotke za pravilno uporabo naprave. Zahvaljujemo se vam, da ste se odločili za enega izmed naših paletnih viličarjev. Radi bi vas opozorili na nekaj
pomembejših točk, ki zadevajo ta navodila za uporabo: - To navodilo za uporabo vsebuje pomembne informacije za pravilno uporabo in vzdrževanje viličarja. Zato je izredno pomembno, da
pozorno pregledate celotno besedilo, kjer boste zasledili, kako ga najenostavneje in najvarneje uporabljati. - To navodilo za uporabo predstavlja sestavni del viličarja in ga je zato potrebno ob
prodaji priložiti. - Tega navodila za uporabo ni dovoljeno reproducirati, ne delno in ne v celoti, brez pisnega dovoljenja proizvajalca. - Vse v temzvezku navedene informacije temeljijo na podatkih,
ki so bili na voljo v času tiskanja. Proizvajalec si kadarkoli pridržuje pravico do sprememb, brez obvestil in kakršnihkoli posledic.
HU EREDETI HASZNÁLATI UTASÍTÁS FORDÍTÁSA - BEVEZETÉS (2.1)
A kézikönyv tartalmazza a gép használatára vonatkozó utasításokat és a berendezés megfelelő működtetéséhez szükséges ismereteket. Köszönjük Önöknek, hogy ezt a targoncánkat
választották ki megvásárlásra, és szeretnénk felhívni a figyelmüket a kézikönyv néhány fontos szempontjára. - Ez az ismertető füzet hasznos utalásokat tartalmaz az adott villástargoncának a
helyes használatára és karbantartására vonatkozóan; ezért nagyon lényeges, hogy nagy figyelmet fordítsunk az összes olyan pontnak az elolvasására, amely a gép használatának legegyszerűbb
és legbiztonságosabb módját mutatja be. - Ezt az ismertető füzetet úgy kell figyelembe venni, mint a gép szerves részét, és az eladás pillanatában annak tartozékának kell lenni. - Ennek a
kiadványnak semmilyen része nem sokszorosítható a gyártó írásbeli engedélye nélkül. - Az ebben az ismertető füzetben található összes információ a kinyomtatás idejében rendelkezésre álló
adatokon alapul; a gyártó minden jogot fenntart arra vonatkozóan, hogy a terméket bármikor módosítsa, előzetes bejelentés és minden kötelezettség nélkül.
RO TRADUCERE A INSTRUCŢIUNILOR ORIGINALE - CUVÂNT ÎNAINTE (2.1)
Acest manual conţine toate instrucţiunile de folosire a aparatului, precum şi cunoştinţele necesare pentru utilizarea corectă a acestuia. Mulţumindu-vă că aţi cumpărat elevatorul nostru, dorim să
vă atragem atenţia asupra unor aspecte importante ale acestui manual: - Documentul de faţă vă furnizează indicaţii utile pentru corecta funcţionare şi pentru întreţinerea corespunzătoare a
elevatorului manual la care face referinţă; este deci indispensabil să citiţi cu maxima atenţie toate paragrafele care ilustrează modul cel mai simplu şi sigur de utilizare a elevatorului manual. -
Documentul de faţă este considerat parte integrantă a acestui elevator manual şi trebuie anexat actului de vânzare. - Prezenta publicaţie sau părţile acesteia nu pot fi reproduse fără autorizaţia
scrisă a casei constructoare. - Toate informaţiile conţinute în acest document sunt bazate pe date disponibile în momentul tipăririi; casa constructoare îşi rezervă dreptul de a efectua modificări
asupra propriilor produse în orice moment, fără preaviz şi fără să se expună nici unei sancţiuni. Vă sfătuim aşadar să verificaţi întotdeauna eventualele modificări.
BG Превод на оригиналната инструкция - ПРЕДГОВОР (2.1)
Това ръководство съдържа всички инструкции по експлоатация на машината и необходимите познания за правилното използване на същата. Като Ви благодарим за покупката на
нашия електрокар, бихме искали да предложим на Вашето внимание някои аспекти от това ръководство: - Настоящата книжка предоставя полезни указания за правилното
функциониране и поддържане на електрокара-количка, за който става дума в нея; следователно е необходимо да обърнем максимално внимание на всички параграфи, които
илюстрират най-семплия и сигурен начин за работа с електрокара. - Настоящата книжка трябва да бъде считана за неразделна част от електрокара-количка и трябва да бъде
включена в договора за продажба. - Тази публикация, нито която и да било част от нея, не може да бъде репродуцирана без писменото съгласие от страна за завода производител.
- Всички приведени тук сведения се базират на данни, които са на разположение в момента на отпечатване; Заводът производител си запазва правото да извършва промени на
собствения си продукт в който и да е момент, без предупреждение и без каквито и да е санкции. Затова се препоръчва да бъдат следни всички актуални осъвременявания.
TR ORIJINAL TALIMATLARIN ÇEVIRISI - ÖNSÖZ (2.1)
Bu kılavuzda makinenin kullanımı ile ilgili tüm talimatlar ve makinenin düzgün kullanımı için gerekli bilgiler yer almaktadır. Firmamız tarafından üretilen taşıyıcı arabayı
satın aldığınız için teşekkür eder bu kılavuzla ilgili aşağıdaki bilgilere dikkatinizi çekmek isteriz: - bu kılavuz konu edilen arabanın düzgün çalıştırılması ve bakımı için
faydalı bilgileri içerir; bu nedenle araba ile en basit ve güvenli bir şekilde çalışmak için tüm paragraflara azami dikkat gösterilmelidir. - bu kılavuz arabanın tamamlayıcı
bir parçası kabul edilmeli ve satış anında size teslim edilmelidir. - bu kitapçık ne tamamen ne de kısmen üretici tarafından izin verilmediği sürece çoğaltılamaz. - burada
yer alan tüm bilgiler baskı anında mevcut olan verilere dayanmaktadır; üretici firma herhangi bir yaptırım olmadan ve bir ön bildirim yapmadan istediği an kendi
ürünlerinde değişiklik yapma hakkını saklı tutar. Bu nedenle olası güncellemeleri her zaman kontrol etmeniz önerilir.
HR UVOD (2.1)
Ovaj priručnik sadrži sve upute za uporabu stroja i znanje potrebno za pravilno korištenje istog. Zahvaljujemo vam što ste kupili naš viličar i istodobno vas upozoravamo
da obratite pažnju na neke aspekte ovog priručnika: - u ovoj knjižici naći ćete korisne upute za pravilan rad i održavanje viličara na koji se knjižica odnosi; stoga je
potrebno krajnje pažljivo proučiti sve odlomke u kojima je opisan najjednostavniji i najsigurniji način rukovanja viličarom. - ovu knjižicu treba smatrati sastavnim dijelom
viličara i ona mora biti priložena viličaru u trenutku prodaje. - ova knjižica, kao ni dijelovi iste, ne smije se umnožavati bez pisanog odobrenja proizvođača. - sve ovdje
navedene informacije temelje se na podacima raspoloživima u trenutku tiskanja; proizvođač pridržava pravo obavljati izmjene na vlastitim proizvodima u bilo kojem
trenutku, bez prethodne obavijesti i bez da to za njega rezultira bilo kakvom kaznom. Stoga preporučamo da uvijek provjerite eventualna ažuriranja.

1
2
3

Rev.06 del 28/12/2020
Dichiarazione CE di Conformità
Declaration CE de Conformite
CE Conformity Declaration
EG Konformitätserklärung
Declaracion CE de Conformidad
Declarçáo CE Conformidade
EG Conformiteitsverklaring
EF Overensstemmelseserklæring
CE Intyg på Likformighet
Erklæring om EU Overensstemmelse
Δήλωση Συμμόρφωσης CE
EY Vaatimustenmulaisuusvakuutus
PR INDUSTRIAL S.r.l. –Loc. Il Piano –53031 Casole d’Elsa (SI) – ITALIA
Fabbricante e detentore della documentazione tecnica - Fabricant et détenteur de la documentation technique - Manufacturer and owner of technical publications - Hersteller und besitzer
der technischen dokumentation - Fabricante y propietario de la documentación técnica - Fabricante e detentor da documentação técnica - Fabrikant en eigenaar van de technische
documentatie - Fabrikant og indehaver af tekniske dokumentation - Produsent og eier av den tekniske dokumentasjonen - Tillverkare och innehavare av den tekniska dokumentationen -
Κατασκευαστής και κάτοχος των τεχνικών εγγράφων - Valmistaja ja teknisen aineiston hallussapitäjä
Dichiara sotto la Sua sola responsabilità che la macchina - Déclare sous sa seule responsabilité que la machine - Declares full and sole responsability that the machine - Erklärt unter ihre
eigenveratwortung, dass die maschine - Declara, bajo su sola resposabilidad, que la máquina - Declara abaixo a sua somente resposabilidade que a maquina - Verklaart onder eigen
verantwoordeliijkheid dat de machine - Erklærer på eget ansvar at maskin - Under eget ansvar, at maskinen - Tillkännager under eget ansvar att maskinen - Δηλώνει υπεύθυνα ότι η μηχανή -
Ottaen täyden vastuun todistaa täten, että laite
Tipo, Type, Type, Typ, Tipo, Tipo, Type, Type, Type, Typ, Τύπος, Tyyppi
Carrello da magazzino a spinta manuale, Chariot à poussée manuelle pour magasins, Pedestrian propelled warehouse truck, Handschubstapler, Transpallet manual para almacén,
Empilhadeira de tração humana para armazém, Handmatig hefmiddel voor magazijn, Manuel lagervogn, Hånddrevet lagervogn, Fotstyrd lagertruck, Χειροκίνητο αμαξίδιο αποθήκης, Käsin
työnnettävä varastotrukki
Modello, Modele, Model, Modell, Modelo, Modelo, Model, Model, Modell, Modell, Μοντέλο, Malli
HX10E 540
N° Serie, N° de Série, Serial No, Serien Nr., N° de Serie, N° de Série, Serienummer, Serienummer, Serienummer, Serienummer, Αρ. Σειράς, Serjanumero
HLI0
Anno costruzione, Année de costruction, Year of construction, Baujahr, Ano de costruccion, Ano de construçáo, Bouwjaar, Fremstillingsåret, Konstruksjonsår, Tillverkningsår, Ετος
κατασκευής, Valmistusvuosi
2020
Alla quale questa Dichiarazione si riferisce è conforme alle Direttive
Waar deze Verklaring betrekking op heeft, overeenkomt de Richtlijnen
À laquelle se rèférè cette Déclaration est conforme à les Directives
Hvortil denne Erklæring hensiver, er i overensstemmelse til Direktiver
To which this Declaration refers is in conformity with the Directives
Som denne Erklæringen gjelde er i overensstemmelse med Direktivenen
Auf der sich diese Erklärung bezieht, entsprich die Richtlinien
Till vilken denna Förklaring hänvisar sig överensstämmer Direktiv
A la cual ésta Declaración està conforme a le Directivas
Στην οποία αναφέρεται η παρούσα Δήλωση είναι συμβατή με τις Οδηγίες
Al qual esta declaração se refere e conforme a le Directivas
Jolle tämä todistus on annettu, mukainen Direktiivit
2006/42/CE, 2014/30/UE
e successive modifiche e integrazioni - et aux modifications successives at intégrations - and subsequent modification and integrations - einsclißlich nachfolgender Änderung und Ergänzungen -
y sucesivas modificas y integraciones - e sucessivas modificações e integrações - en daaroì volgende wýzingen en aanvullingen - og senere modificeringer og suppleringer - med etterfølgende
endringer og integreringer - därpå efterföljande förändringar och tillägg - και τις ακόλουθες τροποποιήσεις και συμπληρώσεις - ja jälkimuutosten ja jälkilisäyksien mukainen
secondo le norme armonizzate - selon des normes harmonisées –according to harmonized standards - nach harmonisierten Normen - según normas armonizadas - de acordo com as normas
harmonizadas - volgens geharmoniseerde normen - i henhold til harmoniserede standarder - i henhold til harmoniserte standarder - enligt harmoniserade standarder - σύμφωνα με εναρμονισμένα
πρότυπα - yhdenmukaistettujen standardien mukaisesti
EN 12895
Nome e indirizzo della persona autorizzata a costituire il fascicolo tecnico - Le nom et l'adresse de la personne autorisée à constituer le dossier technique - Name and address of the person
authorised to compile the technical file - Name und Anschrift der Person, die bevollmächtigt ist, die technischen Unterlagen zusammenzustellen - Nombre y dirección de la persona facultada para
elaborar el expediente técnico - Nome e endereço da pessoa autorizada a compilar o processo técnico - Aam en adres van degene die gemachtigd is het technisch dossier samen te stellen - Avn
og adresse på den person, der har bemyndigelse til at udarbejde det tekniske dossier –Navn og adresse på personen med tillatelse til å lage den tekniske dokumentasjonen - Namn på och adress
till den person som är behörig att ställa samman den tekniska dokumentationen - το όνομα και τη διεύθυνση του προσώπου του εξουσιοδοτημένου να καταρτίσει τον τεχνικό φάκελο·- Sen
henkilön nimi ja osoite, joka on valtuutettu kokoamaan asiaankuuluvat tekniset asiakirjat
PR INDUSTRIAL S.r.l. –Loc. Il Piano –53031 Casole d’Elsa (SI) – ITALIA
For UK: Pramac - Generac UK Ltd –Unit 4 Tunstall Arrow, James Brindley Way, Stoke on Trent, ST6 5GF - England
Il Responsabile, Le Responsable, Authorized by, Der Verantwortliche, El Responsable, O Responsável, De Verantwoordelijke, Den Ansvarlige, Ansvarlig Person, Ansvarig, ΟΥπεύθυνος,
Vastaava lailinen edustaja,
_____________PAOLO CAMPINOTI________________
Firma, Signature, Signed, Unterschrift, Firma, Assinatura, Handtekening, Underskrift,
Underskrift, Underskrift, Υπογραφή, Allekirjoitus
Casole d’Elsa 28/12/2020

Rev.06 del 28/12/2020
Prohlášení o Splnění Požadavků CE
CE Vastavustunnistus
ES Atbilstības Deklarācija
CE Atitikties Deklaracija
Deklaracja Zgodności CE
Заявление о соответствии нормам Совета Европы
CE Prehlásenie o Zhode
CE Izjava Proizvajalca o Skladnosti Izdelka
CE Megfelelőségi Nyilatkozat
Declaraţie de conformitate CE
Декларация Е С за Съответствие
CE Uygunluk Beyanı
CE deklaracija o sukladnosti
PR INDUSTRIAL S.r.l. –Loc. Il Piano –53031 Casole d’Elsa (SI) – ITALIA
Výrobce a majitel technické dokumentace - Toote tehnilised andmed - Izgatavotājrūpnīcas tehniskā dokumentācija - Gamintojo techniné dokumentacija - Dokumantacja techniczna jest
wasnoscia firmy - Изготовитель идержатель технической документации - Výrobca a držiteľ technickej dokumentácie - Proizvajalec in imetnik tehnične dokumentacije - A műszaki
dokumentáció készítője és megőrzője –Fabricant şi proprietar al documentaţiei tehnice - Изготвил и собственик на техническата документация - Teknik dokümantasyonu düzenleyen ve
elinde bulunduran - Proizvođač i vlasnik tehničkih publikacija
Prohlášení o převzetí plné odpovědnosti za to, že zařízení - Tunnistab täielikku ja ainuisikulist vatutust, masina suhtes - Deklarē ar pilnu atbildību, ka zemāk minētā iekārta - Visiškai atsakingai
pareiškia, kad įrenginys - Deklaruje z pełną odpowiedzialnością , że urządzenie - Принимается полная степень ответственности, что погрузчик - Prehlasuje v rámci svojej kompetencie a
zodpovednosti, že stroj - V polni odgovornosti izjavljamo, da je naprava - Teljes és kizárólagos felelősségére kijelenti, hogy a gép - Declară pe propria răspundere că apar - Декларира на
единствена Своя отговорност, че машината - Makinenin kendi münferit sorumluluğuna tabii olduğunu beyan etmektedir - Proglašava punu i isključivu odgovornost da stroj
Typ, Tüüp, Tips, Tipas, Typu, Тип, Typu, Tip, Típus, Tip, Тип, Tip, Vrsta
Ruční skladový vozík, Forklift käsikahveltõstuk, Ratiņi ar manuālo bīdīšanu, Ranka stumiamas dėtuvės vežimėlis, Ręczny wózek magazynowy, Ручная тележка для склада, Ruční skladový
vozík, Ročni skladiščni voziček, Kézi hajtású raktári kocsi, Stivuitor cu manevrare manuală pentru deservire depozit, Складова количка с ръчно избутване, Yaya kumandalı depo aracı, Ručna
potisna skladišna kolica
Model, Mudel, Modelis, Modelis, Model, Модель, Model, Model, Modell, Modelul, Модел, Model, Model
HX10E 540
Výrobní číslo, Seeria Nr., Sērijas numurs, Serijos Nr., Numer seryjny, Серийный номер, Sériové číslo , Serijska Št., Sorozatszám, N° de serie, Сериен номер, Seri No, Serijski broj
HLI0
Rok výroby, Ehitusaasta, Izlaiduma gads, Pagaminimo metai, Rok produkcji, Год выпуска, Rok výroby , Leto proizvodnje, A gyártás éve, An de construcţie, Година на производство, Yapım
yılı, Godina proizvodnje
2020
Ke kterému se toto prohlášení vztahuje je v souladu s Direktivou
Na ktorý sa vzťahuje toto prehlásenia spĺňa ustanovenia Smernice
Vastab EC Direktiivile
Ustreza Smernici
Ir saskaņā ar atbilstošo Direktīvu
Amelyre ez a nyilatkozat vonatkozik, megfelel a
Kuriam taikoma ši Deklaracija, atitinka Direktyvos
La care se referă prezenta declaraţie este conform Directivelor
Do którego odnosię się ninjesza deklaracja spełnia wymogi zawarte w Dyrektywie
Декларира на единствена Своя отговорност, че машината
Упомянутый вданном заявлении, соответствует Директиве
Bu beyana konu olan yukarıdaki makine aşağıdaki Yönetmeliklere uygundur
Na koji se odnosi ova deklaracija je u skladu s direktivama
2006/42/CE, 2014/30/UE
a následnými úpravami a rozšířeními - ja selle järgnevatele muudatustele ja lisadele - un sekojošām modifikācijām un saskaņošanām - ir vėlesnių jos dalinių pakeitimų ir papildymų reikalavimus -
wraz z jej późniejszymi zmianami - Совета Европы иболее поздних обновлений идополнений - a nasledovných úprav a doplnkov - in naknadnim spremembam in dodatkom - Direktívának,
valamint az azt követő módosításoknak és kiegészítéseknek – cu succesivele modificări şi integrări - ЕС и последвалите изменения и допълнения - ve sonraki değişiklikler ve ilaveler - i
naknadnim izmjenama i integracijama
podle harmonizovaných norem - ühtlustatud standardite kohaselt - saskaņā ar saskaņotajiem standartiem - pagal suderintus standartus - zgodnie z normami zharmonizowanymi - согласно
гармонизированным стандартам - podľa harmonizovaných normách - v skladu z harmoniziranih standardih - harmonizált szabványok szerint - conform standardelor armonizate - съгласно
хармонизирани стандарти - uyumlaştırılmış standartlara göre - prema usklađenim standardima
EN 12895
Jméno a adresu osoby pověřené sestavením technické dokumentace –Nimi ja aadress, kellel on õigus koostada tehniline toimik –Tās personas vārds un adrese, kura pilnvarota sastādīt tehnisko
lietu –Asmens, įgalioto sudaryti atitinkamą techninę bylą, kuris turi būti įsisteigęs Bendrijoje, pavadinimas ir adresas –Nazwisko i adres osoby mającej miejsce zamieszkania lub siedzibę we
Wspólnocie, upoważnionej do przygotowania dokumentacji technicznej –Имя и адрес ответственного за обеспечение комплекта технической документации –Meno a adresu osoby
oprávnenej na zostavenie súboru technickej dokumentácie –Ime in naslov osebe, pooblaščene za sestavljanje tehnične dokumentacije –A műszaki dokumentáció összeállítására felhatalmazott
személy –Numele și adresa persoanei autorizate pentru întocmirea cărții tehnice –името и адреса на лицето, оторизирано да съставя техническото досие, като то трябва да е установено
в Общността - Teknik kılavuzun oluşturulmasıyla yetkili kişinin adı ve soyadı - Ime i adresa osoba ovlaštene za sastavljanje tehničke datoteke:
PR INDUSTRIAL S.r.l. –Loc. Il Piano –53031 Casole d’Elsa (SI) – ITALIA
Oprávněn, Volitatud, Pilnvarots, Sankcionavo, Potwierdzone przez, Разрешительный орган, Schválil , Pooblaščen od, Engedélyezt, Responsabilul, Отговорен, Sorumlu, Ovlašteno od
____________ PAOLO CAMPINOTI_________
Podepsán, Alla kirjutatud, Paraksts, Pasirašė, Podpis, Подпись
Podpis, Podpis, Aláírás, Semnătură , Подпис, İmza, Potpisano
Casole d’Elsa 28/12/2020

IT..................................................................................................3
1. CARATTERISTICHE TECNICHE (fig.3)..............................................................3
2. DICHIARAZIONE DI EMISSIONE VIBRATORIA.................................................3
3. IMPIEGO DELLA MACCHINA.............................................................................3
4. DESCRIZIONE DELLA MACCHINA (fig.2) .........................................................3
5. DISPOSITIVI DI SICUREZZA...............................................................................4
6. TARGHETTE........................................................................................................4
7. TRASPORTO E MESSA IN FUNZIONE ..............................................................4
8. BATTERIA............................................................................................................4
9. USO......................................................................................................................5
10. MANUTENZIONE.................................................................................................6
11. RICERCA GUASTI...............................................................................................6
FR................................................................................................ 7
1. CARACTERISTIQUES TECHNIQUES (fig.3)......................................................7
2. DECLARATION DE L'EMISSION VIBRATOIRE.................................................7
3. EMPLOI DE LA MACHINE...................................................................................7
4. DESCRIPTION DE LA MACHINE (fig.2) .............................................................7
5. DISPOSITIFS DE SÉCURITÉ ..............................................................................8
6. PLAQUETTES......................................................................................................8
7. TRANSPORT ET MISE EN MARCHE..................................................................8
8. BATTERIE............................................................................................................8
9. UTILISATION .......................................................................................................9
10. ENTRETIEN .......................................................................................................10
11. DÉPANNAGE.....................................................................................................10
EN..............................................................................................11
1. TECHNICAL FEATURES (fig.3)........................................................................11
2. DECLARATION OF VIBRATION EMISSION.....................................................11
3. USE OF THE MACHINE.....................................................................................11
4. DESCRIPTION OF THE MACHINE (fig.2).........................................................11
5. SAFETY DEVICES.............................................................................................12
6. PLATES..............................................................................................................12
7. TRANSPORT AND SET UP...............................................................................12
8. BATTERY...........................................................................................................12
9. USE ....................................................................................................................13
10. MAINTENANCE .................................................................................................14
11. TROUBLE SHOOTING ......................................................................................14
DE.............................................................................................. 15
1. TECHNISCHE EIGENSCHAFTEN (abb.3) ........................................................15
2. ERKLÄRUNG VON SCHWINGUNGSEMISSION..............................................15
3. GEBRAUCH DES GERÄTES ............................................................................15
4. BESCHREIBUNG DER MASCHINE (abb.2) .....................................................16
5. SICHERHEITSANLEITUNGEN..........................................................................16
6. SCHILDER .........................................................................................................16
7. TRANSPORT UND INBETRIEBNAHME ...........................................................16
8. BATTERIE..........................................................................................................16
9. GEBRAUCH.......................................................................................................17
10. WARTUNG.........................................................................................................18
11. FEHLERSUCHE.................................................................................................19
ES.............................................................................................. 20
1. CARACTERÍSTICAS TÉCNICAS (fig.3)............................................................20
2. DECLARACIÓN DE EMISIÓN DE VIBRACIONES ...........................................20
3. EMPLEO DE LA MÁQUINA...............................................................................20
4. DESCRIPCION DE LA MAQUINA (fig.2) ..........................................................20
5. DISPOSITIVOS DE SEGURIDAD......................................................................21
6. PLACAS.............................................................................................................21
7. TRANSPORTE Y PUESTA EN MARCHA .........................................................21
8. BATERÍA............................................................................................................21
9. UTILIZACIÓN.....................................................................................................22
10. MANTENIMIENTO..............................................................................................23
11. SOLUCIÓN DE PROBLEMAS...........................................................................23
PT .............................................................................................. 24
1. CARACTERÍSTICAS TÉCNICAS (fig.3)............................................................24
2. DECLARAÇÃO DE EMISSÃO VIBRATÓRIA....................................................24
3. FUNCIONAMENTO DO APARELHO.................................................................24
4. DESCRIÇÃO DA MÁQUINA (fig.2) ...................................................................24
5. DISPOSITIVOS DE SEGURANÇA.....................................................................25
6. PLAQUETAS......................................................................................................25
7. TRANSPORTE E MEIO DE FUNCIONAMENTO...............................................25
8. BATTERIA..........................................................................................................25
9. UTILIZAÇÃO......................................................................................................26
10. MANUTENÇÃO..................................................................................................27
11. PORQUE NÃO FUNCIONA ...............................................................................27
NL..............................................................................................28
1. TECHNISCHE GEGEVENS (fig.3).....................................................................28
2. VERKLARING VAN DE TRILEMISSIE..............................................................28
3. GEBRUIK VAN DE MACHINE...........................................................................28
4. BESCHRIJVING VAN DE MACHINE (fig.2)......................................................28
5. VEILIGHEIDSMECHANISMEN..........................................................................29
6. PLAATJES.........................................................................................................29
7. VERVOER EN INBEDRIJFSTELLING...............................................................29
8. ACCU .................................................................................................................29
9. GEBRUIK...........................................................................................................30
10. ONDERHOUD ....................................................................................................31
11. IN GEVAL VAN PROBLEMEN ..........................................................................31
DA.............................................................................................. 32
1. TEKNISKE EGENSKABER (fig.3).....................................................................32
2. IBRATIONSBELASTNINGSERKLÆRING ........................................................32
3. BRUG AF MASKINEN .......................................................................................32
4. BESKRIVELSE AF MASKINEN (fig.2)..............................................................32
5. SIKKERHEDSUDSTYR......................................................................................33
6. SKILTE...............................................................................................................33
7. TRANSPORT OG OPSÆTNING........................................................................33
8. BATTERIET........................................................................................................33
9. BRUG.................................................................................................................34
10. VEDLIGEHOLDELSE.........................................................................................35
11. PROBLEMLØSNING..........................................................................................35
NO..............................................................................................36
1. TEKNISKE DETALJER (fig.3)........................................................................... 36
2. DEKLARERING AV EMISJONSVERDIER FOR VIBRASJONER..................... 36
3. ANVENDELSE AV MASKINEN......................................................................... 36
4. BESKRIVELSE AV MASKINEN (fig.2) ............................................................. 36
5. SIKKERHETSUTSTYR...................................................................................... 37
6. SKILTE............................................................................................................... 37
7. TRANSPORT OG SETTING I BRUK................................................................. 37
8. BATTERIET ....................................................................................................... 37
9. BRUK................................................................................................................. 38
10. VEDLIKEHOLDELSE ........................................................................................ 39
11. PROBLEMLØSNING ......................................................................................... 39
SV...............................................................................................40
1. TEKNISKA FUNKTIONER (fig.3)...................................................................... 40
2. DEKLARATION AV VIBRATIONSEMISSION................................................... 40
3. BRUK AV MASKINEN....................................................................................... 40
4. BESKRIVNING AV MASKINEN (fig.2).............................................................. 40
5. SÄKERHETSANORDNINGAR.......................................................................... 41
6. BRICKOR........................................................................................................... 41
7. TRANSPORT OCH MONTERING ..................................................................... 41
8. BATTERI............................................................................................................ 41
9. ANVÄNDNING................................................................................................... 42
10. UNDERHÅLL..................................................................................................... 43
11. FELSÖKNING.................................................................................................... 43
EL...............................................................................................44
1. ΤΕΧΝΙΚΑ ΧΑΡΑΚΤΗΡΙΣΤΙΚΑ (εικ.3)................................................................. 44
2. ΔΗΛΩΣΗ ΕΚΠΟΜΠΗΣ ΔΟΝΗΣΕΩΝ ................................................................. 44
3. ΧΡΗΣΗ ΤΙΣ ΜΗΧΑΝΗΣ ...................................................................................... 44
4. ΠΕΡΙΓΡΑΦΗ ΤΟΥ ΜΗΧΑΝΗΜΑΤΟΣ (εικ.2)...................................................... 45
5. ΣΥΣΤΗΜΑΤΑ ΑΣΦΑΛΕΙΑΣ................................................................................ 45
6. ΠΙΝΑΚΙΔΕΣ........................................................................................................ 45
7. ΜΕΤΑΦΟΡΑ ΚΑΙ ΕΝΕΡΓΟΠΟΙΗΣΗ .................................................................. 45
8. ΜΠΑΤΑΡΙΑ ........................................................................................................ 45
9. ΧΡΗΣΗ ............................................................................................................... 46
10. ΣΥΝΤΗΡΗΣΗ...................................................................................................... 47
11. ΑΝΑΖΗΤΗΣΗ ΒΛΑΒΩΝ..................................................................................... 48
FI................................................................................................49
1. TEKNISET OMINAISUUDET (KUVA 3)............................................................. 49
2. TÄRINÄPÄÄSTÖILMOITUS.............................................................................. 49
3. KONEEN KÄYTTÖTARKOITUS........................................................................ 49
4. LAITTEEN KUVAUS (KUVA 2) ......................................................................... 49
5. TURVALLISUUSLAITTEET............................................................................... 50
6. KILVET............................................................................................................... 50
7. KULJETUS JA KÄYTTÖÖNOTTO.................................................................... 50
8. AKKU................................................................................................................. 50
9. KÄYTTÖ............................................................................................................. 51
10. HUOLTO............................................................................................................ 52
11. VIANMÄÄRITYS................................................................................................ 52
CZ...............................................................................................53
1. TECHNICKÉ ÚDAJE (obr.3) ............................................................................. 53
2. DEKLAROVÁNÍ HODNOT EMISE VIBRACÍ..................................................... 53
3. POUŽÍTÍ ZAŘÍZENÍ............................................................................................ 53
4. POPIS STROJE (obr.2)..................................................................................... 53
5. BEZPEČNOSTNÍ A OCHRANNÁ ZAŘÍZENÍ .................................................... 54
6. ŠTÍTKY............................................................................................................... 54
7. PŘEPRAVA A UVEDENÍ DO PROVOZU.......................................................... 54
8. BATERIE............................................................................................................ 54
9. POUŽITÍ ............................................................................................................. 55
10. ÚDRŽBA ............................................................................................................ 56
11. ŘEŠENÍ POTÍŽÍ.................................................................................................. 56
ET...............................................................................................57
1. TEHNILISED ANDMED (joonis 3)..................................................................... 57
2. VIBRATSIOONI ERALDUMISE KINNITUS....................................................... 57
3. TÕSTUKI KASUTAMINE................................................................................... 57
4. MASINA KIRJELDUS (joonis 2)....................................................................... 57
5. OHUTUSSEADISED.......................................................................................... 58
6. TÄHISED............................................................................................................ 58
7. TRANSPORT JA KASUTUSELEVÕTMINE...................................................... 58
8. AKU.................................................................................................................... 58
9. KASUTAMINE.................................................................................................... 59
10. HOOLDUS ......................................................................................................... 60
11. RIKKEOTSING................................................................................................... 60
LV...............................................................................................61
1. TEHNISKĀ INFORMĀCIJA (zīm. 3).................................................................. 61
2. PAZIŅOJUMS PAR RADĪTO VIBRĀCIJU ........................................................ 61
3. IEKĀRTAS LIETOŠANA ................................................................................... 61
4. MAŠĪNAS APRAKSTS (zīm. 2)......................................................................... 61
5. DROŠĪBAS IERĪCES ......................................................................................... 62
6. PLĀKSNES........................................................................................................ 62
7. TRANSPORTS UN UZSTĀDĪŠANA.................................................................. 62
8. AKUMULATORS ............................................................................................... 62
9. LIETOŠANA....................................................................................................... 63
10. APKOPE ............................................................................................................ 64
11. TRAUCĒJUMU NOVĒRŠANA........................................................................... 64
LT...............................................................................................65
1. TECHNINIAI DUOMENYS (3 pav.).................................................................... 65
2. PRANEŠIMAS APIE VIBRACINĮ SPINDULIAVIMĄ.......................................... 65
3. ĮRENGIMO NAUDOJIMAS ................................................................................ 65
4. MAŠINOS APRAŠYMAS (2 pav.) ..................................................................... 65
5. APSAUGINIAI ĮTAISAI ...................................................................................... 66
6. LENTELĖS......................................................................................................... 66
7. TRANSPORTAVIMAS IR SUREGULIAVIMAS ................................................. 66
8. BATERIJA ......................................................................................................... 66
9. NAUDOJIMOSI INSTRUKCIJOS....................................................................... 67
10. APTARNAVIMAS............................................................................................... 68
11. GEDIMŲ SURADIMAS ...................................................................................... 68

2
PL .............................................................................................. 69
1. DANE TECHNICZNE (rys.3)..............................................................................69
2. DEKLAROWANIE EMISJI DRGAŃ ...................................................................69
3. ZASTOSOWANIE...............................................................................................69
4. OPIS URZĄDZENIA (rys.2) ...............................................................................70
5. URZĄDZENIA GWARANTUJĄCE BEZPIECZEŃSTWO ..................................70
6. OZNACZENIA OSTRZEGAWCZE.....................................................................70
7. TRANSPORT I ODDANIE DO EKSPLOATACJI...............................................70
8. AKUMULAT0R...................................................................................................70
9. UŻYTKOWANIE .................................................................................................71
10. KONSERWACJA ...............................................................................................72
11. IDENTYFIKACJA USTEREK.............................................................................72
RU..............................................................................................73
1. ТЕХНИЧЕСКИЕ ДАННЫЕ (рис.3) ...................................................................73
2. ОПИСАНИЕ КОЛЕБАТЕЛЬНОЙ ТРАНСЛЯЦИИ ...........................................73
3. ЭКСПЛУАТАЦИЯ ПОГРУЗЧИКА.....................................................................73
4. ОПИСАНИЕ ОБОРУДОВАНИЯ (рис.2) ..........................................................74
5. ЗАЩИТНЫЕ УСТРОЙСТВА ............................................................................74
6. ТАБЛИЧКИ........................................................................................................74
7. ТРАНСПОРТИРОВКА И НАСТРОЙКА ...........................................................74
8. БАТАРЕЯ ..........................................................................................................74
9. ЭКСПЛУАТАЦИЯ..............................................................................................75
10. ОБСЛУЖИВАНИЕ.............................................................................................76
11. ОБНАРУЖЕНИЕ И УСТРАНЕНИЕ НЕПОЛАДОК...........................................77
SK..............................................................................................78
1. TECHNICKÉ ÚDAJE (obr.3)..............................................................................78
2. VYHLÁSENIE O HODNOTÁCH EMISIE VIBRÁCIÍ...........................................78
3. POUŽITIE STROJA............................................................................................78
4. POPIS STROJA (obr.2).....................................................................................78
5. BEZPEČNOSTNÉ PRVKY.................................................................................79
6. ŠTÍTKY...............................................................................................................79
7. PREPRAVA A ZOSTAVENIE ............................................................................79
8. BATÉRIA............................................................................................................79
9. POUŽITIE ...........................................................................................................80
10. ÚDRŽBA.............................................................................................................81
11. ODSTRAŇOVANIE ZÁVAD...............................................................................81
SL .............................................................................................. 82
1. TEHNIČNI PODATKI (slika 3) ...........................................................................82
2. IZJAVA O VIBRACIJSKEM ODDAJANJU........................................................82
3. UPORABA NAPRAVE .......................................................................................82
4. OPIS STROJA (slika 2) .....................................................................................82
5. VARNOSTNE NAPRAVE...................................................................................83
6. PLOŠČICE .........................................................................................................83
7. TRANSPORT IN SISTEM...................................................................................83
8. AKUMULATOR..................................................................................................83
9. UPORABA..........................................................................................................84
10. VZDRŽEVANJE .................................................................................................85
11. ODPRAVLJANJE MOTENJ...............................................................................85
HU..............................................................................................86
1. MŰSZAKI ADATOK (3. ábra)............................................................................ 86
2. REZGÉSKIBOCSÁTÁSI NYILATKOZAT.......................................................... 86
3. A GÉP HASZNÁLATA....................................................................................... 86
4. A GÉP LEÍRÁSA (2. ábra)................................................................................. 86
5. BIZTONSÁGI BERENDEZÉSEK....................................................................... 87
6. AZ ADATTÁBLÁK............................................................................................. 87
7. SZÁLLÍTÁS ÉS ÜZEMBE HELYEZÉS.............................................................. 87
8. AZ AKKUMULÁTOR ......................................................................................... 87
9. A TARGONCA HASZNÁLATA.......................................................................... 88
10. KARBANTARTÁS ............................................................................................. 89
11. HIBAJAVÍTÁS.................................................................................................... 89
RO..............................................................................................90
1. CARACTERISTICI TEHNICE (fig.3).................................................................. 90
2. DECLARAŢIE DE EMISIUNE VIBRAŢII............................................................ 90
3. FOLOSIREA APARATULUI .............................................................................. 90
4. DESCRIEREA UTILAJULUI (fig.2) ................................................................... 90
5. DISPOZITIVE DE SIGURANŢĂ......................................................................... 91
6. PLĂCUŢE .......................................................................................................... 91
7. TRANSPORT ŞI PUNERE ÎN FUNCŢIUNE....................................................... 91
8. BATERIA ........................................................................................................... 91
9. UTILIZARE......................................................................................................... 92
10. INTRETINERE.................................................................................................... 93
11. CĂUTARE DEFECŢIUNI ................................................................................... 93
BG..............................................................................................94
1. ТЕХНИЧЕСКИ ХАРАКТЕРИСТИКИ (фиг.3) ................................................... 94
2. ЕКЛАРАЦИЯ ЗА ВИБРАТОРНО ИЗЛЪЧВАНЕ............................................. 94
3. ИЗПОЛЗВАНЕ НА МАШИНАТА...................................................................... 94
4. ОПИСАНИЕ НА МАШИНАТА (фиг.2)............................................................. 95
5. ПРИСПОСОБЛЕНИЯ ЗА БЕЗОПАСНОСТ..................................................... 95
6. ТАБЕЛКИ .......................................................................................................... 95
7. ТРАНСПОРТ И ПУСКАНЕ В ДЕЙСТВИЕ ....................................................... 95
8. АКУМУЛАТОР................................................................................................... 95
9. ЕКСПЛОАТАЦИЯ ............................................................................................. 96
10. ПОДДРЪЖКА ................................................................................................... 97
11. ТЪРСЕНЕ НА ПОВРЕДИ................................................................................. 98
TR...............................................................................................99
1. TEKNİK ÖZELLİKLER (şek.3) .......................................................................... 99
2. TİTREŞİM EMİSYON BEYANI........................................................................... 99
3. MAKİNENİN KULLANIMI .................................................................................. 99
4. MAKİNE TANIMI A (şek.2)................................................................................ 99
5. GÜVENLİK DONANIMLARI ............................................................................ 100
6. LEVHALAR...................................................................................................... 100
7. NAKLİYE VE İŞLEMEYE ALMA...................................................................... 100
8. AKÜ.................................................................................................................. 100
9. KULLANIM....................................................................................................... 101
10. BAKIM.............................................................................................................. 102
11. ARIZA ARAMA................................................................................................ 102
HR............................................................................................103
1. TEHNIČKE ZNAČAJKE (slika 3) .................................................................... 103
2. IZJAVA O EMISIJI VIBRACIJA....................................................................... 103
3. FOLOSIREA UTILAJULUI............................................................................... 103
4. OPIS VILIČARA (slika 2)................................................................................. 103
5. SIGURNOSNI UREĐAJI.................................................................................. 104
6. PODACI NA PLOČICI...................................................................................... 104
7. PRIJEVOZ I PUŠTANJE U RAD ..................................................................... 104
8. BATERIJA ....................................................................................................... 104
9. KORIŠTENJE .................................................................................................. 105
10. ODRŽAVANJE................................................................................................. 106
11. RJEŠAVANJE PROBLEMA............................................................................ 106

3
IT
1. CARATTERISTICHE TECNICHE (fig.3)
2. DICHIARAZIONE DI EMISSIONE VIBRATORIA
Valori di emissione vibratoria dichiarati conformemente alla EN 12096
Descrizione
Valore
Norma Europea (EN)
Superficie di prova
Valore di emissione vibratoria misurato, a (m/s²)
1.13
EN ISO 20643 (Mano-Braccio)
Pavimento in cemento liscio industriale
Incertezza, K (m/s²)
0.67
Valore di emissione vibratoria misurato, a (m/s²)
3.0
EN ISO 20643 (Mano-Braccio)
Su pista di prova secondo EN 13059
Incertezza, K (m/s²)
0.7
Valori determinati in conformità con la EN ISO 20643 e la EN 13059.
3. IMPIEGO DELLA MACCHINA
Messaggi di sicurezza
Al fine di salvaguardare la sicurezza dell'utilizzatore e di assicurare il corretto funzionamento del carrello, il presente manuale di uso e manutenzione riporta i messaggi
di sicurezza indicati di seguito.
PITTOGRAMMA
DESCRIZIONE
Indica una situazione di rischio imminente che, se non evitata, causa morte
o danno grave (es. amputazioni, gravi ustioni, perdita o deterioramento della
vista o dell’udito).
Indica una situazione di rischio potenziale che, se non evitata, può causare
morte o danno grave (es. amputazioni, gravi ustioni, perdita o
deterioramento della vista o dell’udito).
Indica una situazione di rischio potenziale che, se non evitata, potrebbe
causare danni di minore o modesta entità (es. tagli, graffi, irritazioni).
Viene utilizzato per pratiche non legate alle lesioni fisiche.
Abbigliamento
L’operatore del carrello ha l’obbligo di utilizzare un abbigliamento che riduca la possibilità di pericolo.
Si consiglia di utilizzare scarpe antinfortunistiche, guanti, pantaloni e casacche aderenti.
Si sconsiglia l’uso di orologi e monili metallici onde evitare corto circuiti in vicinanza della batteria.
Utilizzare inoltre adeguate protezioni in presenza di ambienti aggressivi.
Informazioni generali
Questa macchina è stata progettata per il trasporto e sollevamento di unità di carico su pavimenti piani, lisci e senza alcuna asperità, con accompagnamento a piedi
da parte del guidatore. Sullo chassis si trova una targhetta di identificazione che indica la capacità di sollevamento che non dovrà mai essere superata per la sicurezza
del personale e per non danneggiare il veicolo.
Si consiglia di rispettare rigorosamente le norme antinfortunistiche e quelle riguardanti il funzionamento e la manutenzione.
Qualsiasi montaggio di attrezzature accessorie sulla macchina dovrà essere autorizzata dalla Casa Costruttrice.
Il manuale d’uso e manutenzione del carrello deve sempre essere a disposizione dell’operatore.
È vietato eseguire riparazioni o manutenzioni straordinarie.
Eventuali modifiche strutturali o aggiunte indipendenti apportate al carrello possono compromettere la sicurezza, annullando così la dichiarazione di conformità CE.
Questo carrello trova impiego nei posti di lavoro dove l’operatore deve piegarsi per sollevare carichi manualmente e più volte nella giornata, può essere usato sia
come transpallet normale, sia come piano di lavoro sollevabile. Sollevando il carico all’altezza desiderata diminuiscono gli sforzi inutili e si migliora l’ergonomicità del
posto di lavoro fermo o mobile. Il sollevamento elettrico accelera e facilita i cambiamenti ripetitivi delle altezze di lavoro.
Inoltre, a causa di una pressione acustica pari a 70 dB(A) misurata a pieno carico in posizione di lavoro, si raccomanda l'utilizzo di
strumenti di protezione anti-rumore (cuffie, tappi per le orecchie, ecc…).
4. DESCRIZIONE DELLA MACCHINA (fig.2)
1 –Chassis
Struttura saldata, costruita con materiali di prima qualità con resistenza adeguata alle sollecitazioni cui è sottoposto il carrello. I due rulli anteriori (rif.6) e gli stabilizzatori
laterali (rif.7) assicurano una grande stabilità su 4 punti d’appoggio
1.1 COSTRUTTORE
PR INDUSTRIAL PR INDUSTRIAL PR INDUSTRIAL PR INDUSTRIAL PR INDUSTRIAL
1.2 MODELLO
HX10E 1150x540 HX10E 1150x680 HX10E 1525x540 HX10E 1800x540 HX10E 2000x540
1.3 PROPULSIONE
MANUALE MANUALE MANUALE MANUALE MANUALE
1.4 SISTEMA DI GUIDA
ACCOMPAGNAMENTO ACCOMPAGNAMENTO ACCOMPAGNAMENTO ACCOMPAGNAMENTO ACCOMPAGNAMENTO
1.5 PORTATA
Qkg 1000 1000 1000 1000 1000
1.6 BARICENTRO
cmm 600 600 762 900 1000
1.8 DISTANZA ASSE RUOTE DI CARICO DA BASE FORCA
xmm 993 993 1283 1509 1509
1.9 PASSO
ymm 1231 1231 1531 1748 1748
2.1 MASSA IN SERVIZIO
kg 144 151 240 264 267
2.2 CARICO SUGLI ASSI CON CARICO, ANTERIORE/POSTERIORE
kg 435/709 442/709 500/740 531/733 476/791
2.3 CARICO SUGLI ASSI SENZA CARICO, ANTERIORE/POSTERIORE
kg 116/28 123/28 160/80 183/81 185/82
3.1 GOMMATURA
G/P G/P G/P G/P G/P
3.2 DIMENSIONI RUOTE ANTERIORI (Ø x larghezza)
200x50 200x50 200x50 200x50 200x50
3.3 DIMENSIONI RUOTE POSTERIORI (Ø x larghezza)
80x50 80x50 80x50 80x50 80x50
3.4 DIMENSIONI RUOTE LATERALI (Ø x larghezza)
- - - - -
3.5 NUMERO DI RUOTE (x=MOTRICE) ANTERIORE/POSTERIORE
2/2 2/2 2/2 2/2 2/2
3.6 CARREGGIATA ANTERIORE
b10 mm 155 155 155 155 155
3.7 CARREGGIATA POSTERIORE (MIN/MAX***)
b11 mm 447 587 447 447 447
4.4 ALTEZZA DI SOLLEVAMENTO
h3mm 715 715 715 715 715
4.9 ALTEZZA DEL TIMONE IN POSIZIONE DI GUIDA MIN/MAX
h14 mm 887/1244 887/1244 887/1244 887/1244 887/1244
4.15 ALTEZZA FORCHE ABBASSATE
h13 mm 85 85 85 85 85
4.19 LUNGHEZZA TOTALE
l1mm 1665 1665 2040 2315 2515
4.20 LUNGHEZZA UNITÁ MOTRICE
l2mm 515 515 515 515 515
4.21 LARGHEZZA TOTALE (ANTERIORE/POSTERIORE MIN/MAX***)
b1mm 540 680 540 540 540
4.22 DIMENSIONI FORCHE
s/e/l mm 48/160/1150 48/160/1150 48/160/1525 48/160/1800 48/160/2000
4.25 LARGHEZZA FORCHE (MIN/MAX***)
b5mm 540 680 540 540 540
4.32 LUCE LIBERA A METÁ PASSO
m2mm 21 21 21 21 21
4.34 CORRIDOIO DI STIVAGGIO PER PALLET 800x1200 LONGITUDINALMENTE
Ast mm 2170 2170 2474 2726 2864
4.35 RAGGIO DI VOLTA
Wamm 1520 1520 1806 2031 2031
5.2 VELOCITÁ DI SOLLEVAMENTO, CON/SENZA CARICO
m/s 0,08/0,13 0,08/0,13 0,08/0,13 0,08/0,13 0,08/0,13
5.3 VELOCITÁ DI DISCESA, CON/SENZA CARICO
m/s 0,13/0,06 0,13/0,06 0,13/0,06 0,13/0,06 0,13/0,06
6.2 POTENZA MOTORE DI SOLLEVAMENTO
kW 1,6 1,6 1,6 1,6 1,6
6.4 TENSIONE BATTERIA, CAPACITÁ NOMINALE
V/Ah 12/60 (C20) 12/60 (C20) 12/60 (C20) 12/60 (C20) 12/60 (C20)
6.5 MASSA BATTERIA
kg 14 14 14 14 14
8.4 RUMOROSITÁ ALL'ORECCHIO DELL'OPERATORE
dB(A) 67 67 67 67 67
1.2 MODELLO HX10E 1150x540 GEL HX10E 1150x680 GEL HX10E 1525x540 GEL HX10E 1800x540 GEL HX10E 2000x540 GEL
2.1 MASSA IN SERVIZIO kg 149 156 245 269 272
2.2 CARICO SUGLI ASSI CON CARICO, ANTERIORE/POSTERIORE kg 440/709 447/709 505/740 536/733 481/791
2.3 CARICO SUGLI ASSI SENZA CARICO, ANTERIORE/POSTERIORE kg 121/28 128/28 165/80 188/81 190/82
6.4 TENSIONE BATTERIA, CAPACITÁ NOMINALE V/Ah 12/50-60 12/50-60 12/50-60 12/50-60 12/50-60
6.5 MASSA BATTERIA kg 19 19 19 19 19
G=Gomma, P=Poliuretano
DESCRIZIONE
PESI
TELAIO/RUOTE
DIMENSIONI
PRE
STA
ZION
I
MOTOR
I
ELETTR
ICI

4
2 –Timone
Il timone serve a tirare e manovrare il carrello. Una molla a gas lo fa ritornare in posizione verticale automaticamente quando rilasciato. Costruito in modo tale da
proteggere le mani dell’operatore.
3 –Cilindro di sollevamento
Funzionamento a semplice effetto, permette di sollevare lo chassis all’altezza richiesta. I materiali usati garantiscono la sicurezza dell’operatore dai rischi meccanici.
4 –Batteria
La batteria si trova all’interno del cofano (rif.8), facilmente accessibile. Per ricaricarla è sufficiente innestare la spina del caricabatterie (rif.15) alla presa di ricarica
(rif.11) posta sul supporto (rif.9). Due appoggi ricavati sul supporto (rif.9) e una cinghia elastica impediscono qualsiasi movimento alla batteria. La targhetta ”F” (fig.2)
mostra i dati di identificazione della batteria.
5 –Ruote direttrici
Due ruote direttrici in gomma o nylon o poliuretano permettono una manovrabilità senza eccessivo sforzo dell’operatore.
6 –Rulli di carico
Due rulli in poliuretano o nylon con cuscinetti a sfere sopportano ampiamente il carico su di loro concentrato.
7 –Stabilizzatori
I due stabilizzatori laterali si posizionano automaticamente appena dopo che le forche superano un’altezza dal suolo di circa 400 mm. Offrono grande stabilità al
carrello, impedendo il ribaltamento laterale e sollevando le ruote direttrici (rif.5) dal suolo.
8 –Cofano
Protegge la batteria (rif.4), la centralina idraulica (rif.10) ed il caricabatteria (rif.12) dagli urti; di facile estrazione per la manutenzione di tutti i componenti in esso
contenuti.
9 –Supporto
Su di esso sono fissati l’impianto idraulico, il caricabatteria e la batteria. E’ progettato in modo da proteggere i piedi dell’operatore
10 –Centralina idraulica
Su di essa sono montati i dispositivi di sicurezza per l’operatore, quali il controllo della discesa e la valvola di massima pressione.
11 –Presa di ricarica
Posizionata sul supporto, serve a ricaricare la batteria; è sufficiente collegarla alla rete elettrica mediante il cavo con spina fornito in dotazione (rif.15), senza la
necessità di rimuovere il cofano.
12 –Caricabatteria
È integrato nella macchina ed è progettato in modo da interrompere l’erogazione di corrente in modo automatico quando la batteria è completamente caricata. Per
l’uso seguire attentamente le istruzioni di seguito riportate.
13 –Finecorsa telaio sollevato
Evita la possibilità di sollevare il telaio oltre la massima altezza consentita
14 –Interruttore generale
Premendo l'interruttore d’arresto di emergenza si disattivano le funzioni elettriche del carrello
15 –Cavo di alimentazione
Consente di collegare il caricabatteria alla rete elettrica e si trova nell’apposito vano ricavato nel cofano.
5. DISPOSITIVI DI SICUREZZA
1) Interruttore generale (rif.14/fig.2); 2) Valvola limitatrice di flusso; 3) Valvola di massima pressione; 4) Protezione paraurti; 5) Protezione parapiedi (rif.9/fig.2); 6)
Finecorsa telaio sollevato (rif.13/fig.2); 7) Protezione tubo idraulico.
6. TARGHETTE
Sulla macchina sono visibili le seguenti targhette (fig.2): A) Targhetta d’identificazione del tipo di veicolo; B) Targhetta pericolo cesoiamento; C) Simboli indicanti le
funzioni di comando; D) Targhette indicanti i punti d’imbracatura; E) Targhette pericolo schiacciamento piedi; F) Targhetta batteria; G) Targhetta leggere libretto +
Targhetta indicante la posizione del baricentro + Targhetta di portata.
La targhetta di identificazione “A” può essere così riassunta:
Type = TIPO
Model = MODELLO
Code =CODICE
Serial# = NUMERO DI SERIE
Year = ANNO DI COSTRUZIONE
RATED LOAD CAPACITY = PORTATA MASSIMA
UNLOADED WEIGHT = MASSA IN SERVIZIO
BATTERY = MASSA BATTERIA
VOLTAGE = TENSIONE BATTERIA
Le targhette non devono assolutamente essere rimosse o rese illeggibili.
7. TRASPORTO E MESSA IN FUNZIONE
Per portare il carrello sono previsti 4 punti di imbracatura indicati dalle targhette “D” (fig. 2), mentre il peso della macchina è indicato sulla targhetta di identificazione
“A” (fig. 2). Prima di mettere in funzione la macchina, controllare che tutte le parti siano in perfette condizioni, verificare il funzionamento di tutti i gruppi e l'integrità dei
dispositivi di sicurezza.
Verifiche prima di ogni utilizzo
- Verificare che il telaio non presenti deformazioni, danni evidenti o usura significativa
- Verificare il serraggio di tutte le viti
- Verificare che il gruppo idraulico non presenti perdite
- Verificare che la batteria non sia danneggiata, sia carica, ben fissata e gli elementi ben asciutti e puliti
- Verificare usura ruote e rulli
- Verificare la presenza delle targhette identificative e di sicurezza e che siano leggibili. Eventuali targhette mancanti, danneggiate o illeggibili devono essere sostituite
prima dell’utilizzo
- Segnalare eventuali danni, difetti o mancanze di funzionalità al gestore
Non utilizzare il carrello senza aver prima effettuato le suddette verifiche e se si rilevano danni o difetti o mancanza di funzionalità
8. BATTERIA
Istruzioni, misure di sicurezza e manutenzione
L’ispezione, la carica e il cambio della batteria devono essere fatti da personale autorizzato seguendo le istruzioni d’uso del costruttore della stessa.
È vietato fumare e tenere vicino al carrello e all’apparecchio di carica materiale infiammabile o che provoca scintille. L’ambiente
deve essere ben arieggiato.
Per una buona manutenzione i tappi degli elementi devono essere asciutti e puliti. Eliminare l’acido fuoriuscito, spalmare un po’ di
vasellina sui morsetti e stringerli (le batterie al gel avendo l’elettrolito in forma gelificata non necessitano di alcun intervento di manutenzione). Il peso e le dimensioni
della batteria possono influire sulla stabilità del carrello quindi, se viene montata una batteria diversa da quelle standard, si consiglia di interpellare la CASA
COSTRUTTRICE per la necessaria autorizzazione. Il carrello monta un indicatore di stato batteria che si accende all’accensione della macchina. Il led verde indica
che le batterie sono sufficientemente cariche. Quando il livello di carica comincia a diventare insufficiente si accende la luce gialla, indicando una carica ancora
sufficiente solo per alcuni cicli di lavoro. Quando la carica residua raggiunge un livello inferiore al 20% si accende la luce rossa. In questa condizione non è più possibile
sollevare il carico ma la macchina può ancora traslare per raggiungere la presa di corrente per la ricarica. L’indicatore si attiva anche durante la fase di ricarica per
indicarne lo stato di avanzamento.

5
Carica della batteria
- Abbassare le forche
- Collegare il cavo di alimentazione in dotazione (rif.15/fig.2), da un lato nella presa del caricabatterie affacciata al cofano (rif.11/fig.2), dall’altro alla rete elettrica
- Durante la fase di ricarica il caricabatteria inibisce ogni operazione di sollevamento e abbassamento
- La fine carica è segnalata dal LED VERDE. A questo punto staccare la spina, riporre il cavo nell’apposito vano ed è possibile utilizzare di nuovo la macchina
Non scaricare mai completamente la batteria ed evitare le cariche incomplete: scaricare eccessivamente le batterie significa ridurgli
la vita.
Cambio della batteria
- Parcheggiare il carrello in condizioni di sicurezza;
- Svitare il pulsante di azionamento dell'interruttore d’arresto di emergenza
(rif.14/fig.2);
- Svitare le 5 viti (rif.16 e 17/fig.2) che bloccano il cofano;
- Rimuovere il cofano posteriore (rif.8/fig.2);
- Sbloccare la batteria dai fermi;
- Staccare i cavi dai poli della batteria;
- Estrarre la batteria;
- Rimontare il tutto secondo l’ordine inverso
Mettere sempre una batteria dello stesso tipo di quella sostituita. Quando si monta il cofano, assicurarsi che i cavi non restino
impigliati.
Maneggiare con cura la batteria. Non collegare in corto circuito i poli, non invertire la polarità, non bagnare né perforare la batteria.
Nel caso di sostituzione della batteria consegnare la vecchia alla stazione di servizio più vicina (per la presenza di piombo anche
le batterie al gel, in caso di sostituzione, devono essere riciclate).
Verifica batteria
Leggere attentamente le istruzioni di uso e manutenzione del costruttore della batteria. Verificare l’assenza di corrosione, la presenza di vaselina (le batterie al gel
non necessitano di ulteriori verifiche) e che l’acido arrivi 15mm sopra le placche. Se gli elementi sono scoperti rabboccare con acqua distillata. Misurare la densità
dell’elettrolita con un densimetro per controllare il livello di carica.
Nelle batterie che non richiedono manutenzione, controllare lo stato di carica tramite l’apposita finestra di ispezione.
Non utilizzare la batteria se risulta deformata, troppo calda o se emana odore.
Impiegare con cura l’acido solforico, è tossico e corrosivo (l’elettrolito delle batterie al gel e’ ugualmente corrosivo, pertanto non
devono essere assolutamente aperte); attacca la pelle e i vestiti che eventualmente dovranno essere lavati con sapone e acqua abbondante. IN CASO DI INCIDENTE
CONSULTARE UN MEDICO!!!
9. USO
Questo transpallet è stato progettato per il sollevamento ed il trasporto di carichi sopra pallet o contenitori normalizzati su pavimenti piani, lisci e di resistenza adeguata.
Il guidatore dovrà svolgere le seguenti istruzioni d’uso nella posizione di guida; dovrà cioè compiere le operazioni in modo da rimanere ragionevolmente lontano dalle
zone pericolose per lo schiacciamento di mani e/o piedi, quali montanti, forche, catene, pulegge, ruote motrici e stabilizzatrici e qualsiasi altro organo in movimento.
E’ tassativamente vietato utilizzare il carrello su piani inclinati e su superfici che non siano dure, solide e in grado di sopportare il
peso del carrello e del suo carico. Il non rispetto di tale prescrizione obbligatoria puo’ determinare danno a cose o persone gravi o mortali.
Nell’utilizzarlo fare molta attenzione alle seguenti norme:
- Non caricare MAI il carrello al di sopra della sua portata massima indicata sulla targhette “A” (fig.2); un limitatore protegge il carrello dai sovraccarichi
- La fig.”1” spiega come deve essere posizionato il carico sulle forche del transpallet per non creare situazioni pericolose
- L’operatore della macchina deve essere adeguatamente formato, conoscere le istruzioni d’uso relative al veicolo, indossare i dispositivi di protezione individuali
opportuni
- Il conducente, responsabile del carrello, deve impedire ai non addetti la guida del mezzo ed evitare che estranei salgano sulle forche
- Durante la guida l’operatore deve opportunamente diminuire la velocità in curva, in passaggi stretti, porte o su pavimento irregolare. Deve far allontanare dalla zona
dove il carrello si muove i non addetti ed avvisare immediatamente se ci sono persone in pericolo; nel caso in cui, nonostante l’avvertimento, ci sia ancora qualcuno
nella zona di lavoro l’operatore è tenuto a fermare subito il carrello
- L’operatore deve evitare le frenate brusche e le inversioni di marcia veloci
- Durante la guida l’operatore deve fare attenzione ad avere una buona visibilità ed avere lo spazio libero durante la retromarcia
- E’ vietato trasportare o sollevare persone
- Non caricare le forche solo da un lato ma distribuire il carico in modo uniforme su entrambe le forche; non sollevare il carico sulle punte delle forche
- La portata del carrello presuppone che il carico sia distribuito in maniera uniforme sull'intera lunghezza delle forche, con il baricentro al centro del carico
- È proibito soffermarsi nelle zone in cui ci siano parti in movimento e salire sulle parti fisse del carrello
- E’ vietato apportare modifiche alla struttura del carrello
- Movimentare il carico con le forche in posizione abbassata (max 300 mm) e sterzare lentamente per non creare situazioni di pericolo
- E’ vietato trainare il carrello con mezzi di trazione elettrici o meccanici; è permesso solo l’utilizzo mediante trazione umana
- E’ proibito mettere fuori servizio o smontare i dispositivi di sicurezza
- Il carrello deve essere impiegato solamente in ambienti chiusi, in aree idonee e in condizioni ambientali normali. Temperatura d’uso –12°C / +40°C
- E’ vietato usare il carrello in ambienti con pericolo d’incendio o di esplosione
- La macchina non richiede un’illuminazione propria. In ogni caso prevedere nella zona d’utilizzo un’illuminazione in conformità alle normative vigenti
- E’ proibito il trasporto di generi alimentari che sono a diretto contatto con il carrello
- Se il carrello viene trasportato su ascensori deve entrare con le forche di carico davanti (accertarsi prima che l’ascensore abbia la portata sufficiente)
- Il carrello deve essere sempre adoperato o parcheggiato al riparo da pioggia, neve e comunque non deve essere impiegato in zone molto umide
LA CASA COSTRUTTRICE NON SI ACCOLLA NESSUN ONERE RELATIVO A GUASTI O INFORTUNI DOVUTI AD INCURIA, INCAPACITÀ, INSTALLAZIONE
DA PARTE DI TECNICI NON ABILITATI ED UTILIZZO IMPROPRIO DEL CARRELLO.
Per sua concezione il transpallet a pantografo, durante il sollevamento, modifica la propria stabilità riducendo il passo fra gli
stabilizzatori e i rulli di carico. Fare quindi attenzione a posizionare in modo corretto il peso sulle forche ed assicurarsi che il baricentro del peso stesso corrisponda a
quello dichiarato dal costruttore. Con pesi non ben distribuiti e con baricentri diversi da quelli dichiarati, il transpallet a pantografo può sembrare stabile nella prima
fase di sollevamento, ma può improvvisamente ribaltarsi se il baricentro fuoriesce dalla linea dei rulli.
Accensione/Spegnimento
Per accendere la macchina tirare verso l’alto l’interruttore di emergenza (rif.14/fig.2); per spegnerla premere lo stesso interruttore.
Movimentazione
Dirigersi nella direzione di lavoro trainando il carrello con il timone (rif.2/fig.2).
Movimentare il carico con le forche in posizione bassa (MAX 300mm) e sterzare lentamente per non creare situazioni pericolose.
Lo spazio necessario al carrello per muoversi in un magazzino corrisponde al corridoio di stivaggio Ast, variabile con le dimensioni del carico e riportato nella tabella
delle caratteristiche tecniche all’inizio di questo manuale al punto 4.34 per il carico di riferimento indicato. L’operatore dovrà tener conto del corridoio di stivaggio,
assicurandosi sempre che lo spazio in cui avrà luogo la curva sia libero da ostacoli.

6
Funzionamento
Per sollevare le forche di carico premere il pulsante (rif.C/fig.2) nella parte superiore fino all’altezza desiderata, mentre per abbassarle premere il pulsante (rif.C/fig.2)
nella parte inferiore. Il carrello si muove liberamente fino ad un’altezza da terra delle forche di 400 mm circa, oltre intervengono due stabilizzatori laterali (rif.7/fig.2)
che bloccano la macchina impedendole ogni movimento orizzontale.
Prima del rilascio del carico verificare sempre che l’area in prossimità del carrello sia libera da persone o cose.
Effettuare le operazioni di sollevamento e rilascio del carico sempre con il carrello in piano per evitare movimenti imprevisti del
carrello potenzialmente pericolosi.
Frenatura
Per frenare il carrello, con o senza carico spostare il timone nella direzione di guida e utilizzare la forza muscolare per ridurre la velocità del carrello.
Se il carrello decelera troppo rapidamente, il carico può scivolare in avanti e causare danni in seguito all'urto.
Uso magazzino frigorifero
Prima dell'utilizzo in cella frigo è necessario che il carrello sia asciutto; infatti l’acqua potrebbe congelare quando si rientra nel
magazzino frigorifero e bloccare le parti in movimento del carrello.
Parcheggiare sempre il carrello all'esterno del magazzino frigorifero. Caricare la batteria all'esterno del magazzino frigorifero
Arresto d’emergenza
In caso di emergenza, tutte le funzioni elettriche del carrello possono essere disattivate premendo l’interruttore d’emergenza
Parcheggio in sicurezza
L’operatore non deve mai lasciare il carrello in condizioni tali che esso possa provocare danni o infortuni.
Abbassare completamente le forche e attivare l'interruttore arresto di emergenza.
Non parcheggiare il carrello in pendenza. Accertarsi che il carrello non possa rotolare accidentalmente. Mai parcheggiare il carrello
in cella frigorifera.
10. MANUTENZIONE
La manutenzione deve essere effettuata da personale specializzato. Il carrello deve essere sottoposto almeno una volta l'anno ad
un controllo generale. Eventuali riparazioni o manutenzioni straordinarie eseguite in proprio o in officine non autorizzate, durante tutto il periodo di garanzia, fanno
automaticamente decadere la stessa.
Per eseguire qualsiasi manutenzione o ispezione staccare sempre la batteria.
Si consiglia di utilizzare scarpe antinfortunistiche, guanti, occhiali protettivi e vestiario adeguato quando si opera con le batterie.
È vietato fumare e tenere vicino al carrello e all’apparecchio di carica materiale infiammabile o che provoca scintille. L’ambiente deve essere ben arieggiato.
Condizioni ambientali particolari (ad esempio, ambienti polverosi o celle frigo), richiederanno una riduzione degli intervalli indicati nel programma di manutenzione.
L’inosservanza del programma di manutenzione raccomandato può ridurre l’efficienza operativa e la durata del carrello.
11. RICERCA GUASTI
PROBLEMA
CAUSA
SOLUZIONE
Le forche non si alzano
Batteria scarica
Caricare la batteria
Fusibile bruciato
Sostituire
Cortocircuito impianto elettrico
Controllare impianto elettrico
Guarnizioni cilindro usurate
Cambiare le guarnizioni
Non c’è olio nel serbatoio
Riempire di olio il serbatorio
Avaria relè motore
Verificare e Sostituire
Spazzole motore usurate
Sostituire le spazzole
Le forche non scendono
Elettrovalvola difettosa
Verificare e Sostituire
Cortocircuito impianto elettrico
Controllare impianto elettrico
Se nessuna delle soluzioni suggerite risolve il guasto, portare il carrello all'assistenza più vicina.
Tabella di manutenzione
●
Verifica interruttore generale
Verifica delle perdite e usura connessioni
●
Verifica integrità cavi
ELEMENTO
CONTROLLI
SCADENZA
3 MESI
6 MESI
12 MESI
●
●
ELEMENTO
CONTROLLI
●
STRUTTURA
E FORCA
SCADENZA
●
●
●
●
●
3 MESI
6 MESI
12 MESI
●
●
●
Verifica funzionamento
Verifica connessioni, guasti di cavi
Verifica elementi portanti
Verifica serraggio bulloni e viti
Verifica bronzine
Verifica usura
Verifica gioco cuscinetti
Verifica ancoraggio
Verifica funzionamento
Cambiare olio 1,75 l (32 Cst. 40C)
MOTORE ELETTRICO
●
Lubrificare articolazioni
●
●
Verifica del gioco
Verifica movimento laterale
TIMONE
SISTEMA
ELETTRICO
Ingrassare morsetti con vasellina
Verifica dispositivi di sicurezza
ISPEZIONI
INGRASSAGGIO
Verifica ritorno posizione verticale
BATTERIA
SISTEMA
IDRAULICO
Controllo tensione elementi
Verifica ancoraggio e tenuta morsetti
●
●
●
RUOTE
Verifica funzionamento valvola limitatrice di pressione
Verifica valvola limitatrice di flusso
●
PULIZIA DEL CARRELLO: pulire le parti del carrello, ad esclusione di quelle elettriche ed elettroniche
con uno straccio umido. Non lavare assolutamente con getti d'acqua diretta, vapore e liquidi infiammabili.
Pulire le parti elettriche ed elettroniche con aria compressa deumidificata a bassa pressione (max 5 bar),
oppure con un pennello non metallico.
ATTENZIONE: Usare olio idraulico escluso olio motore e freni.
NOTA: disfarsi dell'olio usato rispettando l'ambiente. Si consiglia l'accumulo in fusti da consegnarsi
successivamente al centro di raccolta più vicino. Non scaricare l'olio in terra o in luoghi non adatti.
Verifica livello olio
●
●
Verifica densità e livello elettrolita (non
necessario su batterie gel)
●
Verifica usura spazzole
●
Verifica relais di avviamento motore
●
●
●

7
FR
1. CARACTERISTIQUES TECHNIQUES (fig.3)
2. DECLARATION DE L'EMISSION VIBRATOIRE
Valeurs d'émission vibratoire déclarées conformément à EN 12096
Description
Valeur
Règle Européenne (EN)
Surface d'essai
Valeur d'émission vibratoire mesurée, a (m/s²)
1.13
EN ISO 20643 (Main-Bras)
Plancher en ciment lisse industriel
Incertitude, K (m/s²)
0.67
Valeur d'émission vibratoire mesurée, a (m/s²)
3.0
EN ISO 20643 (Main-Bras)
Sur piste d'essai selon EN 13059
Incertitude, K (m/s²)
0.7
Valeurs déterminées conformément à EN ISO 20643 et EN 13059.
3. EMPLOI DE LA MACHINE
Messages de sécurité
Afin de garantir la sécurité de l’utilisateur et d’assurer le bon fonctionnement du chariot élévateur, ce manuel d’utilisation et de maintenance contient les messages de
sécurité indiqués ci-dessous.
PICTOGRAMME
DESCRIPTION
Indique une situation de risque imminente qui, si elle n’est pas évitée,
provoque la mort ou des dommages graves (par exemple, amputations,
brûlures graves, perte ou détérioration de la vue ou de l’ouïe, par exemple).
Indique une situation de risque imminente qui, si elle n’est pas évitée, peut
provoquer la mort ou des dommages graves (amputations, brûlures graves,
perte ou détérioration de la vue ou de l’ouïe, par exemple).
Indique une situation de risque potentiel qui, si elle n’est pas évitée, peut
provoquer des dommages mineurs (par exemple, coupures, égratignures,
irritation).
Il est utilisé pour des pratiques non liées à des blessures physiques.
Vêtements
L’opérateur du chariot élévateur est obligé d’utiliser des vêtements qui réduisent les risques de danger.
Nous recommandons l’utilisation de chaussures de sécurité, des gants, des pantalons et des vestes ajustées.
L’utilisation de montres et de bijoux en métal n’est pas recommandée, car ils pourraient provoquer des
courts-circuits à proximité de la batterie.
De plus, utilisez une protection adéquate en présence d’environnements agressifs.
Informations générales
Cette machine est conçue pour le transport et le levage des unités de charge sur des sols plats et lisses sans aucune rugosité, avec le conducteur à pied. Sur le
châssis on trouve une plaquette d'identification qui indique la capacité de soulèvement qui ne devra jamais être dépassée pour la sécurité du personnel et pour ne
pas endommager le véhicule. Il est conseillé de respecter rigoureusement les normes anti-accidents et celles qui concernent le fonctionnement et l'entretien.
N'importe quel montage d'équipements accessoires sur la machine devra être autorisé par la MAISON DE CONSTRUCTION.
Le manuel d’utilisation et de maintenance de chariots élévateurs doit toujours être disponible pour l’opérateur.
Il est interdit de realiser des travaux extraordinaires ou la maintenance.
Un changement structurel indépendant ou un ajout apporté au chariot de manutention peut affecter la sécurité, et ce manque de fiabilité invalide alors la déclaration
de conformité CE.
Ce transpalette est utilisé dans les lieux de travail où l'opérateur doit se pencher pour soulever des charges manuellement et plusieurs fois pendant la journée, il peut
être utilisé à la fois comme transpalette normal et comme surface de travail relevable. Le levage de la charge à la hauteur souhaitée réduit les contraintes inutiles et
améliore l'ergonomie du poste de travail stationnaire ou mobile. Le levage électrique accélère et facilite les changements répétitifs de hauteur de travail.
En outre, la pression acoustique mesurée à pleine charge en position de travail étant de 70 dB(A), il est recommandé d'utiliser les
protections antibruit d'usage (casque, bouchons d'oreille, etc…).
4. DESCRIPTION DE LA MACHINE (fig.2)
1 –Chassis
Structure soudée, construite avec des matériaux de la plus grande qualité offrant une résistance adéquate au stress auquel est soumis le chariot. Les deux rouettes
avant (réf.6) et les stabilisateurs latéraux (réf.7) garantissent une grande stabilité sur 4 points de support.
1.1 CONSTRUCTEUR PR INDUSTRIAL PR INDUSTRIAL PR INDUSTRIAL PR INDUSTRIAL PR INDUSTRIAL
1.2 MODÈLE HX10E 1150x540 HX10E 1150x680 HX10E 1525x540 HX10E 1800x540 HX10E 2000x540
1.3 ENTRAÎNEMENT
MANUEL MANUEL MANUEL MANUEL MANUEL
1.4 FONCTIONNEMENT ACCOMPAGNANT ACCOMPAGNANT ACCOMPAGNANT ACCOMPAGNANT ACCOMPAGNANT
1.5 CAPACITÉ DE CHARGE
Qkg 1000 1000 1000 1000 1000
1.6 CENTRE DE GRAVITÉ
cmm 600 600 762 900 1000
1.8 DISTANCE DE CHARGE DEPUIS LA BASE FOURCHE
xmm 993 993 1283 1509 1509
1.9 EMPATTEMENT
ymm 1231 1231 1531 1748 1748
2.1 MASSE EN SERVICE
kg 144 151 240 264 267
2.2 CHARGE PAR ESSIEU CHARGÉ, AVANT/ARRIÈRE
kg 435/709 442/709 500/740 531/733 476/791
2.3 CHARGE PAR ESSIEU À VIDE, AVANT/ARRIÈRE
kg 116/28 123/28 160/80 183/81 185/82
3.1 PNEUS G/P G/P G/P G/P G/P
3.2 DIMENSIONS ROUES AVANT (Ø x largeur) 200x50 200x50 200x50 200x50 200x50
3.3 DIMENSIONS ROUES ARRIÈRE (Ø x largeur) 80x50 80x50 80x50 80x50 80x50
3.4 DIMENSIONS ROUES LATÉRALES (Ø x largeur) - - - - -
3.5 NOMBRE DE ROUES (x=MOTRICE) AVANT/ARRIÈRE 2/2 2/2 2/2 2/2 2/2
3.6 LARGEUR DE LA VOIE AVANT
b10 mm 155 155 155 155 155
3.7 LARGEUR DE LA VOIE ARRIÈRE (MIN/MAX***)
b11 mm 447 587 447 447 447
4.4 HAUTEUR DE LEVAGE
h3mm 715 715 715 715 715
4.9 HAUTEUR DU TIMON EN POSITION DE CONDUITE MIN/MAX
h14 mm 887/1244 887/1244 887/1244 887/1244 887/1244
4.15 HAUTEUR FOURCHES EN POSITION BASSE
h13 mm 85 85 85 85 85
4.19 LONGUEUR TOTALE
l1mm 1665 1665 2040 2315 2515
4.20 LONGUEUR AVEC ARRIÈRE DE LA FOURCHE
l2mm 515 515 515 515 515
4.21 LARGEUR TOTALE (AVANT/ARRIÈRE MIN/MAX***)
b1mm 540 680 540 540 540
4.22 DIMENSIONS FOURCHES
s/e/l mm 48/160/1150 48/160/1150 48/160/1525 48/160/1800 48/160/2000
4.25 LARGEUR FOURCHES (MIN/MAX***)
b5mm 540 680 540 540 540
4.32 DÉGAGEMENT AU CENTRE DE L’EMPATTEMENT
m2mm 21 21 21 21 21
4.34 ALLÉE DE TRAVAIL POUR PALETTES 800x1200 LONGITUDINAL
Ast mm 2170 2170 2474 2726 2864
4.35 RAYON DE BRAQUAGE
Wamm 1520 1520 1806 2031 2031
5.2 VITESSE DE LEVAGE, AVEC/SANS CHARGE
m/s 0,08/0,13 0,08/0,13 0,08/0,13 0,08/0,13 0,08/0,13
5.3 VITESSE DE DESCENTE, AVEC/SANS CHARGE
m/s 0,13/0,06 0,13/0,06 0,13/0,06 0,13/0,06 0,13/0,06
6.2 PUISSANCE MOTEUR DE LEVAGE
kW 1,6 1,6 1,6 1,6 1,6
6.4 TENSION BATTERIE, CAPACITÉ NOMINALE
V/Ah 12/60 (C20) 12/60 (C20) 12/60 (C20) 12/60 (C20) 12/60 (C20)
6.5 MASSE BATTERIE
kg 14 14 14 14 14
8.4 NIVEAU SONORE À L’OREILLE DU CONDUCTEUR
dB(A) 67 67 67 67 67
G=Pneu, P=Polyuréthane
1.2 MODÈLE HX10E 1150x540 GEL HX10E 1525x540 GEL HX10E 1800x540 GEL HX10E 2000x540 GEL
2.1 MASSE EN SERVICE kg 149 245 269 272
2.2 CHARGE PAR ESSIEU CHARGÉ, AVANT/ARRIÈRE kg 440/709 505/740 536/733 481/791
2.3 CHARGE PAR ESSIEU À VIDE, AVANT/ARRIÈRE kg 121/28 165/80 188/81 190/82
6.4 TENSION BATTERIE, CAPACITÉ NOMINALE V/Ah 12/50-60 12/50-60 12/50-60 12/50-60
6.5 MASSE BATTERIE kg 19 19 19 19
CHÂSSIS/ROUES
DESCRIPTION
POIDS
DIMENSIONS
MOTEURS
ÉLECTRIQ
UES
PERF
ORMA
N_CE
S

8
2 –Timon
La barre de direction permet de tirer et de manoeuvrer le chariot. Un ressort pneumatique revient automatiquement en position verticale quand il est relâché. Il est
conçu pour protéger les mains de l'opérateur.
3 –Vérin de levée
Avec un mouvement unique, il lève le châssis à la hauteur désirée. Les matériaux utilisés garantissent la sécurité de l'opérateur contre les risques mécaniques.
4 –Batterie
La batterie est située à l'intérieur du capot (réf.8). Elle est facilement accessible. Pour la recharger, insérer la prise du chargeur de batterie (réf.15) dans la prise de
recharge (réf .11) située sur le support (réf .9). 2 supports obtenus sur la fixation (réf .9) et une courroie élastique empêchent la batterie de bouger. La plaque « F »
(fig. 2) fournit les données d'identification de la batterie
5 –Roues directionnelles
Deux volants en caoutchouc en nylon ou en polyuréthane permettent une maniabilité sans effort excessif de l'opérateur.
6 –Galets de chargement
Deux rouleaux en polyuréthane ou en nylon avec roulements à billes supportent largement la charge.
7 –Stabilisateurs
Les deux stabilisateurs latéraux se positionnent automatiquement quand les fourches dépassent une hauteur de 400 mm au-dessus du sol. Ils offrent une grande
stabilité au chariot en empêchant le retournement et élèvent les roues directionnelles (réf.5) du sol.
8 –Capot
Protège la batterie (réf.4), l'unité de contrôle hydraulique (réf.10) et le chargeur de batterie (réf.12) contre les chocs ; facile à retirer pour l'entretien de tous les
composants qu'il contient.
9 –Support
Le système hydraulique, le chargeur et la batterie y sont attachés. Conçu pour protéger les pieds de l'opérateur.
10 –Petite centrale hydraulique
Ici sont placés les dispositifs de sécurité de l'opérateur, c'est-à-dire la commande de descente et la valve de pression maximum.
11 –Prise de chargement
Positionnée sur le support, elle sert à recharger la batterie ; il suffit de la brancher sur l'alimentation électrique à l'aide du câble avec prise fourni (réf.15), sans avoir à
retirer le capot.
12 –Chargeur
: Il est intégré à la machine et est conçu pour interrompre automatiquement l'alimentation électrique lorsque la batterie est complètement chargée. Suivez attentivement
les instructions ci-dessous pour l'utilisation.
13 –Interrupteur de fin de course de châssis levé
: Évitez la possibilité de soulever le cadre au-delà de la hauteur maximale autorisée
14 –Interrupteur principal
Appuyer sur l'interrupteur d'arrêt d'urgence désactive les fonctions électriques du transpalette
15 –Cordon d'alimentation
Il vous permet de connecter le chargeur à l'alimentation électrique et se trouve dans le compartiment du capot.
5. DISPOSITIFS DE SÉCURITÉ
1) Interrupteur general (ref.14/fig.2); 2) Soupape de limitation du debit; 3) Soupape de surpression; 4) Protection pare-chocs; 5) Garde-pied (réf.9 / fig.2); 6) Interrupteur
de fin de course de châssis levé (réf.13 / fig.2); 7) Protection de tuyau hydraulique.
6. PLAQUETTES
Sur la machine sont visibles les plaquettes suivantes (fig.2): A) Plaquette d’identification du type de véhicule; B) Plaque danger de cisaillement; C) Symboles qui
indiquent les fonctions de commande; D) Plaquettes indiquant les points d’élingage; E) ) Plaquettes danger écrasement pieds; F) Plaquette batterie; G) Plaquette: lire
les instructions + Plaquette indicant la position du barycentre du poids + Plaque de capacité.
La plaquette d’identification “A” (se résume ainsi:
Type = TYPE
Model = MODELE
Code = CODE
Serial# = NUMERO DE SERIE
Year = ANNEE DE CONSTRUCTION
RATED LOAD CAPACITY = CHARGE MAXIMALE
UNLOADED WEIGHT = MASSE EN SERVICE
BATTERY = MASSE BATTERIE
VOLTAGE = TENSION BATTERIE
Les plaquettes ne doivent absolument pas être enlevées ou être illisibles.
7. TRANSPORT ET MISE EN MARCHE
Pour transporter le chariot 4 points d’élingage sont prévus et sont indiqués sur les plaquettes “D” (fig.2), tandis que le poids est indiqué sur la plaquette d’identification
“A” (fig.2). Avant de mettre en marche la machine contrôler que toutes les parties sont en parfaite condition, vérifier le fonctionnement de tous les groupes et l'intégrité
des dispositifs de sécurité.
Inspection avant chaque utilisation
- Vérifiez s'il y a des déformations, des dommages visibles ou une usure du chassis
- Vérifiez le serrage de toutes les vis
- Vérifier d’éventuelles fuites au niveau de la pompe hydraulique
- Vérifiez que la batterie n'est pas endommagée, qu'elle est chargée, bien fixée et que les composants sont bien secs et propres
- Vérifiez l'usure des roues et des galets
- Vérifiez la présence des plaques d’identification et de sécurité ainsi que leur lisibilité. Les plaques manquantes, endommagées ou illisibles doivent être remplacées
avant l'utilisation
- Signaler la présence de dommages, d’avaries ou de problèmes au propriétaire
Ne pas utiliserle transpalette avant toutes les opérations et vérification citées ci-dessous n’aient été effectuées et si des dommages,
des défauts sont constatés sur le transpalette
8. BATTERIE
Instructions, mesures de sécurité et entretien
L'inspection, la charge et le changement de batterie doit être fait par un personnel autorisé en suivant les instructions d'utilisation du constructeur de celle-ci..
Il est interdit de fumer et de laisser à côté du chariot et de l'appareil de charge des matériaux inflammables ou qui provoquent des
scintilles. Le milieu doit être bien aéré.
Pour un bon entretien les bouchons des éléments doivent être secs et propres. Éliminer l'acide qui sort, appliquer un peu de
vaseline sur les bornes et les serrer (les batteries au gel, avec l'électrolyte sous forme gélifiée, ne nécessitent aucun entretien). Le poids et les dimensions de la
batterie peuvent influer sur la stabilité du chariot et donc si l'on monte une batterie différente des batteries standard il est conseillé d'interpeller la MAISON DE
CONSTRUCTION pour une autorisation nécessaire. Le chariot monte un indicateur de l’état de la batterie qui s’allume à la mise sous tension de la machine. La Del
verte indique que les batteries sont suffisamment chargées. Quand le niveau de la charge commence à devenir insuffisant, la lampe jaune s’allume pour indiquer que
la charge suffit uniquement pour encore quelques cycles de travail. Lorsque la charge restante atteint un niveau inférieur à 20% de la charge totale, la lampe rouge
s’allume. A ce stade, il n’est plus possible de soulever le chargement mais on peut encore manœuvrer la machine pour atteindre la prise de courant où se produira la
recharge. L’indicateur est également activé pendant la phase de recharge, afin d’indiquer l’état d’avancée de celle-ci.

9
Rechargement de la batterie
- Descendre les fourches
- Branchez le câble d'alimentation fourni (réf.15 / fig.2), une extrémité à la prise du chargeur face au capot (réf.11 / fig.2), l’autre extrémité à l'alimentation
- Pendant la phase de charge, le chargeur inhibe toutes les opérations de levage et d'abaissement
- La fin de la charge est signalée par la LED VERTE. Débranchez maintenant la prise, rangez le câble dans le compartiment approprié puis utilisez à nouveau la
machine
Ne jamais décharger complètement les batteries, et éviter les rechargements incomplets: décharger excessivement les batteries
signifie leur réduire la vie.
Changement de la batterie
- Stationner le chariot de manutention en toute sécurité;
- Dévisser le bouton de commande de l'interrupteur d'arrêt d'urgence
(ref.14/fig.2);
- Dévissez les 5 vis (réf.16 et 17 / fig.2) bloquant le capot;
- Déposer le capot arrière (ref.8/fig.2);
- Débloquer la batterie des attaches;
- Détacher les câbles des pôles de la batterie;
- Extraire la batterie;
- Remontez tout dans l'ordre inverse
Toujours mettre une batterie du même type de celle que l’on change En fixant le couvercle de batterie, s'assurer que les câbles
ne sont pas coincés.
Manipulez la batterie avec attention. Ne court-circuitez pas les batteries, n’inversez pas la polarité, ne mouillez pas et ne perforez
pas la batterie
Si on remplace la batterie, on remettra l’ancienne au centre de collecte le plus proche (en raison de la présence de plomb, les
batteries au gel, si elles sont remplacées, doivent être recyclées).
Vérification batterie
Lire attentivement les instructions d’utilisation et d’entretien du Constructeur de la batterie. Vérifier l’absence de corrosion, la présence de vaseline sur les pôles
vaselina (les batteries au gel ne nécessitent pas de vérification supplémentaire) et que l’acide arrive à 15 mm audessus des plaques. Si les éléments sont découverts,
remplir avec de l’eau distillée. Mesurer la densité de l’électrolyte avec un densimètre pour contrôler le niveau de charge.
Pour les batteries sans entretien, controller l'état de charge par le biais du regard de contrôle
N’utilisez pas la batterie si elle est déformée, trop chaude ou si elle dégage une odeur
Employer avec soin l’acide sulfurique, il est toxique et corrosif (l'électrolyte des batteries au gel est également corrosif, il ne faut
donc pas les ouvrir du tout); il attaque la peau et les habits qui devront éventuellement etre laves avec du savon et de l’eau abondante. EN CAS D’INCIDENT
CONSULTER UN MÉDECIN!!!
9. UTILISATION
Ce transpallette a été fabriqué pour le soulèvement et le transport de charges sur des palettes ou des conteneurs normalisés sur des sols plats, lisses et de résistance
appropriée.
Le conducteur devrà dérouler le mode d’emploi suivant dans la position de conduction; ça pour rester loin des zones dangereuses (comme les montants, les fourches,
les chaînes, les poulies, les roues motrices et stabilisatrices et tous les organes en mouvement), qui impliquent l’écrasement des mains et/ou des pieds.
il est strictement indertid d’utiliser le transpalette sur une surface inclinee, ou en devers ou n’ayant pas la resistance necessaire
pour supporter la masse du transpalette et de la charge. Les non respect de ces consignes peut entrainer des dommages materiels et/ou des blessures graves ou
mortelles.
En l’utilisant FAIRE TRES ATTENTION aux normes suivantes:
- Ne JAMAIS charger le transpalette plus que sa portée maximale indiquée sur la plaquette “A” (fig.2); un limiteur protège le chariot des surcharges.
- La fig.”1” explique comment doit être placée la charge sur les fourches du transpallette pour ne pas provoquer de situations dangereuses
- L’opérateur doit être correctement formé, connaître les instructions d’utilisation du véhicule et porter un équipement de protection individuelle approprié
- Le conducteur, responsable du chariot, doit empêcher à ceux qui ne sont pas autorisés la conduite du moyen et éviter que des personnes externes sautent sur les
fourches ou sur l'estrade
- Durant la conduite l'opérateur doit régler la vitesse dans les virages, dans les passages étroits, dans les portes ou sur des sols irréguliers. Il doit éloigner de la zone
où le chariot bouge ceux qui sont étrangers aux travaux et aviser immédiatement s'il y a des personnes en danger; au cas où malgré l'avertissement il y aurait encore
quelqu'un dans la zone de travail le conducteur est tenu d'arrêter immédiatement le chariot
- Le conducteur doit éviter les arrêts brusques et les inversions de marche rapides
- Durant la conduite le conducteur doit faire attention à avoir une bonne visibilité et à avoir un espace libre pour faire marche arrière
- Il est interdit de transporter ou de soulever des personnes
- Ne pas charger une seule fourche ; répartir la charge uniformément sur les deux fourches et ne pas lever la charge sur les pointes des fourches
- La capacité du transpalette suppose une charge distribuée équitablement sur toute la longueur des fourches et avec un centre de gravité de la charge situé au milieu
de celle-ci
- Il est interdit de s'arrêter dans les zones ou il y a des parties en mouvement et de monter sur les parties fixes du chariot
- Il est interdit d'apporter des modifications à la structure du chariot
- Déplacer la charge avec les fourches en position basse (max. 300 mm) et manoeuvrer lentement pour ne pas générer de situation dangereuse
- Il est interdit de tirer le chariot avec des moyens de tractions électriques ou mécaniques; l’utilisation n’est consentie que par traction humaine
- Il est absolument interdit de mettre hors service ou de démonter les dispositifs de sécurité
- Le chariot élévateur doit être utilisé uniquement à l’intérieur, dans des zones appropriées et dans des conditions environnementales normales. Température
d'utilisation –12°C / +40°C
- Il est interdit d’utiliser le chariot dans des lieux présentant un danger d’incendie ou d’explosion
- La machine ne nécessite pas d’éclairage particulier. Dans tous les cas, prévoir dans la zone d’utilisation un éclairage conforme aux normes en vigueur
- Il est interdit de transporter des produits alimentaires à contact direct avec le transpalette
- Si le chariot est transporté sur des ascenseurs il doit entrer avec les fourches de recharge devant (s’assurer avant que l’ascenseur a une portée suffisante)
- Le chariot doit toujours être utilisé ou parqué à l'abri de la pluie, de la neige et ne doit pas être employé dans des zones très humides
LA MAISON DE CONSTRUCTION N'EST RESPONSABLE D'AUCUNE DÉPENSE RELATIVE À DES DÉGÂTS OU À DES ACCIDENTS DUS À UN MANQUE DE
SOIN, Ô L'INCAPACITÉ, À UNE INSTALLATION FAITE PAR DES TECHNICIENS NON HABILITÉS, ET À UNE UTILISATION IMPROPRE DU CHARIOT.
A cause de son conception le chariot à pantographe pendant le soulevement modifique sa propre stabilité en reduiant le pas entre
les stabilisateurs et les rouleaux de chargement. Il faut donc faire attention a positionner correctement le poids sur les fourches et s’assurer que le barycentre du poids
même corrspond a ce-ci declaré par le constructeur. Avec les poids mal distribués sur les fourches et les barycentre differents de ces-ci declarés le transpallet à
pantographe peut sembler stable pendant la première phase du soulevement, mais peut se verser à l’improviste si le barycentre sort de la ligne des rouleaux.
Mettre en marche / arrêter
Pour mettre la machine en marche, tirez l'interrupteur d'urgence (réf.14 / fig.2) ; appuyez sur le même interrupteur pour l'éteindre.
Manipulation
Dirigez le transpalette dans le sens de travail en utilisant le volant (réf.2 / fig.2).

10
Déplacer la charge avec les fourches en position basse (MAX 300 mm) et braquer lentement pour ne pas créer de situations
dangereuses. L’espace nécessaire pour que le chariot élévateur se déplace dans un entrepôt correspond à l’allée de rangement Ast, variable en fonction de la
dimension du chargement et indiquée dans le tableau des caractéristiques techniques au début de ce manuel au point 4.34 pour le chargement de référence indiqué.
L’opérateur doit tenir compte de l’allée de rangement en s’assurant toujours que l’espace dans lequel se déroule le virage est exempt d’obstacles
Opération
Pour lever les fourches de chargement, appuyez sur le bouton (réf.C / fig.2) en haut à la hauteur désirée, tandis que pour les abaisser appuyez sur le bouton (réf.C /
fig.2) en bas. Le transpalette se déplace librement jusqu'à une hauteur de fourche d'environ 400 mm au-dessus du sol, en plus de deux stabilisateurs latéraux (réf.7 /
fig.2) qui bloquent la machine empêchant tout mouvement horizontal.
Avant de relâcher le chargement, vérifiez toujours qu’il n’y a pas des personnes ou des objets dans la zone à proximité du chariot
élévateur.
Effectuez les opérations de levage et de libération du chargement toujours avec le chariot élévateur de manière à éviter tout
mouvement imprévu du chariot.
Le freinage
Pour freiner le transpalette, avec ou sans charge, déplacez la direction dans le sens de la marche et utilisez la force musculaire pour réduire la vitesse du transpalette.
Si la vitesse du chariot est réduite trop rapidement, la charge peut glisser vers l'avant et provoquer des dégâts dus à l'écrasement.
Travail en chambre froide
Avant de l'utiliser dans la chambre froide, sécher le chariot de manutention; cette eau peut geler en entrant de nouveau dans la
chambre froide et bloquer les pièces mobiles du chariot de manutention.
Toujours stationner le chariot de manutention en dehors de la chambre froide. Chargez la batterie en dehors de l’entrepôt
frigorifique
Interrupteur pour l’arrêt d’urgence
En cas d'urgence, toutes les fonctions électriques du transpalette peuvent être désactivées en appuyant sur l'interrupteur d'urgence
Parking sécurisé
L’opérateur ne doit jamais quitter le chariot dans des conditions qui peuvent causer des dommages ou des blessures
Abaissez complètement les fourches et actionnez l'interrupteur d'arrêt d'urgence.
Ne pas stationner le chariot de manutention en pente. S'assurer que le chariot de manutention ne puisse pas rouler
accidentellement. Ne garez jamais le chariot élévateur dans une pièce froide.
10. ENTRETIEN
L'entretien doit être effectué par un personnel spécialisé. Le chariot doit être soumis au moins une fois par an à un contrôle général.
Toute réparation ou maintenance extraordinaire effectuée par ses propres moyens ou dans des ateliers non autorisés, pendant toute la période de garantie, annule
automatiquement la garantie.
Pour effectuer tout entretien ou inspection, débrancher toujours la batterie.
Nous vous recommandons d’utiliser des chaussures de sécurité, des gants, des lunettes de protection et des vêtements appropriés
lorsque vous travaillez avec des batteries. Il est interdit de fumer et de garder du matériel inflammable ou des étincelles près du chariot et du dispositif de chargement.
L’environnement doit être bien ventilé. Des conditions environnementales particulières (par exemple, des environnements poussiéreux ou des places froides)
nécessiteront une réduction des intervalles indiqués dans le programme de maintenance. Le non-respect du programme de maintenance recommandé peut réduire
l’efficacité de fonctionnement et la durée de vie du chariot
11. DÉPANNAGE
PROBLÈME
CAUSE
SOLUTION
Les fourches ne se lèvent pas
Batterie faible
Chargez la batterie
Fusible brûlé
Remplacez
Court-circuit du système électrique
Vérifiez le système électrique
Les joints de cylindre usés
Remplacez les joints
Il n’y a pas d’huile dans le réservoir
Remplissez le réservoir d’huile
Relais du moteur casse
Verifier et remplacer
Balais du moteur uses
Remplacer les balais
Les fourches ne descendent pas
Electrovanne defectueuse
Verifier et remplacer
Court-circuit du système électrique
Vérifiez le système électrique
Si aucune des solutions suggérées ne résout le problème, apportez le chariot élévateur au centre de service le plus proche.
Tableau d'entretien
Vérifications interrupteur général
●
●
Vérifications fonctionnement valve limitatrice de pression
●
Vérifications valve limitatrice de flux
SYSTEME
ELECTRIQUE
Vérifications fonctionnement
Vérifications des pertes et usure connexions
●
SYSTEME
HYDRAULIQUE
Vérifications fonctionnement
●
Changer huile 1,75 l (32 Cst. 40C)
Vérifications niveau d'huile
●
●
GRAISSAGE
Lubrifier les joints
●
Vérifications connexions, dégâts des câbles
●
NETTOYAGE DU CHARIOT: Nettoyer les parties du chariot avec un chiffon humide en évitant les éléments
électriques et électroniques. Ne jamais laver au jet d'eau direct, à la vapeur ou avec des liquides inflammables.
Nettoyer les parties électriques et électroniques à l'air comprimé déhumidifié à basse pression (5 BAR max.) ou
avec un pinceau non métallique.
ATTENTION: Utiliser une huile hydraulique en excluant l'huile moteur et freins.
NOTE: on éliminera l’huile usée en respectant le milieu ambiant. Il est conseillé de la stocker dans des fûts qu’on
remettra ensuite au centre de collecte le plus proche. Ne pas décharger l'huile sur la terre ou dans des lieux non
adaptés.
●
INSPECTIONS
Vérification dispositifs de sécurité
●
Vérifications mouvement latéral
●
GOUVERNAIL
Vérifications du jeu
●
●
Vérifications retour position verticale
●
●
ROUES
Vérifications usure
●
Vérifications jeu coussinets
●
Vérifications ancrage
●
Contrôle des coussinets en bronze
●
BAITERIE
Vérification densité et niveau électrolyte (pas
nécessaire sur batteries au gel)
Vérification intégrité câbles
Engraisser bornes avec vaseline
●
Contrôle tension éléments
●
Vérification ancrage et tenue bornes
●
Vérification serrage boulons et vis
●
Vérification relais de mise en marche moteur
●
6 MOIS
12 MOIS
STRUCTURE
ET FOURCHE
Vérification éléments portants
●
MOTEUR ELECTRIQUE
Vérification usure brosses
●
ÉLÉMENTS
CONTROLES
TOUS LES:
ÉLÉMENTS
CONTROLES
TOUS LES:
3 MOIS
6 MOIS
12 MOIS
3 MOIS

11
EN
1. TECHNICAL FEATURES (fig.3)
2. DECLARATION OF VIBRATION EMISSION
Declared vibration emission values in compliance with EN 12096
Description
Value
European Norm (EN)
Test surface
Measured vibration emission value, a (m/s2)
1.13
EN ISO 20643 (Hand-Arm)
Industrial smooth concrete floor
Uncertainty, K (m/s2)
0.67
Measured vibration emission value, a (m/s2)
3.0
EN ISO 20643 (Hand-Arm)
On test track according to EN 13059
Uncertainty, K (m/s2)
0.7
Values determined in compliance with EN ISO 20643 and EN 13059.
3. USE OF THE MACHINE
Safety messages
In order to safeguard the user safety and ensure the correct operation of the forklift, this use and maintenance manual contains the safety messages indicated below.
PICTOGRAM
DESCRIPTION
Indicates an imminent risk situation which, if not avoided, causes death or
serious damage (e.g. amputations, severe burns, loss or deterioration of
vision or hearing).
Indicates a situation of potential risk which, if not avoided, can cause death
or serious damage (e.g. amputations, severe burns, loss or deterioration of
vision or hearing).
Indicates a situation of potential risk which, if not avoided, may cause minor
damage (e.g. cuts, scratches, irritation).
It is used for practices not related to physical injuries.
Clothing
The operator of the forklift is obliged to use clothing that reduces the possibility of danger.
We recommend using safety shoes, gloves, trousers and close-fitting jackets. The use of watches
and metal jewelry is not recommended, since they could cause short circuits near the battery.
In addition, use adequate protection in the presence of aggressive environments.
General Informations
This machine is designed for the transport and lifting of load units on flat, smooth floors without any roughness, with the driver on foot. An identification plate can be
found on the chassis indicating the lifting capacity that must never be exceeded both for the safety of the personnel and not to damage the vehicle. Please observe
the safety, use and maintenance regulations to the letter.
Any mounting of extra equipment on the machine must be authorised by the manufacturers.
The forklift use and maintenance manual must always be available to the operator.
It is forbidden to perform extraordinary repairs or maintenance.
An independent structural change or addition to the industrial truck can compromise safety, thus invalidating the EC declaration of conformity.
This truck is used in workplaces where the operator needs to bend over to lift loads manually and several times during the day, it can be used both as a normal pallet
truck and as a liftable work surface. Lifting the load to the desired height reduces unnecessary stress and improves the ergonomics of the stationary or mobile
workplace. Electric lifting accelerates and facilitates repetitive changes in working heights.
Moreover, as there is an acoustic pressure of 70dB(A), measured with full load in working position, it is recommended to use due
anti-noise protections (headphones, ear-plugs, etc…).
4. DESCRIPTION OF THE MACHINE (fig.2)
1 –Chassis
Soldered structure, constructed from top quality materials with adequate resistance to the stress to which the truck is subjected. The two front rollers (ref.6) and the
lateral stabilisers (ref.7) guarantee high stability on 4 points of support
2 –Steering bar
1.1 MANUFACTURER PR INDUSTRIAL PR INDUSTRIAL PR INDUSTRIAL PR INDUSTRIAL PR INDUSTRIAL
1.2 MODEL HX10E 1150x540 HX10E 1150x680 HX10E 1525x540 HX10E 1800x540 HX10E 2000x540
1.3 DRIVE
MANUAL MANUAL MANUAL MANUAL MANUAL
1.4 OPERATOR TYPE PEDESTRIAN PEDESTRIAN PEDESTRIAN PEDESTRIAN PEDESTRIAN
1.5 LOAD CAPACITY
Qkg 1000 1000 1000 1000 1000
1.6 LOAD CENTRE DISTANCE
cmm 600 600 762 900 1000
1.8 LOAD DISTANCE, CENTRE OF DRIVE AXLE TO FORK
xmm 993 993 1283 1509 1509
1.9 WHEEL BASE
ymm 1231 1231 1531 1748 1748
2.1 SERVICE WEIGHT
kg 144 151 240 264 267
2.2 AXLE LOAD LADED, FRONT/REAR
kg 435/709 442/709 500/740 531/733 476/791
2.3 AXLE LOAD UNLADEN, FRONT/REAR
kg 116/28 123/28 160/80 183/81 185/82
3.1 TYRES G/P G/P G/P G/P G/P
3.2 TYRE SIZE, FRONT (Ø x width) 200x50 200x50 200x50 200x50 200x50
3.3 TYRE SIZE, REAR (Ø x width) 80x50 80x50 80x50 80x50 80x50
3.4 SIDE WHEELS (Ø x width) - - - - -
3.5 WHEELS, NUMBER (x=DRIVEN) FRONT/REAR 2/2 2/2 2/2 2/2 2/2
3.6 TREAD, FRONT
b10 mm 155 155 155 155 155
3.7 TREAD, REAR (MIN/MAX***)
b11 mm 447 587 447 447 447
4.4 LIFT
h3mm 715 715 715 715 715
4.9 HEIGHT OF TILLER IN DRIVE POSITION MIN/MAX
h14 mm 887/1244 887/1244 887/1244 887/1244 887/1244
4.15 HEIGHT, LOWERED
h13 mm 85 85 85 85 85
4.19 OVERALL LENGTH
l1mm 1665 1665 2040 2315 2515
4.20 LENGHT TO FACE OF FORKS
l2mm 515 515 515 515 515
4.21 OVERALL WIDTH (FRONT/REAR MIN/MAX***)
b1mm 540 680 540 540 540
4.22 FORK DIMENSIONS
s/e/l mm 48/160/1150 48/160/1150 48/160/1525 48/160/1800 48/160/2000
4.25 DISTANCE BETWEEN FORK ARMS (MIN/MAX***)
b5mm 540 680 540 540 540
4.32 GROUND CLEARANCE, CENTRE OF WHEEL BASE
m2mm 21 21 21 21 21
4.34 AISLE WIDTH FOR PALLETS 800x1200 LENGHTWISE
Ast mm 2170 2170 2474 2726 2864
4.35 TURNING RADIUS
Wamm 1520 1520 1806 2031 2031
5.2 LIFT SPEED, LADEN/UNLADEN
m/s 0,08/0,13 0,08/0,13 0,08/0,13 0,08/0,13 0,08/0,13
5.3 LOWERING SPEED, LADEN/UNLADEN
m/s 0,13/0,06 0,13/0,06 0,13/0,06 0,13/0,06 0,13/0,06
6.2 LIFT MOTOR POWER
kW 1,6 1,6 1,6 1,6 1,6
6.4 BATTERY VOLTAGE, NOMINAL CAPACITY
V/Ah 12/60 (C20) 12/60 (C20) 12/60 (C20) 12/60 (C20) 12/60 (C20)
6.5 BATTERY WEIGHT
kg 14 14 14 14 14
8.4 SOUND LEVEL AT DRIVER'S EAR
dB(A) 67 67 67 67 67
G=Rubber, P=Polyurethane
1.2 MODEL HX10E 1150x540 GEL HX10E 1525x540 GEL HX10E 1800x540 GEL HX10E 2000x540 GEL
2.1 SERVICE WEIGHT kg 149 245 269 272
2.2 AXLE LOAD LADED, FRONT/REAR kg 440/709 505/740 536/733 481/791
2.3 AXLE LOAD UNLADEN, FRONT/REAR kg 121/28 165/80 188/81 190/82
6.4 BATTERY VOLTAGE, NOMINAL CAPACITY V/Ah 12/50-60 12/50-60 12/50-60 12/50-60
6.5 BATTERY WEIGHT kg 19 19 19 19
DESCRIPTION
WEIGHTS
TYRES/CHASSIS
DIMENSIONS
PERF
ORMA
N_CE
DATA
ELECTR
IC
MOTOR
S

12
The steering bar is used to pull and manoeuvre the truck. A gas spring automatically returns it to its vertical position when released. It is constructed to protect the
hands of the operator.
3 –Lifting cylinder
With a single-acting movement it lifts the chassis to the desired height. The materials used guarantee the safety of the operator from mechanical risks.
4 –Battery
The battery is located inside the hood (ref.8), and it is easily accessible. To recharge, insert the plug of the battery charger (ref.15) into the recharging socket (ref.11)
located on the support (ref.9). 2 supports obtained on the mounting (ref.9), and an elastic belt prevent any battery movement. The plate “F” (Fig.2) displays the
identification data of the battery.
5 –Steering wheels
Two rubber or nylon or polyurethane steering wheels allow maneuverability without excessive operator effort.
6 –Loading rollers
Two polyurethane or nylon rollers with ball bearings largely support the load on them.
7 –Stabilisers
The two lateral stabilisers are automatically positioned when the forks exceed a height of 400 mm from the ground. They give great stability to the truck impeding
lateral overturning and lift the steering wheels (ref.5) from the ground
8 –Hood
Protects the battery (ref.4), the hydraulic control unit (ref.10) and the battery charger (ref.12) against impact; easy to remove for maintenance of all the components
contained therein.
9 –Support
The hydraulic system, the charger and the battery are attached to it. Designed to protect the operator's feet
10 - Hydraulic control
Here are mounted the safety devices for the operator, i.e. the descent control and the maximum pressure valve.
11 –Charging socket
Positioned on the support, it is used to recharge the battery; simply connect it to the power supply using the cable with plug supplied (ref.15), without the need to
remove the hood.
12 –Charger
It is built in into the machine and is designed to interrupt the power supply automatically when the battery is fully charged. Carefully follow the instructions below for
use.
13 –Lifted frame limit switch
Avoid the possibility of lifting the frame beyond the maximum height allowed.
14 –Main switch
Pushing the emergency stop switch deactivates the electric functions of the truck.
15 –Power cord
It allows you to connect the charger to the power supply and is located in the compartment in the hood.
5. SAFETY DEVICES
1) Main switch (ref.14/fig.2); 2) Flow control valve; 3) Relief valve; 4) Bumper guard; 5) Foot guard (ref.9/fig.2); 6) Lifted frame limit switch (ref.13/fig.2); 7) Hydraulic
pipe guard.
6. PLATES
The following plates are visible on the machine (fig.2): A) Plate that identifies the kind of vehicle; B) Shearing danger plate; C) Symbols identifying control functions;
D) Plates indicating the harness points; E) Plates indicating that feet may be squashed; F) Battery plate; G) Plate read the instructions + Plate indicating the position
of the weight barycenter + Rating plate.
Rating plate “A” can be thus summarized:
Type = TYPE
Model = MODEL
Code = CODE
Serial# = SERIES NUMBER
Year = YEAR OF MANUFACTURE
RATED LOAD CAPACITY = MAXIMUM CAPACITY
UNLOADED WEIGHT = SERVICE WEIGHT
BATTERY = BATTERY WEIGHT
VOLTAGE = BATTERY VOLTAGE
Le targhette non devono assolutamente essere rimosse o rese illeggibili.
7. TRANSPORT AND SET UP
To transport the truck 4 harness points are supplied, indicated by the “D” type plates (fig.2) located on the machine, while the weight of the truck is indicated on the
“A” type identification plate (fig.2). Before starting the machine check that all the parts are in perfect condition, check the performance of all the units and the safety
devices.
Inspections before every use
- Check whether there is any deformation, visible damage or wear on the frame
- Check the tightening of all the screws
- Check for leakages of the hydraulic pump
- Check that the battery is not damaged, is charged, well secured and that the components are well dry and clean
- Check the rollers and castors wear
- Check the presence of the name and safety plate and their legibility. Missing, damaged or unreadable plates must be replaced before the use
- Report the presence of damages, failures or problems to the proprietor
Do not use the truck before all the operations and verifications described above are accomplished and if damages, failures or
problems are found
8. BATTERY
Instructions, safety measures and maintenance
Inspection, charging and substitution of the battery must be carried out by authorized personnel following the manufacturer's instructions.
It is forbidden to smoke or keep inflammable or spark-producing material near the truck or the battery recharger. The area must be
kept well aired.
The caps of the elements must be kept dry and clean. Remove any acid that has leaked out and spread a little Vaseline on the
terminals and then tighten them (Gel batteries, having the electrolyte in gelled form, do not require any maintenance). The weight and size of the batteries can effect
the stability of the truck, therefore, if a non-standard battery is mounted it is advisable to contact the MANUFACTURERS for the relative authorization. The truck is
fitted with a battery status indicator that lights when the truck is turned on. The green LED light indicates that battery charge is sufficient. When the charge is no longer
sufficient the light turns yellow, indicating that charge is available only for some further lifting cycles. When the residual charge is lower than 20%, red LED light turns
on. At this stage is no longer possible to lift the forks, but the truck can only move to the nearest charging point. The battery status indicator turns on during the charging
phase, indicating its progress.
Charging the battery
- Lower the forks
- Connect the power cable supplied (ref.15/fig.2), on the one hand in the socket of the charger facing the hood (ref.11/fig.2), on the other hand to the power supply

13
- During the charging phase, the charger inhibits all lifting and lowering operations
- The end of charge is signalled by the GREEN LED. Now disconnect the plug, store the cable in the appropriate compartment and then use the machine again
Never completely discharge the battery and avoid partial charging: If the batteries are allowed to run down too much their life will
be shortened.
Substituting the battery
- Park the industrial truck securely;
- Unscrew the actuation button for emergency stop switch (ref.14/fig.2);
- Unscrew the 5 screws (ref.16 and 17/fig.2) locking the hood;
- Remove the rear cover (ref.8/fig.2);
- Remove the battery from its retainers;
- Remove the cables from the battery terminals;
- Slide out the battery;
- Reassemble everything in reverse order
The battery must always be of the same type that it replaces. When attaching the battery cover, make sure that the cables are not
trapped.
Handle the battery carefully. Do not short-circuit the poles, do not reverse the polarity, do not wet or puncture the battery.
After replacing the battery, consign the used one to the nearest collecting center (Due to the presence of lead, also gel batteries,
if replaced, must be recycled).
Battery check
Carefully read the battery manufacturer’s use and maintenance instructions. Check that there is no corrosion, that Vaseline is present on the poles (Gel batteries do
not require further verification) and that the acid is 15 mm above the plates. If the elements are not covered, top up with distilled water. Measure electrolyte density
with a densimeter to check the charging level.
For maintenance-free batteries, check the charge status at inspection window.
Do not use the battery if it is deformed, too hot or if it gives off an odor.
Use the sulphuric acid with care, it is toxic and corrosive (the electrolyte of the gel batteries is equally corrosive, so they must not
be opened at all); if skin or clothes come into contact with this acid wash with abundant soap and water. IN CASE OF ACCIDENTS CONSULT A DOCTOR!!!
9. USE
This transpallet was designed for the lifting and the transport of loads on a pallet or standardized containers on level, smooth andadequately strong pavements.
The driver must carry out the following instructions of use in the driving position in way to remain reasonably distant from the dangerous zones (such as masts, forks,
chains, pulleys, driving and stabilizing wheels and any other movable part), that can cause the crushing of hands and/or foots.
it is strictly forbidden tu use the truck on inclined floor and on surfaces which are not hard, solid and able to support the weight of
the truck and the load. Not respecting this mandatory prescription may result in material damage and/or serious personal injury or death.
In its use pay careful attention to the following rules:
- Do not EVER load the fork truck over its maximum capacity indicated on the ”A” rating plate (fig.2); a limiting device protects the truck from overloads
- Fig. “1” explains how the load must be positioned on the forks of the transpallet to not create dangerous situations
- The operator must be properly trained, know the instructions for use relating to the vehicle and wear the appropriate personal protective equipment
- The driver responsible for the fork lift truck must not allow unauthorized personnel to drive the truck or to step onto the forks or the platform
- While the truck is in movement the operator must reduce speed in curves, in narrow corridors, through doors or on irregular surfaces. He must keep unauthorized
personnel away from the area where the truck is working and immediately warn people if they are in danger; if, in spite of this warning there is still someone in the
work area the driver must immediately stop the truck
- The driver must avoid sudden stops and fast inversions of movement
- When driving the driver must make sure that visibility is good and that there are no obstructions when reversing
- It is forbidden to transport or lift people
- Do not load the forks unilaterally; distribute the load uniformly on both forks & do not raise the load on the tips of the forks
- The capacity of the truck assumes a load distributed evenly over length of the forks and the load centre of gravity being in the middle of the load
- It is forbidden to stop in areas where there are moving parts and step on the fixed parts of the truck
- It is forbidden to make alterations to the structure of the truck
- Move the load with the forks in the low position (max 300mm) and steer slowly to not create dangerous situations
- It is forbidden to tow the truck with electrical or mechanical means of traction; it may only be moved by hand
- It is absolutely forbidden to disconnect or dismount the safety devices
- The forklift must be used only indoors, in suitable areas and in normal environmental conditions. Temperature of use –12°C / +40°C
- It is prohibited to use the fork truck in environments with danger of fire or explosion
- The machine does not need to be in a specially lighted area. However provide adequate lighting to comply with applicable working norms
- It is forbidden to transport foodstuffs in direct contact with the truck
- If the truck is transported in lifts he must enter them with the loading forks in front (first make sure the lift has a sufficient load)
- The truck must always be used or parked sheltered from rain and snow and in no case must it be used in very damp areas
THE MANUFACTURERS SHALL NOT BE HELD LIABLE IN CASE OF FAULTS OR ACCIDENTS DUE TO NEGLIGENCE, INCAPACITY, AND INSTALLATION
BY UNQUALIFIED TECHNICIANS AND IMPROPER USE OF THE TRUCK.
Because of its design, the scissor lift pallet truck modifies its stability during lifting, reducing the wheelbase between the stabilizers
and the load rollers. Please pay attention to place the load on the forks in the correct way and be sure that the load center position complies with the one certified by
the manufacturer. If the load is not properly distributed on the forks and the load center is not in the certified position, the scissor lift pallet truck may seem stable in
the first phase of lifting and it may suddenly overturn if the load center goes beyond the load rollers line.
Power on/off
To turn the machine on, pull up the emergency switch (ref.14/fig.2); to turn it off, push the same switch.
Handling
Head in the working direction by towing the truck with the steering (ref.2/fig.2).
Move the load with the forks in the low position (MAX 300mm) and steer slowly to not create dangerous situations. The space
needed for the forklift to move around in a warehouse corresponds to the Ast stowage aisle, variable with the size of the load and shown in the table of technical
characteristics at the beginning of this manual at point 4.34 for the indicated reference load. The operator must take into account the stowage aisle, always making
sure that the space in which the curve takes place is free from obstacles.
Operation
To lift the load forks press the button (ref.C/fig.2) at the top to the desired height, while to lower them press the button (ref.C/fig.2) at the bottom. The truck moves
freely up to a fork height of about 400 mm above the ground, in addition to two lateral stabilisers (ref.7/fig.2) that block the machine preventing any horizontal movement.

14
Before releasing the load, always check that the area near the forklift is free from people or objects.
Carry out the lifting and load releasing operations always with the forklift in a level position to avoid unexpected dangerous
movements of the truck.
Braking
To brake the truck, with or without load, move the steering in the driving direction and use muscle strength to reduce the truck speed.
If the truck is decelerated too quickly, the load could slip forwards and lead to damage as a result of crushing.
Cold store application
Before it is used in the cold store, the industrial truck must be dry; this water may freeze on re-entry to the cold store and block
moving parts of the industrial truck.
Always park the industrial truck outside the cold store. Charge the battery outside the cold store.
Emergency stop
In case of emergency, all the electric functions of the truck can be deactivated by pushing the emergency switch
Safe Parking
The operator must never leave the truck in conditions that could cause damage or injury.
Lower the forks completely and trigger the emergency stop switch.
Do not park the industrial truck on a slope. Make sure that the industrial truck cannot roll away unintentionally. Never park the
forklift in a cold room.
10. MAINTENANCE
Maintenance must be carried out by specialized personnel. The truck must undergo a general check up at least once a year. Any
repairs or extraordinary maintenance performed on one's own or in unauthorized workshops, during the entire warranty period, automatically invalidate the warranty
Always disconnect the battery before carrying out any maintenance operations or inspections.
We recommend using safety shoes, gloves, protective glasses and appropriate clothing when working with batteries.
It is forbidden to smoke and keep flammable or sparking material near the truck and the charging device. The environment must be well ventilated.
Particular environmental conditions (for example, dusty environments or cold rooms) will require a reduction in the intervals indicated in the maintenance program.
Failure to follow the recommended maintenance schedule may reduce the operating efficiency and life of the truck.
11. TROUBLE SHOOTING
PROBLEM
CAUSE
SOLUTION
The forks do not rise
Low battery
Charge the battery
Burned fuse
Replace
Electrical system short circuit
Check the electrical system
Worn cylinder seals
Change the seals
There is no oil in the tank
Fill the tank with oil
Motor relay broken
Check and substitute
Worn motor brushes
Substitute brushes
The forks don’t lower
Faulty solenoid valve
Check and substitute
Electrical system short circuit
Check the electrical system
If none of the suggested solutions solves the problem, take the forklift to the nearest service center.
Maintenance table
Check master switch
●
●
Check performance of pressure limiting valve
●
Check flow limiting valve
ELECTRICAL
SYSTEM
Check performance
Check for leaks and wear of connections
●
HYDRAULIC
SYSTEM
Check performance
●
Change oil 1,75 l (32 Cst. 40C)
Check oil level
●
●
GREASING
Lubricate joints
●
Check connections, cable trouble
●
CLEANING THE TRUCK: Clean the parts of the truck, except electrical and electronic elements, with a
damp cloth. Do not use direct jets of water, steam or inflammable liquids. Clean electrical and electronic
components with dehumidified compressed air at low pressure (max. 5 bar) or with a non metallic brush.
CAUTION: Use hydraulic oil apart from motor and brake oil.
NOTE: respect the environment when discarging the used oil. The oil should be stored in adrum that should
be consigned to the nearest collecting station. Do not dump the oil in the ground or in unsuitable places.
●
INSPECTIONS
Check safety devices
●
Check sideways movement
●
STERING BAR
Check play
●
●
Check return to vertical position
●
●
WHEELS
Check wear
●
Check bearing play
●
Check anchorage
●
Check of bronze bushes
●
BATTERY
Check electrolyte density and level (not
necessary for gel batteries)
Check cables
Grease terminals with Vaseline
●
Check voltage of elements
●
Check anchorage and hold of terminals
●
Check nuts and bolts are tightened
●
Check starting motor relay
●
6 MONTHS
12 MONTHS
STRUCTURE
AND FORKS
Check load bearing elements
●
ELECTRIC MOTOR
Check wear of brushes
●
ELEMENT
CHECKS
EVERY
ELEMENT
CHECKS
EVERY
3 MONTHS
6 MONTHS
12 MONTHS
3 MONTHS
Other manuals for HX10E
1
Table of contents
Languages:
Other Lifter Lifting System manuals
Popular Lifting System manuals by other brands

BraunAbility
BraunAbility A Series Installation instructions & user manual

EZ-ACCESS
EZ-ACCESS TiLT Toilet Incline Lift Installation and user manual

Consul
Consul Prolift 2.30 EL Operating & installation instructions

RITE-HITE
RITE-HITE RHV Series owner's manual

Terex
Terex Genie GS-1532 Service and repair manual

LGMG
LGMG AR20J Operation manual