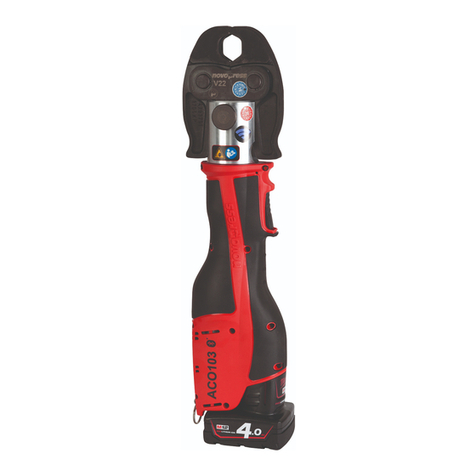
NovoPress AXI102 User manual

Pos: 2/ RVT /Al lg emei nes /Bi ld-Dec kbl att/ Bil d-Dec kbla tt-AAP/AXI102@ 2\mod_1450271928485_0.docx@ 16397@ @ 1
Pos: 4 /R VT/Al lgemei nes/ Titel seite n/Kopi e von Ti telsei te 2 Pro dukt e-AAP/AX I @ 2\mod_1450272524200_0.docx@ 16418@ @ 1
AXI102
AAP102
Pos: 5/ R VT/ Allg e meine s/ Länd er ken nz eich en/ Lä nder ken nz eich e n D E bi s C S @ 0\mod_1380201864709_0.docx@ 923@ @ 1
DE Betriebsanleitung
EN Operating Manual
FR Manuel d'utilisation
IT Manuale d'istruzioni
ES Instrucciones de uso
NL Handleiding
SV Bruksanvisning
FI Käyttöohje
NO Bruksanvisning
PT Manual de instruções
DA Betjeningsvejledning
EL Οδηγίες λειτουργίας
RU Инструкция по эксплуатации
PL Instrukcja obsługi
CS Návod k obsluze
Pos: 6/ RVT /Allgemeines/Länder k ennz eic he n/Län der ken nzei ch en HU @ 0\m od_1380202020728_0.docx @ 929@ @ 1
HU Használati utasítás
Pos: 7/ RVT /Allgemeines/Länder k ennz eic he n/Län der ken nzei ch en ZH @ 0\m od_1380202130807_0.docx @ 935@ @ 1
ZH 操作说明书
=== En de der Lis te für T extmar ke Tit elblatt = ==
45200/b09int
0320
17762

AXI102 / AAP102
7
7
1
Pos: 9/ RVT /St ric hbil der /AA P/AX I1 02 @ 6\mod_1582802591539_0.docx@ 55222@ @ 1
1a 1b 2
3 4 5
6 7 8
77
1

AXI102 / AAP102
9 10 11
12 13 14
15 16
=== Ende d er List e f ür T ext mar ke G r afi k= ==

AXI102 / AAP102

AXI102 / AAP102
13
EN
Pos: 11 /R VT/S prach e und Bet riebs anlei tung/ Sprac he und B etri ebsanl eitu ng- 2-Gerät e @ 4\mod_1518421355947_18.docx@ 34415@ @ 1
AXI102 / AAP102
EN English
Translation of the Original Instructions
Contents
=== En de der Lis te für T extmar ke Inhal t2 ===
1Proper use..............................................................................................................................................13
2Basic safety information .........................................................................................................................13
3Definition of terms...................................................................................................................................15
4Symbols on the device and information on the rating plate ...................................................................15
5Scope of supply......................................................................................................................................16
6Technical data........................................................................................................................................16
7Brief description......................................................................................................................................17
8Start-up and operation of AXI102...........................................................................................................19
9Start-up and operation of AAP102 .........................................................................................................20
10 Cleaning, maintenance and repair .........................................................................................................22
11 Disposal..................................................................................................................................................23
12 Warranty and guarantee.........................................................................................................................23
13 EU Declaration of Conformity.................................................................................................................24
Pos:13/RVT/Sicherheit/BestimmungsgemäßeVerwendung/AXI/AAP/BestimmungsgemäßeVerwendungAXI/AAP@ 1\mod_1448532720624_18.docx@ 15508@ 1 @ 1
1 Proper use
The expanders and pusher tools are intended solely for use with expander heads or adaptors that
have been declared suitable by Novopress in consultation with system suppliers.
The expander with the appropriate expander heads from the system manufacturer are intended
exclusively for expanding pipes that are suitable for these expander heads.
The pusher tool and adaptors are to be employed solely for the pressing of pipes and fittings for which
these adaptors have been designed.
Any use beyond or different to that described shall be regarded as improper use.
Proper use also includes compliance with the Operating Manual, adherence to the inspection and
maintenance conditions as well as compliance with the latest versions of all relevant safety
regulations.
Any work with this tool that does not correspond to proper use may lead to damage to the expander or
pusher tool, the accessories or the pipes. Leaks and/or injury may result.
Novopress is not liable for damage resulting from
•the use of unsuitable expander heads or adaptors from other manufacturers, or
•applications that do not conform to proper use.
Pos: 14 /R VT/Si cher heit/ Grundl ege nde Sic herheit shi nweis e/01 - Gru ndleg ende Sic herh eitshi nweis e @ 2\mod_1468564550445_18.docx@ 21439@ 1 @ 1
2 Basic safety information
The following pictograms are used to highlight sections of text. Please follow these instructions and
act with particular caution in these cases. Pass all health and safety instructions on to other users and
technicians.
WARNING!
This information indicates a potentially dangerous situation that could result in serious
injury or death.
CAUTION!
This information indicates a potentially dangerous situation that could result in minor
injuries and/or material damage.

AXI102 / AAP102
14
EN
Information!
This information is directly linked to the description of a function or an operating
sequence.
Please read this Operating Manual carefully.
The safety instructions it contains must be observed.
Compliance with local safety regulations is essential!
WARNING!
Read all safety warnings and all instructions.
Failure to follow the warnings and instructions may result in electric shock, fire and/or
serious injury.
Therefore:
– Save all warnings and instructions for future reference.
Pos: 15 /R VT/Si cher heit/ Grundl ege nde Sic herheit shi nweis e/02b - Br uch st üc ke - uns ac hge mäßer Umg ang - In fo-AXI/A AP @ 1\mod_1448532961566_18.docx@ 15528@ @ 1
WARNING!
Risk of injury from ejected fragments
Incorrect or improper use or the use of worn or damaged tools and devices carries a
risk of injury from ejected fragments.
Therefore:
– Tools and devices may only be used by trained personnel.
– Compliance with the specified service work and service intervals is mandatory.
– Check the tools and devices for cracks and other signs of wear before each use.
– Separate all tools and devices with material cracks or other signs of wear
immediately and do not use them any longer.
– Only use tools and devices that are in perfect technical condition.
– Following incorrect use, do not use the tool and device any longer and have them
inspected by an authorised workshop.
CAUTION!
Unskilled use may lead to a damaged or malfunctioning tool and device.
Therefore:
– Replace worn tools immediately and do not use them any longer.
– Use carrying cases for transport and storage and keep tools and the device in a
dry room.
– Have damage checked immediately by an authorised workshop.
– Comply with the safety instructions regarding the cleaning and anti-corrosion
agents used.
Information!
Consult the documents provided by the system supplier for handling and assembly
instructions for fittings and pipes.
Pos:16/RVT/Allgemeines/####Seitenumbruch####@ 0\mod_1380200837280_0.docx@ 885@ @ 1

AXI102 / AAP102
15
EN
Pos: 17 /R VT/ Besc hr ei bung /B egr iffs er klär u ng/B egr iff ser klär ung @ 6 \mod_1571815340747_18.docx@ 49204@ 1 @ 1
3 Definition of terms
V volt Ah ampere hour Ø diameter
A ampere db(A) decibel (sound pressure) h hour
Hz hertz bar bar min minute
W watt °C degree Celsius s second
kW kilowatt kN kilonewton m/s² metre divided by
square second
(acceleration)
g gram a.c. /
∿
Alternating current voltage
kg kilogram d.c. /
⎓
Direct current voltage
Bj year of
manufacture F force Nr number
Pos: 18 /R VT/Bes chrei bung/ Symb ole auf de mG erät/ AXI/AA P102/ Quets chgef ahr, War tung @ 0\mod_1380709172237_18.docx@ 1183@ 1 @ 1
4 Symbols on the device and information on the rating plate
Symbol Meaning
Warning: Danger of crushing
Service sticker; indicates when the next service is due.
Pos: 19 /R VT/B eschr eibung /Ty pensc hild/T ypens child - A AP102@ 1\mod_1448611719464_18.docx@ 15701@ @ 1
Information on the rating plate
1 Manufacturer logo incl.
address 6 Power consumption
2 Permissible uninterrupted
operating time 7 Country of manufacture
3 Part No. 8 Permissible voltage
range in volt
4 Serial No. 9 Nominal force
5 Year of manufacture
mm.yy 10 Type designation of
device
Pos: 20 /R VT/B eschr eibung /Pi ktogr amme auf Typ ensc hild/1 00er - R eihe/ Pi ktog ram me auf T yp ensc hil d- 100er @ 6\mod_1583229472910_18.docx@ 55439@ @ 1
Explanation of possible pictograms on the rating plate
Verification marking Canada/
USA Verification marking Australia
Verification marking Canada/
USA CE conformity marking product
safety in Europe
Registration of products on the
uniform customs territory
Read Operating Manual
Pos:21/RVT/Allgemeines/####Seitenumbruch####@ 0\mod_1380200837280_0.docx@ 885@ @1

AXI102 / AAP102
16
EN
Pos: 22 /RVT/Lieferumfang/2Geräte/Lieferumfang 12V AXI/AAP102@ 6\mod_1582706739892_18.docx@ 55114@ 1@ 1
5 Scope of supply
The scope of supply for the standard equipment includes:
AXI102 AAP102
Expander incl. operating manual Pusher tool incl. operating manual
Battery charger incl. operating
instructions Battery charger incl. operating
instructions
Battery 12 V DC Battery 12 V DC
Safety instructions Safety instructions
EU Declaration of Conformity EU Declaration of Conformity
Carrying case Carrying case
Optional additional accessories (e.g. expander head, adaptor) may also be included. Please contact
the system supplier for information on the scope of supply.
Pos: 23 /R VT/T echni sche Da ten/TD --AAP/ AXI102 @ 6\mod_1582707053474_18.docx@ 55138@ 1 @ 1
6 Technical data
AXI102 expander without expander head
Product number: 45200 45222 45250 45255 47492
Expander cone pitch: 20° 18° 18° -- 18°
Expansion stroke: 20 mm 25 mm 25 mm 25 mm 23,5 mm
Expansion range: In accordance with information from the system manufacturer
Rated voltage/battery: 12 V DC (lithium-ion) / M12 (Milwaukee)
Power consumption: 240 W
Nominal force: 10 kN 10 kN 10 kN 24,5 kN 16 kN
Height without battery: 324 mm 324 mm 324 mm 330 mm 333 mm
Length without battery: 119 mm 131 mm 131 mm 132 mm 122 mm
Width: 69 mm 69 mm 69 mm 69 mm 69 mm
Weight without battery: 1,7 kg 1,75 kg 1,76 kg 2,27 kg 1,95 kg
Max. noise level: 86,5 db(A) 1)
Noise pressure level at
user's ear: 75,5 db(A) 1)
Vibration value: <2,5 m/s² 2)
Type of protection: IP20
Temperature range during
operation: -10°C to +50°C

AXI102 / AAP102
17
EN
AAP102 pusher tool without adaptor
Product number: 45170 45225 45230 46330 47140 47501
Adaptor mount: Ø27 mm Ø33 mm Ø33 mm Ø29,6 mm Ø36 mm Ø33 mm
Pushing range: In accordance with information from the system manufacturer
Working stroke: Depends on system manufacturer
Rated voltage/battery: 12 V DC (lithium-ion) / M12 (Milwaukee)
Power consumption: 240 W
Nominal force: 14 kN 17 kN 23 kN 19 kN 38 kN 19 kN
Height without battery: 325 mm 354 mm 330 mm 330 mm 338 mm 330 mm
Length without battery: 195 mm 277 mm 219 mm 212 mm 207 mm 219 mm
Width: 69 mm 89 mm 69 mm 69 mm 69 mm 69 mm
Weight without battery: 2,1 kg 3,3 kg 2,34 kg 2,3 kg 2,7 kg 2,4 kg
Max. noise level: 86,5 db(A) 1)
Noise pressure level at
user's ear: 75,5 db(A) 1)
Vibration value: <2,5 m/s² 2)
Type of protection: IP20
Temperature range during
operation: -10°C to +50°C
1) Measurement uncertainty 3 db(A) 2) Measurement uncertainty 1,5 m/s²
Pos: 24 /R VT/T echni sche Da ten/ Gehör schut z/TD--G ehörsc hutz @ 2\mod_1469775048472_18.docx@ 22083@ @ 1
Information!
Wear hearing protection.
Pos:25/RVT/TechnischeDaten/Schwingung/TD--Schwingung@ 2\mod_1469773528240_18.docx@ 22060@ @ 1
The stated vibration emission value was measured using a standard test procedure and can be
employed for the purpose of comparison with another device.
The stated vibration emission value can also be used to obtain an initial estimate of interruptions
during intermittent operation.
Caution The vibration emission value may differ from the stated value while the device is actually in
use, depending upon the manner in which the device is used. It may be necessary to establish safety
measures to protect operating personnel, depending on the actual conditions of use (intermittent
operation.
Pos: 26 /R VT/T echni sche Da ten/ Ladeg erät/TD --Ladeg er ät @ 0\mod_1381215657501_18.docx@ 1310@ @ 1
Battery charger
For information on the function and operation of the battery charger and the rechargeable batteries,
please consult the battery charger operating instructions.
Pos: 28 /R VT/ Kur zbes c hr eibung / Pre ssa ut oma ti k/PA--A XI102 @ 6\mod_1582811300421_18.docx@ 55286@ 123@ 1
7 Brief description
7.1 AXI102 expander (Fig. 1)
1 Start button
5 Release button
7 Expander head
14 Battery
7.1.1Automatic press cycle (Fig. 1)
The expander features positive control. During expansion, the expander remains in the position
reached, even if the start button (1) is temporarily released. When the intended switch-off force is
achieved, it is perceptible by means of an increase in the motor speed and a discernible decrease in
pressure. When the start button (1) is released, the device returns to its initial position. For safety

AXI102 / AAP102
18
EN
reasons, the positive control is only activated after a minimum force has been attained. Until this force
is achieved, the expansion process can be interrupted at any time by releasing the start button (1).
The device then automatically returns to its initial position.
Pos: 29 /R VT/K urzbes chr eibung /Entr iegel ungs knopf/ AXI1 02 @ 0\mod_1382426033219_18.docx@ 1414@ 3@ 1
7.1.2Release button (5) (Fig. 1)
The release button (5) is used to return the tool to its initial position before the expansion process has
been completed. In order to do this, press the release button (5) until the expander head (7) has
moved back completely.
Pos: 30 /R VT/ Kur zbes c hr eibung / Pre ssa ut oma ti k/PA--AAP102@ 6\mod_1583245266539_18.docx@ 55489@ 23 @ 1
7.2 AAP102 pusher tool (Fig. 2)
1 Start button
5 Pusher adapter
7 Expander head
14 Battery
7.2.1Automatic press cycle (Fig. 2)
The pusher tool features positive control. During compression, the pusher tool remains in the position
reached, even if the start button (1) is temporarily released. When the intended switch-off force is
achieved, it is perceptible by means of an increase in the motor speed and a discernible decrease in
pressure. When the start button (1) is released, the device returns to its initial position. For safety
reasons, the positive control is only activated after a minimum force has been attained. Until this force
is achieved, the pressing operation can be interrupted at any time by releasing the start button (1).
The device then automatically returns to its initial position.
Pos: 31 /R VT/ Kur zbes c hr eibung / Entr ieg el ung skn op f/AA P1 02 @ 0\mod_1382427863945_18.docx@ 1420@ 3 @ 1
7.2.2Release button (5) (Fig. 2)
The release button (5) is used to return the tool to its initial position before the pressing operation has
been completed. In order to do this, press the release button (5) until the pusher adaptor (7) has
moved back completely.
Pos: 32 /R VT/ Kur zbes c hr eibung /D r ehb arer Kopf /DK--AAP102 @ 1\mod_1448549759659_18.docx@ 15628@ 3 @ 1
7.2.3Rotatable head (Fig. 2)
The pusher tool is equipped with a rotatable head. It cannot be rotating during the pressing operation.
Pos: 33 /R VT/ Kur zbes c hr eibung / Sc hie bea dapt er/ Schi e bead apt er @ 1\mod_1448462990250_18.docx@ 15484@ 3 @ 1
7.2.4Pusher adaptor (Fig. 3)
The nominal width and the name of the system supplier are inscribed on the pusher adapters.
Furthermore, an arrow indicates the installation direction and a number indicates the order. If the
nominal widths for a size are aligned with each other, the arrows and the numbers will be in line.
Pos: 35 /RV T/Kurz bes chr eib ung /A kku allg emei n/Ü ber sc hrif t/A A--ÜS--AC O102, AC O152, AC O202X L, AXI/ AAP10 2, @ 0\mod_1382447195475_18.docx@ 1453 @ 2@ 1
7.3 Battery
Pos: 36 /R VT/K urzbes chr eibung /Akk u allge mein/ Akku ab nehm en + aufse tzen/ AAP/ AXI10 2@ 0 \mod_1402922267408_18.docx@2711 @ @ 1
Removing the battery (Fig. 4)
Push in (1) the two release buttons (A) and then remove the battery (2).
Inserting the battery (Fig. 5)
Slide the battery into the device as illustrated until it clicks into place.
Pos: 37 /R VT/ Kur zbes c hr eibung / Akk u all ge mein/ A kku Z ust ands anz eig e/AC O 102, ACO1 52, AXI/A AP 102 @ 0\mod_1382444821884_18.docx@ 1440@ @ 1
Battery charge indicator (Fig. 1)
The 4 green LEDs (4) indicate the charge level of the battery. The number of LEDs lit up denotes the
battery charge. If the LED (2) is flashing, the battery is empty and no further travel is possible.
Pos: 38 /R VT/Kur zbes chrei bung/ Gerät + Akk u/Info welc her Akk u/12V : AAP/AX I102 @ 0\mod_1402925654215_18.docx@ 2725 @ 2 @1
7.4 AXI102 and battery
Information!
The AXI102 expander and AAP102 pusher tool must only be operated with
12 V DC lithium-ion rechargeable batteries. The 12 V battery must only be used in
the appropriate press devices.
Pos: 39 /R VT/K urzbes chr eibung /Akk u allge mein/ Info: nic ht gel aden + T emper atur en/AA--NG--ACO 102, ACO1 52, ACO /ECO20 2, ACO202 XL, AFP/ EFP20 2, AXI/AA P102 @ 2\mod_1469431352019_18.docx@21590 @ @ 1

AXI102 / AAP102
19
EN
Information!
The batteries are not charged at the factory.
Therefore:
– Charge the batteries before using for the first time.
Information!
Limited temperature range for charging and storing the batteries.
Therefore:
– It is imperative that the operating instructions for the battery charger are complied
with.
Pos: 40 /R VT/Kur zbes chrei bung/ Gerät + Akk u/lä ngere Nic htbe nutzung /ACO 102, AC O152, AC O/EC O202, ACO 202XL ,A XI/A AP102 @ 0\mod_1382607497309_18.docx@ 1524 @ @ 1
Feature of the press device after extended periods out of use or when changing the battery:
If the press device is out of use for approx. 30 minutes or the battery is reinserted, it switches off. No
LED is lit up any longer. Press the start button (1) briefly to start the press device.
Pos: 41 /R VT/I nbetri ebn ahme un d Betrie b/Ger ät vorb erei ten/Vor ber eiten kompl ett AXI 102 @ 0\mod_1382619745430_18.docx@ 1577 @ 12@ 1
8 Start-up and operation of AXI102
8.1 Preparing AXI102 (Fig. 6)
CAUTION!
Damage to the expander
Using expander heads from other system suppliers may result in damage to the
expander. The pitch of the expander cones differs from one system supplier to another.
Therefore:
– Only use expander heads approved by the system supplier.
– Only use expanders with intact, clean expander heads.
Information!
For product number: 45200; 45222; 45250:
Grease the expander cone
• Screw the expander head onto the expander and tighten by hand.
• Insert the battery.
Pos: 42 /R VT/I nbetri ebn ahme un d Betrie b/Ver press en/00 b- Aufw eiten k omplet t AXI10 2 @ 0\mod_1387198222391_18.docx@ 1746@ 2@ 1
8.2 Expanding operation (Fig. 7)
CAUTION!
Danger of crushing!
There is a risk of crushed fingers and hands during the expanding process.
Therefore:
– Keep body parts and foreign objects away from the operating zone during the
expansion operation.
– Do not perform dry runs without expanding a pipe.
– Do not operate the device without the expander head.
Information!
Before an expanding process, observe the system manufacturer's instructions.
1. Check that the nominal width of the pipe matches the nominal width of the expander head.
2. Check that the pipe and expander head are from the same system manufacturer.
3. Slide the pipe into the expander head as far as the stop.
4. Press the start button and hold it until the pipe has been expanded.
Pos:43/RVT/Allgemeines/####Seitenumbruch####@ 0\mod_1380200837280_0.docx@ 885@ @1

AXI102 / AAP102
20
EN
Pos: 44 /R VT/I nbetri ebn ahme un d Betrie b/Ger ät vorb erei ten/Vor ber eiten kompl ett AAP 102 @ 0\mod_1382620048811_18.docx@ 1583@ 12 @ 1
9 Start-up and operation of AAP102
9.1 Preparing AAP102
CAUTION!
Damage to pusher tool and pusher adaptors
Pressing operations using a system from a manufacturer for which the pusher tool and
pusher adaptors have not been designed may result in damage to the pusher tool and
pusher adaptors.
Therefore:
– Make sure that the system is press-fitted using the pusher tool and pusher
adapters from the system manufacturer.
1. The guide rod must be clean and greased.
If necessary, clean and lubricate the guide rod.
2. Press the pin into the bolt and keep it pressed (1). (Fig. 8).
Pull the bolt out completely (2).
Release the pin.
3. Push the pusher adapter with inscription 1 onto the guide rod in the direction of the arrow (Fig. 9).
4. Align the pusher adaptor with the guide rod such as to ensure that the transverse holes are on
the same axis (Fig. 10).
CAUTION!
Damage to pusher tool and pusher adaptors if the bolt is not pushed in
correctly (Fig.11)
An incorrectly inserted bolt may result in damage to the pusher tool and pusher
adaptors.
Therefore:
– Make sure that bolts are fully inserted and locked in place.
5. Lock the pusher adapter in place with the bolt (Fig. 10)
To do so:
Press the pin into the bolt and keep it pressed (1).
Push the bolt in fully (2).
Release the pin in the bolt.
CAUTION!
Damage to pusher tool and pusher adaptors (Fig.12)
The pusher tool and pusher adaptors can be damaged by
•Fitting nominal widths that do not match
•Pressing a system from a manufacturer for which the pusher tool and
pusher adaptors have not been designed.
Therefore:
– Make sure that adaptors have the same nominal width.
– Make sure that the matching nominal widths are lined up.
– Make sure that the system is press-fitted using the pusher tool and pusher
adapters from the system manufacturer.
6. Push the pusher adapter with the inscription 2 onto the guide rod in the direction of the arrow and
lock it using the bolt (Fig. 13)
7. Insert the battery.
Pos:45/RVT/Allgemeines/####Seitenumbruch####@ 0\mod_1380200837280_0.docx@ 885@ @1

AXI102 / AAP102
21
EN
Pos: 46 /R VT/I nbetri ebn ahme un d Betrie b/Ver press en/00c - Ver pr ess en kompl ett AAP 102 @ 0\mod_1387198591609_18.docx@ 1752 @2 @ 1
9.2 Performing the pressing operation
CAUTION!
Faulty pressing!
Dirt, swarf, etc. in the contours of the pusher adaptors leads to a risk of faulty pressing.
Therefore:
– Ensure that there is no dirt, swarf, etc. in the contours of the pusher adapters.
Information!
To align the tool with the pipe, compliance with the system manufacturer's instructions
is essential.
1. Place the pusher tool on the joint to be pressed in accordance with information from the system
manufacturer.
CAUTION!
Danger of crushing by moving parts
Fingers risk being crushed.
Therefore:
– Keep all body parts and foreign objects away from the operating zone.
Information!
The pusher tool must be held in the aligned position during the entire pressing
operation.
2. Press the start button and hold it until the pressing process is complete.
Pos:47/RVT/Allgemeines/####Seitenumbruch####@ 0\mod_1380200837280_0.docx@ 885@ @1

AXI102 / AAP102
22
EN
Pos: 48 /R VT/I nbetri ebn ahme un d Betrie b/Be deutu ng der LED -Anzeig e/K apit elüb eers chri ft+Ü ber schri ft - T abell e @ 0\mod_1385652188500_18.docx@ 1618@ 2@ 1
9.3 Meaning of the LED display
LED display Status/cause Measure
Pos: 49 /R VT/I nbetri ebn ahme un d Betrie b/Be deutu ng der LED -Anzeig e/Al le_ LEDs _aus-Ka pit el 7.4 @ 1\mod_1448621701837_18.docx@ 15723 @ @ 1
All LEDs off. The device is switched off. Briefly press the start button (1) (see
section 7.4).
Pos: 50 /R VT/I nbetri ebn ahme un d Betrie b/Be deutu ng der LED -Anzeig e/Grü ne_LED _leuc htet @ 0\mod_1400057953215_18.docx@ 2330@ @ 1
Green LED (2) lights up. On standby.
Pos: 51 /R VT/I nbetri ebn ahme un d Betrie b/Be deutu ng der LED -Anzeig e/Gr ün e_LED _bl ink t @ 0\mod_1400062218616_18.docx@ 2337@ @ 1
Green LED (2) flashes. Insufficient battery charge. Charge or replace battery.
Pos: 52 /R VT/I nbetri ebn ahme un d Betrie b/Be deutu ng der LED -Anzeig e/Gr üne_ LED s (4) @ 0\mod_1400077557059_18.docx@ 2379@ @ 1
Green LEDs (4) Battery charge display
Pos: 53 /R VT/I nbetri ebn ahme un d Betrie b/Be deutu ng der LED -Anzeig e/Rot e_LED _blin kt @ 3\mod_1489564282895_18.docx@ 28653@ @ 1
Red LED (3) flashes. Device not within the
temperature range The device only works within a
temperature range of -10 to +50°C. If the
red LED is flashing, the device must be
moved into a warmer or colder area. The
device can be warmed to operating
temperature by means of dry runs.
If the device is too warm it must be cooled
down by means of a short break.
Pos: 54 /R VT/I nbetri ebn ahme un d Betrie b/Be deutu ng der LED -Anzeig e/Rot e_L ED _leuc htet @ 0\mod_1400062249067_18.docx@ 2358@ @ 1
Red LED (3) lights up. Device fault. Press the start button (1). If this is
unsuccessful, the press device is
defective.
Send the device to a specialist workshop.
NOTE!
The pressing operation may not have
been completed; please check and repeat
if required.
Pos: 55 /R VT/I nbetri ebn ahme un d Betrie b/Be deutu ng der LED -Anzeig e/R ote-und_Grüne_LED_blinken_abwechselnd@ 0\mod_1400062253497_18.docx@2365 @ @ 1
Red (3) and green (2)
LED flash alternately. Service interval reached. Take the press device to be serviced.
Pos: 56 /R VT/R einig ung, W artung ,R epar atur /01a - Vor sic ht -Einsc h alter- ACO102,ACO152,ACO202XL,ACO401,AXI/AAP102@ 0\mod_1390815867244_18.docx@ 1770@ 1@ 1
10 Cleaning, maintenance and repair
CAUTION!
Risk of injury during cleaning or repair work from inadvertently pressing
the On switch.
Therefore:
– Comply with the safety instructions and always remove the battery before
performing cleaning, servicing or repair work.
Pos: 57 /R VT/R einigu ng, War tung, Rep aratur /02 - Servi ce ans chri ft - A CO 102, ACO152,ACO/ECO202,ACO202XL,ECO301,ACO401,AFP/EFP202,AXI/AAP102@ 5\mod_1563274700835_18.docx@ 45254 @ @ 1
Service addresses
Novopress GmbH Pressen und Presswerkzeuge & Co. KG
Welserstr. 7
41468 Neuss
Germany
You can find the addresses of authorised specialist workshops by contacting Novopress or at
www.novopress.de.
Pos: 58 /R VT/R einig ung, W artung ,R epar atur /03d - Inf ormati on War tung - AXI/AAP102@ 0\mod_1403078178579_18.docx@ 2790@ @ 1
Service intervals
Service and repair work may only be carried out by Novopress or the authorised Novopress specialist
workshops.
Information!
The next service deadline is indicated on the press device.
This service must be performed at least every 2 years or at the latest when the LED
display indicates that a service is due (see Section 9.3 Meaning of the LED display).
Pos: 59 /R VT/R einig ung, W artung ,R epar atur /04a - R egel mäßig 1. ter T eil - Bil d 14+ 1 5--AXI/AAP102@ 0\mod_1403079596126_18.docx@ 2797 @ @ 1

AXI102 / AAP102
23
EN
Routine inspection (before use, at the start of the working day) and when soiled (Fig. 14+15)
Check for visible damage, material cracks and other signs of wear. If defects are found, do not use the
device and have it repaired.
Pos: 60 /R VT/R einigu ng, War tung, Rep aratur /04c - R egelm äßig - 2. ter Teil- AAP/AXI102 @ 0\mod_1403011531774_18.docx@ 2782@ @ 1
Expander •Clean expander head.
•Clean and grease ram/expander cone.
Pusher tool •Clean all adaptors completely with a solvent.
•Remove deposits from the contours of the adaptors.
•Clean the contours of the adaptors with a solvent.
•Lubricate the pusher tool bolts with machine oil.
•Clean and grease the guide rod.
Pos: 61 /RV T/E nt sorg ung /01 - V orsi cht + Übers chr ift -al le @ 0\mod_1392977304612_18.docx@ 1858@ 1 @ 1
•
11 Disposal
CAUTION!
Groundwater hazard
The device contains hydraulic fluid.
Hydraulic fluids pose a hazard to groundwater. Uncontrolled drainage or improper
disposal is punishable by law.
Therefore:
– Dispose of the device in an environmentally responsible manner.
Pos: 62 /R VT /Ent sor gu ng/0 2 - Bedi enu ngsanl eitu ng Akku + La deger ät - all e bis auf EC O301 @ 0\mod_1392977618930_18.docx@ 1864@ @ 1
•
The instructions in the operating instructions provided with the battery charger must be complied with
when disposing of rechargeable batteries and the charger.
Pos: 63 /RV T/E nt sorg ung /03 - dr itter T eil - al le @ 0\mod_1392977709253_18.docx@ 1870@ @1
•
The product must not be disposed of as normal household waste.
Novopress recommends that disposal be carried out by authorised specialist companies.
Alternatively, waste devices can be returned directly to Novopress (or a specialist workshop) for
proper disposal.
Pos: 64 /R VT/G ewähr leist ung un d Garan tie/0 1b -Ü bersc hrif t + 1.t er Satz - AXI/AAP102@ 0\mod_1393226020554_18.docx @ 188 6@ 1 @ 1
•
12 Warranty and guarantee
Novopress provides the full statutory warranty of 24 months for the AXI102 expander and AAP102
pusher tool. The warranty period always commences on the date of delivery, which must be proven by
means of the sales documentation in case of doubt.
Pos: 65 /R VT/G ewähr leist ung und Garan tie /0 2 - 2. ter Teil vo m 1.ten A bsch nitt - all e @ 0\mod_1393226295176_18.docx@ 1892 @ @ 1
•
Within the warranty period, the warranty covers the repair of any damage or malfunction of these tools
that is attributable to material or production faults.
The following are not covered by the warranty:
•Damage caused by improper use or inadequate servicing.
•Damage caused by the use of products not approved by Novopress for use with its
press devices.
•Damage caused by pressing unsuitable pipes or fittings.
For wearing parts, the Novopress warranty lasts only for the intended service life.
Service work and parts provided in response to warranty claims do not have to be paid for. However,
all shipping costs shall be borne by the user.
Claims can only be accepted if the device is delivered to Novopress or a Novopress workshop in an
assembled state.
Repair or replacement of the device under warranty does not result in an extension of the warranty
period. Repair or replacement can only be performed using as-new components, the function of which
corresponds to that of the old components. All parts that are faulty and consequently replaced are the
property of the manufacturer.
Pos: 66 /R VT/G ewähr leist ung un d Garan tie/0 3c- A nsc hluss g ara nti e 1 ja hr - AXI/AAP102@ 0\mod_1393237934441_18.docx@ 1910@ @ 1
•
Extended warranty on expiry of the statutory warranty period
We voluntarily provide the following extended guarantee beyond the statutory warranty period.

AXI102 / AAP102
24
EN
1-year extended warranty for new expanders, pusher tools and pusher adaptors
Novopress provides an extended warranty of one year for all new expanders, pusher tools and pusher
adaptors that have been serviced at least every 12 months by Novopress or by an authorised
Novopress workshop. There is a charge for this service work. For details of costs, please contact
Novopress or an authorised Novopress workshop
Pos: 67 /R VT/G ewähr leist ung un d Garan tie/0 4- Ge währl eist ung auf Re parat uren @ 0 \mod_1393238067679_18.docx@ 1916@ @ 1
•
Repair warranty
Novopress provides the following repair and spare parts warranty beyond the warranty period for new
products that undergo repair after this period:
•6-month warranty for replaced spare parts.
•12-month warranty for replaced assemblies.
•12-month warranty for replaced press devices.
Pos: 68 /RV T/EG-Ko nfor mit äts er kl äru ng/0 0 K onf or mitä ts erkl äru ng @ 5\mod_1520513310993_18.docx@ 35543@ 1 @ 1
•
13 EU Declaration of Conformity
EU declaration of conformity and list of maintained directives and applicable standards see attached
document EU declaration of conformity.
=== En de der Lis te für T extmar ke Inhal t= ==
Other manuals for AXI102
2
This manual suits for next models
6
Table of contents
Other NovoPress Tools manuals

