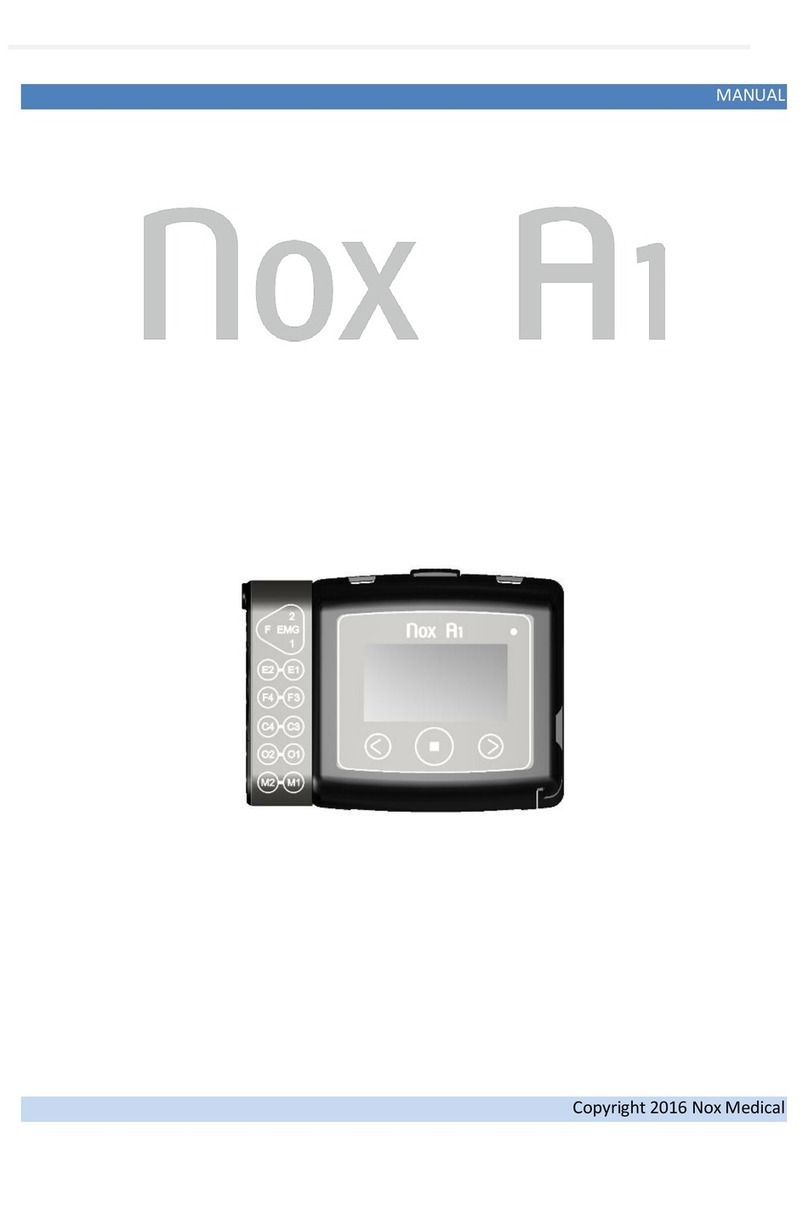
Nox Medical A1 User manual

MANUAL
Copyright 2013 Nox Medical

Nox A1 Manual
Version 1.0
Latest Revision: 29 August 2013
Copyright © 2013
Nox Medical - All rights reserved
Manufactured by:
Nox Medical ehf
Katrinartuni 2
IS - 105 Reykjavik
Iceland
Website: www.noxmedical.com
For distributor information go to:
www.noxmedical.com
Copyright Notice
No part of this publication may be reproduced, transmitted, transcribed, stored in a retrieval system, or
translated into any language or computer language, in any form, or by any means: electronic, mechanical,
magnetic, optical, chemical, manual, or otherwise, without the prior written authorization from Nox Medical.
Disclaimer
This document may contain typographical errors or technical inaccuracies. Nox Medical does not accept any
liability for the use or misuse whether direct or indirect of the products, or for damages arising out of the use of
or inability to use the products. Users must accept all responsibility for any results obtained by or concluded
from data obtained by the products including software from Nox Medical. All clinical conclusions and decisions
that are based on the use of this product are the responsibility of the user.
License Notice
The NOX-A1 device software contains BIGDIGITS multiple-precision arithmetic code originally written by David
Ireland, copyright © 2001-8 by D.I. Management Services Pty Limited <www.di-mgt.com.au>, and is used with
permission.

Nox A1 Manual
~ 3 ~
Table of Contents
Table of Contents .....................................................................................................................................3
Introduction..............................................................................................................................................5
Scope ...................................................................................................................................................5
Warnings and Cautions for Use ...........................................................................................................5
Device Description....................................................................................................................................7
Intended Use........................................................................................................................................7
Contraindications.................................................................................................................................7
A1 Interface .........................................................................................................................................8
Operating the Device..............................................................................................................................10
Connecting the A1 Device to a Computer .........................................................................................10
Configuring and Downloading from A1 Device..................................................................................10
Manually Starting/Stopping a Recording...........................................................................................11
Starting a Recording at a Scheduled Time .........................................................................................12
Signal and Status Checks.................................................................................................................... 13
Patient Hookup.......................................................................................................................................16
Inserting a Battery to the A1 Device..................................................................................................16
Attaching the A1 Device and the RIP Belts ........................................................................................18
Attaching the Nasal Cannula..............................................................................................................20
Measuring EEG Signals.......................................................................................................................21
Measuring EMG/ECG Signals .............................................................................................................22
Measuring Mask Pressure..................................................................................................................23
Measuring Capnography....................................................................................................................24
Measuring Pulse and Oxygen Saturation...........................................................................................24
Inserting Batteries into the Oximeter ................................................................................................ 25
Selecting Oximeter Sensor Size..........................................................................................................27
Attaching the Pulse Oximeter Module and Sensor............................................................................28
Maintenance...........................................................................................................................................30
Compatible Sensors and Devices............................................................................................................32

Nox A1 Manual
~ 4 ~
Specifications..........................................................................................................................................36
A1 Device ...........................................................................................................................................36
Material Information .........................................................................................................................37
Battery Information ...........................................................................................................................38
Regulatory Information ..........................................................................................................................39
Performance Testing and Validation Summary .................................................................................39
Classifications ....................................................................................................................................39
Description of Symbols and Abbreviations........................................................................................39
Bluetooth® Wireless Technology .......................................................................................................41
EMC Information ...............................................................................................................................41

Nox A1 Manual
~ 5 ~
Introduction
Congratulations on choosing the new Nox A1 portable PSG recorder. The A1 is an AASM (American
Academy of Sleep Medicine) compliant PSG recorder and can be used for home sleep testing
polysomnography (PSG). The device is compact, lightweight and easy to use. Simple sensor placement
makes setup quick and easy.
Scope
This manual covers the A1 device and its components along with external sensors and devices that
have been validated with the A1 system. It does not cover the software application needed for device
configuration, data download, review and/or analysis.
Warnings and Cautions for Use
The device is NOT CERTIFIED TO BE USED FOR CONTINUOUS MONITORING where failure to
operate can cause injuries or death of the patient. The term CONTINUOUS MONITORING is
specified in the standard IEC 60601-1.
Caution: U.S. Federal law restricts this device to sale by, or on the order of, a physician.
This device complies with the international standard IEC 60601-1-2 for electromagnetic
compatibility for medical electrical equipment and/or systems. This standard is designed to
provide reasonable protection against harmful interference in a typical medical installation.
However, because of the proliferation of radio-frequency transmitting equipment and other
sources of electrical noise in healthcare and other environments, it is possible that high levels of
interference due to close proximity or strength of source might disrupt the performance of the
device. Medical electrical equipment needs special precautions regarding EMC, and all equipment
must be installed and put into service according to information detailed in the EMC Information
section of this manual.
The A1 device is designed to be safe for use for pacemaker patients as long as the pacemakers
comply with the EN 50061 standard of electrical safety of medical devices. However it should be
noted that a continuous low current impedance test at 500 Hz is ongoing throughout the sleep
study. The operator should consult the accompanying documents of the pacemaker regarding its
certifications and requirements of use or, if necessary, contact the producer.
The A1 device is not defibrillator proof.
The A1 device is not intended to be used with high frequency (HF) equipment
The device is classified as an ordinary equipment regarding ingress of liquids, i.e. it is NOT drip-
proof, splash-proof or watertight.
The device is NOT suitable for use in presence of a FLAMMABLE ANAESTHETIC MIXTURE WITH
AIR or WITH OXYGEN or NITROUS OXIDE.
As with all medical equipment, carefully route cables and connections to reduce the possibility of
entanglement or strangulation.
Do not use any part of the A1 system, including electrodes, in an MRI (Magnetic Resonance
Imaging) environment.
The A1 device and RIP belts should be worn over clothing.
Do not use damaged equipment, sensors or accessories.
The A1 device and its accessories should be removed from the patient before download of data.
There are no user serviceable parts inside the A1 device. The A1 device should be serviced by
authorized parties only. The warranty is void if the A1 device is opened.
WARNING: No modification of this equipment is allowed.

Nox A1 Manual
~ 6 ~
To avoid risk of battery leakage, the A1 device should not be stored with a battery inserted in the
battery compartment.
External equipment intended for connection to signal input, signal output or other connectors
shall comply with the relevant product standard e.g. IEC 60950-1 for IT equipment and the IEC
60601-series for medical electrical equipment. In addition, all such combinations –systems –shall
comply with the safety requirements stated in the collateral standard IEC 60601-1-1 or the
general standard IEC 60601-1, edition 3, clause 16. Any equipment not complying with the
leakage current requirements in IEC 60601-1 shall be kept outside the patient environment i.e. at
least 1.5 m from the patient support. Any person who connects external equipment to signal
input, signal output or other connectors has formed a system and is therefore responsible for the
system to comply with the requirements. If in doubt, contact qualified medical technician or your
local representative.
The A1 system is only to be operated by skilled health care professionals.
The A1 device and accessories should be removed from patient before use of the USB connector.
The USB connector shall only be used for the purposes of configuring the device and downloading
data from the device.
WARNING: Avoid accidental contact between connected but unused APPLIED PARTS and other
conductive parts including those connected to protective earth.
Please read this manual carefully before use, especially sections marked with an
exclamation mark.

Nox A1 Manual
~ 7 ~
Device Description
The NOX A1 device is an AASM compliant PSG recorder.
The A1 input channels and built-in capabilities include the following:
13 unipolar channels; for recording of EEG, EOG and submental EMG
1 ground channel
4 bipolar channels; for recording of thermistor, ECG, EMG –LM, bruxism or additional EMG
1 pressure/cannula channel: for recording of nasal or mask pressure
2 respiratory effort channels; for recording of abdomen and thorax effort
3-D inbuilt acceleration sensor; for recording patient’s position and activity
Inbuilt microphone; for recording of audio and snoring
Inbuilt Bluetooth module; to support wireless connectivity allowing it to record signals from a
compatible Bluetooth pulse oximeter, and capnography data via the NOX EtCO2
All the unipolar inputs are recorded against customizable common reference with continuous
impedance check that is capable of self-adjusting the reference for lost/noisy EEG signals.
The Bluetooth function also allows wireless streaming of data for online check of signals.
The device is powered with one AA battery.
Intended Use
The NOX A1 device is intended for recording of physiological signals during sleep. The A1 device is
intended for patients greater than 2 years of age.
The intended environments are hospitals, institutions, sleep centers, sleep clinics, or other test
environments, including the patient’s home.
Contraindications
The A1 device is NOT intended for any patient monitoring or automatic diagnosis.

Nox A1 Manual
~ 8 ~
A1 Interface
The A1 device interface consists of a display, buttons, sensor inputs/connections and a USB
connector. The USB connector is placed under the battery lid and connects to a mini USB cable for
device configuration and data download. The display allows for various status checks, like battery
charge and Bluetooth connection. See the figures and tables below for detailed description.
NUMBER
FUNCTION
1
Display
2
Push button –Middle
3
Push button –Forward
4
Push button –Backward
5
Clip strap loops
6
Microphone –For recording of respiratory sounds;
7
Indicator light for device status
8
Pressure lock –Connects to nasal cannula/mask pressure tube
9
Unipolar touch proof inputs
10
Reference ground input
11
Bipolar touch proof inputs

Nox A1 Manual
~ 9 ~
12
Battery lid –Covers the battery and the USB connector
13
Battery lid pin
14
Metal snaps –Connects to thorax RIP belt
15
Metal snaps –Connects to abdomen cable

Nox A1 Manual
~ 10 ~
Operating the Device
The A1 device is operated with three push buttons located on the front panel. Pressing the Middle
button turns on the display. The display will automatically turn off in 40 seconds.
Connecting the A1 Device to a Computer
To connect an A1 device to a computer you need to access the USB connector on the device. The USB
connector is placed under the battery lid making it inaccessible and tamper proof for children. To
open the battery lid, press with a pen or a similar tool on the battery lid pin and slide the battery lid
down, towards the bottom of the device. The A1 device connects to the computer by using a mini USB
cable. The battery does not have to be inserted while the device is connected to the computer.
When the A1 device is connected to the computer the device display lights up and displays a message
saying the device is connected to the computer.
Configuring and Downloading from A1 Device
To download a recording or configure the A1 device you will need to start the Noxturnal software
application after connecting the device to the computer. Please refer to the applicable software user
manual for more information on how to perform those tasks.
When you are done working with the device unplug the mini USB cable, insert the battery and close
the battery compartment by pressing the lid back towards the device without causing any strain, then
slide it back into position, towards the top of the device.

Nox A1 Manual
~ 11 ~
Manually Starting/Stopping a Recording
If the device has been configured to start the recording manually, you can use the Middle button to
manually start a recording. Pressing the middle button turns on the display. The device will instruct
you to “Hold middle button down to start recording”. Please do so until you see “Recording Duration”
displayed. Note the Middle button needs to be pressed down for approximately 4-5 s before
“Recording Duration” displays. At this point the device has started to record data. After the display
turns off, the light on the top right side of the display will blink intermittently indicating that recording
is taking place. Use the same method to manually stop the recording.
The device performs continuous impedance checks throughout the recording.
If the duration of the recording has been specified during configuration, the recording will
automatically stop after the specified duration.

Nox A1 Manual
~ 12 ~
Starting a Recording at a Scheduled Time
If the device has been configured to automatically, start a recording at a scheduled time there are no
actions required for the recording to start. Pressing the Middle button before the recording has
started will display a countdown to the specified start time of the recording. If the recording has
begun, the display shows the current duration of the recording.

Nox A1 Manual
~ 13 ~
Signal and Status Checks
The indicator light on the device blinks green when a recording is in progress and the device is
functioning normally. When there are any device warnings the indicator light blinks orange. Warnings
might include:
Battery low
Information about the recording and the device is shown on the display. If the display is turned off,
pressing the Middle button turns it on. The display will turn itself off again after being inactive for 40
seconds.
1. On the top right corner is a battery bar
which shows the battery status. The
battery bar is full when the device has
fresh batteries.
2. In the bottom left corner is a number
indicating how many recordings are
stored on the device. The device can
contain as many recordings as the
internal 1GB memory allows.
Oximeter Signals
Pressing the Forward button once will show the patient’s actual oxygen saturation levels (SpO2) and
pulse rate in beats per minute (bpm).
If communication has not been established with the selected oximeter, a message is displayed
indicating that the device is trying to communicate with an oximeter with a certain serial number.

Nox A1 Manual
~ 14 ~
Make sure that the serial number of the oximeter used matches the configured serial number. Also,
be sure that the Bluetooth symbol is displayed on the screen of the oximeter. If the Bluetooth symbol
is not displayed, the Bluetooth is inactive and the A1 device cannot connect to the oximeter.
If the Bluetooth symbol is not visible, press the small button at the top of the oximeter and hold it
down for 3 seconds or until the Bluetooth symbol appears on the screen.
If the oximeter probe is not on the finger or the values received from the oximeter are outside normal
range, a message comes up on the display saying Probe not on finger.

Nox A1 Manual
~ 15 ~
Capnography Signals
When the A1 device has been configured to record capnography data pressing the Forward button
one more time will show the capnography display, including CO2waveform, end-tidal CO2(EtCO2)
value (mmHg) and respiratory rate/respiration per minute (rpm).
NOTE: If the A1 device has not succeeded in connecting with the capnography monitor, the display
will indicate that it is still trying to connect and will display the serial number of the NOX EtCO2
interface.

Nox A1 Manual
~ 16 ~
Patient Hookup
The A1 system is only to be operated by skilled health care professionals. A trained clinician should
perform the hookup of A1 system to the patient using the instructions provided in this manual. If the
patient is supposed to start the recording at home, the clinician trains the user how to do so.
Do not use damaged equipment, sensors or accessories.
As with all medical equipment, carefully route cables and connections to reduce
the possibility of entanglement or strangulation.
Always use fully charged or fresh battery for each sleep recording.
Inserting a Battery to the A1 Device
Before you start a recording you should make sure that the device has new or fully charged battery.
To insert a new battery do the following:
1. Open the battery compartment by pressing down the battery lid pin with a pen or similar
tool and slide the lid towards the bottom of the device.
2. Place one AA battery in the compartment aligning the battery poles as illustrated on the back
of the device (the positive (+) pole is towards the battery lid).
3. Close the battery compartment by pressing the lid back towards the device without causing
any strain, then slide it back into position, towards the top of the device. Make sure the lid is
securely closed.
The status of the battery can be checked by turning on the device. The battery status indicator
positioned in the upper right-hand corner of the device display allows you to check the battery status.
When the battery is running low during a recording the device will automatically stop the recording.

Nox A1 Manual
~ 17 ~
Always use fully charged or fresh battery for each sleep recording.
All lithium batteries used with the A1 device shall be according to the standard IEC
60086-4 Primary batteries - Part 4: Safety of lithium batteries.

Nox A1 Manual
~ 18 ~
Attaching the A1 Device and the RIP Belts
Step 1
Snap the clips that are attached to the device to the patient’s shirt.
1
Step 2 to Step 4
Snap the abdomen cable to the back of the device.
Place a RIP belt around the thorax and snap its ends to the back panel of the device.
Adjust the cable length as needed by wrapping it around the abdomen connection unit. Place
a RIP belt around the abdomen and snap in place.
2
3
4
Step 5
Attaching the device and respiratory sensors is now completed.
5

Nox A1 Manual
~ 19 ~
Adjusting the RIP Belts
Semi-disposable RIP Belts
Use the sliders to adjust the belt length. The slider is fixed by the hook/loop fastener.
Disposable RIP Belts
Fit the belts around the patient’s waist and thorax and adjust the length using the loop on each end to
adjust the belt length such that the belt covers about two thirds of the patient’s circumference when
the belt is unstretched. The length is fixed with hooks on the plastic connector of the belt.
Refer to the section Compatible Sensors and Devices regarding the types of Nox RIP belts that have
been validated with the A1 device.
NOTE: For most patients the disposable RIP belts do not need to be adjusted if the correct belt size is
chosen based on the patient’s abdomen circumference and/or body mass index (BMI). Belt size
selection tables accompany the product for more detailed instruction.
The A1 device and RIP belts should be worn over clothing.
The RIP belts should fit the patient snugly without being uncomfortably tight.
The disposable RIP belts are single use.
The semi-disposable RIP belts are reusable up to 5 times.
The use of the same disposable RIP belt on more than one patient poses a risk of
cross-infection.

Nox A1 Manual
~ 20 ~
Attaching the Nasal Cannula
Step 1
Place the nasal prongs gently in the nostrils. The prongs should point downwards inside the nostrils.
1
Step 2
Pull the cannula tubing over the ears and then position it under the chin.
Step 3
Slide the fastener snugly under the chin to hold the cannula tubing securely in place.
1
2
3
NOTE: The Nox nasal cannula with filter has a built-in hydrophobic filter and is the preferred way to
measure nasal airflow and snoring as it is designed to maximize the signal quality and fits directly with
the A1 device. If it is preferred to use a non-filtered Luer-lock cannula, it is necessary to use a filter
tube connector from Nox Medical to interface with the A1 device.
Refer to the section Compatible Sensors and Devices regarding the types of nasal cannulas that have
been validated with the A1 device.
Medical tape can be used to hold the cannula against the cheeks to secure the
cannula in place if necessary.
The nasal cannula is single patient use.
The use of the same nasal cannula on more than one patient poses a risk of cross-
infection.
Other manuals for A1
2
Table of contents
Other Nox Medical Medical Equipment manuals