Contents
Contents .................................................................................................................................................................... 3
Introduction ................................................................................................................................................................ 4
Regulatory Information .............................................................................................................................................. 5
Intended Use ......................................................................................................................................................... 5
Warnings and Cautions for Use ............................................................................................................................ 5
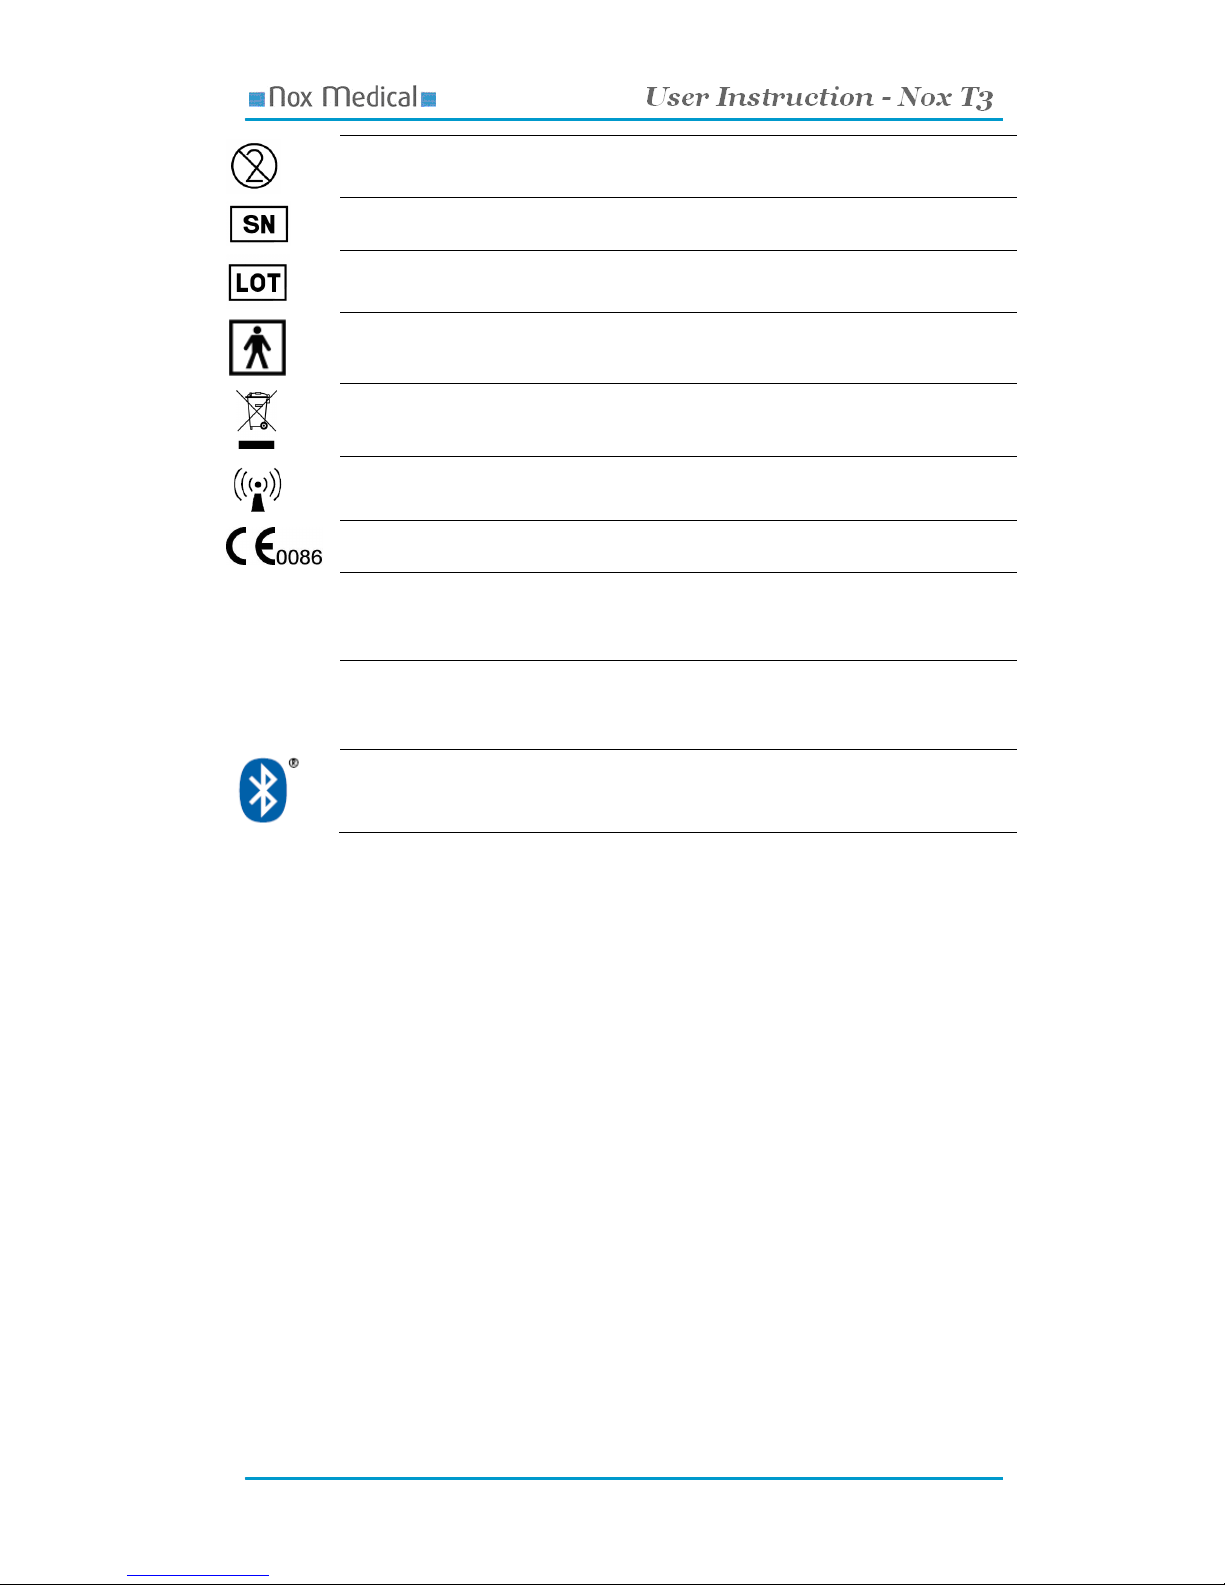
Guide to Symbols .................................................................................................................................................. 5
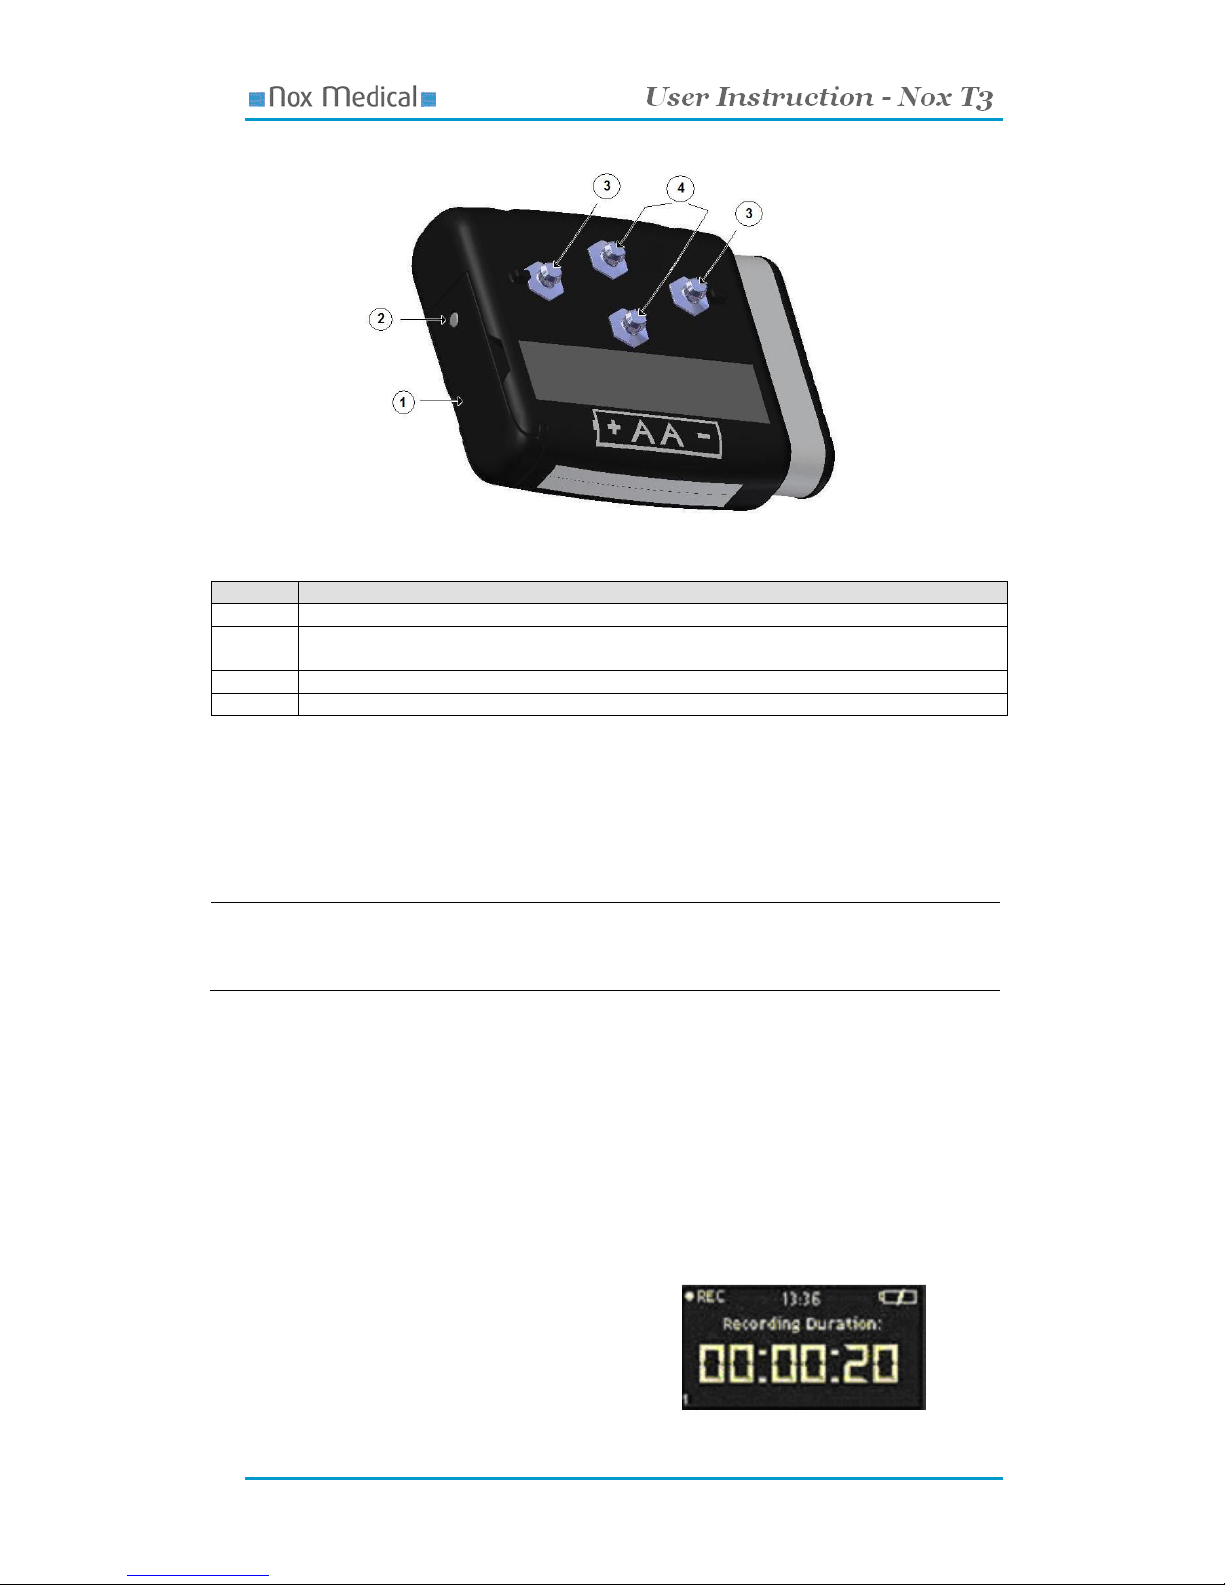
System Components ................................................................................................................................................... 7
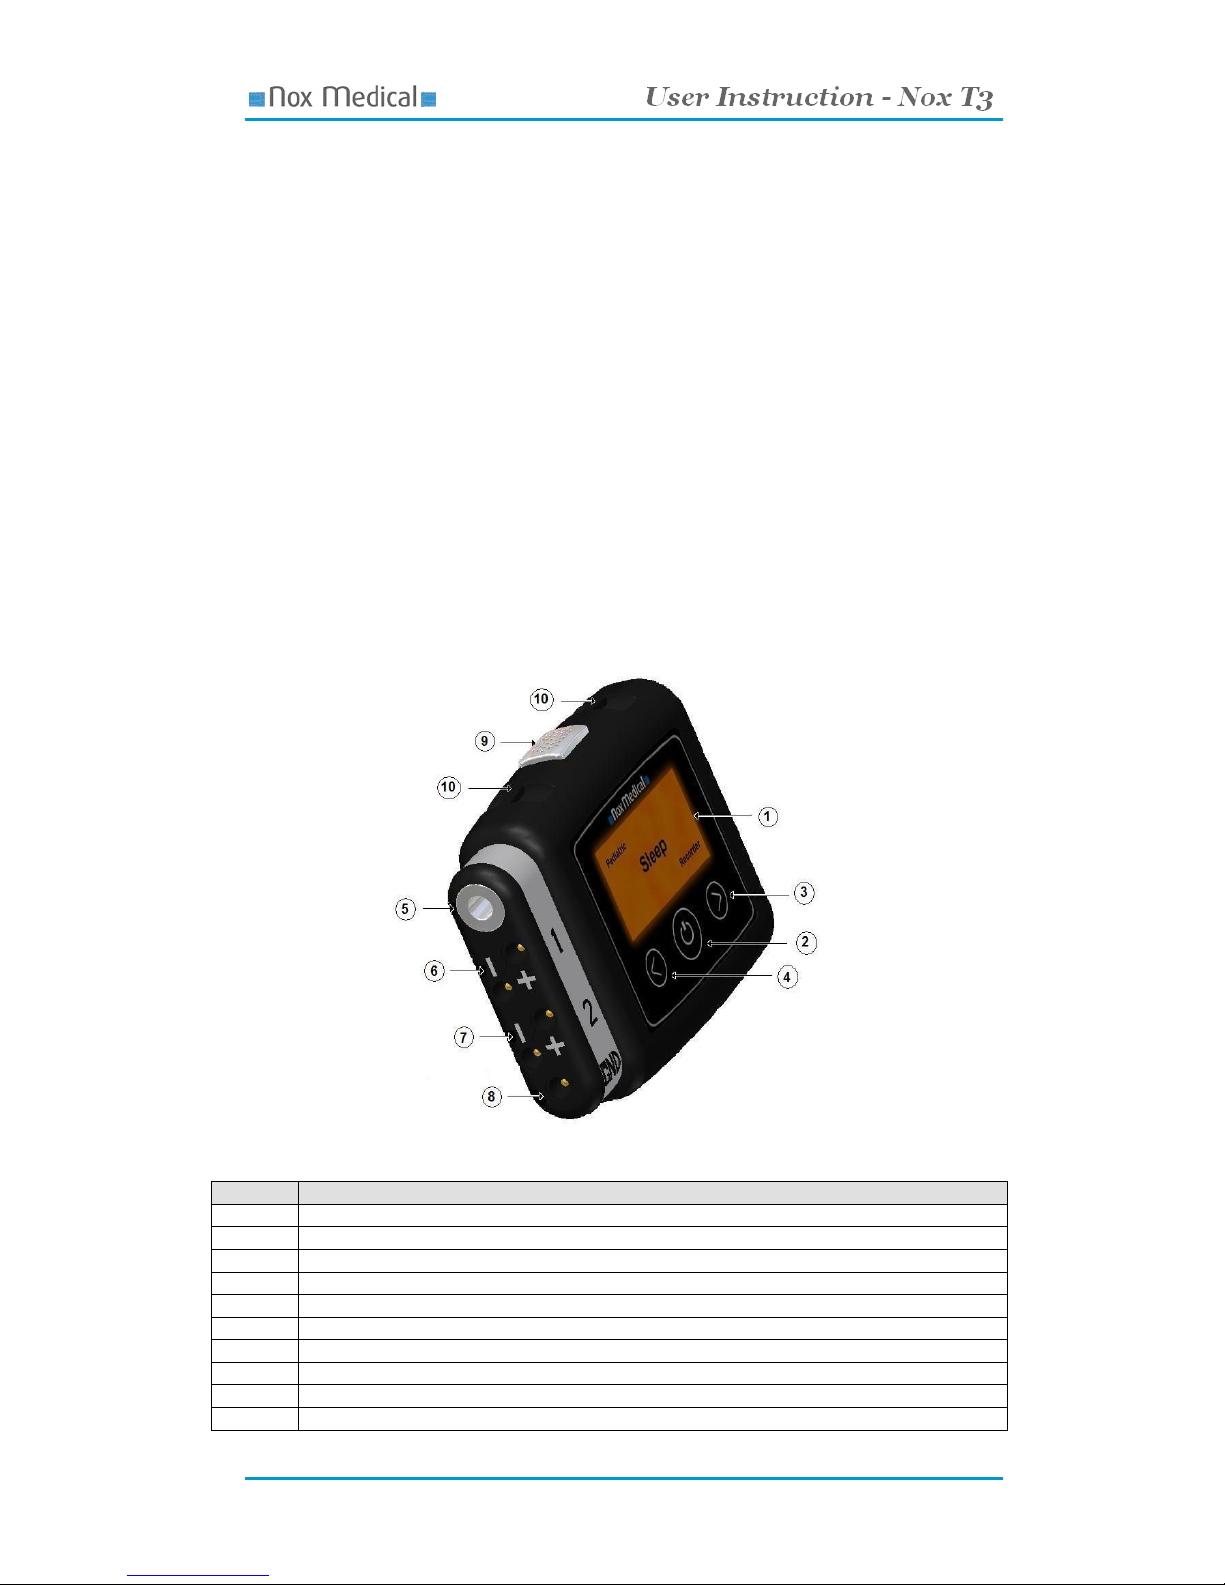
he Nox 3 Device ............................................................................................................................................... 7
Interfaces ......................................................................................................................................................... 7
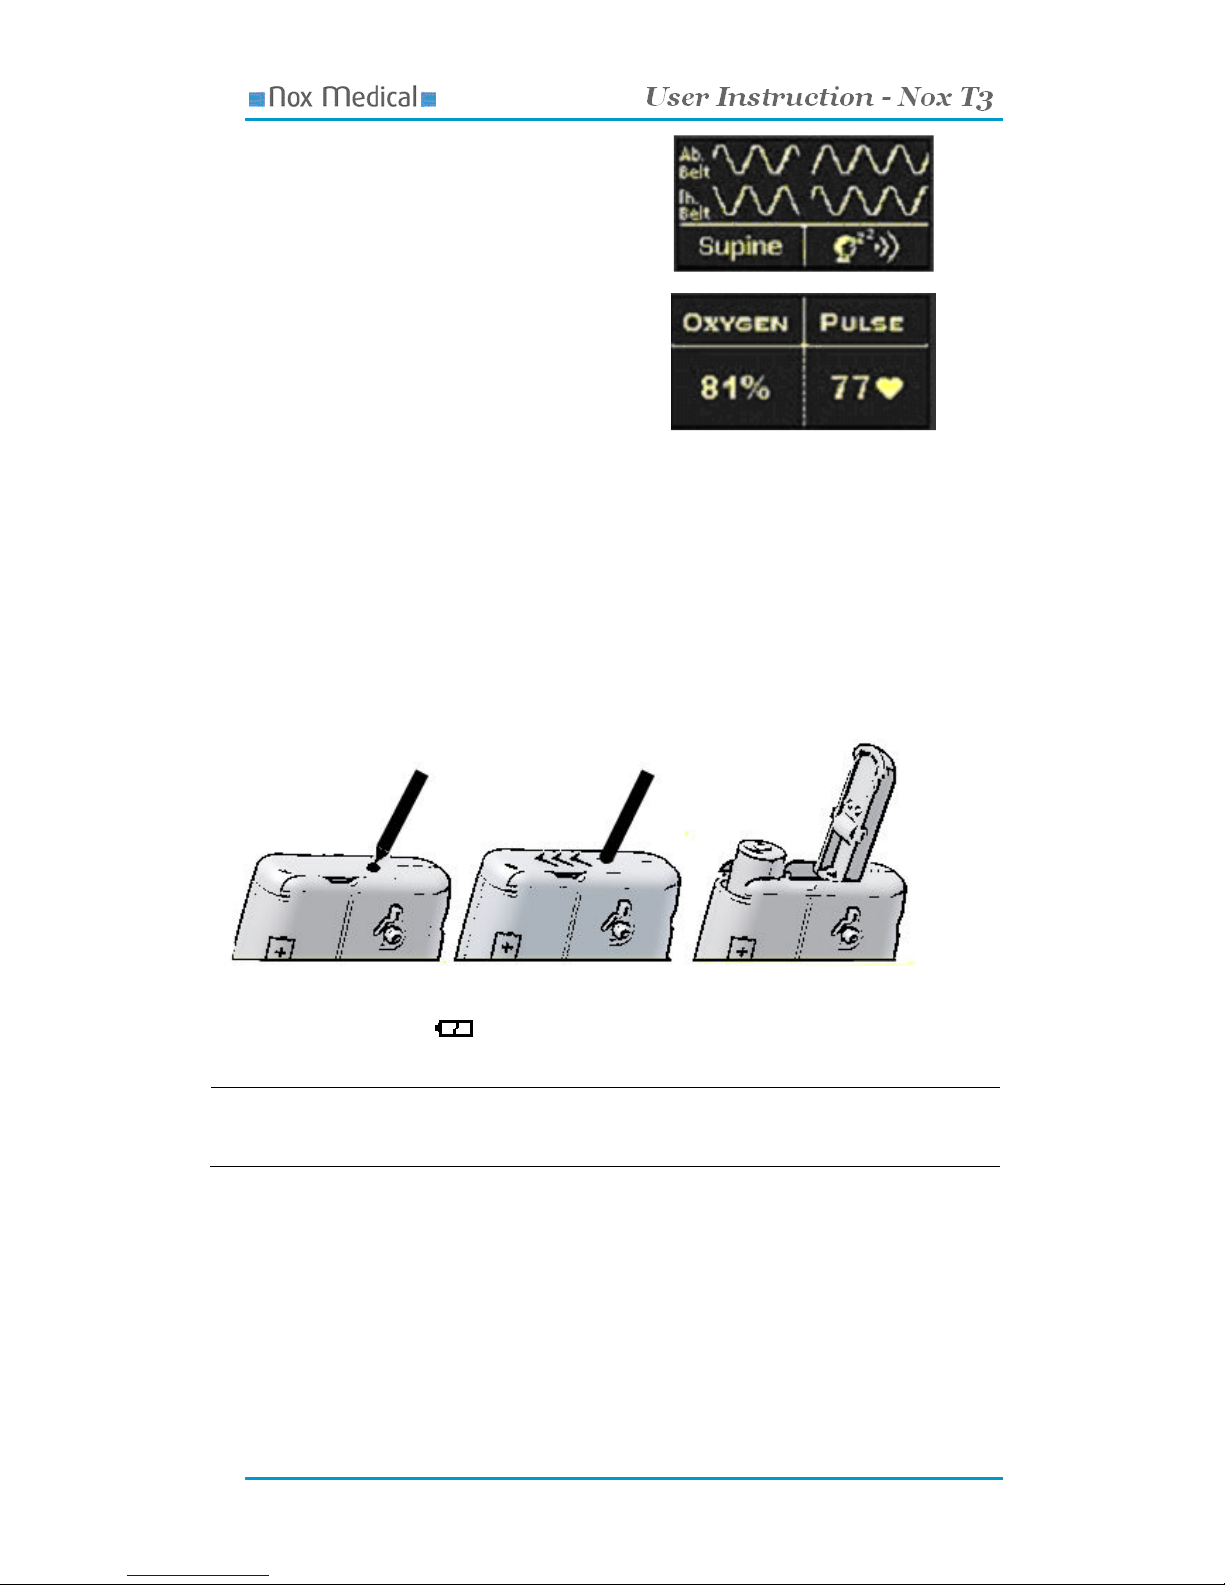
Starting/Stopping a Recording ......................................................................................................................... 8
Navigating the Nox 3 device ......................................................................................................................... 8
Power ............................................................................................................................................................... 9
he Nox 3 Application Software – Noxturnal .................................................................................................. 10
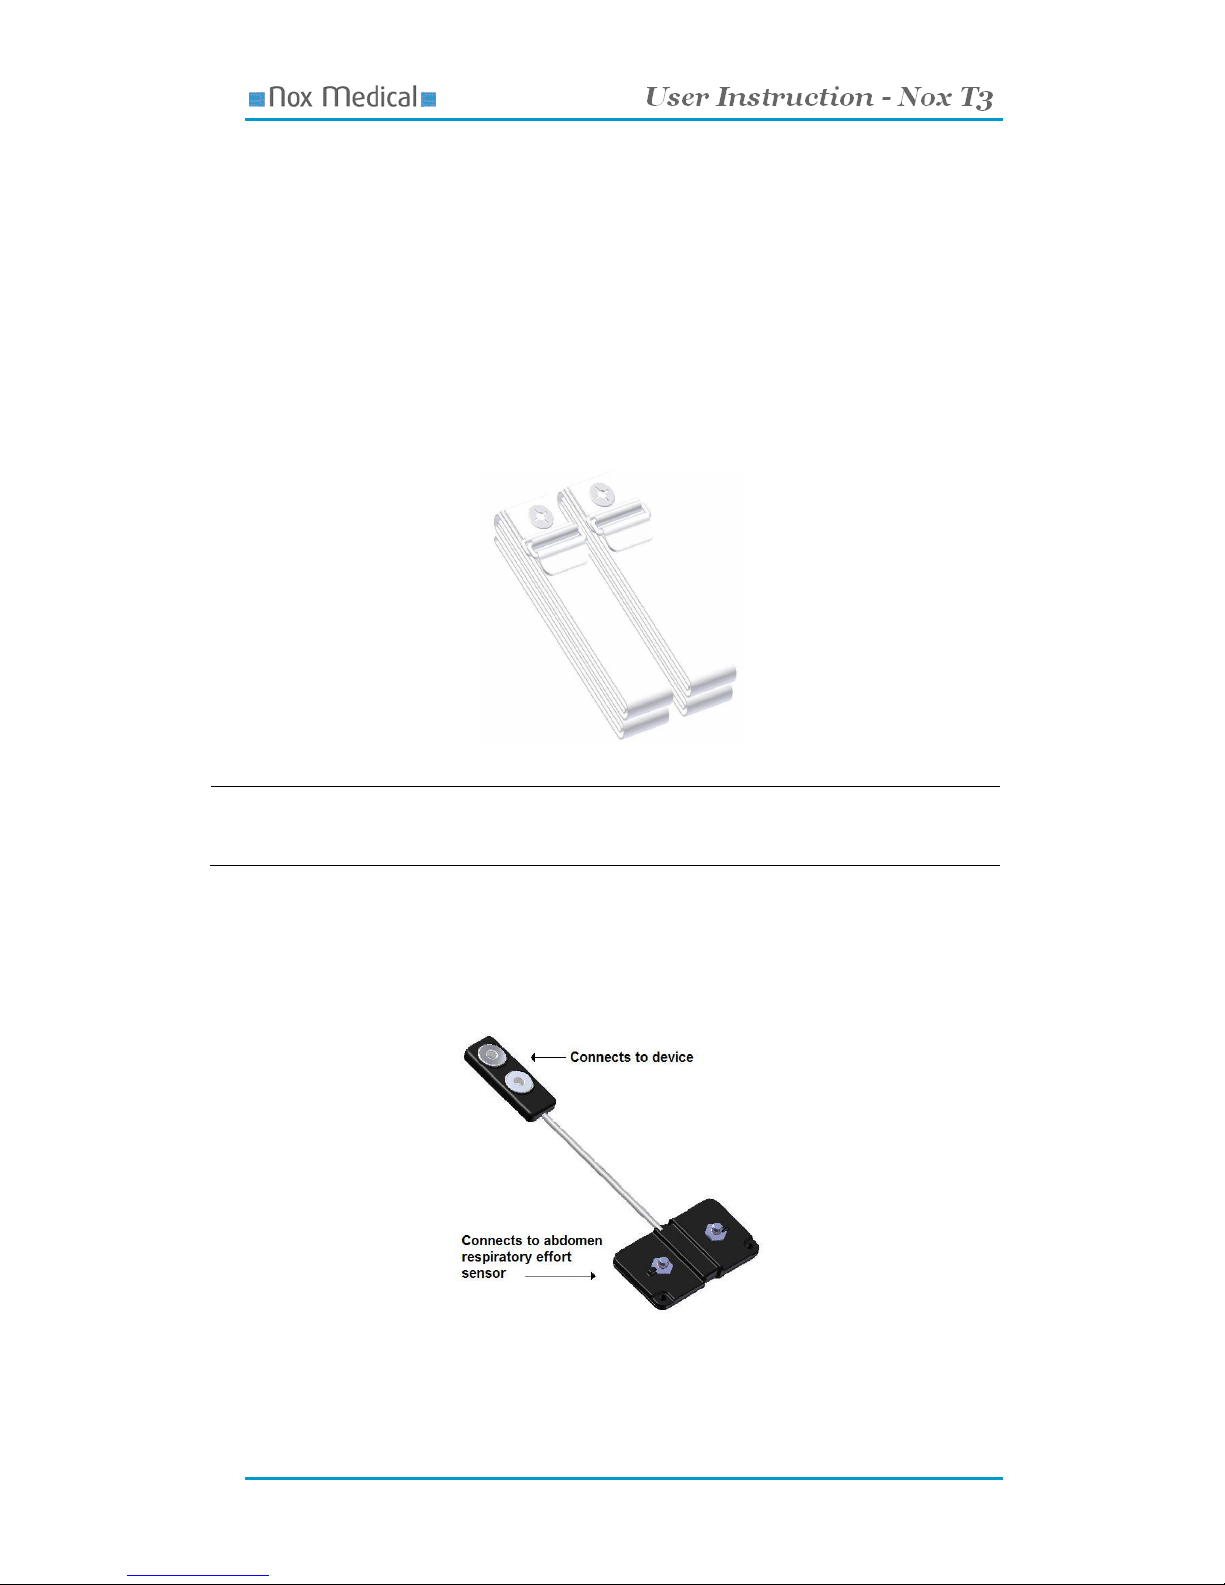
Respiratory Effort Sensor (Belt).......................................................................................................................... 10
Abdomen – horax Cable .................................................................................................................................... 10
USB Cable .......................................................................................................................................................... 11
Nasal Cannula ..................................................................................................................................................... 11
Clip Strap ............................................................................................................................................................ 11
Carry Bag ............................................................................................................................................................ 11
Pulse Oximeter .................................................................................................................................................... 12
Inserting Batteries .......................................................................................................................................... 12
Oximeter Sensors ........................................................................................................................................... 12
ExG Sensors ........................................................................................................................................................ 13
Nox Noxturnal .......................................................................................................................................................... 14
System Requirements .......................................................................................................................................... 14
Desktop Minimum System Requirements ...................................................................................................... 14
Laptop Minimum System Requirements........................................................................................................ 14
Desktop Recommended System Requirements .............................................................................................. 14
Laptop Recommended System Requirements ................................................................................................ 14
Installation........................................................................................................................................................... 15
Running the software .......................................................................................................................................... 18
Configuring the Device .................................................................................................................................. 19
Viewing Recorded Data ................................................................................................................................. 21
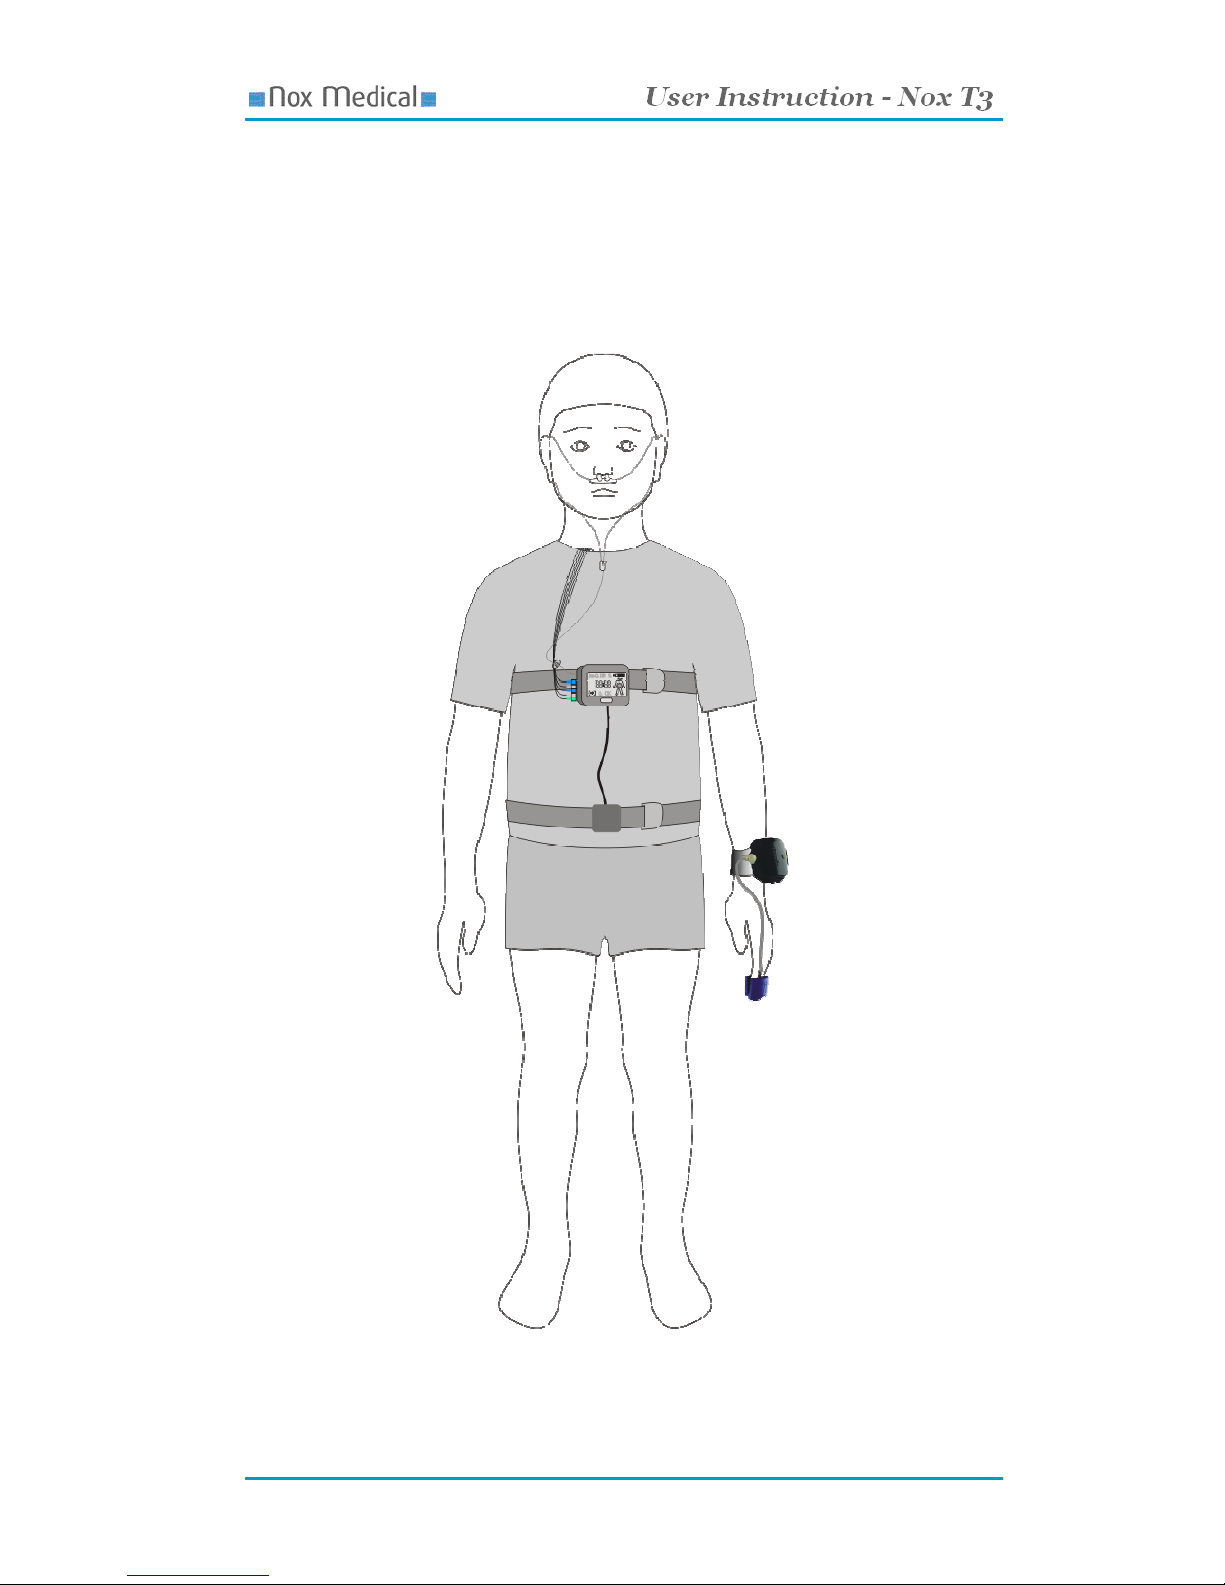
Hook-Up ................................................................................................................................................................... 23
Attaching the Device and the Respiratory Effort Sensors ................................................................................... 23
Recording of Respiratory Sounds and Snoring ................................................................................................... 25
Applying the Nasal Cannula ............................................................................................................................... 25
Attaching Electrodes ........................................................................................................................................... 25
Pulse Oximeter Module....................................................................................................................................... 26
Choosing the Appropriate Pulse Oximerer Sensor ......................................................................................... 26
Attaching the Pulse Oximeter Module and Sensor......................................................................................... 26
Precautions for Use of the Pulse Oximeter .................................................................................................... 27
System Maintenance................................................................................................................................................. 28
Calibration........................................................................................................................................................... 28
Cleaning .............................................................................................................................................................. 28
Disposal .............................................................................................................................................................. 28
Specification ............................................................................................................................................................. 29
Nox 3 Device .................................................................................................................................................... 29
Respiratory Effort Sensor .................................................................................................................................... 29
Nasal Cannula ..................................................................................................................................................... 30
Pulse Oximeter Module....................................................................................................................................... 30
Classifications ..................................................................................................................................................... 31
Certifications ....................................................................................................................................................... 31
EMC – Information ............................................................................................................................................. 32
Declaration of Conformity with USA Federal Communications Commission (FCC) and Canadian Ministry
of Health Rules for Electromagnetic Compatibility ....................................................................................... 32
Guidance and Manufacturer’s Declaration – Electromagnetic Emissions ..................................................... 34
Guidance and Manufacturer’s Declaration – Electromagnetic Immunity ...................................................... 34
Recommended Separation Distance between Portable and Mobile RF Communications Equipment and the
Nox 3 Device ............................................................................................................................................... 35