Jorvet J-166M Manual

J-166M
RESPIRATORY MONITOR
APNEA ALARM:
Sets time interval
for alarm to sound
LIGHT SENSOR:
Pass hand over to reset TIME DISPLAY INDICATOR:
The seconds elapsed since
the last breath
BATTERY LEVEL
VOLUME:
Monitor beeps
with every breath
Figure 1
APNEA ALARM:
(in seconds)
20
10
30 40 50
60
LAPSE TIME
BATTERY
Green - Charging
Red - Low
VOLUME
OFF
Respiratory Monitor
Figure 2
Jorgensen Laboratories, Inc.
1450 N. Van Buren Ave.
Loveland, Colorado 80538
(970) 669-2500

DIRECTIONS FOR USE
Setup Respiratory Monitor in four easy steps.
1. Select and connect endo-tube to appropriate sensor adapter.
2. Connect sensor to the sensor adapter and sensor cable to the
monitor.
3. Select apnea time for alarm.
4. Turn on monitor and set alarm volume.
Setup Details
1a. For installing endo-tubes larger than 5 mm please refer to
Figure 3. The 15 mm sensor adapter will fit standard 15 mm
endotracheal tube connectors. The sensor adapter has a side
mounted luer-lock fitting where the end of the sensor is inserted.
1b. For endo-tubes less than or equal to 5 mm, a small bore sensor
adapter should be be used as shown in Figure 4. The endo-tube is
removed from the 15 mm connector and placed on the
appropriate small bore sensor adapter with luer-lock side mount.
The small bore adapters come in sizes of 3 to 5 mm.
The sensor adapters, sizes 3 to 5 mm, are used on animals of small
tidal volumes. If this is not done, the warmth of the breath will be
dissipated in the larger chamber of the 15 mm sensor adapter,
reducing the sensitivity or possibly not being sensed at all. Larger
animals should not use the smaller sensor adapters (5 mm and
smaller).
2. The white housing on the end of the sensor cable has a small
temperature sensor extending out form the luer-lock end of the
housing (See Figure 4). This end of the housing should be insert
ed into the luer fitting on the side of the sensor adapter. Gently
twist the sensor housing in as far as it will go. This should place
the sensor in the middle of the air hole in the adapter.
The sensor is a sensitive electronic device that can be damaged if
hit or its wires are bent. Be careful when handling it!
Figure 3
Remove Tube from
15 mm Connector
Small Bore
Sensor Adapter
Luer-lock Fitting
White Sensor Housing
Sensor Plug
Sensor
Endotracheal Tube
Place tube on
Small Bore Sensor
Adapter.

The other end of the sensor cable has an 1/8 inch plug on it.
Insert the plug into the socket marked “SENSOR” on the back
of the monitor (See Figure 2). Be sure that it is pushed all the
way into the socket.
3. With the breath paths and the sensor connected, the monitor is
ready for use. Now the apnea time can be selected. This is a
time that should be long enough to include at least one
animal breath. If the animal does not breathe before this time
is up, the monitor alarm will sound. This time can be selected
from 10 to 60 seconds in 10 second steps with the selector
switch on the monitor front panel (See Figure 1 on the front
cover).
4. The monitor is OFF when the VOLUME control knob on the
front panel is turned fully counterclockwise. Turn it ON by
turning the VOLUME control knob clockwise. The monitor
should start counting seconds on the LCD display. The
volume can be preset to half with the white mark on the knob
pointing up. Adjust volume up or down as needed later.
Inlet/Outlet
to Gas Machine
White Sensor Housing
Sensor Plug
Sensor
Endotracheal
Tube
15 mm
Connector
15 mm
Sensor Adapter
Optional
15 mm Wye
Figure 4

GETTING THE MOST FROM YOUR MONITOR
Using the Breath Monitor
With no breathing present, the LCD display will count seconds
continuously. The display will start with zero counting to 99 sec-
onds, then return to zero and start over. When the apnea time select-
ed is reached the alarm will start pulsing at a one second rate. Each
time the animal breathes, the displayed time will return to zero and
start counting again. The alarm will also emit a short beep with
each breath.
Resetting the Alarm
If you want to stop the alarm or reset the LCD displayed count,
just pass your hand or an object over the light sensor window on top
of the monitor case. The light sensor is designed to reject small,
slow changing light patterns. This means that a deliberate shadow
must be cast across the light sensor window to reset the monitor. If
there is a strong low angled light such as that from a window or
lamp, the hand should be close to the monitor top for a sufficient
shadow to be cast and sensed. This eliminates responding to move-
ments in the room or clouds darkening outside light. Only be sure
there is sufficient light on the sensor in the first place. This is
needed to cast a shadow.
Other Considerations
The monitor’s breath sensitivity is adjusted by a microproces-
sor so no manual adjustments are needed. Responding to a breath
cycle does require a different minimum level of breath volume
under different room conditions. This minimum volume is depend-
ent on several factors that make it difficult to specify just what vol-
ume is needed to trigger the monitor. Several of the more important
influences are room temperature, room humidity, temperature of
the sensor area, i.e., sensor adapter, and the type of plumbing used.
The monitor is designed to respond to very small air flows (less
than 1 cc of air at 3 seconds per breath under the right conditions).
WARRANTY SERVICE
Parts will be warranted only if a copy of the original invoice
and defective parts are returned directly to :
Jorgensen Laboratories, Inc.
1450 N. Van Buren Avenue
Loveland, CO 80538
Phone (970) 669-2500
Fax (970) 663-5042
Important: When shipping your unit, pack your monitor
securely and be sure that all pieces are insulated from each other
to avoid abrasion. Ship prepaid and insured. Also, please indicate
exactly what the problem is with any monitor returned.

The monitor acts on changes in temperature. This occurs when
the animal exhales warm air and inhales the cooler room air over
the sensor. The greater the temperature difference, the smaller the
amount of air volume that is needed to trigger the monitor. But if
there is too large a difference in temperature, another problem
occurs. The animal’s breath is approximately 100 degrees
Fahrenheit, so a temperature difference implies that the room air
temperature must be lower. Cold room air can also make the sensor
adapter cooler. The exhaled air must pass through the plastic
adapter which will cool the breath down. So now we have lost some
of the desirable temperature difference that we need to sense small
breath volumes. The cooler the sensor adapter, the less temperature
change and more air it takes to produce the same signal to the
monitor.
The opposite can also happen when the sensor adapter is heat-
ed by, say, a warm overhead light. The adapter warms the incoming
room air, reducing the temperature difference.
What can be done about this dilemma? In cold weather when
the sensor adapter is also cold, warm the adapter up with your hand
before, depending on the monitor to respond to small breaths. If the
monitor has been working for a time and quits responding to obvi-
ous breathing, then the sensor adapter is probably too warm. Cool
it down until it is responding again. Then insulate the sensor with a
small towel or other insulating material. One way of cooling the
adapter would be to wrap it in a towel saturated with cool water.
REPLACEMENT PART CATALOG NUMBERS
J-166md#1A Sensor cable complete with connector.
J-166md #2 Rechargeable battery.
J-166md#3 AC adapter/recharger.
J-166md#4 Mounting Bracket
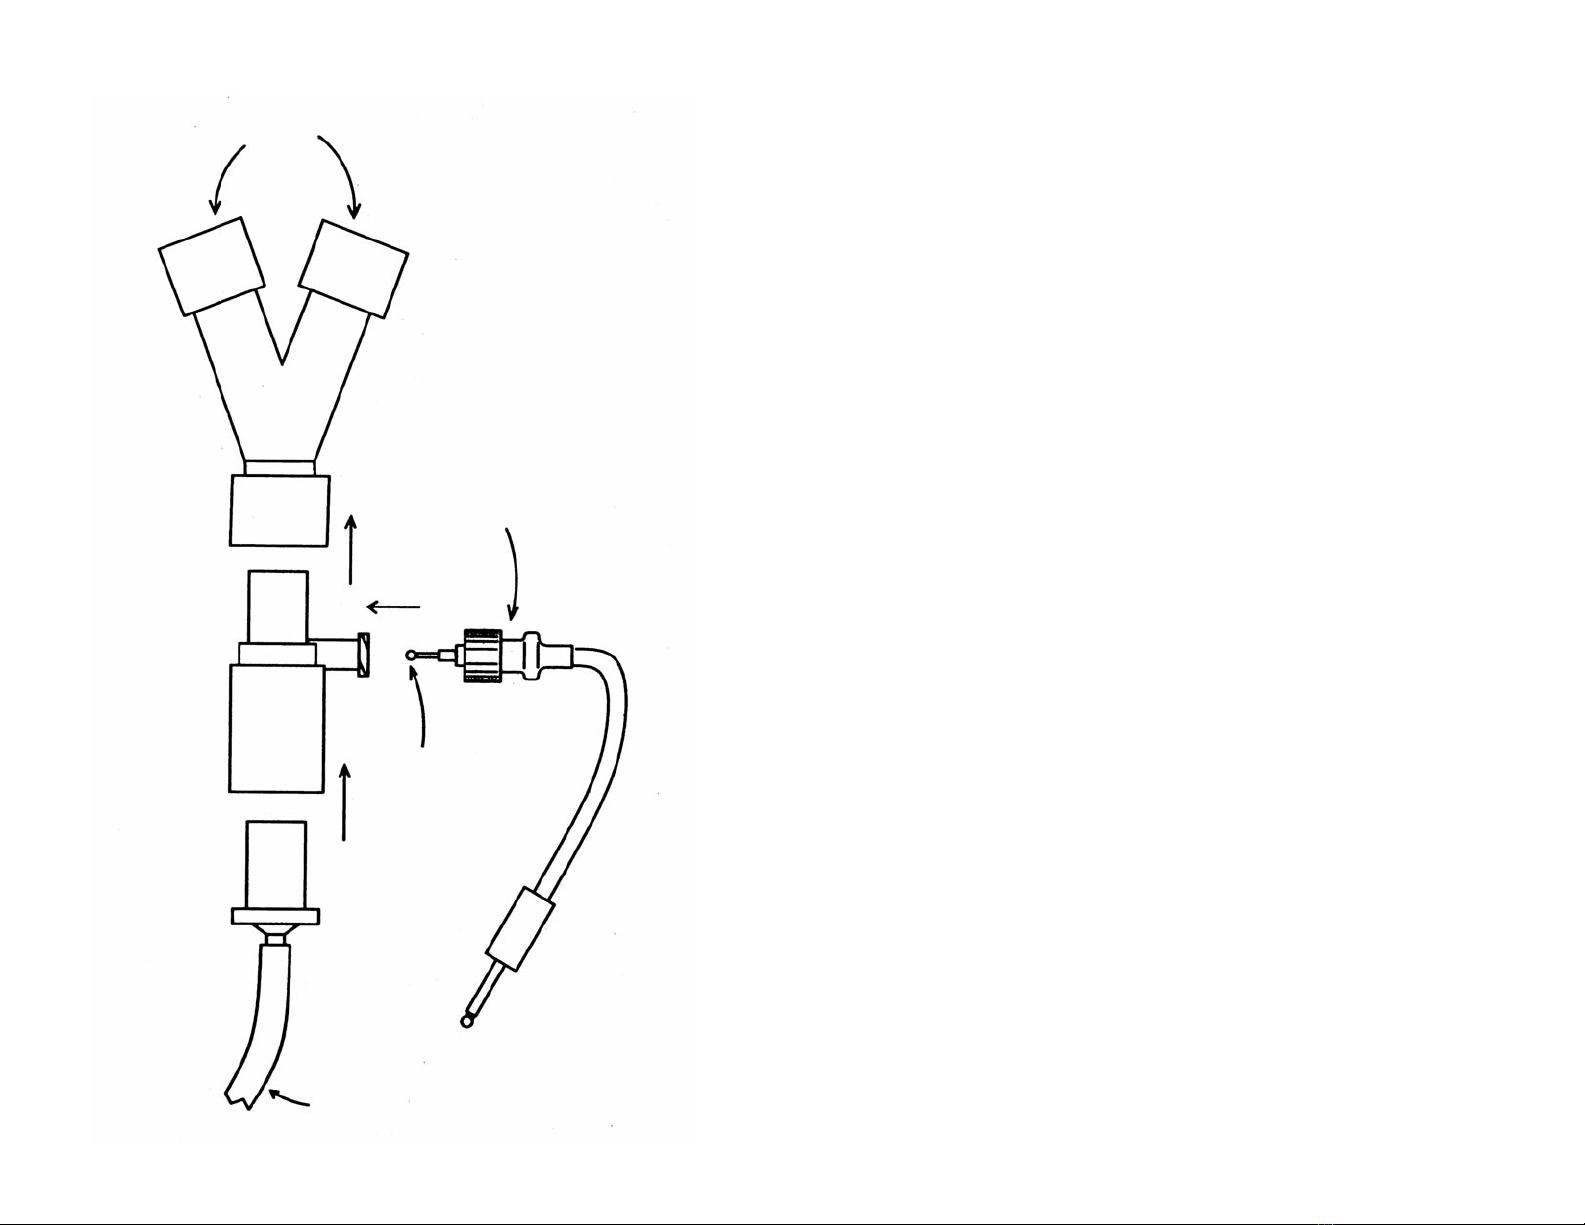
J-166md#6A Double-ended 15 mm connector with side
Luer fitting.
J-166md#7 Black case screw only for mounting bracket.
J-166md#9A Endo-tube connector package.
(3.5 mm to 5 mm)
WARRANTY STATEMENT
This product has a limited warranty to the original purchaser (end-
user) for a period of 1 (one) year from the original purchase date.
THIS WARRANTY IS LIMITED TO DEFECTIVE MATERIALS
AND WORKMANSHIP. The warranty is voided by unauthorized
adjustment or repairs, physical abuse, inappropriate use, or neglect.
In no event shall Jorgensen Laboratories, Inc. be responsible or
liable for any damages arising from the use of this instrument.
Note: Sensor cables for earlier monitors will not work properly with
this design. Use only the sensor mounted in a luer fitting, J-
166md#1A. This model has a black colored rear panel where
previous models of the monitor are white.

CARE AND FEEDING OF THIS BATTERY POWERED
INSTRUMENT
The external power can remain connected to the monitor for
extended periods of time without damage. The DC power socket on
the monitor is shown in Figure 2. Insert the plug on the end of the
cable from the wall power supply into the socket. The wall power
supply is then plugged into any AC, 60 cycles, 115 volt wall outlet.
If the instrument is not going to be used for a time such as
weeks, or is put into storage, disconnect the external power cable
and unplug the wall power supply. Be sure that the power switch on
the monitor is OFF.
If it is known that the monitor is going to be put back into serv-
ice after storage, ti would be a good idea to reconnect the power
cable and plug in the wall power supply. If this is done at least eight
hours before using, the internal battery will have a good charge on
it.No harm will result to battery if it is not precharged, but the mon-
itor may not function for very long before a charge cycle is needed.
Avoid leaving the monitor power ON when the red battery-low
light is illuminated. If it is necessary to sue the monitor in this state,
plug in the external power cable and wall power supply. This
should power the monitor and perform a quick battery charge. A
battery recharge should be completed in four to five hours.
TROUBLESHOOTING
Symptom.
Possible cause.
Battery charge light is not green when charger is plugged in.
Faulty wall power supply.
Battery will not hold a charge or goes dead quickly.
Battery red-discharged light does not change to green after
5 hours of charging.
Faulty battery.
Intermittent breath sensing or no response at all.
Sensor cable or orange sensor broken.
Sensor clogged. Carefully clean with running water
or isopropyl alcohol.
Sensor cable plug not inserted all the way into the
socket.
Light sensor not resetting count or alarm.
Light window dirty. Clean with glass cleaner or
water/alcohol mixture.
Not enough overhead light for good shadow.
Relocate monitor.
Too much side light from window, etc. Create
shadow closer to sensor window. Create shadow
between bright side light and sensor window. Move
monitor out of side light.
Alarm will not sound.
Turn up volume.
Monitor may be defective if unit is on and is
counting past the set apnea time without the
alarm sounding.
Table of contents
Other Jorvet Medical Equipment manuals
Popular Medical Equipment manuals by other brands

Bauerfeind
Bauerfeind OmoLoc manual

LEVITAS
LEVITAS ST323 instruction manual

Halotherapy Solutions
Halotherapy Solutions HALO BOOTH Installation & operation manual

Mass
Mass 1672 operating manual

Dentsply Sirona
Dentsply Sirona Propex IQ Getting started guide

Augustine Surgical
Augustine Surgical HotDog U101 Instructions for use