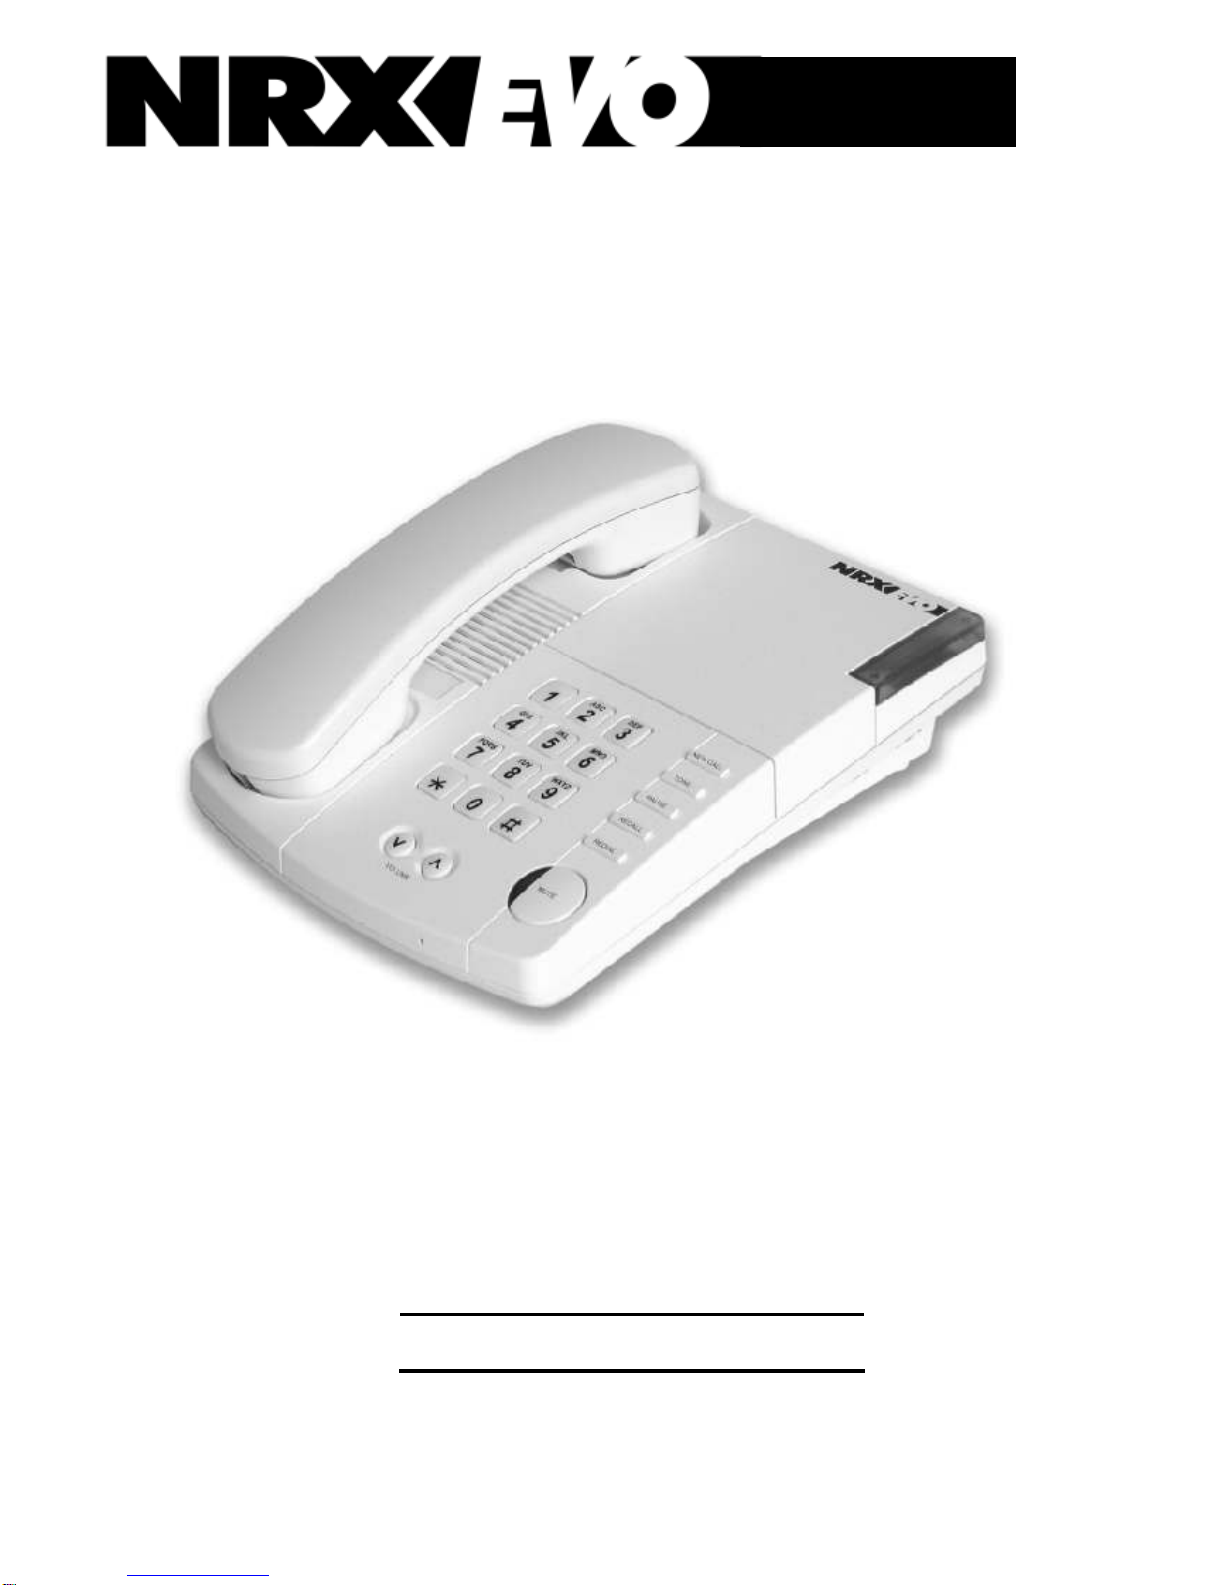
NRX EVO 150 User manual

USER GUIDE
NRX EVO 150
www.nrx-telecom.com

1. INSTALLATION
2. OPERATION
2.1 Dialling
2.2 Tone or Pulse Option
2.3 Mixed Mode Dialling
2.4 Other Network Services
2.5 Message Waiting
2.6 Last Number Redial
2.7 Adjustable Ringing Volume
2.8 Adjustable Ringing Tone Pitch
2.9 Privacy (Muting the Microphone during Conversation)
2.10 Impedance Matching
2.11 Receiver Volume
2.12 Hearing Aid Compatibility
3. WALL MOUNTING THE UNIT
4. APPROVED USE
5. CE APPROVED
6. NUMBER OF PHONES THAT CAN BE CONNECTED
7. WARRANTY
Contents
1
Number Keypad
New Call Button
Mute Button
Ringer/MWI Indicator
Wall Mount Tab
Tone Button
Recall Button
Redial Button
The layout of your NRX EVO 150
Pause Button
Digital Volume Control
12
ABC 3
DEF
6
MNO
5
JKL
4
GHI
8
TUV
7
PQRS 9
WXYZ
0
P
R

3
1. INSTALLATION
Connect one end of the coil cord to the handset and the
other end to the socket located in the bottom of the
phone.Replacethehandsettothecradle.
NOTE: You will need to remove the wall mount
brackettoaccessthissocket.
Connect the small plug of the telephone line cord to the
socket at the back of the unit and the other plug to the
telephonesocketatthewall.
NOTE: If the RJ-11 to RJ-11 line cord is used, please
ensure that the Blue plug is connected to the wall
socket.
After connecting the telephone to the line socket, the
handset should be lifted to check dial tone is being
received. If the handset is not lifted, the telephone will
take about 15 seconds to power up during which time
anyincomingcallswillnotringtheunit.
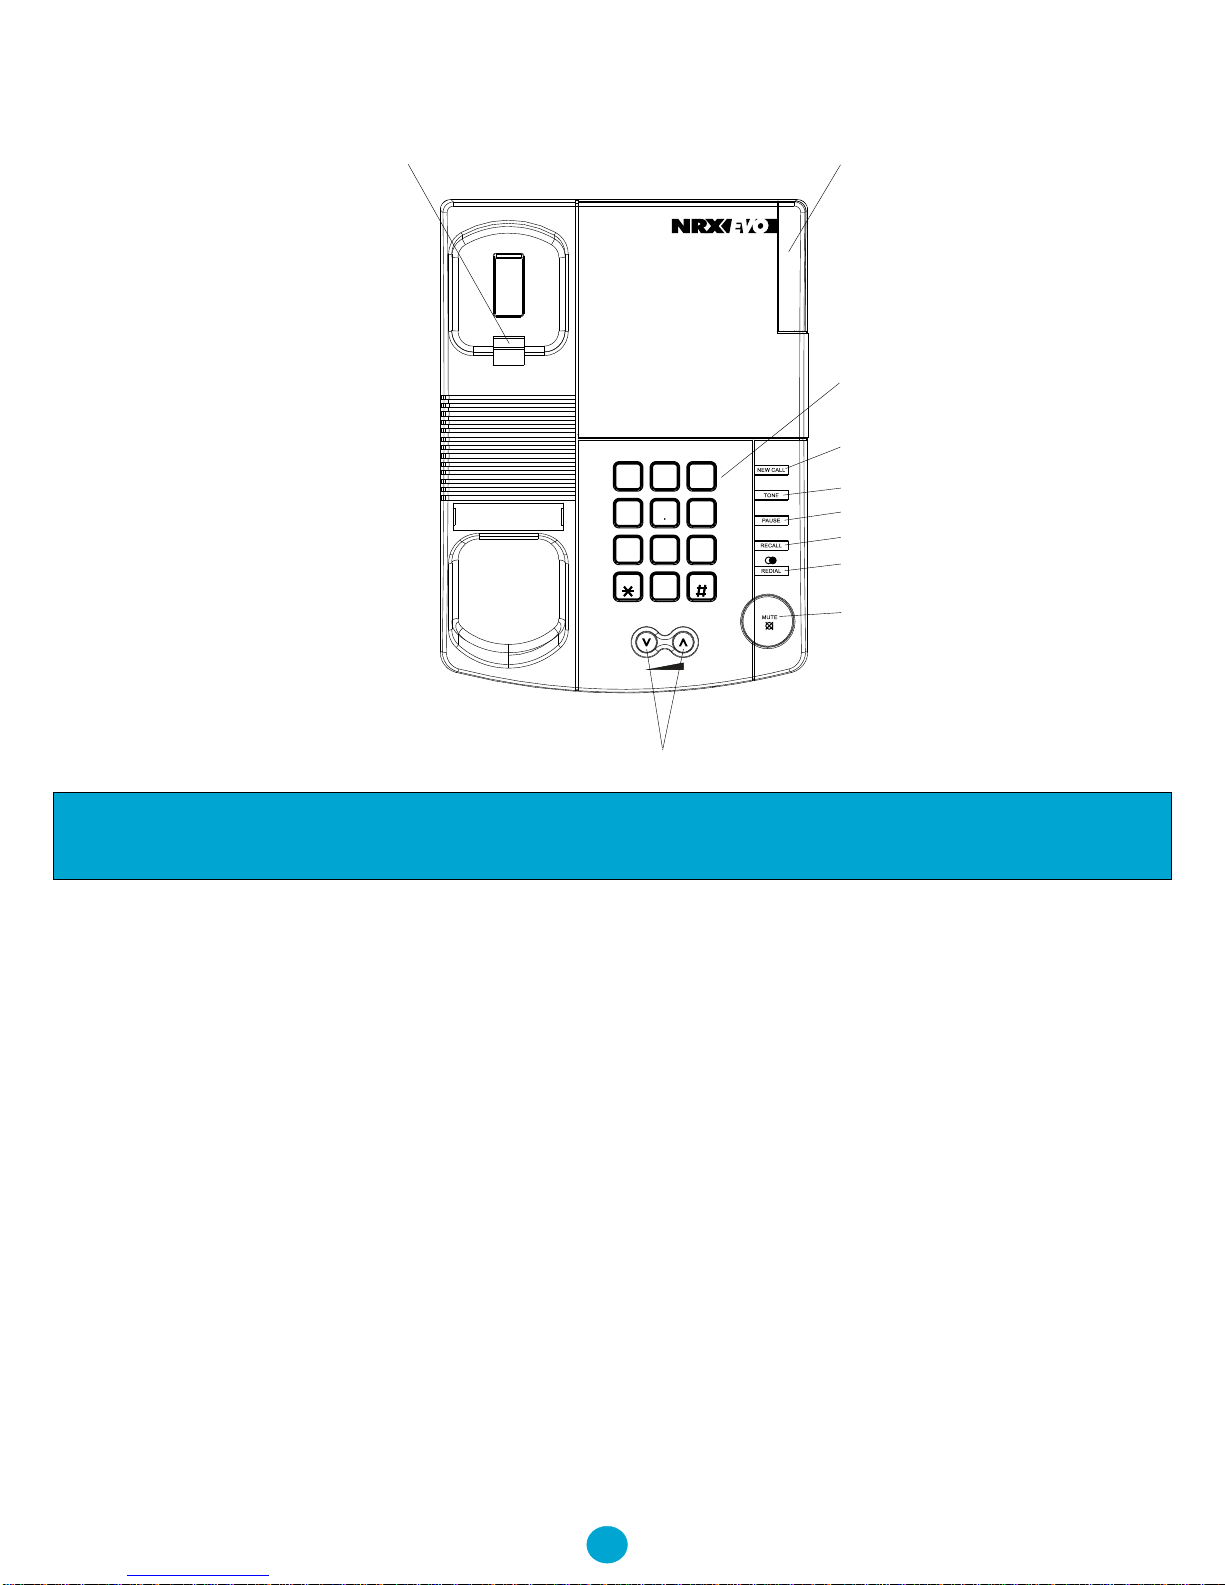
2. OPERATION
2.1 Dialling
Lift the handset and dial the number. The telephone is
Installation & Operation
pre-setattonemode.
To terminate a phone call, simply replace the
handset.
If you want to terminate a call and make another call
immediately, you may press the NEW CALL key
once. The unit will terminate a call and let you dial
thenumberforanothercall.
2.2 ToneorPulseOption
Tofindoutwhetheryouareonadigitalexchangethat
accepts tone dialling, locate switch number 2 which
is the TONE/PULSE switch inside the switch
compartment of the unit. First try dialling out with
the switch in the TONE position. If this is
unsuccessful,switchbacktothePULSEposition.
2.3 Mixed Mode dialling (how to switch from
pulsetotoneinmid-call)
Even if your local exchange only allows pulse
dialling, there may still be occasions when you need
tone dialling. For instance, when you call into a
bank's computer system, you may be asked to enter
numbercodes.Youcanonlydothisifyourtelephone
2
Operation
sendsouttoneswhenyoupressthekeypad.
The TONE button helps you make change over from
pulsetotonediallinginthemiddleofacall.
What you do: Pulse-dial the telephone numbers you
require. When you are connected, press the "TONE"
button
What you do: Dial the rest of the sequence you
require.
What you hear: Each number you dial emits a tone.
When the handset is replaced, the unit goes back to
pulse dialling.
2.4 OtherNetworkServices
The NRX EVO 150 is fully compatible with many
telephone network services, which provides a number
of useful additional facilities, including three way
calling, call diversion, call waiting etc. It you are
connected to one of the digital exchanges, you can
access these services via the RECALL button on the
keypad. For further details, please contact your local
PTTSalesOffice.
2.5 MessageWaiting
The NRX EVO 150 has built in message waiting
indicators that are compatible with most types of
PABX with such a facility. By correct setting of
switches 4 and 5 in the switch compartment located
in the base of the phone, the telephone can be set to
detectanumberofmessagewaitingsignals.
Message Waiting Signal Switch 4 Switch 5
Polarity Normal OFF 1
Polarity Reversed OFF 2
90V or above DC orAC ON (Default) OFF (Default)
Thetelephoneissuppliedsettothedefaultsetting.
2.6 LastNumberRedial
If you dial a number and find it is engaged or there is
no reply, replace the handset. The number will be
retained in the memory until you dial a different
number. Toredialthelastnumberautomatically.
What you do: Lift the handset or press the 'NEW
CALL' key
Press the "REDIAL" button

5
2.7 AdjustableRingingVolume
On the right of the unit is a switch, this adjusts the
ringing volume of incoming calls. From left to right it
has three positions: low, medium, high. Move the
switch to the position you require. In addition to the
ringingtonethereisaRingIndicatorLampontheunit
that will flash when the telephone is ringing as a visual
indication. The Ringer Switch does not control this
RingIndicatorLamp.
The ringer volume can be turned off by switching
switch number 1, located in the switch compartment in
thebaseofthetelephone.
2.8 AdjustableRingingTonePitch
The ringer tone ringer melody repetition rate can be
adjustedinoffhookcondition,asfollows:-
Pitch SettingCode
1 'Mute'+'#'+'3'+'Mute'
2 'Mute'+'#'+'6'+'Mute'
3 'Mute'+'#'+'9'+'Mute'
Operation
2.9 Privacy (Muting the Microphone during
Conversation)
Duringa telephoneconversation, youmay switchoff
the microphone in the handset by pressing the Mute
button on the telephone base. The mute LED will be
flashingtoindicate thatthemicrophone is mutedand
the other party, on the other end of the telephone line
innot abletohear yourconversation. Pressthe Mute
button again to release the Mute function and the
LEDwillbeoff.
Alternatively, youmayalso press the Mute buttonon
the handset. As long as the handset Mute button is
pressed, the microphone mute function is activated.
Releasing the handset Mute button will re-enable the
microphoneforconservation.
In a office environment where for security reasons, a
'Push To Talk' facility is required, the handset button
can converted by switching a small micro switch
located in the compartment directly above the
handsetbutton.
4
Operation
2.10 ImpedanceMatching
The Impedance Matching switch inside the battery
compartment allows the NRX EVO 150 to be
connected to different types of PABXs. There are 3
positions for this switch. The default setting is
compatible to the BT's PSTN network, for matching
other PABXs, make a phone call and slide the switch at
different locations and find the position where the
soundonthereceiverisatbestquality.
2.11 ReceiverVolume
It is possible to adjust the receiver volume on the
telephone handset by pressing the volume
buttons.
2.12 Hear-aidcompatibility
Thehandsetreceiverishearingaidcompatible.
3. WALL-MOUNTINGTHEUNIT
TheNRXEVO 150 canbewall mounted using thewall
mountbracketinstalledonthebottomoftheunit.
Dismount the wall mount bracket from the unit.
- Placing the wall mount bracket on the required
position on the wall
- Drill two holes on the wall according to the
distance as marked by two mounting holes.
- Install the two screws supplied with the unit in
the wall.
- Re-install the wall mount bracket to the bottom
cabinet for the wall mount position.
- Position the wall mount slots on the bracket of the
unit over the two screws on the wall. Pull down
and lock into place.
- Beneath the earpiece section of the cradle you
will find a small tab. Pull this up to form the hook
for the handset.
- When you are on the telephone, you sometimes
need to put the handset down for a moment. There
is a special hook at the back (top) of the unit so that
you can hang the handset on the unit, when it is
wall-mounted, without terminating the call.

7
If you wish to increase the angle of the telephone
when used on a desk, the wall mount bracket can also
be fitted and used for this purpose.
4. APPROVED USE
The NRX EVO 150 can be connected to the Public
Switched Telephone Network (PSTN) and compatible
to PABX's but not connected in the following
manner: -
1. As an extension to a payphone.
2. On shared service line or 1+1 carrier system.
NetworkCompatibility
The NRX EVO 150 has been approved persuant to
Commission Decision 1999/303/EC for pan-
European connection to the public switched telephone
network (PSTN). However, due to differences
between the individual PSTNs provided for in
different countries, the approval does not, of itself,
give an unconditional assurance of successful
operation on every PSTN network termination point.
In the event of problems you should contact your
equipment supplier in the first instance.
Operation
5. CE APPROVED
This unit has been EMC tested and meets the
requirements with respect to EN50081-1 emissions
and EN50082-1 immunity.
6. THE NUMBER OF TELEPHONES THAT
MAY BE CONNECTED
If you connect too many telephones to your line they
may not ring correctly. To determine the number of
telephones that can be satisfactorily connected to
yourline, addtogethertheringerequivalent numbers
(RENs) of all the equipment you wish to connect. If
this number exceeds four, your telephones may not
ring. Your NRX EVO 150 telephone has an REN of
one (1). BT telephones have an REN of one unless
otherwisemarked.
7. WARRANTY
Trojan Telecom have built the NRX EVO 150
telephone to a high standard. Our warranty reflects
ourbeliefthatduring it’sworkinglife you should not
experienceanymechanicalfailures.
6
Operation
Trojan Telecom will at all times use a sensible and
supportive attitude towards warrantable returns,
working with you in identifying ‘no fault found’.
The following terms and conditions apply:
1) Where we find a genuine warranty failure, Trojan
Telecom will replace the faulty instrument with a
one-for-one replacement.
2) It is the responsibility of the user to return the
faulty telephone to Trojan Telecom. We ask you to
cover this cost and we will return your replacement
telephone at our expense.
3) We reserve the right to repair the faulty item or
replace it with a similar telephone of the same make.
4) Discontinued models under warranty will be
replaced with a similar or more featured telephone.
5) We reserve the right to charge for items considered
to be chargeable under fair wear and tear.
6) User misuse or any modification carried out to the
NRX EVO telephone by the customer is not
considered a manufacturing fault or component
defect. Therefore it is not covered by the warranty.
7) Accidental damage such as liquid spillage or user
damage will not be covered under the terms of the
warranty.
8) When returning the telephone please ensure you
fully complete the returns authorisation form,
failure to do so could cause you unnecessary delay.
The terms of this warranty do not effect your
statutory rights.
Warranty applies to UK customers only

9
Faulty units should be returned to our service centre
at the following address, together with the completed
return form on the opposite page.
SERVISCOMM
UNIT 2
RED BARNES WAY
McMullen Road
Darlington
DL1 2RR
UK
Warranty
8
Warranty
Date of Purchase Model No Details of Fault
Returns Authorisation Form
Customer Details
Address: ................................. Tel No: ...................... Returns Auth No: .....................
................................................. Fax No: ......................
................................................. Account No: ..............
Trojan Telecom's full liability will extend to the cost of repair
or complete replacement of the returned item only.

REF: ENGEVO150190308
Ist Floor
Amphenol Complex
Thanet Way
Whitstable
Kent
CT5 3JF
ENGLAND
Tel: (+44) (0)1227 275357 Fax: (+44) (0)1227 272932
e-mail: [email protected]
Table of contents
Other NRX IP Phone manuals