MANUEL D'UTILISATION
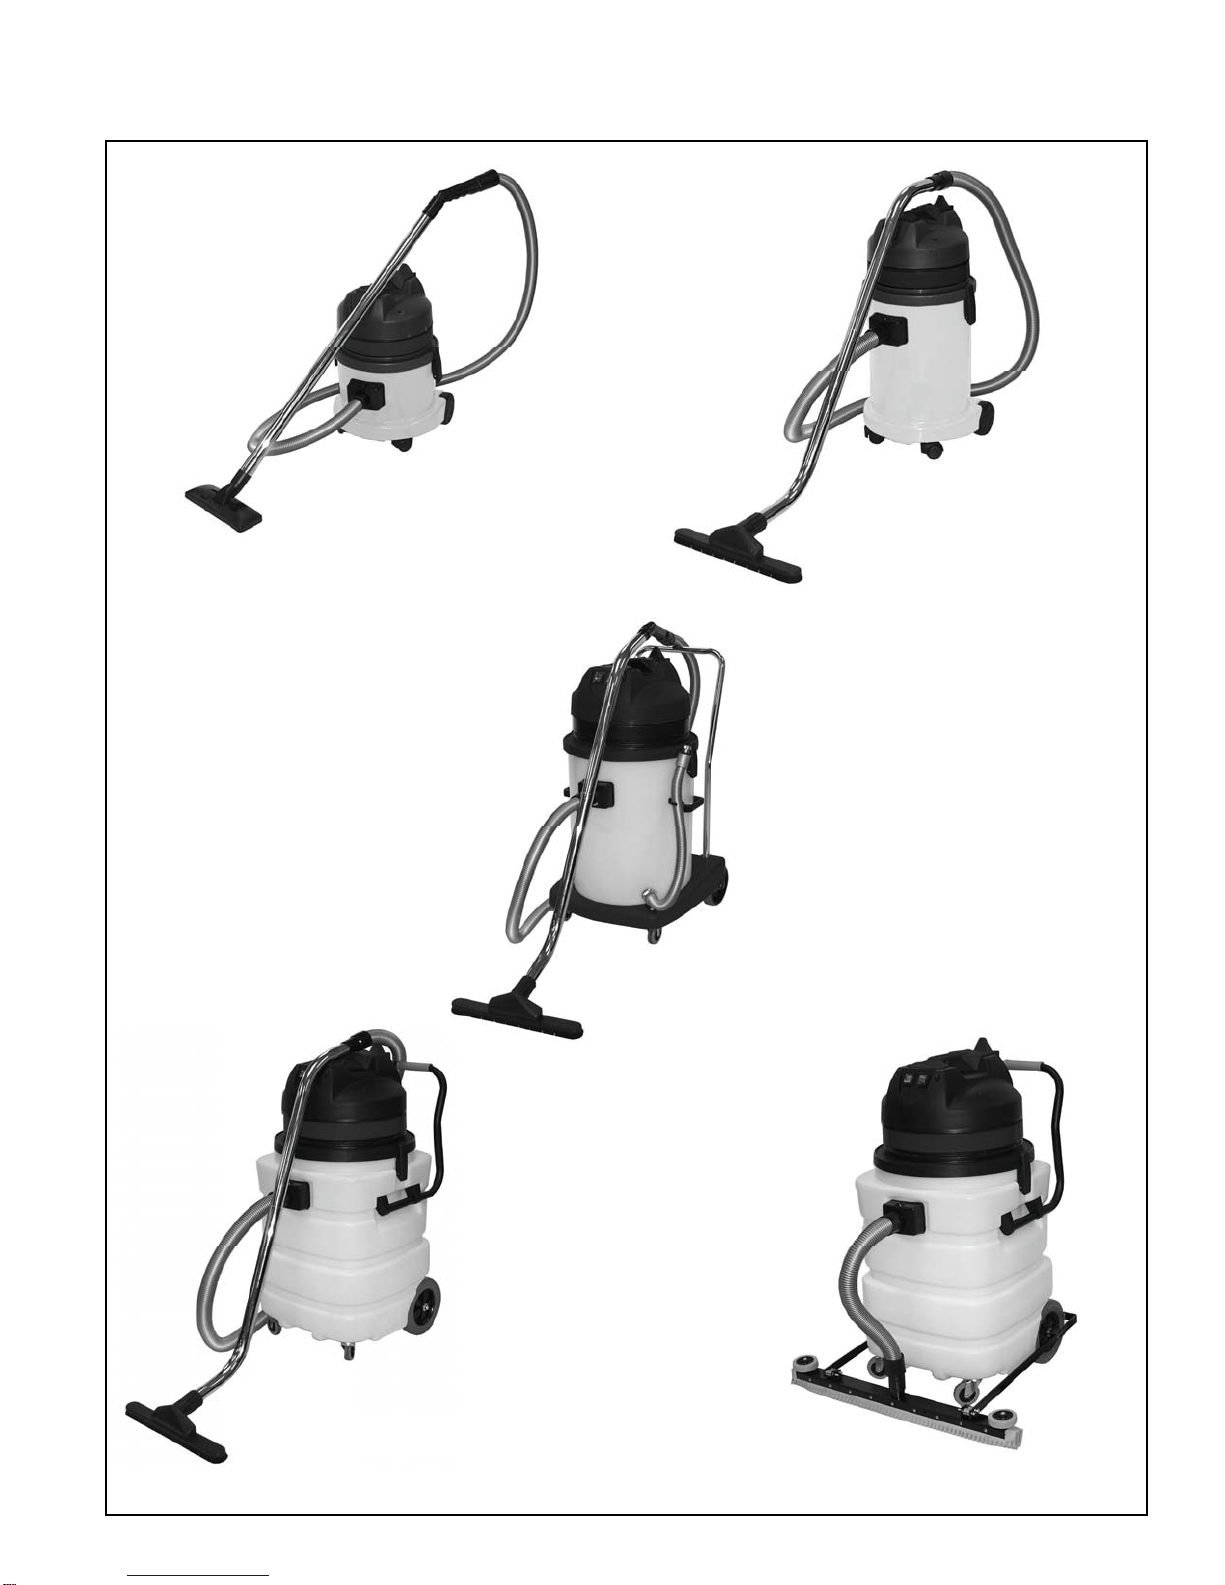
BRONCO WET / DRY
CONSERVER CES INSTRUCTIONS
IMPORTANTES INSTRUCTIONS DE SÉCURITÉ
Lisez toutes les instructions avant d’utiliser ou de réparer et faire l’entretien de l’appareil.
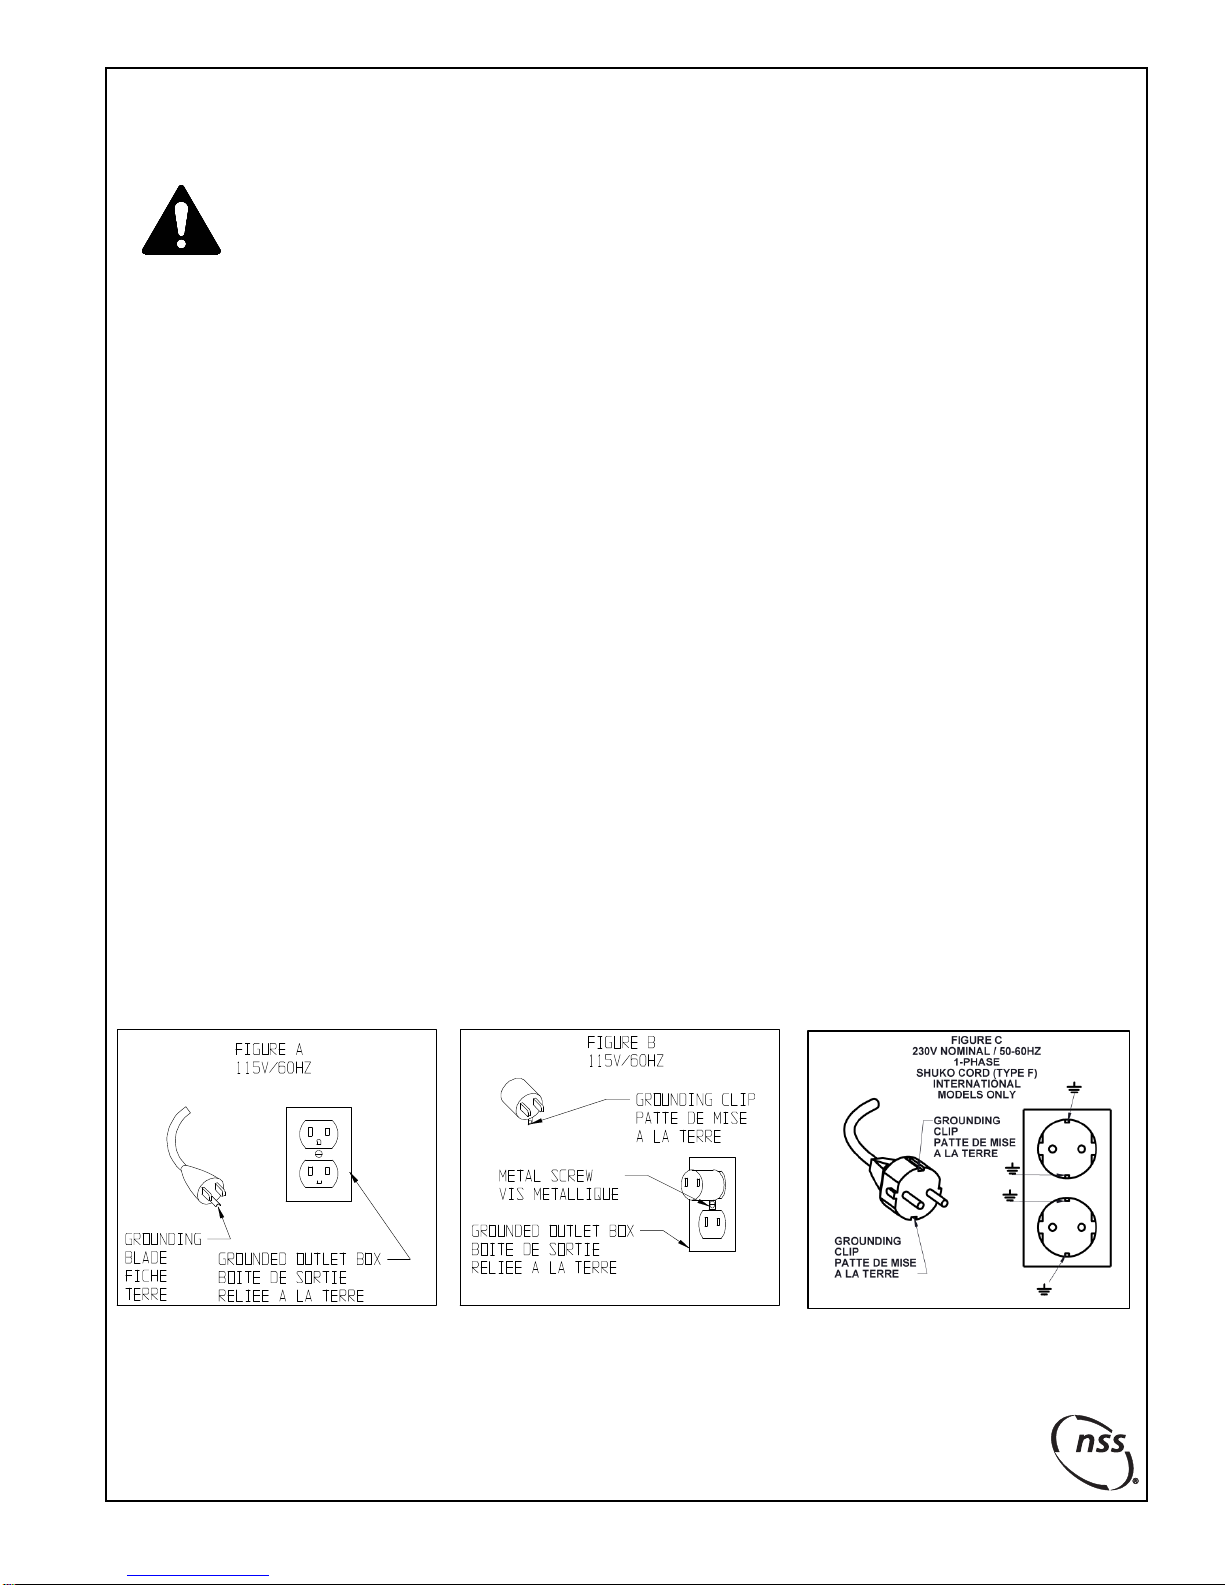
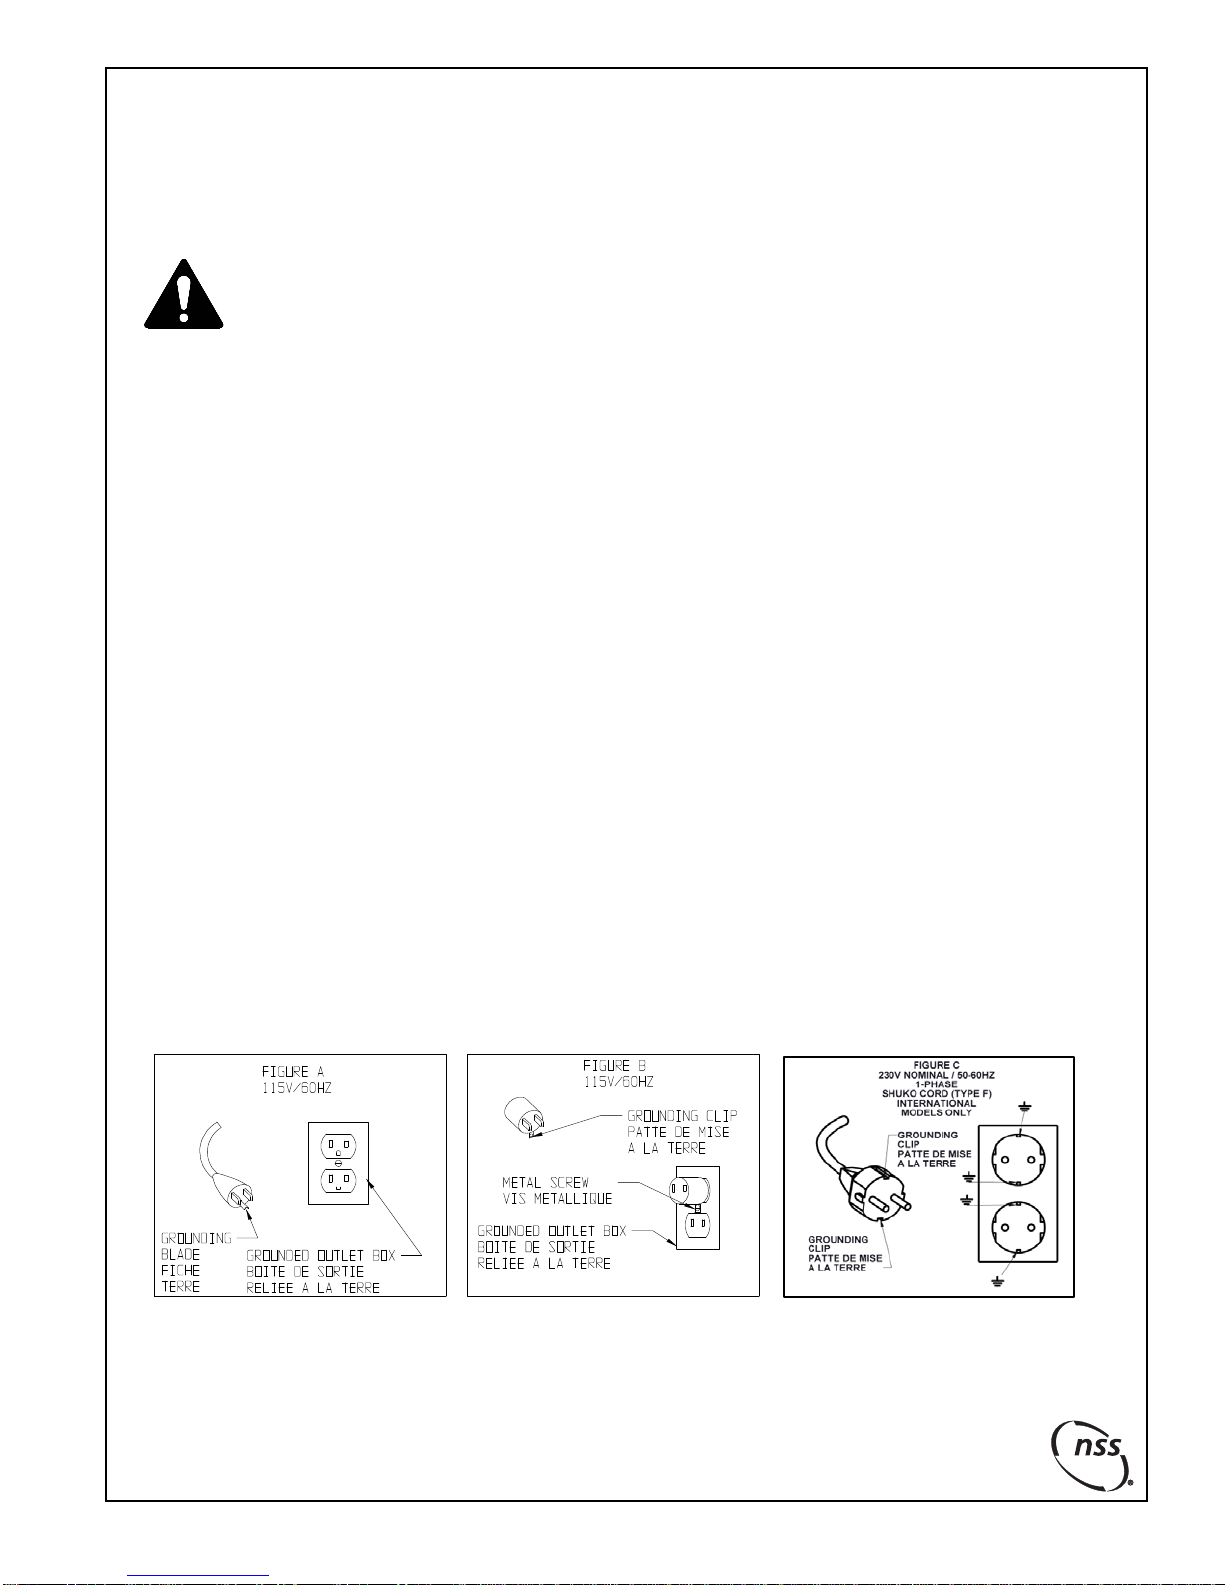
AVERTISSEMENT: Danger de choc ou
d'électrocution.
TOUJOURS débrancher l'appareil avant
tout entretien ou réparation.
AVERTISSEMENT: Danger de choc ou
d'électrocution.
NE JAMAIS brancher cet appareil à une
prise électrique qui n'est pas mise à la
terre correctement. Voir les instructions
de mise à la terre.
AVERTISSEMENT: Danger d'incendie ou
d'explosion.
NE JAMAIS utiliser pour ramasser des liquides
inflammables ou combustibles ou toute autre chose
qui brûle ou fume, comme des cigarettes, des
allumettes ou des cendres chaudes.
NE JAMAIS faire fonctionner cet appareil dans un
milieu explosif (poussière céréalière, liquides ou
fumées inflammables, etc.).
ADVERTENCIA: Este producto contiene un químico conocido al estado de California para
causar defectos de cáncer y nacimiento u otro daño reproductor.
AVERTISSEMENT:
UTILISATION PRÉVUE
Les appareils Bronco sont des appareils à utilisation
commerciale pour aspirer les déversement humides
et/ou les débris secs des planchers, dans un milieu
intérieur. Cet appareil N'est PAS pour retirer l'amiante
ou les déchets dangereux. NSS ne recommande pas
d'utiliser ces appareils à d'autres fins.
En utilisant un appareil électrique, on doit
suivre les précautions de bas, y compris ce
qui suit :
•TOUJOURS lire et comprendre toutes les instructions
avant d'utiliser ou de réparer l'appareil.
•TOUJOURS utiliser l'appareil SEULEMENT selon la
description dans ce manuel.
•NE JAMAIS essayer de faire fonctionner cet appareil à
moins d'être formé pour son utilisation.
•NE JAMAIS permettre à une personne non formée de
faire fonctionner cet appareil.
•NE JAMAIS laisser l'appareil branché dans la prise de
courant lorsqu'il n'est pas utilisé.
•NE JAMAIS débrancher l'appareil de la prise de courant
avant qu'il ne soit éteint.
•SI l’appareil ne fonctionne pas correctement, a été
échappé, endommagé, laissé à l’extérieur ou échappé
dans l’eau, retournez-le à un centre de service.
•NE JAMAIS débrancher ou modifier les interrupteurs ou
les dispositifs de sécurité.
•NE JAMAIS faire fonctionner cet appareil si le cordon et /
ou la fiche est endommagé(e), brisé(e), coupé(e), usé(e)
ou scellé(e) avec un ruban adhésif.
•TOUJOURS remplacer tout le cordon lorsque ce dernier
ou la fiche est endommagé(e) de quelque façon que ce
soit.
•NE JAMAIS manipuler l'appareil, le cordon ou la fiche
avec les mains mouillées.
•NE JAMAIS laisser tomber ou insérer un objet dans toute
ouverture de l'appareil.
•NE JAMAIS faire fonctionner cet appareil lorsqu'une ouverture
d'air est bloquée. Garder toutes les ouvertures d'air libres de
poussières, peluche, cheveux, etc.
•NE JAMAIS tirer ou porter l'appareil par son cordon
électrique, utiliser le cordon comme poignée, fermer une
porte sur le cordon, tirer le cordon autour de bords ou
coins tranchants, exposer à des surfaces chauffées, faire
passer l'appareil sur le cordon, ou déposer des objets
lourds ou tranchants sur le cordon.
•NE JAMAIS débrancher en tirant le cordon. Pour
débrancher le cordon de la prise, agripper la fiche non
pas le cordon.
•NE JAMAIS laisser cet appareil servir de jouet. Attention
tout particulièrement lorsque l'appareil est utilisé par ou
près d'enfants.
•TOUJOURS garder le visage, les doigts, les cheveux ou
toute autre partie du corps ou vêtements amples loin de
toute ouverture de l'appareil ou pièce mobile.
•TOUJOURS utiliser l'appareil prudemment en nettoyant
les escaliers ou lorsque l'appareil lui-même est sur
l'escalier.
•NE JAMAIS faire fonctionner cet appareil sans sac à
poussières et / ou filtres en place.
•NE JAMAIS utiliser d'accessoires autres que ceux
recommandés par le fabricant.
•NE JAMAIS pulvériser cet appareil d'eau ou d'autres
liquides.
•NE JAMAIS faire fonctionner l'appareil à l'extérieur.
•NE JAMAIS exposer l'appareil à la pluie, à la neige ou à
des températures extrêmes.
•TOUJOURS ranger cet appareil à l'intérieur dans un
endroit sec et frais.
•TOUJOURS utiliser un agent antimousse pour aspirer les
liquides savonneux.
TOUTES LES RÉPARATIONS DOIVENT ÊTRE EFFECTUÉES PAR UN DISTRIBUTEUR / STATION
SERVICE AUTORISÉ(E) NSS UTILISANT SEULEMENT DES PIÈCES ORIGINALES NSS.
Pour réduire le risque d’incendies, de choc électrique ou de blessures.