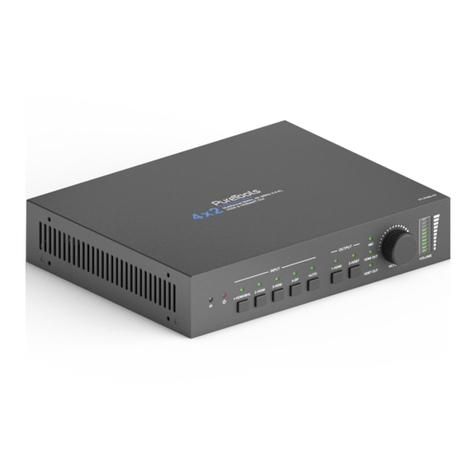
NTI VEEMUX Series User manual

MAN422 Rev Date 7/06/2022
SM-4X4-4K18GBA-LCV2
Low-Cost 4K 18Gbps HDMI Video Matrix Switch
Installation and Operating Manual
Front and Rear View of SM-4X4-4K18GBA-LCV2
VEEMUX®Series

TRADEMARK
VEEMUX and the NTI logo are registered trademarks of Network Technologies Inc in the U.S. and other countries. All other brand
names and trademarks or registered trademarks are the property of their respective owners.
COPYRIGHT
Copyright © 2022 by Network Technologies Inc. All rights reserved. No part of this publication may be reproduced, stored in a
retrieval system, or transmitted, in any form or by any means, electronic, mechanical, photocopying, recording, or otherwise,
without the prior written consent of Network Technologies Inc, 1275 Danner Drive, Aurora, Ohio 44202.
CHANGES
The material in this guide is for information only and is subject to change without notice. Network Technologies Inc reserves the
right to make changes in the product design without reservation and without notification to its users.

TABLE OF CONTENTS
Introduction......................................................................................................................................................................1
Materials..........................................................................................................................................................................2
Features and Functions...................................................................................................................................................3
Connections.....................................................................................................................................................................5
Operation.........................................................................................................................................................................6
Remote Control Features ............................................................................................................................................6
LCD Panel Control.......................................................................................................................................................7
Video switch operation:.............................................................................................................................................7
Video Switching ........................................................................................................................................................8
Turn ON/OFF Output................................................................................................................................................9
Audio Control Interface...........................................................................................................................................10
Switch Output Audio............................................................................................................................................10
Audio Extraction Control:.....................................................................................................................................11
EDID Setting Interface:...........................................................................................................................................12
Preset Application...................................................................................................................................................13
Setup Interface........................................................................................................................................................14
Baud rate setting .................................................................................................................................................14
DHCP switch........................................................................................................................................................15
Reboot.................................................................................................................................................................16
Factory Reset ......................................................................................................................................................16
View Information Interface......................................................................................................................................17
RS232 Control...............................................................................................................................................................18
Web Control...................................................................................................................................................................19
Technical Specifications................................................................................................................................................28
Warranty Information.....................................................................................................................................................28

NTI 4x4 HDMI2.0 Matrix Switch
1
INTRODUCTION
The VEEMUX®Low-Cost 4K HDMI Matrix Switch routes digital 4Kx2K HDMI video and audio signals from up to four HDMI video
sources (computers, Blu-Ray players, satellite receivers, etc) to up to four displays (monitors, 4K TV’s, projectors, etc).
Features
Configure and control the switch through front panel buttons, Ethernet, IR remote control, or RS232.
Supports Ultra-HD 4Kx2K resolutions (4096x2160 and 3840x2160 @24/30/60Hz YUV 4:4:4) and HDTV resolutions to
1080p.
Each input can be independently connected to any or all outputs.
HDCP 2.2 compliant.
HDMI features supported: HDMI 2.0
oDolby TrueHD, DTS-HD Master Audio, Dolby Digital, DTS 7.1 and LPCM
oYUV 4:4:4
oHDR
o3D
oBandwidth up to 600 Mhz (18 Gbps)
oLip Sync
Audio switching follows video switching.
oHDMI-embedded audio switching (four-channel stereo mixing)
oL/R analog audio and SPDIF digital audio out ports for each source.
oFor example, if HDMI output 1 video is from HDMI input 3, then it will also receive audio from HDMI input 3. The
L/R analog audio output 1 and the SPDIF audio output 1 will receive audio from HDMI input 3 also.
Configurable built-in EDID table.
Compact desktop design.

NTI 4x4 HDMI2.0 Matrix Switch
2
MATERIALS
Materials supplied with this kit:
NTI SM-4X4-4K18GBA-LCV2 HDMI Matrix Switch
110-240VAC, 50 or 60Hz-12VDC/2A AC Adapter
Remote Control
IR Receiver Extension Cable
5 pcs 3-Terminal plugs for RS232 cable termination and Audio termination
URL Slip with path to this manual
Materials Not supplied but REQUIRED:
CATx cable for connection to network
HD-xx-MM Cables for connection of displays
BNC cables for SPDIF connection to speakers
where:
xx is the length of the cable in feet
MM indicates male-to-male connector
Cables can be purchased from Network Technologies Inc by calling (800) 742-8324 (800-RGB-TECH) in the US and Canada or
(330) 562-7070 (worldwide).
Cables
Interface cables between the video sources/displays and the switch are required for proper operation. Supports cable lengths to
20 feet for 4Kx2K resolutions at 60Hz and lengths to 50 feet for 1080p at 60Hz using passive HDMI cables. Cables longer than 50
feet can be used provided they have a built-in video equalizer (also known as “active HDMI cables”).
Use HD-xx-MM HDMI cables to connect an HDMI source or display. HD-3/6/10/15-MM supports resolutions to
4K@60Hz.
HD-25/30/50-MM supports resolutions to 1080p@60Hz.
Use HD-ACT-xx-MM 4K HDMI Active Cables to connect an HDMI source or display up to 100 feet. HD-ACT-20/25/30/40/50-
MM supports resolutions to 4K@60Hz (18 Gbps).
HD-ACT-60/75/100-MM supports resolutions to 4K@30Hz (10.2 Gbps).
Use DP-HD-xx-MM to connect a 4K@60Hz DisplayPort computer up to 15 feet.
Use USB3C-HD4K-xx-MM to connect a 4K@60Hz computer with USB Type C connector up to 10 feet.
Use DVI-HD-xx-MM cable to connect a DVI source. Supports resolutions to 1080p.
Cables not included.

NTI 4x4 HDMI2.0 Matrix Switch
3
FEATURES AND FUNCTIONS
SM-4X4-4K18GBA-LCV2 Front Panel
# LABEL INTERFACE DESCRIPTION
1 None (behind window) IR Receiver Sensor for receiving IR signal from Remote Control
2 OUTPUT 1-4 BUTTONS Press to choose an output, press again to cancel / Press and hold to
choose all outputs, press and hold again to cancel all outputs
3 INPUT 1-4 BUTTONS Press to choose one input (must have already selected an output) /
Press and hold to select one input for all outputs
4 PRESET BUTTON Momentary press to preset
5 UP BUTTON Momentary press to move up in the LCD menu
6 LOCK BUTTON Press and hold to lock, press and hold again to unlock
When locked, all buttons will be non-responsive except for the Lock
button
7 MENU BUTTON Press for main menu interface, or to return to the previous menu
interface
8 DOWN BUTTON Momentary press to move down in the LCD menu
9 ENTER BUTTON Momentary press to confirm selection
10 None LCD SCREEN For displaying the onboard menu
Note: The Unit can be controlled using front panel buttons, like: video switch, EDID switch, baud rate switch, etc.. When entering
into the menu interface, press button(s) within 30 seconds; if you exceed 30 seconds, the LCD screen will return to audio channel
interface automatically; if you exceed 60 seconds, the LCD screen will go OFF.

NTI 4x4 HDMI2.0 Matrix Switch
4
SM-4X4-4K18GBA-LCV2 Rear Panel:
# LABEL INTERFACE DESCRIPTION
1 L/R Audio Out -L/G/R 3-Terminal Blocks For connecting to analog speakers
2 S/PDIF OUT BNC connections For connecting to S/PDIF type speakers
3 RS232 Tx/G/Rx 3-Terminal Block For connection to RS232 terminal
4 IR-Ext 3.5mm Jack For connection of IR Receive extension cable
5 IP Control RJ45 Female For connection to Computer or Ethernet Switch
6 DC/12V DC Power Jack For connection of DC power supply
7 Output 1-4 HDMI Female For connection of display devices
8 Input 1-4 HDMI Female For connection of HDMI sources

NTI 4x4 HDMI2.0 Matrix Switch
5
CONNECTIONS
1. Connect HDMI video and audio source devices to the Input ports of the matrix
2. Connect HDMI Output ports to Televisions or other HDMI sink devices.
3. Optional: connect an RS232 cable from a computer's RS232 port.
4. Optional: connect an Ethernet cable from the TCP/IP port on the matrix to a local area network.
5. Connect the 12V POWER supply (provided) to the DC power socket.
Application Diagram

NTI 4x4 HDMI2.0 Matrix Switch
6
OPERATION
Remote Control Features
1. Power ON/Standby.
2. M: Mute the HDMI output audio
3. W: Lock remote control
4. Output 1-4
5. All outputs select INPUT-y:
a.Press ALL button
b.Press INPUT-y button (y means 1 to 4 of the Inputs),then INPUT-y is switched
to ALL OUTPUTS.
6. Turn OFF the Output channel
7. PTP button: Mirror all Inputs and Outputs
(Ex. Input 1 to output 1, input 2 to output 2, etc)
8. Input 1-4 (press Output-x then Input-y):
9. Switching Input left or right
10. Up and down, left and right for the menu page on the LCD
Remote Control Usage
Note: All buttons require only a momentary press, there is no function for a long press
Power ON/Standby: a short press will put the matrix in Standby mode,
the LCD screen will display "System Shutdown”,
HDMI output 5V will disconnect and
Display devices will be without image.
Press momentarily again to wake the matrix switch, the HDMI output will return to normal.
Video switch: Output+Input (example:Output1+Input2 = switch Output1 to Input1)
Mute HDMI output audio: Output+M (example:Output1+M= Mute Output1 audio)
Lock Remote Control: short press ”W” to lock, short press again to unlock.
Turn OFF output channel: Output+X (example: Output1 + X= Output1 turns to a black screen, Output+X again to return to
normal)
Switching input left or right:Output + <(>) = the input source connecting to Output 1 will be switched to the previous or next
available input. For example- Input1,3 and 4 have signal and Output1 is now connecting to Input1. Press Output1 + >, this will
switch the source to Input3. Press it again and it will switch to Input4. Press it again and it will switch to Input1 ).

NTI 4x4 HDMI2.0 Matrix Switch
7
LCD Panel Control
Video switch operation:
Signal switching includes 4 switching channels, which can be randomly configured as input/output according to requirements to
form a 1×4~4×4 matrix. It can switch any input signal to 1 channel output or all channels output.
Operation format: "output channel"+"input channel", or long press “input channel”
For example:
1. Switch output1 to input4
Operation: press output1+input4 to complete the switch
2. Output2,1,3 switch to input 2
Operation:press output2,1,3+input2 to complete the switch
3. Switch All outputs to input4
Operation: long press output4+long press input4 to complete the switch
Note: Press output+input to switch; you can then press another input button to switch to a different input (you don't need to
repeatedly press the output (if you exceed 10 seconds between button presses you will need to press an output again)
Video control:
There are 2 sub-menus in the video interface:
1.switching
2.On/Off

NTI 4x4 HDMI2.0 Matrix Switch
8
Video Switching
Operation:
1. Select "Video" in the main menu, press "ENTER" button.
2. Press “up and down” button to choose “Switching” .
3. Press "ENTER" to enter the next sub-menu
4. Press the “up and down” button to select “Output1~4” (“All” means switching all outputs)
5. Press "ENTER" to enter the next sub-menu
6. Press the “up and down” button to select the input
7. Press "ENTER" button to complete video switching

NTI 4x4 HDMI2.0 Matrix Switch
9
Turn ON/OFF Output
You can turn ON/OFF any output port, or turn ON/OFF all output ports. Output video is ON by default
Operation:
1. In the main menu, select "Video" and press "ENTER" button
2. Press “up and down” button to select “On/Off”
3. Press "ENTER" button to enter the next sub-menu
4. Press “up and down” button to select “output1-4” (All means for all outputs)
5. Press "ENTER" to enter the next sub-menu
6. Select Output-HDMI1~4, press “ENTER" button to enter the next sub-menu
7. Press the “up and down” button to select ”Off” or “On”
8. Press "ENTER" button to confirm that the output port is to switch ON/OFF.

NTI 4x4 HDMI2.0 Matrix Switch
10
Audio Control Interface
There are 2 sub-menus in audio control interface: Line out and De-Embed (both are default open)
Switch Output Audio
“Line out” means switch HDMI output audio ON/OFF, with which you are able to mute the TV sound from any one channel HDMI
output.
:Operation
1. Select “Audio” in the main menu and press the ”ENTER” button.
2. Press “up and down” button to select “Line out”, press “ENTER” button. You are now able to select output1-4 or all outputs by
pressing “up and down” button, press “ENTER” button to choose ”ON” and “OFF”
example:mute sound of TV which is connected to HDMI output1
Operation: “Audio”+“ENTER”+“Line out”+“Output1-HDMI1”+“Off", will return to upper-menu after “ENTER” .

NTI 4x4 HDMI2.0 Matrix Switch
11
Audio Extraction Control:
“De -Embed” enables you to set the output audio (for both analog and SPDIF audio). You can select any one
Channel audio output or mute.
:Operation
1. Select “Audio” in main menu and press ”ENTER” button.
2. Press “up and down” button to select “De - ,Embed” press ,“ENTER” button the background ,of the selected turn to white You
can select output1-4 or All via pressing “up and down” button, press “ENTER” button to choose ”On” and “Off”
example:Turn off audio extraction of HDMI output1,
Operation: “Audio”+“ENTER”+“De -Embed”+“Output1”+“Off”, will return to upper-menu after “ENTER”

NTI 4x4 HDMI2.0 Matrix Switch
12
EDID Setting Interface:
EDID management: User EDID, built-in EDID, Copy EDID mode.
The default EDID is "Default1” for all input channels.
Default1 4K60 444-LPCM: 2.0, HDR:HLG Default2 4K60 420-LPCM: 2.0, HDR:None
Default3 4K30 444-LPCM: 2.0, HDR:None Default4 1080P60 444-LPCM: 2.0, HDR:None
Example: Switch Input1 to Default1 EDID:
Operation:
1. Select “EDID” in main menu and press ”ENTER” button
2. Press (“up and down” button to select “Input 1” All means for )all inputs
3. Press "ENTER" button to enter the next sub-menu
,4. Press “up and down” button to select “Default1” press “ENTER” to complete the setting
5. Behind the selected EDID, it will show the maximum supported resolution, audio format and audio channel.

NTI 4x4 HDMI2.0 Matrix Switch
13
Preset Application
Preset interface can save the current video, audio, EDID, system settings, etc..., there are 8 slots available for preset
configurations. They can be configured through web, command, panel buttons, and recall.
Preset control interface has three sub-menu:
Call scene
Save scene
Clear scene
Operatio :n
Select “Preset” in main menu and short press ”ENTER” button to enter preset interface; then you can call, save and clear preset.
:Save preset select Save-> any one of Preset1~8->ENTER.
:Call preset Call->any of the saved Preset1~8->ENTER.
:Clear preset Clear->any of the saved Preset1~8->ENTER (the saved preset will return to the default).

NTI 4x4 HDMI2.0 Matrix Switch
14
Setup Interface
Setup Interface can set serial port Baud Rate, DHCP ON/OFF, device Reboot and Factory Reset.
Baud rate setting
There are 4 options for baud rate setting: 9600,19200,57600,115200. The default serial port baud rate is 115200
The example below is setting baud rate to 9600.
:Operation
1. Select “Setup” in main menu and press ”ENTER” button.
2. Press “up and down” button to select “Baud”
3. Press “ENTER” to enter the next sub-menu.
4. Press “up and down” button to select “9600”
5. Press “ENTER” to complete the setting

NTI 4x4 HDMI2.0 Matrix Switch
15
DHCP switch
DHCP On = dynamic IP address; DHCP Off = static IP address (default is DHCP Off)
DHCP On operation:
1. Select “Setup” in main menu and press ”ENTER” button.
2. Press “up and down” button to select “DHCP” setting
3. Press “ENTER” to enter the next sub-menu.
4. Press “up and down” button to select “On”
5. Press “ENTER” to open DHCP to allocate IP address automatically.

NTI 4x4 HDMI2.0 Matrix Switch
16
Reboot
Reboot the device.
:Operation
1. Select “Setup” in main menu and press
”ENTER” button
2. Press “up and down” button to select
”Reboot”
3. Press “ENTER” to enter the next sub-
menu.
4. Press “up and down” button to select
“Yes”
5. Press “ENTER” to complete reboot
device.
Factory Reset
You can use this feature to restore the
matrix to the initial factory settings. There are two factory settings:
Factory Common: Provides a factory reset for video switch, EDID, audio and settings (IP address can’t be factory reset
when under “common”).
Factory All: Provides a factory reset for video switch, EDID, audio, settings, presets and the device name.
Example: Factory All operation:
1. Select “Setup” in main menu and press ”ENTER” button
2. Press “up and down” button to select “Factory"
3. Press “ENTER” to enter the next sub-menu.
4. Press “up and down” button to select “ALL” and press “ENTER” button
5. Press “up and down” button to select “Yes” and press “ENTER” button

NTI 4x4 HDMI2.0 Matrix Switch
17
View Information Interface
View IP and System Information.
System interface:View company name, device name and version information
IP interface:View device IP address, MAC address and DHCP status.
:Operation
1. Select “INFO” in main menu and press ”ENTER” button
2. Press “up and down” button to select “System” or “IP”, background will turn white when selected
3. Press “ENTER” to enter the next sub-menu, then you can view device information.
Other manuals for VEEMUX Series
1
This manual suits for next models
2
Table of contents
Other NTI Matrix Switcher manuals
NTI
NTI SM-8X8-DVI User manual

NTI
NTI SM-4X4-4K18GBA-LC User manual

NTI
NTI VEEMUX SM-nXm-C5AV-1000 User manual
NTI
NTI SM-8X8-C6HDR-HDBT User manual
NTI
NTI VEEMUX VEEMUX SM-nXm-C5AVR-LCDSeries User manual

NTI
NTI SM-8X8-C6HDR-HDBT User manual
NTI
NTI VEEMUX Series User manual
NTI
NTI VEEMUX SM X 15V-LC Series User manual
NTI
NTI SM-8X8-C6HDR-POE-HDBT User manual
NTI
NTI VOPEX-2P User manual
