Nugsmasher NS022219 User manual

rosin
made
simple
owners manual
nugsmasher touch
Version 2.0
NS022219
Copyright © 2019 NugSmasher. All Rights Reserved.

Version 2.0NS022219 I
Introduction ................................................. 1
Quick Start Guide ............................................ 2
unit operation ............................................... 4
pressure system............................................. 6
notice ........................................................ 8
Safety ....................................................... 9
table of contents

Version 2.0NS022219 1
introduction
Thank you for the purchase of your NugSmasher® Touch an intelligent
solution to rosin extraction. We have designed this unit for the purpose
of effortless rosin extraction for up to 28 grams of flower. Your Touch
system will be constantly updated with the newest software and tools to
further aid in rosin extraction. When setting up your unit, please ensure
your stand is suitable for the weight of the machine. Also note that the
unit gets hot and the high temperature hydraulic heat plates are capable
of bodily injury if not used in a safe manner. (Please do not attempt to
open your unit casing as this will void your factory warranty.)
While our products are sturdy and built to last, they are also heavy and
shippers can be rough during handling. If there are any problems from
shipping and your item does not deliver safely please contact us direct so
we can resolve the matter immediately.
As always, please feel free to call us at any point with any questions or
concerns at (951) 272-9800 or NugSmasher®.com/contact.

Version 2.0NS022219 2
quick start guide
Powering on Unit:
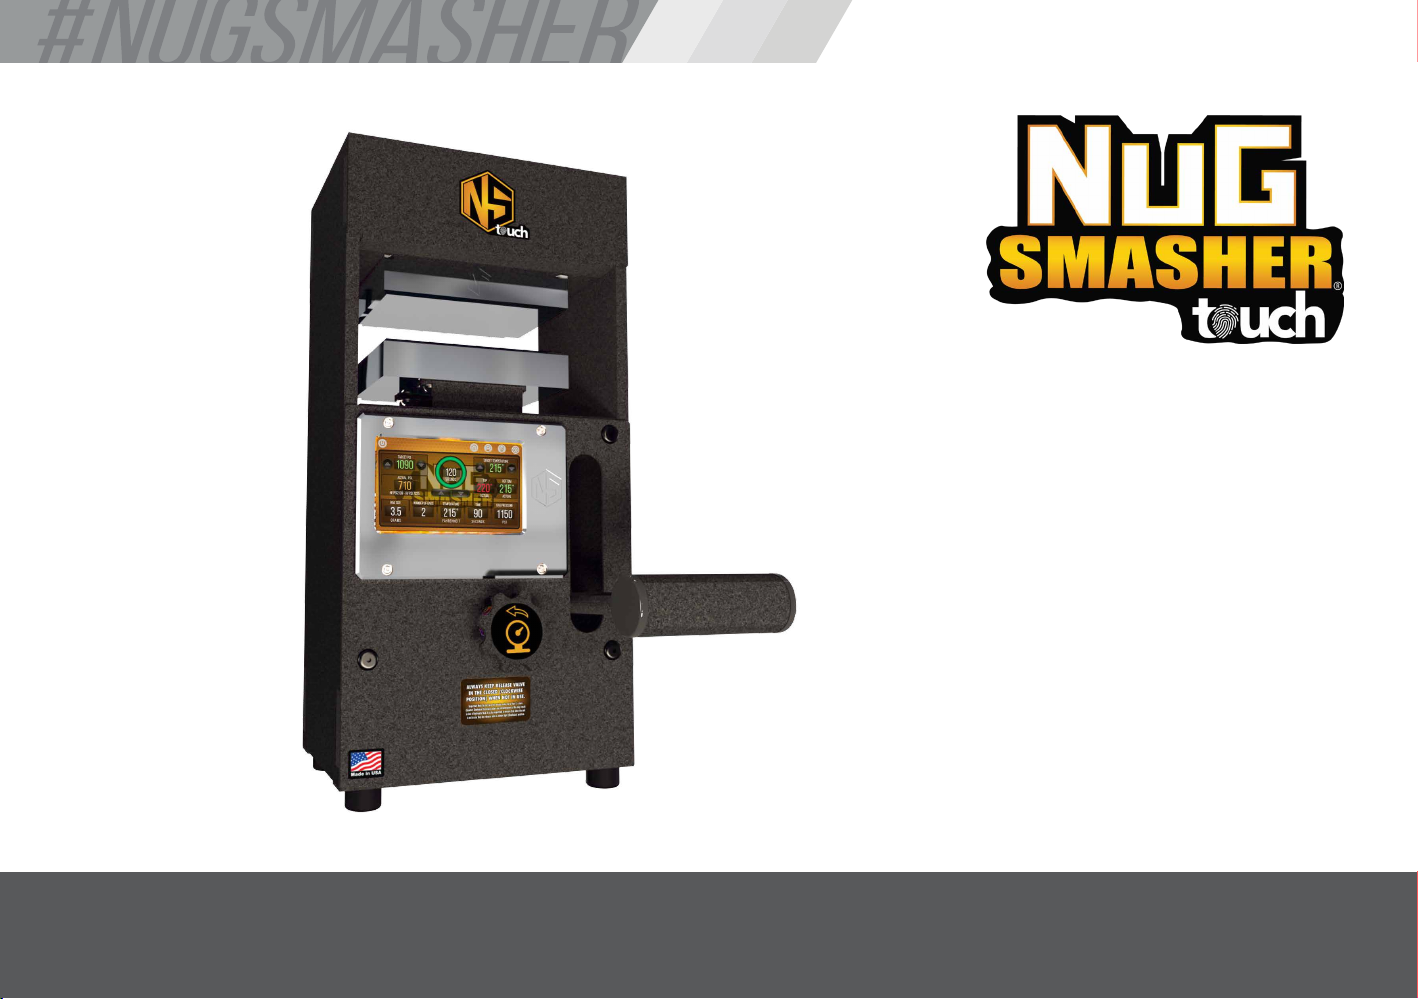
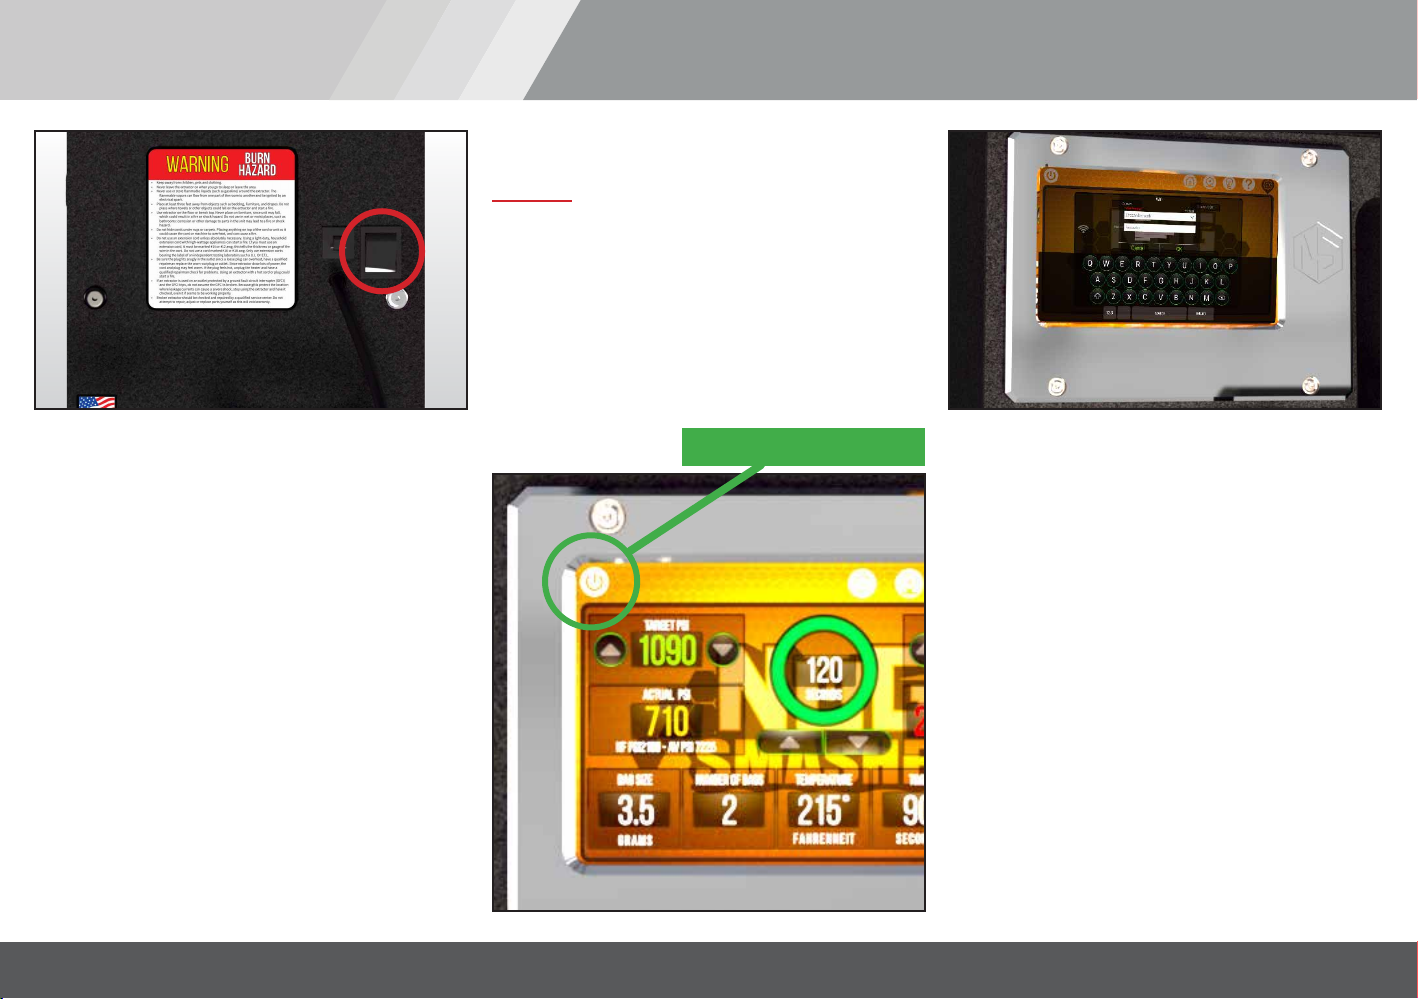
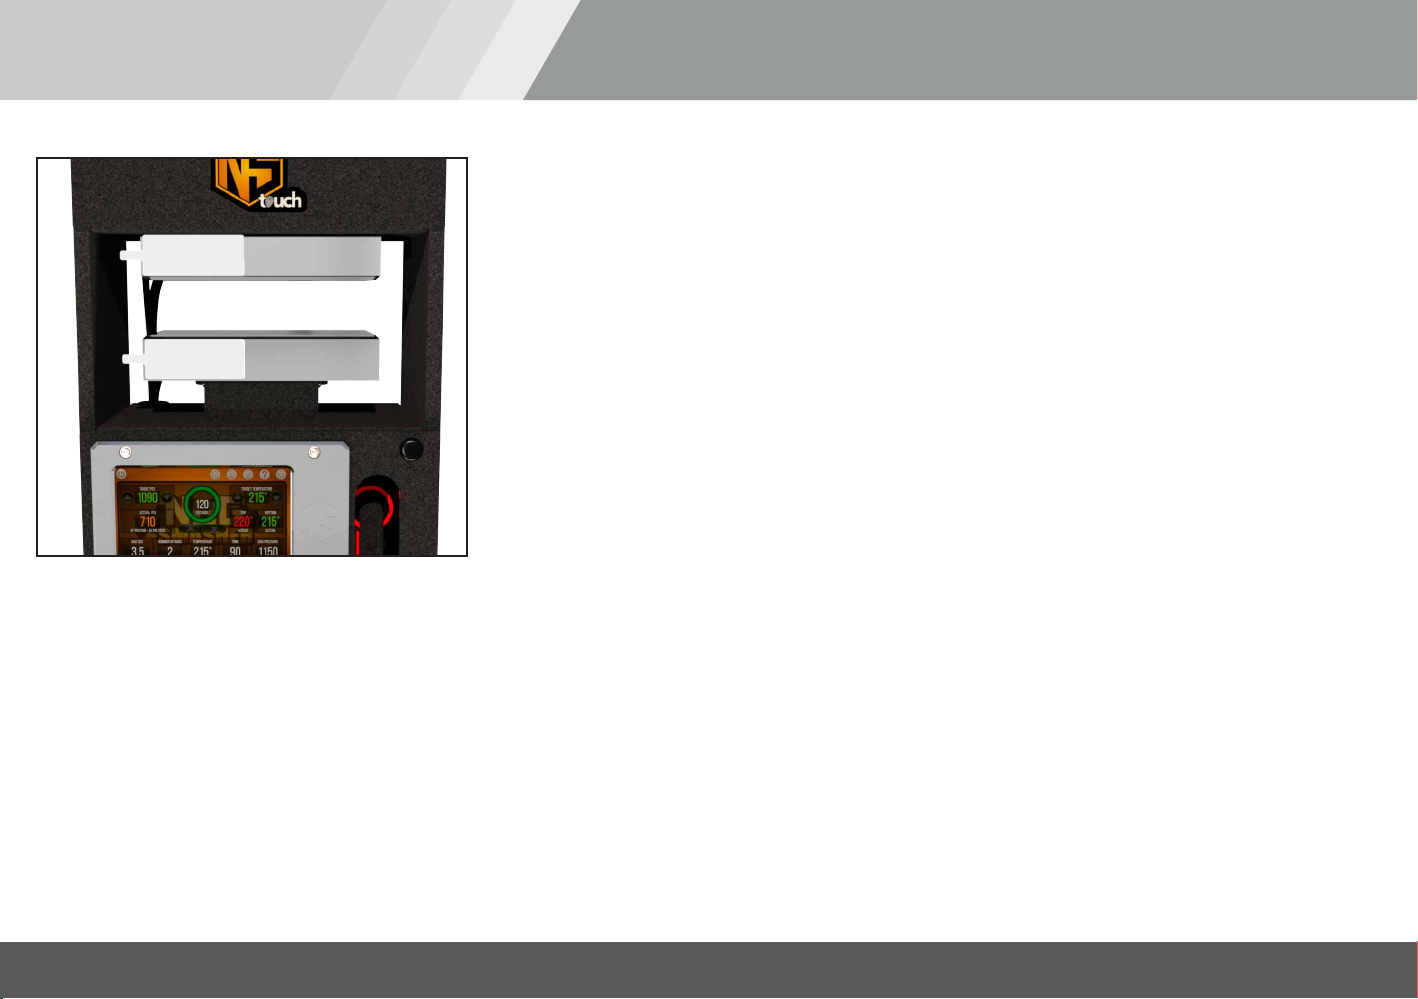
To start your unit turn on power switch
on the rear of unit (red circle) and display
will start within 5 - 7 seconds. The
NugSmasher® Touch is designed with
several time saving features that will
allow you to choose the perfect setup
and pressure using our NugSmasher®
bags in accordance with their dimensions.
We also have integrated a custom
configuration for bag size if your using
Non NugSmasher® bags to achieve correct
pressure vs. surface area configuration.
(Note not all bags are created equally, use
NugSmasher® bags for best results).
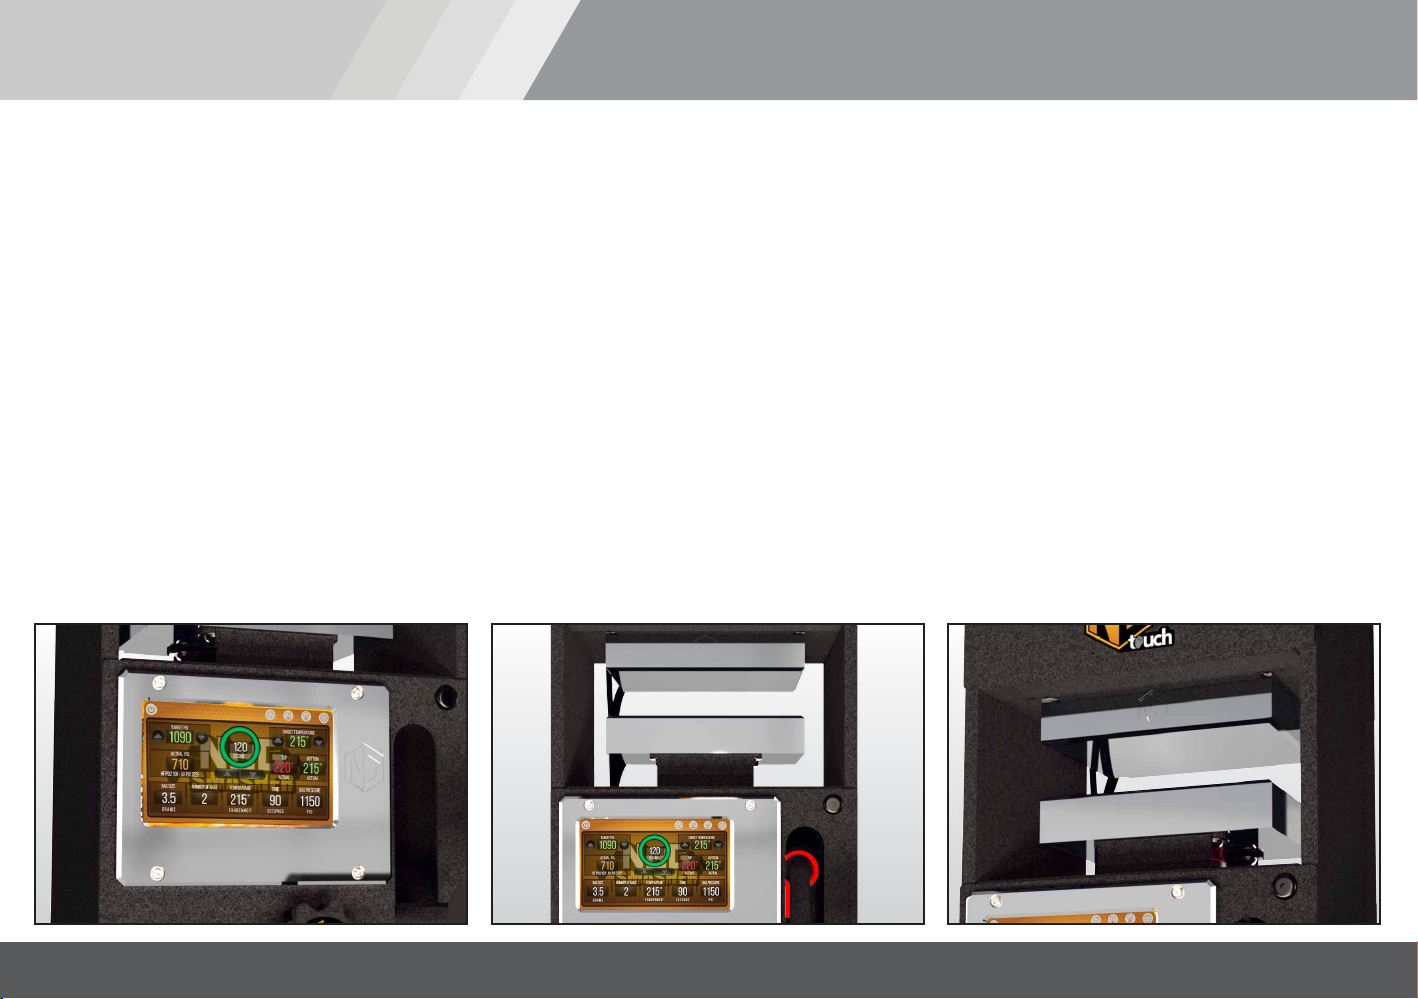
Powering off Unit:
DO NOT power off your unit by the switch! It is
imperative when powering down to use the on
screen power button (green circle in illustration
below). Once power down cycle is complete
and screen has shut down -approximately 7-10
seconds- then the main power switch on the
rear on the unit can be set to the off position.
Internet connection setup
The wifi connectivity of your machine must
be turned on to allow any updates which
will include new NugSmasher® Touch
capabilities with your machine as they are
designed. Simply go to settings button
which is on the top right of your screen and
select “connect” to allow it to be connected
via your home wifi network, connect to your
available network connection by inputting
your wifi password.
Note: Connection can take approx 10
seconds before its connected. The system
only works wireless so you would need to
have a wireless connection within range.
POWER OFF

Version 2.0NS022219 3
quick start guide
Please note that under any circumstances do not turn release valve more then ½ a turn in the open (counter clockwise) direction as
this will void your warranty and may result in hydraulic fluid loss. Also make sure when not in use or stored, the release valve must
be in closed tight (clockwise) position.
KEEP RELEASE VALVE IN CLOSED “CLOCKWISE POSITION” WHEN NOT IN USE
WARNING!
Never turn your
release knob more
than ½ full turn
counter clock wise
from tight.
Please Note:
Your release knob
is factory designed
to be a slight
upward.
For more tips and tricks; follow our pages on YouTube –the best resource
for “how to press” video tutorials–, Google, Instagram and Facebook... and
remember, practice makes perfect!

Version 2.0NS022219 4
Pressure:
Once yourunitreachessettemperatureyou’rereadytostart pressing.Follow recommendedpressureasadvised by Touch on screen,there arethreepreset pressure
settingsthatyoucan togglethrewwhichwouldbe low, medium and high which areavailable bypressingthe bag pressuresquarebuttonrepeatedly. Notethe pressure
iscalculated using the preset bag sizeyouchoose from.If your using a non NugSmasher® bag select thebuttontorightofhome buttonand youcan manually inputyour
bagdimensions which will give you recommended surfacebagareacalculations. Onceyouhaveyourmaterialbetweenparchment paper (do notuse wax paper!),
slowlystart raisingplates bypumping handle.Itis keyto do thisslowly toproperlybuild heatintoyourmaterial. The entirepressingprocessshould be between90-120
secondsdepending on yourstrain.There are several videosavailableonlineon the NugSmasher® social Instagramaccountaswell as the NugSmasher® YouTube
channel thatareverybeneficial fortechniquesand tipsofyourrosinextraction.Note theleverage designed with your pumphandle is only designed forhandoperation.
Do not use anyotherleverage device or foot topush handle down asyouwill cause damage notcoveredbywarranty. VisitTerp Files atNugSmasher®.com/view-public-
rosin-data/forgreat referencetostrains,tempsand unit settings used.
Ideal Temperature:
To adjust temperature simply select arrows up or down on display (red circle), also note that there
are several preset common temperatures that can quickly be toggled threw for convenience.
Note: NugSmasher® Touch is set in Fahrenheit. The ideal pressure and temperature will vary
depending on strain and growing techniques so don’t be discouraged on your results when
you press new material. We recommend when pressing a new strain to start at approx. 220
degrees for flower and notate your yield results (weight of material in vs. rosin out). Perform
additional test presses and drop 5-10 degrees per press until you notice your yield percentage
starting to drop. Adjust back to the previous temp and that will be your ideal temp for that strain.
It is advised to have a thermal temp gun to verify and check temperatures from time to time.
Use our temperature test strips included with your unit (also available for purchase at
NugSmasher®.com), unless in a pinch use a small piece of electrical tape as the high
gloss on heat plates will affect accurate temp readings if using a thermal temp gun. (As
shown in Illustration)
unit operation

Version 2.0NS022219 5
unit operation
Remember
“Fire in fire out!”
3.5g bag (1.1g-3.5g) = 1.5”-1.6”Diameter
7g bag (3.6g-7g) = 2”-2.2”Diameter
14g bag (7.1g-14g) =2.4”-2.7”Diameter
As the micron gets smaller the diameter gets larger, this is the reason for the variance in the diameter numbers above. We prefer to use
160 micron for fresh flower, as flower dries we go down in micron screen size (for dry flower use 90 micron). Micron size determines the
diameter (surface area) of the smashed bag. For nugs 1g and smaller no bag is necessary. For more details about loading Bottle-Tech
and/or Barrel-Tech style (BTS) please visit NugSmasher® on YouTube: https://www.youtube.com/watch?v=0osvcD7CLK0
Loading Micron Bags:
NugSmasher® extraction bags, are recommended for optimal yield and clean quality rosin. Our bags are hand-made and packaged
in the USA! NugSmasher® extraction bags are specially designed to work with the weight of fresh cured flower and are labeled
accordingly at: 3.5 g (1.1g-3.5g), 7 g (3.6g-7g) and 14 g (7.1g-14g). This assumes the bags are loaded (BTS) or bottle/barrel-tech
style (upright so that you end up with the round coin like puck once fully pressed). This perfected method allows you the ability to put
the proper weight of flower into the bag and get a consistent extraction every time. This method also applies the proper pounds per
square inch of pressure (PSI) on your product and eliminates the guess work.

Version 2.0NS022219 6
NugSmasher® extraction bags, our bags are recommended or optimal yield and
clean quality rosin. NugSmasher® extraction bags are specifically designed to work
with the weight of fresh cured flower together with our extraction machines and are
labeled accordingly at: 3.5g, 7g and 14g this assumes the bags are loaded (BTS)
or bottle/barrel-tech style (upright so that you end up with the round coin like puck
once fully pressed).
This perfected method allows you the ability to put the proper eight of flower into the
bag and get a consistent extraction very time. The reason for this is that it allows for
the proper pounds per square inch, pressure (PSI) on your product and eliminates
the guess work.
3.5g = 1.5” Diameter = 1.77” in surface area
7g = 2”-2.2”Diameter= 3.14” in surface area
14g=2.4”-2.7”Diameter= 4.91” in surface area.
We prefer to use 160 micron for fresh flower, as flower dries we go down in micron
screen size (for dry flower use 90 micron).
NOTE: As the micron gets smaller the diameter get slightly larger. Example: 90 micron is about
5% larger at the end of your extraction.
Plate Pressure:
The applied plate pressure is determined by the extracted material’s
surface area (bag, size and quantity) and the applied pressure to
the extraction (Screen PSI Reading)
HF Pressure:
HF pressure (psi) is measured from the hydraulic rams fluid
pressure. This is the applied pressure and should be adjusted to the
surface area to achieve optimum results.
Plate Pressure: HF Pressure:
Surface Area Key
-VS-
pressure System

Version 2.0NS022219 7
EXTRACTION EXAMPLE:
One 3.5g bag Two 3.5g bags
Plate Pressure
750 PSI
There is only one 3.5g bag
that has the total surface
area of around 1.77in2.
Plate Pressure
750 PSI
There are two 3.5g bags
that has a total combined surface
area of around 3.54in2.
Hydraulic Fluid Pressure
577 PSI
To extract your material at 750 PSI
with a surface area of 1.77in (one
3.5g bag) it would equal 577 PSI on
your screen.
Hydraulic Fluid Pressure
1154 PSI
To extract your material at 750 PSI
with a surface area of 3.54in2(1.77in2
for each 3.5g bag) you would need
1154 PSI on your screen.
pressure System
top plate view:

Version 2.0NS022219 8
Notice
•Copyright © 2019 All rights reserved. No part of this manual may be reproduced
or used in any manner without written permission of the copyright owner.
• The contents of this document may be subject to change without notice.
• Due to improvement or change of this device, the description of this document
could be partially different in specification, for which your understanding is
requested.
• With the exception of what is provided for in the warranty provisions of
NugSmasher®, we do not assume any liability against the damages (including
but not limited to the loss of profit, indirect damage, special damage or other
monetary damages) arisen out of the use or failure to use this product properly.
The same shall also apply to the case even if NugSmasher® had been notified
of the possibility of arising damages in advance. As an example, we shall not
be liable for any loss of material made using this product or indirect damages
caused by the product.
• Use of your NugSmasher® press should be done in accordance with all local,
state and federal regulations. It is owner/users responsibility to know and
understand laws and regulations regarding concentrates. NugSmasher® has
no responsibility of how product is used and products produced with it.

Version 2.0NS022219 9
Safety
• Keep away from children, pets and clothing.
• Never leave the extractor on when you go to sleep or leave the area.
• Never use or store flammable liquids (such as gasoline) around the extractor. The flammable vapors can flow from one part of
the room to another and be ignited by an electrical spark.
• Place at least three feet away from objects such as bedding, furniture and drapes. Do not place where towels or other objects
could fall on the extractor and start a fire.
• Use extractor on the floor or bench top. Never place on furniture, since unit may fall , which could result in a fire or shock
hazard. Do not use in wet or moist places, such as bathrooms; corrosion or other damage to parts in the unit may lead to a fire
or shock hazard.
• Do not hide cords under rugs or carpets. Placing anything on top of the cord or unit as it could cause the cord or machine to
overheat, and can cause a fire.
• Do not use an extension cord unless absolutely necessary. Using a light-duty, household extension cord with high-wattage
appliances can start a fire. If you must use an extension cord, it must be marked #14 or #12 AWG; this tells the thickness or
gauge of the wire in the cord. Do not use a cord marked #16 or #18 AWG. Only use extension cords bearing the label of an
independent testing laboratory such a U.L. or E.T.L.
• Be sure the plug fits snugly in the outlet. Since a loose plug can overheat, have a qualified repairman replace the worn-out
plug or outlet. Since extractor draw lots of power, the cord and plug may feel warm. If the plug feels hot, unplug the heater
and have a qualified repairman check for problems. Using an extractor with a hot cord or plug could start a fire.
• If a extractor is used on an outlet protected by a ground fault circuit interrupter (GFCI) and the GFCI trips, do not assume
the GFCI is broken. Because GFCls protect the location where leakage currents can cause a severe shock, stop using the
extractor and have it checked, even it if seems to be working properly.
• Broken extractor should be checked and repaired by a qualified service center. Do not attempt to repair, adjust or replace
parts yourself as this will void warranty.

rosin made simple
Table of contents
Other Nugsmasher Power Tools manuals