Nura nuraphone User manual

nuraphone User Manual
This user manual contains everything you need to know to set up and get the most from your
nuraphones, use the nura app, and troubleshoot any issues you might experience.

User Manual
2
Copyright © 2017 nura® Pty. Ltd.
Contents
nuraphone safety information 3
Getting started 5
nuraphone components 5
Turningyournuraphoneson/o 5
Downloading the nura app 5
Connecting your nuraphones with Bluetooth® 6
Personalising your nuraphones 6
Updating your nuraphones 7
Your nuraphones 8
Charging your nuraphones 8
Making and receiving voice calls with your nuraphones 8
Connecting your nuraphones to other products 9
Cleaning the nuraphone 11
The nura app 12
nura app features 12
Conguringyournuraphones’touchbuttons 12
Choosing your Immersion 13
Social Mode™ and CleanANC™ (active noise cancellation) 13
Usingoinemode 13
Changingyournuraphones’voicelanguage 13
Swapping,addinganddeletinghearingproles 14
Troubleshooting 15
Getting started troubleshooting 15
nuraphone troubleshooting 17
nura app issues 19
Need more help? 20
Warranty 20
Compliance 21

3
Copyright © 2017 nura® Pty. Ltd.
User Manual
nuraphone safety information
Read this manual before using the nuraphone for the rst time.
Always use the nuraphone responsibly, particularly in Immersion Mode.
Keep this manual handy for future reference.
The nuraphone has been designed and tested for safety and comfort, but please note: exposure to
any loud noise of 85 Decibels (dB) or above (approximately the same volume as a food blender) can
causegradualhearingloss.Duetotheclarityandsoundisolationofthenuraphone,youwon’tneed
to listen to your music as loudly as with many conventional headphones.
Approximate volumes of common sounds
This table shows approximate volumes of sounds you might encounter in your daily life.
Sound Noise Level Eect
Rustling leaves 20 dB Just audible.
Quietoce 60 dB Comfortable hearing levels are under
60 dB.
Averagecitytrac 80 dB Annoying; interferes with
conversation; constant exposure
may cause damage.
Lawnmover, food blender,
recreational vehicles, TV
80–90 dB Annoying; interferes with
conversation; constant exposure
may cause damage.
Symphony orchestra, power saw
(chainsaw), pneumatic
drill/jackhammer
110 dB Regular exposure to sound over 100
dB of more than one minute risks
permanent hearing loss.
Concert 110–140dB Threshold of pain begins around 125
dB.
Information via the National Institute on Deafness and Other Communication Disorders
Monitor your use. Hearing loss is a function of loudness versus time — the louder the volume, the
less time you can be exposed to it. The quieter the volume, the longer you can listen. For example, 8
hoursat85dBcausesasmuchdamageas4hoursat88dB,2hoursat91dB,orjust15minutesat
100 dB.
Only use the nuraphone with your volume set at a comfortable, moderate level.
Don’t listen to music in the front row setting in Immersion Mode at high volume for any
extendedperiod.
Be awarethatreminderorwarningsounds,i.e.alarms,messagetonesandincomingcalls,might
vary while using the nuraphone.
If you experience a warming sensation or loss of hearing, remove the nuraphone from your
headimmediately.
If the nuraphone emits a loud or unusual noise, stop using it and contact the nura® Customer
Experience Experts immediately.

User Manual
4
Copyright © 2017 nura® Pty. Ltd.
Due to the noise isolating Inova ™ technology, don’t use the nuraphone at any time when an
inability to hear may present a danger to yourself or others. For example, while driving, riding a
bicycle,inaconstructionsite,orinorneartrac.
Ifyou’reusingthenuraphoneforphonecallswhiledriving,thenuse caution and follow applicable
lawsregardingmobilephoneandheadphoneuse.Somejurisdictionsimposespeciclimitations
such as using a single earpiece while driving.
Useonlycertiednura®cablestochargethenuraphone.
Charging the nuraphone should be done only in accordance with the instructions in this
usermanual.
Don’t make unauthorised alterations to this product. Any attempt to do so will void warranty.
Contains small parts which may be a choking hazard. Not suitable for children
under age 3.
This product contains magnetic material. Consult your physician on whether
thismightaectyourimplantablemedicaldevice.
Removal of the rechargeable lithium-ion battery in this product should be
conductedonlybyaqualiedprofessional.

User Manual
5
Copyright © 2017 nura® Pty. Ltd.
Getting started
Followingthesestepstosetupyournuraphonesthersttimeyouusethem.
nuraphone components
Turning your nuraphones on/o
• Turn on — your nuraphones automatically turn on when you place them on your head.
• Turno—yournuraphonesautomaticallyturnotopreservebatterywhenyoutakethemo.
Downloading the nura app
To set up your nuraphones, you need to download the nura app onto your mobile device.
Onceyou’vedownloadedthenuraapp,youcanuseittopersonaliseyournuraphones.
You can download the nura app from:
• iOS — the App Store or iTunes.
• Android — Google Play.
• For Android users only: directly from nuraphone.com.
On the nuraphone.com homepage, scroll down to Create your unique hearing prole.
Then, press Download here.
nura app system requirements:
• iOS—iOS9.3+andBluetooth®4.
• Android—Android5.0+andBluetooth®4.
TeslaFlow™valves
1
2
3
4
5
6
Headband slider
Touch button
Charging port
Inova™
Voice call microphones
2
3
4
6
1 2
3
1
5

User Manual
6
Copyright © 2017 nura® Pty. Ltd.
Connecting your nuraphones with Bluetooth®
To set up your nuraphones, you need to connect them to your mobile device with Bluetooth.
Onceyou’reconnectedwithBluetooth,youcanconnecttothenuraappandpersonaliseyour
nuraphones.
To connect your nuraphones with Bluetooth:
1. Remove any cables from your nuraphones.
Your nuraphones enter discoverable mode when you remove any cables.
2. Put on your nuraphones.
When you place your nuraphones on your head, they turn on and enter
discoverablemode.
3. Openyourmobiledevice’sSettings > Bluetooth.
Select nuraphone XXX from the Bluetooth menu. XXXisyournuraphones’unique
pairingnumber.Don’tconnecttonuraphone XXX [LE].Thisisyournuraphones’low
energymode,whichautomaticallyconnectsafteryou’veconnectedtonuraphone XXX.
Swapping between Bluetooth® devices
Yournuraphonesautomaticallyenterdiscoverablemodefortwominuteswhenyourstputthem
on, allowing you to easily swap between your devices, without disconnecting from any previously
connected devices.
You can also turn on discoverable mode at any time by opening the nura app and tapping the menu
button > nuraphone settings > Enter discoverable mode.
Personalising your nuraphones
Youneedtopersonaliseyournuraphonesbeforeyoucanstartusingthem,butdon’tworry—
youonlyhavetopersonalisethisrsttimeyouuseyournuraphones.
When you personalise, your nuraphones learn and adapt to your unique hearing.
Before personalising your nuraphones:
1. Download the nura app.
2. Put on your nuraphones and open the nura app.
When you place your nuraphones on your head, they turn on and enter
discoverablemode.
3. Tap Create an account and enter your details.
Ifyou’vepreviouslycreatedanuraaccount,thentapLog in instead.
4.Tap Open Bluetooth Settings on the nura app and select your nuraphones.
Personalising your nuraphones:
1. In the nura app, press Start to begin personalisation.
If the nura app prompts you to upgrade your nuraphones, then tap Start update.
2. Adjustyournuraphones’earcupsuntilyouseetwoconstantticksonthenura
appscreen.
Onceyouhaveagoodt,personalisationbeginsandtakes1—2minutes.

User Manual
7
Copyright © 2017 nura® Pty. Ltd.
Ifyou’rehavingtroublegettingagoodtduringpersonalisation:
• Makesureyou’reinaquietplace.
• Don’ttalkormovearoundtoomuch.
• Remove any earrings, or other jewellery, that sit near your ears.
• If you wear glasses, then remove them for personalisation.
• Makesureyournuraphones’chargingportisonyourrightside.
• Checkyournuraphones’headbandslidersarelevelonbothsides.
• Makesureyournuraphones’eartipsaresittingcomfortablyinyourears.
• Trythedierent-sizedeartips.
• SeetheTroubleshooting:nuraphoneswon’tpersonalisesectionofthismanual.
3. Tap Personalisedtohearmusicwithyourhearingproleapplied.
4.Use the slider to adjust your Immersion between low and front row.
5. Tap the Social Mode™ button to hear your surroundings.
6. Congureyournuraphones’touchbuttons.
Your nuraphones are now personalised.
Updating your nuraphones
From time to time, the nura app will ask you to update your nuraphones:
Tap Start update, or tap: > nuraphone Settings > Software update > Start update.
Oncetheupdatestarts,youcantakeoyournuraphones,butkeepthemclosetoyourmobile
devicewithyourdevice’sscreenturnedon.
Checking your nuraphones’ software is updated
1. Open the nura app.
2. Tap > nuraphone Settings > Software update.
If you see a red marker next to Software update , then your nuraphones need updating —
tap Start update.
Ifyoucan’tseearedmarker,thenyournuraphones’softwareisuptodate.

User Manual
8
Copyright © 2017 nura® Pty. Ltd.
Your nuraphones
This section contains everything you need to know about using your nuraphones.
Charging your nuraphones
Yournuraphones’lithium-ionbatteryprovides20+hoursofwirelessuse.
Tochargeyournuraphones’battery:
1. Connect your nuraphones to:
• a nura USB-A charging cable, which comes included with your nuraphones.
• a nura USB-C cable, which can be purchased separately.
2. Connect the cable to:
• a computer.
• a wall charger.
A tone announces that the battery is charging.
Allowthreehoursforthenuraphone’sbatterytofullycharge.
Pleasenote:youcan’tchargethenuraphonewiththenuraLightning,analogormicro-USBcables.
Thisistopreventthenuraphonefromdrainingyourmobiledevice’sbattery.
Checking your nuraphones’ battery
• Check the battery indicator in the top right of the nura app.
• A voice prompt will announce your battery level when you put on your nuraphones.
• A voice prompt will announce ”battery low” when your nuraphones need charging.
Making and receiving voice calls with your nuraphones
Youcanmakeandreceivevoicecallswithyournuraphonesifthey’reconnectedwith:
• Bluetooth.
• a Lightning cable.
When your nuraphones are connected with Bluetooth, you can answer voice calls:
• Directly on your phone.
• Byusingyournuraphones’touchbuttons.
When your nuraphones are connected with a Lightning cable, you can answer voice calls:
• Directly on your phone.
• BypressingtheLightningcableinlineremote’scentrebutton.

User Manual
9
Copyright © 2017 nura® Pty. Ltd.
Connecting your nuraphones to other products
You can connect your nuraphones in the following ways:
Cable Quality
Lossless Audio Voice Calls Control
Touch Button
Bluetooth
Near Lossless
Lightning
USB–A
USB–C
Micro–USB
Analog
Pleasenote:thenuraphone’spersonalisedsoundworksnomatterhowyouconnect—wirelessorwired.
Pleasenote:don’tconnectyournuraphonestoanexternalheadphoneamplierasthiscandamagethethenuraphone.
Thenuraphonehasabuilt-inheadphoneamplier.
(Control through in-line, not through
your nuraphones’ touch buttons)
(via Qualcomm® aptX™ audio /
Qualcomm® aptX™ HD audio)

User Manual
10
Copyright © 2017 nura® Pty. Ltd.
Computers
Connect your nuraphones to a Mac with Bluetooth:
1. Remove any cables from your nuraphones.
Your nuraphones enter discoverable mode when you remove any cables.
2. Put on your nuraphones.
When you place your nuraphones on your head , they turn on and enter
discoverablemode.
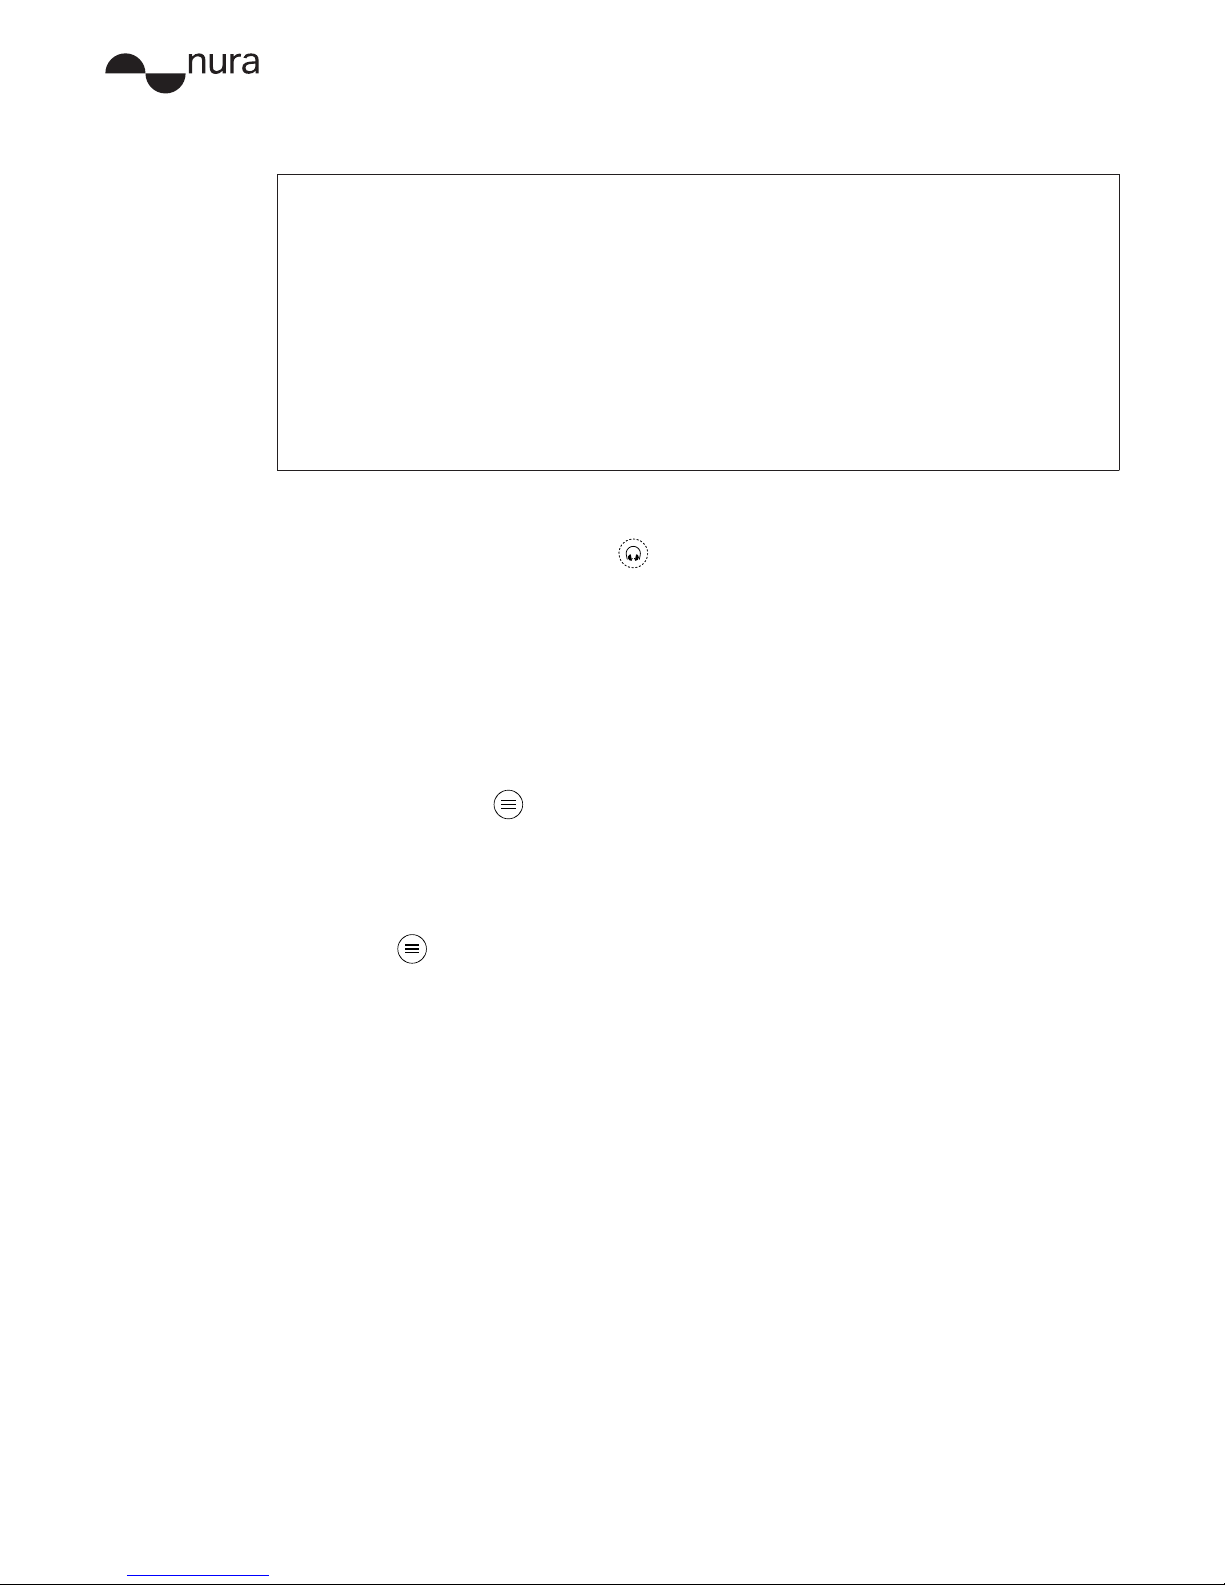
3. From your Mac menu bar, select > System Preferences > Bluetooth.
4.Select nuraphone XXX from the Devices list.
XXX isyournuraphones’uniquepairingnumber.
Connect your nuraphones to a Mac with a cable:
1. Connect your nuraphones to the cable, and then connect the cable to your Mac.
2. From the Mac menu bar, select > System Preferences > Sound.
3. Select nuraphone XXX as the Output.
XXX isyournuraphones’uniquepairingnumber.
Connect your nuraphones to a PC with Bluetooth:
1. Remove any cables from your nuraphones.
Your nuraphones enter discoverable mode when you remove any cables.
2. Put on your nuraphones.
When you place your nuraphones on your head, they turn on and enter Bluetooth
pairingmode.
3. Click the Bluetooth icon onyourcomputer’staskbar.
4.From Bluetooth & other devices, click Add Bluetooth or other device.
5. Select nuraphone.
Connect your nuraphones to a PC with a cable:
1. Connect your nuraphones to the cable, and then connect the cable to your PC.
Right-clickthevolumebuttononyourcomputer’staskbar.
2. Select Playback devices.
3. Right-click nuraphone > set as default device.
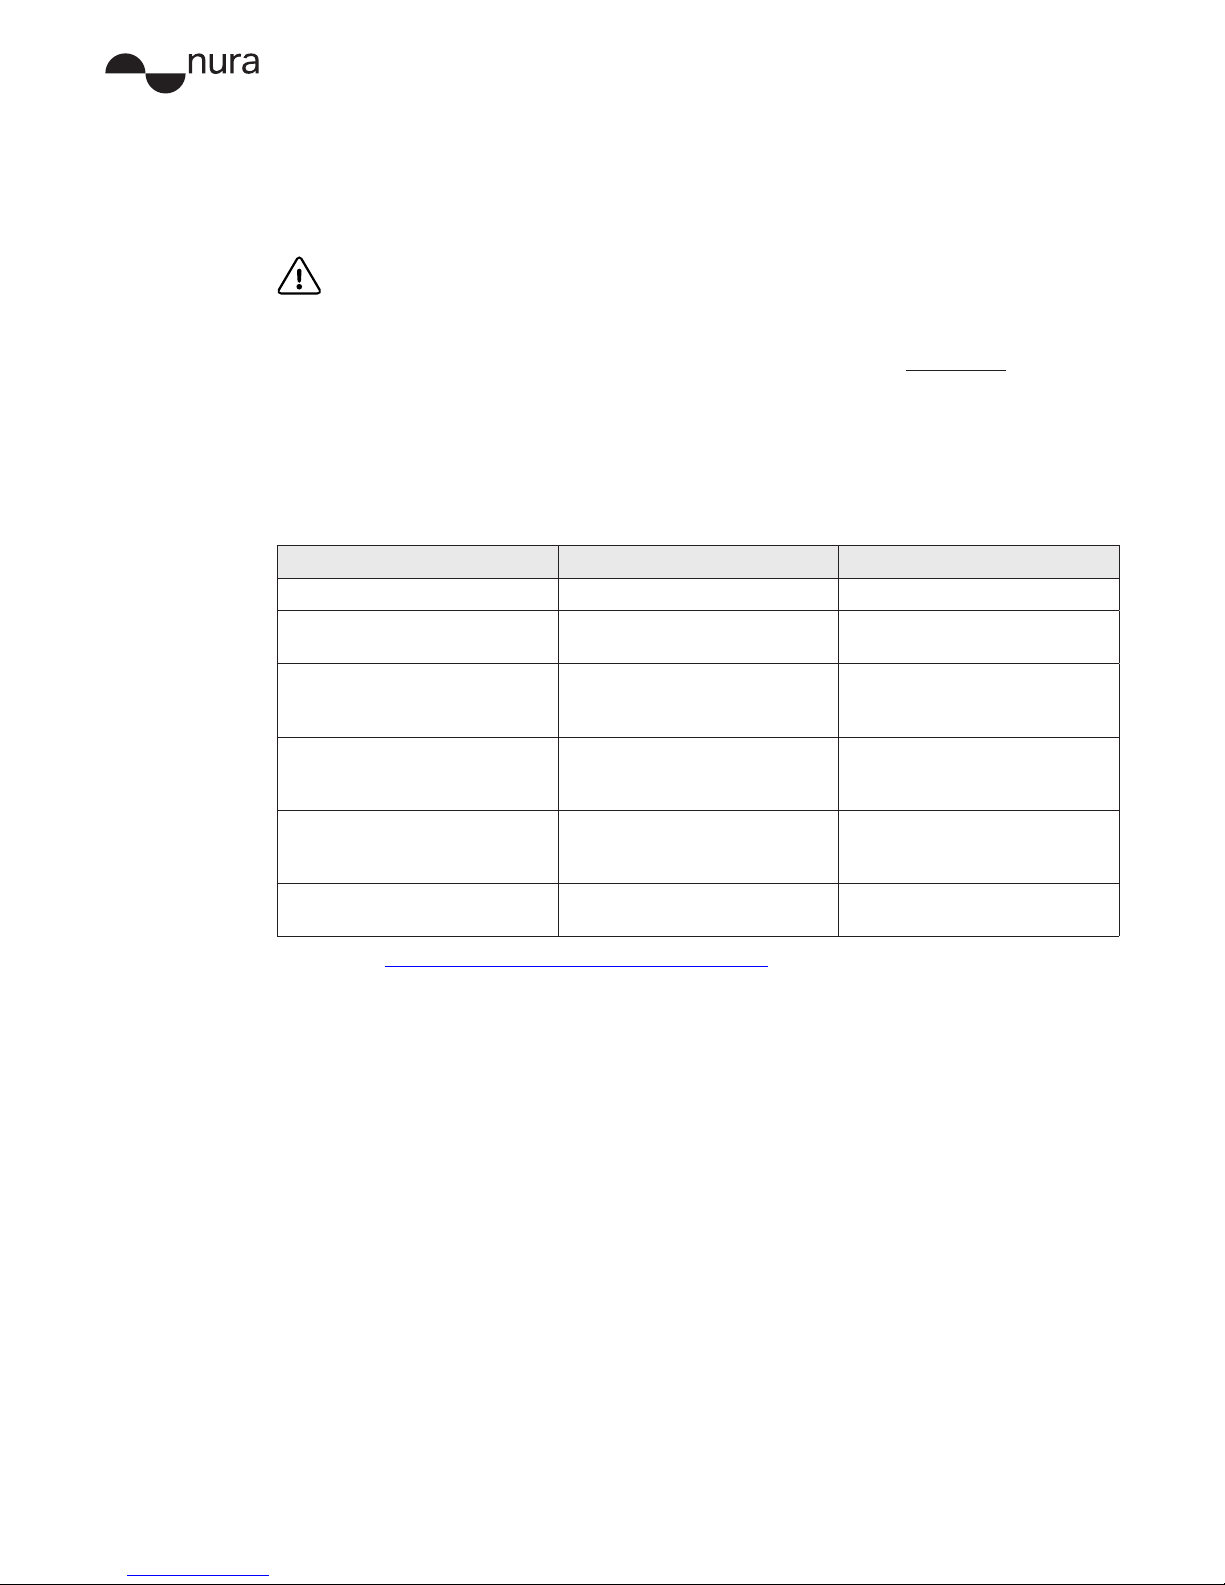
TVs
AudiocongurationsonTVsvary.CheckyourTVsconnectivityiscompatiblewiththe
nuraphone’sconnectivity.
External DACs (digital-to-analog converters)
AudiojackcongurationsonDACsvary.Wherepossible,useadigitalcable(USBor
Lightning) when connecting the nuraphone to a DAC as the nuraphone has a built-in DAC and
headphoneamplier.
If your DAC has a 3.5mm jack, then use the nura analog cable.
Gaming consoles
Use the nura analog cable to connect your nuraphones to a PlayStation® controller and some
Xbox® controllers.
Pleasenote:youcan’tuseyourconsole’svoicechatfunctionswithyournuraphones,or
connectyournuraphonestoPlayStation®orXbox®consoleswithBluetooth.
This limitation is because Playstation® and Xbox® have their own licensed RF formats.
Bluetooth dongles (Bluetooth network adapters)
Thenuraphoneisn’toptimisedforusewithBluetoothdongles.Ifyouwanttoconnectyour

User Manual
11
Copyright © 2017 nura® Pty. Ltd.
nuraphoneswithadongle,thenchoseadonglethat’sQualcomm®aptX-HD™compatible.
Aeroplane adaptors
Audiojackcongurationsonaeroplanesvary.Iftheaeroplaneadaptorhasa3.5mmjack,thenuse
the nura analog cable.
Cleaning the nuraphone
Your nuraphones need cleaning from time to time.
Please note: never use alcohols, cleaning solvents or strong detergents when cleaning the
nuraphone.
To clean the nuraphone:
1. Removethenuraphone’seartips,andgentlywashthemwithwaterandamilddetergent.
2. Rinse and dry the ear tips.
3. Reattach the ear tips.
4.Wipethenuraphone’sbodywithasoft,dampcloth.

User Manual
12
Copyright © 2017 nura® Pty. Ltd.
The nura app
This section contains everything you need to know about using the nura app.
nura app features
Conguring your nuraphones’ touch buttons
The nuraphone has a touch-sensitive button on each ear cup that you can use to perform helpful
functions.
Eachtouchbuttonhasbothsingleanddoubletapfunctionality,whichmeansyoucanchoose4
functionsforyournuraphones’touchbuttons.
Pleasenote:youcanonlyuseyournuraphones’touchbuttonswhenyou’reconnectedwith
Bluetooth and have removed any cables.
Tocongurethetouchbuttons:
1. Open the nura app.
2. Tap menu > nuraphone settings > Congure Buttons.
3. Choosefunctionsforyournuraphones’touchbuttons.
Menu
1
2Refer a friend
3Add new prole
4Share prole
5Battery
6Change prole
7Unique hearing prole
8Social Mode
9Personalised Mode
10 Immersion
6
1
8
5
9
7
2
10
3 4

User Manual
13
Copyright © 2017 nura® Pty. Ltd.
Choosing your Immersion
The nuraphone has a bass driver in each ear cup that you can adjust to create the feeling of a live
performance. We call this Immersion mode.
AlwayssetImmersionmodetoacomfortable,moderatelevelwhenyou’reusingyournuraphones
for an extended period of time.
To choose your Immersion:
1. Open the nura app.
2. Use the Immersion slider to adjust between low and front row.
Social Mode™ and CleanANC™ (active noise cancellation)
Active noise cancellation (ANC) reduces outside noise so you can focus on your music.
When activated, Social Mode™ passes outside sounds into your nuraphones so you can hear your
surroundings and have conversations.
ANCisdesignedtobeturnedonwheneveryou’renotusingSocialMode™.However,youcan
manuallyturnANCo/on:
1. Open the nura app.
2. Tap menu > nuraphone Settings.
3. Toggle ANC (Active Noise Cancellation)o/on.
TurningSocialMode™o/on:
Tap the Social Mode™ button on the homepage of the nura app.
Using oine mode
Withoinemode,youcanadjustyournuraphones’settingsviathenuraappwithoutaninternet
connection.
Pleasenote:inoinemode,youcan’tadjustnuraphonesettingsthatrequirecommunicationwith
thenuraservers,likepersonalisation,referafriend,andaddinganddeletingproles.
Toconnecttooinemode:
1. Connect your nuraphones to your mobile device with Bluetooth.
2. Open the nura app.
The message You are currently oine, some services are not available announces
thatthenuraappisinoinemode.
Pleasenote:thenuraappautomaticallyswapsoutofoinemodewhenyouconnecttothe
internet again.
Changing your nuraphones’ voice language
Youcanchangeyournuraphones’voicelanguageatanytime.
Yournuraphones’voiceisthespokenmessagesthatguideyouthroughpersonalisingyour
nuraphones, announce the battery level and identify connected devices.

User Manual
14
Copyright © 2017 nura® Pty. Ltd.
The nura app and nuraphone voice are available in the following languages:
• English
• French
• German
• Chinese
• Japanese
• Spanish
• Italian
• Arabic
Please note: additional languages might be available. Check https://help.nuraphone.com/hc/en-us/
articles/327222305751-changing-your-nuraphones-language for additional available languages.
Please note: it takes approximately 10 minutes for the voice language to change.
The nuraphone needs to install new software to change your language.
1. Open the nura app.
2. Tap menu > nuraphone settings > Change voice language.
3. Choose your preferred language.
4.Toconrmthechange,tapYe s .
Swapping, adding and deleting hearing proles
Youcanstoreuptothreeuser’shearingprolesonyournuraphonesatatime.
Here’showtoswap,addanddeleteahearingprole:
Swappingproles
1. Open the nura app.
2. Tapthecurrentuser’snameonthenuraapphomepage.
3. Tapthehearingproleyou’dliketoswitchto.
Addingahearingprole
1. Open the nura app.
2. a. Tap the additional user button on the nura app homepage.
b.Tapthecurrentuser’snameonthenuraapphomepage.Then,tapcreate new
hearingprole.
3. Select either Owner or Another Person/ Guest.
Ifyouownthenuraphoneyou’reusing,selectOwner.Ifyou’reusingsomeoneelse’s
nuraphone, select Another Person/ Guest.
4.Followtheapppromptstonishaddingyournewhearingprole.
Deletingahearingprole
1. Open the nura app.
2. Tap menu > nuraphone Settings > Delete Hearing Prole.
3. Selectthehearingproleyou’dliketodelete.
Thenuraappconrmsyourhearingprolehasbeendeleted.

User Manual
15
Copyright © 2017 nura® Pty. Ltd.
Troubleshooting
Ifyou’reeverhavingtroublewithyournuraphones,readthroughthefollowingtroubleshooting:
Getting started troubleshooting
Connecting to the nura app troubleshooting
Ifyournuraphoneswon’tconnecttothenuraapp:
• Close and reopen the nura app.
• Makesureyou’veputonyournuraphonesandremovedanycables.
Yournuraphonesturnonandenterdiscoverablemodewhenyouplacethemonyourheadand
remove any cables.
• Check your nuraphones are connected to your mobile device with Bluetooth.
You need to be connected with Bluetooth to use the nura app.
• Check your mobile device and the nura app have been updated to the latest version.
• Check your internet connection is stable.
• Delete/ reinstall the nura app
1. Delete the nura app.
2. Restart your mobile device.
3. Reinstall the nura app.
• Reset your nuraphones
Bluetooth troubleshooting
Ifyou’rehavingtroubleconnectingyournuraphoneswithBluetooth:
• Quick checks:
• Check your nuraphones and device are charged.
• Check your nuraphones and device are within 10 feet of each other.
• Checkyou’veputonyournuraphonesandremovedanycables.
Your nuraphones turn on and enter Bluetooth pairing mode when you place them on
your head and remove any cables.
• Checkyou’reconnectingtonuraphone XXX , not nuraphone XXX[LE].
nuraphone XXX [LE]isyournuraphones’lowenergymode,whichautomatically
connectsafteryou’veconnectedtonuraphone XXX.
• Move away from other Bluetooth devices, microwaves and wireless routers to avoid
interference.
• Further troubleshooting:
• Restart your device and then try connecting your nuraphones with Bluetooth again.
• Ifyou’vepreviouslyconnectedyournuraphoneswithBluetooth,thenremoveyour
nuraphonesfromyourdevice’spaireddevicelistandtryconnectingthemagain.
• Reset your nuraphones.

User Manual
16
Copyright © 2017 nura® Pty. Ltd.
Bluetooth cutting in and out?
Bluetooth is designed for short distances, so you might sometimes experience interference. To
minimise Bluetooth interference, try the following:
• Moveyourpaireddeviceclosertothenuraphone’sBluetoothsensor,whichisintheright-hand
ear cup.
• Move your nuraphones and device away from other Bluetooth devices, microwaves and wireless
routers.
• Make sure your nuraphones and paired device are updated to the latest software.
• ForAndroidusersonly:checkyou’reusingtheaptX-HDcodec.TapSettings > Advanced
Settings *. Then, select aptX-HD as your codec.
*To access Advanced Settings, you might have to Enable Developer Options in your Android
device’sSystems tab.
nuraphones won’t personalise
Ifyournuraphoneswon’tpersonalise,thenitmeansthere’snotagoodsealbetweenthe
nuraphone and your ears.
When personalising, getting a good seal is crucial because it keeps noise out, which allows the
nuraphone to detect your OAEs and accurately measure your hearing.
Ifyournuraphoneswon’tpersonalise:
—Makesureyournuraphones’eartipsaresittingsecurelyinyourears.
—Makesureyou’reinaquietplace.
— Sit still and try not to talk during personalisation.
• Fit your nuraphones correctly:
Anything that sits near your ears can break the seal between your ears and your nuraphones.
— Remove any headwear and earrings or other jewellery that sit near your ears.
— If you wear glasses, then remove them for personalisation.
— If you have long hair that sits near your ears, then tie it back for personalisation.
• Changeyournuraphones’eartips:
—Everyone’searsaredierent,sopleasetryallthedierentsizesofeartipstondthe
besttforyou.

User Manual
17
Copyright © 2017 nura® Pty. Ltd.
• Realignyournuraphones’eartips:
1. Check the base of the ear tip is pressing against the ear cup.
2. Check the ear tip is positioned correctly:
i.There’safaintlinerunningacrossthebottomofthemeshpartofyoureartip.
Use that line to make sure the ear tip is in the correct upright position.
ii.Ifyoucan’tseetheline,thenrotatetheeartipuntilthelineappears.
• Stillnotgettingagoodt?
Tap Continue on the nura app.
This takes you to the next stage of personalisation, even without a perfect seal.
nuraphone troubleshooting
Comfort troubleshooting
Like with any headphones with an in-ear component, some people with sensitive ear canals might
experiencesomediscomfortwiththenuraphoneatrst.
If your nuraphones are feeling uncomfortable:
• Checkyournuraphones’eartipsarettedcorrectly.
• Trydierentsizeeartips.
Ifyou’restillexperiencingdiscomfort,don’tworry—you’llgetusedtothetandfeelofthe
nuraphone after a few days of use.

User Manual
18
Copyright © 2017 nura® Pty. Ltd.
nuraphones aren’t making and receiving calls correctly
Followthesestepsifyou’rehavingtroublemakingandreceivingphonecalls,orcallsviaSkype,
FaceTime or other calling apps.
• Check your nuraphones are connected with Bluetooth or Lightning cable only.
Ifyouconnectwithanyothercable,you’llhearthecallerbutwillhavetouseyourdevice’s
microphone to speak.
• Checkthatnothingisblockingyournuraphones’microphones,includinganyplastic
packaging, which are at the front of the ear cups.
• Disconnect your nuraphones from your device and then reconnect.
• Check your Bluetooth connection.
Poor call quality can be caused by a poor Bluetooth connection.
• Checkyou’vechosenthenuraphoneasyoursoundoutput.
• Reset your nuraphones.
Charging and battery issues
Ifyournuraphonesaren’tcharging:
• Makesureyou’rechargingwiththenuraUSB-AorUSB-Ccablesonly.
TheLightning,analogandmicro-USBcableswon’tchargethenuraphone.
• Checkyou’renottryingtochargewithyourphone.
Tohelpsaveyourphone’sbattery,yournuraphoneswon’tchargewithmostphones.
• Ifyou’retryingtochargewithacomputer,tryusingadierentUSBportorawallcharger.
• Ifyou’retryingtochargewithawallcharger,trychargingwithacomputer.
• Ifyou’reattemptingtochargewithaUSBhub,makesureit’spowered.
MostUSBhubswon’tprovideenoughpowertochargeyournuraphones.
• Ifyou’retryingtochargewithaUSB-Acable,trychargingwithaUSB-Ccable(ifpurchased
separately).
• Reset your nuraphones.
Sound quality troubleshooting
To get the highest sound quality from your nuraphones:
• Use an Analog, Lightning or USB cable for lossless transfer.
• Usealosslessleformat,suchasAIFF,WAVorFLAC.
• Use a lossless streaming service, such as Tidal.
• Ifyou’reusingSpotifyorasimilarstreamingservice,usethehigh-qualitystreamingoption.
• Checkyou’renotinSocialMode™.
• Ifyou’reusingMP3orMP3-likeles,usehigh-bitrateMP3,OggorAACles.
Oruseminimum256kbps(andpreferably320kbps)leswithmoderncodecs.
• Personalise your nuraphones again.
The nuraphone uses sensitive microphones to personalise, so movements, outside noises and
heavybreathingcanaectyourhearingprole.
Touch button troubleshooting
Ifyournuraphones’touchbuttonsaren’tworkingcorrectly:
1. Checkyournuraphones’touchbuttonshavebeensetupcorrectly.
2. Makesureyou’veplacedyournuraphonesonyourheadandremovedanycables.
Yournuraphones’touchbuttonsonlyfunctionwhenyou’reconnectedwithBluetooth
andhaveremovedanycables.
3. Reset your nuraphones.

User Manual
19
Copyright © 2017 nura® Pty. Ltd.
nura app issues
Immersion Mode troubleshooting
Ifyournuraphones’ImmersionModeisn’tworkingcorrectly:
1. Close and reopen the nura app.
2. Check your Immersion Mode is set to a comfortable, moderate level.
With Immersion, the nuraphone uses powerful bass drivers to create the feeling of a live
performance, so please adjust to suit your music.
3. Reset your nuraphones.
Resetting your nuraphones
Ifyou’reeverhavingtroublewithyournuraphonesandaren’tsurehowtoproceed:
1. Connect your nuraphones to the USB-A charging cable.
2. Connect the USB-A charging cable to your computer.
3. Place your nuraphones on your head.
Listen for the spoken “welcome back” message.
4.Disconnect the USB-A charging cable from your nuraphones.
Your nuraphones have now been reset and will function correctly.

User Manual
20
Copyright © 2017 nura® Pty. Ltd.
Needmorehelp?
Check our in-depth online help & support site https://help.nuraphone.com/
You can also contact us via email and live chat at www.nuraphone.com/contact
Warranty
Your nuraphones are covered by a one-year limited warranty. Find out more about the warranty at
www.nuraphone.com/warranty
Other manuals for nuraphone
1
Table of contents
Other Nura Headphones manuals