NuWave PIC PLATINUM Quick guide

PIC®
PLATINUM
Owner’s Manual & Complete Recipe Book

2 • NuWave™PIC®Platinum Complete Cookbook
Table of Contents
Introduction, Parts & Accessories 6-7
Important Safeguards 8-9
Owner’s Manual 10-17
Troubleshooting 18-19
Cooking Tips 20
Breakfast 21
Scrambled Eggs 22
Omelette 22
Homemade Yogurt 23
Breakfast Potatoes 23
Fried Eggs 24
Homemade Pancakes 24
Crepes 25
Garden Vegetable Frittata 25
Poached Eggs Benedict 26
French Toast 26
Vegetables 27
Green Beans Almondine 28
Grilled Japanese Eggplant with
Feta & Sun-Dried Tomatoes
29
Stir-Fried Tofu & Vegetables 29
Broccoli & Carrot Stir-Fry 30
Artichokes with Butter Sauce 30
Marinated Zucchini
and Summer Squash
31
Ratatouille Stew 31
Sugar Snap Peas and Spinach
with Ginger
32
Grilled Vegetable Medley 32
Grilled Vegetables with
Balsamic -Garlic Sauce
33
Beef 34
Bistro Beef & Mushrooms 35
Hometown Chili 35
Steak au Poivre 36
Grilled Sirloin with
Mushrooms & Red Peppers
36
Korean Beef 36
Spiced Beef with Dumplings 37
Beef Stroganoff over
Buttered Noodles
38
Cajun Rib Eye 39
Bacon, Onion and Cheese
Stuffed Burgers
39
Pork & Chicken 40
Pan-Fried Pork Chops 41
Pork Marsala 41
Sweet & Sour Pork
with Pineapple
42
Black-Eyed Peas with Andouille 42
Sautéed Pork Medallions with
Lemon-Garlic Sauce
43
Pork Tenderloin with
Sautéed Apples
43
Pork Chops with
Red Onion Cont
44
Pork Chops alla Pizzaiola 44
Asian-Marinated Pork Chops 45
Chicken & Mushrooms 45
Herb Chicken 46
Teriyaki Chicken 46
Parmesan Chicken 47
Fried Chicken PIC Style 47
Chicken Burgers 48
Chicken Fajitas 48
Chicken Fried Steak 49
Chicken Breasts with
Oregano Garlic Butter
49
Seafood 50
Seafood Paella 51
Ginger Shrimp 51
Steamed Mussels in
Tomato & Wine
52
Jumbo Louisiana Shrimp with
Andouille & Grits
52
Pan-Seared Tuna with Avocado 53
Chicken Stock 70
Beef Stock 71
Vegetable Beef Soup 71
Creamy Cheddar Soup 72
French Onion Soup 72
Shrimp & Tofu Soup 73
Chunky White
Bean-Tomato Soup
73
Thai Coconut Chicken Soup 74
Chicken Tortilla Soup 74
Chicken Noodle Soup 75
Butter Sauce 75
Hollandaise Sauce 76
Roux 76
Marinara Sauce 77
Cheese Sauce 77
Quick Brown Sauce 78
Basic White Sauce 78
Mushroom Duxelle 79
Mustard Marinade 79
Fondues 80
Chocolate Fondue 81
Cheddar Cheese Fondue 81
S’Mores Fondue 81
Cheddar Chipotle Fondue 81
Brie & Sun-Dried
Tomato Fondue
82
Shabu-Shabu 82
Chicken Fondue 83
Beef Fondue 83
Three Cheese Fondue 84
Creamy Vegetable Fondue 84
Deserts 85
Simple Fudge 86
Classic Cherries Jubilee 86
Peanut Brittle 87
Chocolate Caramel Turtles 87
Pan-Seared Red Snapper 53
Orange Roughy
with Citrus Sauce
54
Fish Tacos 54
Battered Fried Shrimp 55
Fried Catsh 55
Pan-Seared Halibut 56
Pasta 57
How to Cook Pasta 58
Basic Pasta Dough 58
Roasted Red Pepper Sauce
over Tortellini
59
Mushroom Stroganoff 59
Fettuccine Alfredo 60
Beans with Pesto Bulgur 60
Fresh Tomato, Sausage and
Pecorino Pasta
61
Bucatini with Mushrooms 61
Mediterranean Orzo Salad
with Feta Vinaigrette
62
Sausage and Rice 62
Quinoa Tabbouleh 63
Mexican Green Quinoa 63
Mediterranean Bulgur Wheat 63
Barley with Bacon,
Peas and Dill
64
Vegetable Fried Rice 64
Rice Pilaf 65
Spanish Rice 65
Popcorn Rice with Pecans 66
Basic Fresh Herb Risotto 66
Risotto with Peas
and Parmesan
67
Saffron Rice 67
Coconut Rice 68
Wheat Berry Salad 68
Stocks, Soups & Sauces 69
Vegetable Stock 70

4 • NuWave™PIC®Platinum Complete Cookbook
Bananas Foster 87
Pears in White Wine
Caramel Sauce
88
Lollipops 88
Panna Cotta with
Amber Crystals
89
Old Fashioned Hard Candy 89
Pressure Cooker 90
#1 Texas Style Chili 91
#2 Short Ribs 91
#3 Corn on the Cob with
Herb and Garlic Butter
92
#4 Italian Chickpea
and Barley Stew
92
#5 Italian Sausage with
Peppers and Onions
93
#6 Creamy Mashed Potatoes 93
#7 Fifteen Minute Risotto 94
#8 Spiced Tomato Rice Soup 95
#9 Beer-Braised
Savoy Cabbage
96
#10 Roasted Bell Pepper Soup 96
#11 Old Fashioned
Potato Soup
97
#12 Farmhouse Chicken
Noodle Soup
97
#13 Balsamic and Fig
Pork Chops
98
#14 Wild Mushroom Sauce 98
#15 Vegetarian Ragu 99
#16 Coconut Flavored Haddock 100
#17 Ratatouille 100
#18 Vegetarian Black
Bean Chili
101
#19 Easy Beef Stew 102
#20 Chicken Masala 103
#21 Refried Beans 103
#22 Beer-Braised Chicken
Thighs with Onions
104
Recetas 141
Caldo de Pollo 141
Huevos Revueltos 141
Caldo de Res 142
Papas Para el Desayuno 142
Cardo Agridulce con Piña 143
Camarones Capeados 143
Chili Tradicional 144
Paella de Mariscos 144
Masa Básica para Pasta 145
Arroz Español 145
Arroz Frito con Verduras 146
Fettuccine Alfredo 146
Table de Matiéres 147
Manual D’Utilisation 148-161
#23 Golden Beets 104
#24 So So Simple
Barbecue Beef Ribs
105
#25 Sloppy Joes 106
#26 Peppered Beef Marsala 106
#27 Beef Stroganoff 107
#28 Maple and Bourbon Beans 108
#29 Barbecue-Style
Brisket Sandwiches
109
#30 Ciopino 110
5.5 Quart Pot 111
#31 BBQ Beef Brisket 112
#32 Chicken Corn Chowder 112
#33 Sausage and Cabbage 113
#34 Lemon Chicken
Thighs with Olives
113
#35 One Pot Chicken
Enchilada Soup
114
#36 One Pot Sicilian Beef 114
#37 Slow Cooker Pork Chops 115
#38 Peppers and Beef 116
#39 Potato Soup with
Onions and Cheddar
116
#40 Easy Weeknight Chili 117
Everyday Pan 118
#41 One Bowl Mung Bean Meal 119
#42 One Pan Mexican Quinoa 119
#43 One Pot Zesty Macaroni 120
#44 Chicken Lo Mein 121
#45 Southwest Pasta 121
#46 Chicken Enchilada Bowls 122
#47 Vegetarian Tagine 122
#48 Rustic Tomato Soup 123
#49 Beef Stew 124
#50 Pot Roast 124
Contenido 125
Manual Del Usario 126-
140

6 • NuWave™PIC®Platinum Complete Cookbook
What is Induction Cooking?
Welcome to NuWave™
Precision Induction Cooking
Congratulations on purchasing your NuWave™ Precision Induction Cooktop
(PIC®) Platinum. This book contains detailed instructions and images to help you
get started using your cooktop. It is also lled with great recipes and time-saving
tips to help you prepare delicious gourmet meals in a fraction of the time it would
take when using a regular stovetop. Cooking is fast and easy with the Precision
Induction Cooktop Platinum from NuWave, LLC. This versatile countertop
appliance uses induction technology to save time, energy and money. The
NuWave™ Precision Induction Cooktop is efcient, safe, fast and easy to clean.
Also, because you can program times and temperatures from warm to sear, you
can make almost any kind of food without the risk of under or overcooking.
The NuWave™ PIC Platinum is comprised of a series of induction coils (based
on magnetic principles). These coils generate magnetic elds that produce a
warming reaction in steel and iron-based pots and pans. In this way, heat is
generated in the cookware and not on the cooktop surface, which is much more
energy-efcient than traditional gas or electric ranges. Induction cooking is the
most eco-friendly way to prepare meals because the method releases no toxins
into the environment. Induction cooking emits no ame, so less residual heat is
produced in your kitchen. The NuWave™ Precision Induction Cooktop Platinum
remains cool to the touch where the magnetic surface is not activated.
Additional Benets:
• Energy Conservation: The magnetic eld, generated by the copper coils,
causes invisible molecules in the cookware to begin vibrating rapidly,
creating heat, so the cookware itself heats the food.
The NuWave™ PIC Platinum is one of the most energy-efcient cooktops
available today, which means that cooking with the PIC Platinum can
translate into savings on your monthly utility bills.
• Safety: The NuWave™ PIC Platinum’s design uses no red hot coils or open
ames, essentially eliminating the risk of re. Automatic shut-off features
enhance the cooktop’s safety. Simply Touch and Go! Users can also take
the ice cube challenge! Induction technology warms the pan, but the surface
remains cool to the touch.
• Fast Cooking: Heating is immediate and temperature is precise with the
NuWave™ PIC Platinum. Features 6 different temperature settings that are
adjustable in 5-degree increments. There’s no guessing!
• Lightweight & Portable: Because it weighs only 5.7 pounds, you can take the
NuWave™ PIC Platinum anywhere you go! Use it indoors or out - anywhere
with a standard U.S. electrical outlet.
• Easy to Clean: Spills won’t burn and stick to the cooktop surface. Just wipe
and go!
Owner’s Manual • 7
NuWave™ Precision Induction Cooktop
Platinum Products and Accessories
To order parts and accessories, call customer service at:
1-877-689-2838, Monday-Friday, 8:00 AM – 4:30 PM CST.
You may also order online at: www.NuWaveNow.com.
Please provide the correct item name and number to ensure that your order is
processed accurately.
NuWave™Precision Induction Cooktop:
(30401~30432) NuWave™ PIC®Platinum
(32456) Complete Cookbook / Manual
(32459) Instructional DVD
(32460) Fact Sheet
NuWave™Ultimate Cookware Set:
(32003) 3.5-quart Stainless Steel Pot
(32004) 3.5-quart Pot Lid
(32005) Stainless Steel Steamer
NuWave™Cast Iron:
(32023) Cast Iron Grill
(32022) Oil Drip Tray
(32056) Cast Iron Grill Manual
(31201) NuWave™Precision Pressure Cooker
(32076) Nuwave™Precision Pressure Cooker Manual
Lid (Optional):
Lid (Optional):
Lid (Optional):
Hard-Anodized Aluminum Pans:
9-inch
10.5-inch
12-inch
(32109)
(32110)
(32114)
(32012)
(32004)
(32014)
Stainless Steel Stock Pots & Saucepans:
Everyday Pan:
Stainless Steel Grill Pan:
8.0-quart Steamer Pot Set:
Lid (Optional):
Lid (Optional):
Lid (Optional):
Lid (Optional):
1.5-quart
2.0-quart
3.0-quart
5.5-quart
9.0-quart
10-piece Set
12-inch, 5.0-quart
11-inch, 3.0-quart
8.0-quart Stock Pot
7.0-quart Steamer Insert
Steamer Rack
(32031)
(32032)
(32033)
(32039)
(32034)
(31250)
(32018)
(32024)
(32400)
(32401)
(32402)
(32019)
(32025)
(32403)
(32036)
(32037)
(32038)
(32040)
(32004)
Stainless Steel Plus Pans:
Stainless Steel Chef Series Pans:
9-inch
10.5-inch
12-inch
9-inch
10.5-inch
11.5-inch
(32015)
(32016)
(32017)
(32009)
(32010)
(32011)
(32012)
(32004)
(32014)
(32012)
(32004)
(32013)
NuWave™Duralon®Ceramic Non-Stick Cookware:
NuWave™Precision Pressure Cooker:
(31113) Cast Iron Griddle
(32060) Cast Iron Griddle Manual
(32100) NuWave™ Duralon®Ceramic Non-Stick Cookware Manual
(32457) Quick Start Guide
(32158) Registration Card
(31117) Custom-Made Carrying Case
(32462) Remote Control
(32007) Stainless Steel Fondue Insert
(32008) Set of 8 Fondue Forks
(32055) Ultimate Cookware Set Manual

8 • NuWave™PIC®Platinum Complete Cookbook
IMPORTANT SAFEGUARDS
When using electrical appliances, basic safety precautions should always be
followed including the following:
WARNING – For individuals with pacemakers:
1. This appliance emits an electromagnetic eld that is strongest within two feet
of the cooking surface.
2. Scientic tests have proven inconclusive as to whether the electromagnetic
eld will disrupt the function of a pacemaker. Please consult your doctor or
medical professional for guidance before use.
WARNING – To reduce the risk of burns, electrocution, re, or injury:
1. This appliance is not meant for continuous use.
2. This appliance includes a heating function. Surfaces may develop high
temperatures. Do not touch hot surfaces. Cooktop may retain residual heat
after cookware has been removed. The use of pot holders or alternative safety
measures is highly recommended.
3. This appliance should not be used by children. Close supervision is necessary
when this product is used near children.
4. Do not place on any gas or electric burner or in a heated oven.
5. Do not place metallic objects such as knives, forks, spoons, or lids on the
cooktop as they may become hot.
6. This appliance is not intended for commercial use.
7. Use this appliance for its intended purpose as described in this manual.
Do not use any other accessories or attachments not recommended by the
manufacturer. They may result in re, electrical shock, or personal injury.
8. Never operate this appliance if it has a damaged cord or plug, is not working
properly, has been dropped or damaged, or dropped in water. Contact
customer service for inspection, repair, or adjustment.
9. Do not operate broken cooktop. If cooktop should break, cleaning solutions
and spillovers may penetrate the appliance and create a risk of electric shock.
10. Keep cord away from heated surfaces. Do not let the cord hang over the
edge of the table or counter. Never force the plug into an outlet. Always
unplug power cord by pulling on the plug. Turn the unit off before removing
the plug from the wall.
11. Do not operate where aerosol (spray) products are being used or where
oxygen is being administered.
12. Use proper judgment and caution while using cooktop in outdoor
environments and public areas. This appliance should never be set up
around unattended children or those unaware of its presence. The appliance
should be situated on at, stable surfaces, away from water sources such as
pools, spas, sprinklers, hoses, etc.
READ ALL INSTRUCTIONS
BEFORE USING
DANGER – To reduce the risk of electrocution:
1. Read all instructions, safeguards and warnings before using the appliance.
2. Do not place appliance where it can fall or be pulled into water or other liquids.
3. Do not reach for an appliance that has fallen into water. Unplug immediately.
4. Do not immerse cord, plug, or any portion of appliance in water or other liquids.
Owner’s Manual • 9
13. Do not move the appliance while hot.
14. This appliance is for household use only; it is designed to process
normal household quantities. It is not suitable for continuous
or commercial operation.
15. Do not disassemble the product. There are no user serviceable parts.
16. Do not leave the appliance unattended while in use.
17. This appliance is not intended for operation by means of an external timer.
18. Clean cooktop with caution. Cleaning a hot surface with wet applications can
cause steam and some cleaners can produce dangerous fumes. Unplug from
outlet before cleaning.
19. Use caution when disposing of hot grease.
20. Keep this manual handy for future reference.
Electrical Information
• The cord length of this appliance was selected to reduce Safety Hazards that may
occur with a long cord. Extension cords are available and may be used if care is
exercised in their use. If an extension cord is used: (1) the marked electrical rating of
the extension cord should be at least as great as the electrical rating of the appliance,
and (2) the longer cord should be arranged so that it does not drape over the counter
or table top where it could be accidentally pulled off the counter or table or tripped over.
• Certain models of the appliance may have a polarized plug (one blade is wider than the
other). This plug is intended to t into a polarized outlet only one way. If the plug does
not t fully into the outlet, reverse the plug. If it still does not t properly, contact
a qualied electrician. Do not attempt to modify the plug in any way.
SAVE THESE INSTRUCTIONS
IMPORTANT – FCC Information:
Warning: Changes or modications to this unit not expressly approved by the party
responsible for compliance could void the user’s authority to operate the equipment.
Note: The device complies with part 18 of the FCC Rules.
Correct Disposal of This Product
This marking indicates that this product should not be disposed of with other
household wastes throughout the EU. To prevent possible harm to the environment
or human health from uncontrolled waste disposal, recycle it responsibly to promote
the sustainable reuse of material resources. To return your used device, please
use return and collection systems or contact the retailer where the product was
purchased. They can handle environmentally safe recycling.
WARNING
WARNING: All items on the cooktop can get very hot during
cooking. Please be careful when removing these items from
the unit. Always wear oven mitts or use pot holders. Cooktop
may retain residual heat after cookware has been removed.
Allow everything to cool completely before cleaning.
Electric shock hazard. Use with adequate electrical system.
Do not use if cord or plug is damaged.

10 • NuWave™PIC®Platinum Complete Cookbook
NuWave™ Precision Induction Cooking
Ventilation: Air vents are located on the back of the product to allow any heat
generated by the heating element to escape. This design feature prevents
heat transfer to the cooking surface and ensures efcient performance of the
NuWave™ PIC Platinum.
Surface: The NuWave™ PIC Platinum’s heat-resistant glass surface stays cool
to the touch and cleans easily with the simple wipe of a damp cloth.
Control Panel with LED Display: Clearly lit, easy-to-read control panel.
Heat Source: Electromagnetic coils located below the glass surface transfer
generated heat directly to induction-ready cookware.
On/Off Switch: The NuWave™ PIC Platinum has an on/off switch located
on the right side of the PIC.
1
1
2
3
4
5
4
3 1 5
2
While the NuWave™ PIC Platinum is in operation, do not
touch the appliance’s surface as it may become very hot,
leading to the risk of burns. Cooktop may retain residual heat
after cookware has been removed.
Do not remove pots and pans during cooking process.
Push “Pause/Clear” button to turn off power before removal.
CAUTION
Owner’s Manual • 11
Induction Cooktop-Compatible Cookware
ATTENTION:
The heating coils are located inside the thicker gold ring. You may use pans
measuring up to the total width of the NuWave™ PIC Platinum, which measures
12.3 inches, however in these situations, heat will transfer more slowly to the outer
edges. Not recommended for pans larger than 12.3 inches.
Examples of compatible cookware:
• All NuWave™ Cookware • NuWave™ Duralon®Ceramic Non-Stick Cookware
• Cast iron • Enameled iron and steel • Stainless steel with magnetic base
Non-induction-compatible cookware:
• Copper • Glass • Aluminum • Pottery type vessels
How do I check my cookware for induction compatibility?
Three simple ways to check if your existing pots and pans, or future cookware
purchases, are compatible with the NuWave™ PIC Platinum:
1. A magnet is typically a great indicator. If it sticks to the bottom of a piece of
cookware, this typically means the pot or pan is induction-ready. However be
cautioned that there are instances when a cooking vessel’s magnetic properties
may not be strong enough for the pot to work efciently with the
NuWave™ PIC Platinum.
2. Place a small amount of water in a particular pot or pan.
If induction compatible, water will begin to boil.
3. An induction-ready symbol may be printed on the
bottom of the cookware.
IMPORTANT - Do not immerse unit in water or
attempt to cycle through dishwasher. The outer
surface may be cleaned by wiping carefully with
a damp dishcloth or sponge. Make sure unit has
cooled completely prior to cleaning.
As induction technology is based on magnetic principles, compatible cookware
must have a ferrous (iron-based, magnetic) bottom. Some types of cookware are
made of naturally magnetic metals (such as pure iron), while others are rendered
magnetic by “sandwiching” a thin layer of a ferrous metal within the base. This
layer will be acted upon by the magnetic eld of the induction cooktop to distribute
heat. Tri-ply, high-quality stainless steel and cast iron cookware will work with
induction cooktops. Copper, glass and aluminum cookware will not work unless
they have a sandwiched magnetic base. Pots that function optimally with the
NuWave™ PIC Platinum tend to be medium to heavy gauge.
BEFORE USE:
Wipe surface with a cloth soaked in warm,
soapy water.
Cleaning & Care for Your
NuWave™ PIC®Platinum

12 • NuWave™PIC®Platinum Complete Cookbook Owner’s Manual • 13
General Operating Instructions:
General Cleaning Instructions:
• Clean after each use.
• Make sure unit has cooled completely prior to cleaning.
• The outer surface may be cleaned by wiping carefully with a damp dishcloth or sponge.
• Remove the power plug prior to cleaning the NuWave™ Platinum. Do not use caustic
cleaning agents and water should not penetrate the interior of the induction cooktop.
• Never immerse the NuWave™ PIC Platinum, its cables or plug in water or other liquids.
• Wipe the glass surface with a damp cloth or use a mild, non-abrasive soap
solution. Make sure the unit has cooled completely before cleaning.
• Wipe casing and operating panel with a soft cloth dampened with water or a
mild detergent.
• Do not use oil-based cleansing products as their use may damage plastic parts
or the casing/operating panel.
• Do not use ammable, acidic or alkaline materials or substances near the
NuWave™ PIC Platinum, as this may reduce the service life of the induction
cooktop or pose a re risk when the induction cooktop is in use.
• In order to keep your NuWave™ PIC Platinum looking like new, take measures
to ensure that the bottom of cookware does not scrape the unit’s glass surface,
although a scratched surface will not impair the use of the induction cooktop.
• Make sure to properly clean the unit before storing it in a cool, dry place.
• Place the cooktop on a stable, level, non-metallic surface.
• Never use the cooktop on a ammable surface (e.g. table cloth, carpet, etc.).
• Do not block the ventilation slots of the induction cooktop. This may cause
the unit to overheat. Maintain a minimum distance of 3-5 inches from walls
and other objects, appliances, etc.
• Do not place devices or objects that are sensitive to magnetic elds on
top of or next to the NuWave™ PIC Platinum.
(e.g. credit cards, cell phones, radios, TVs, video recorders, etc.).
• Do not use the induction cooktop in the proximity of open res,
heaters or other heat sources.
• Do not place on stove top.
• Ensure that the power cable is not damaged or compressed
beneath the induction cooktop.
• The power cable must not come into contact with sharp edges and/or hot surfaces.
• Prior to connecting the NuWave™ PIC Platinum, conrm that the voltage
needs indicated in this manual correspond to the voltage supply in your home.
A wrong connection may lead to the unit’s damage and possible injury to persons.
• The cooktop’s surface is designed from temperature-resistant glass. In the event
that damage to the unit is observed, even a small crack on the glass surface,
immediately disconnect the NuWave™ PIC Platinum from the power supply.
IMPORTANT TIPS:
1. Check power outlets to ensure proper operation. Do not use in an outlet
where other major appliances are engaged. Check settings if the unit is
cooking too slowly.
2. The electrical plug must be properly plugged into the outlet.
3. Always turn off and unplug the unit before wiping.
IDC 4 Control Panel Graphic
LED
Display
LED Display
Increase Start
Pause/
Clear
Decrease
WattsProgram
Low-Max/Sear ClockCook
Time
Stage
End
Time
Cook
Temperature
Number
AM/PM
Control Panel:
LED Display should read “0” when program is
clear or power is on.
Easy Start:
NOTE: Ensure that your NuWave™ PIC Platinum is turned on
by ipping the on/off switch on the right hand side of the PIC.
The NuWave™ PIC Platinum is defaulted to cook on Med/High (375°F) for 1 hour. To begin
cooking, press the “Start” button, after placing an induction-ready pot on the surface. To cook
at a different temperature setting, press one of the 6 main temperature buttons, or press the
“+” or “-” arrows to decrease or increase the temperature in 5°F increments.
See Setting Temperature for more details.
Setting Clock Time And AM/PM Button:
1. Press the “Clock” button. CLOCK indicator will ash on LED display
and “00:00” will be displayed.
2. Enter digits to match the current time.
• For example, 1:25 would be entered by pressing “1,2,5”.
3. Once entered, the time will be set as AM as a default.
4. To change to PM, press the “am/pm” button.
5. Press the “Clock” button again to set.
• “End Time” feature will not work unless the time is set and “0” is shown in the display.
• If the NuWave™ PIC Platinum is cut from a power supply or
turned off, the clock must be reprogrammed.
Fahrenheit to Celsius Conversion:
1. The NuWave™ PIC Platinum’s LED display is defaulted to display cooking temperature in
Fahrenheit (F) and the F will appear on display panel.
2. To switch the display to Celsius(C), press the “Cook Temp” and “Cook Time”
buttons simultaneously.
3. To close out of the F/C conversion option, press the “Pause/Clear” button until “0”
or the current time appears on the unit’s screen.
Lock And Unlock Function:
The PIC can be locked by pressing
“Low” and “Sear/Max” simultaneously until
“LOCK” is displayed on the LED display.
To unlock, press “Low” and “Sear/Max”
simultaneously until “LOCK” is no longer
displayed on the LED display.
Directions for the Display Panel

14 • NuWave™PIC®Platinum Complete Cookbook
Wattage Function:
The default wattage is 1800 watts.
1. Press “Watts” button if you desire to cook using 600 watts.
2. Press “Watts” button two times if you desire to cook using 900 watts.
3. Press “Watts” button three times if you desire to cook using 1200 watts.
4. Press “Watts” button four times if you desire to cook using 1800 watts.
To Start Cooking:
There are several ways to begin cooking with your NuWave™ PIC Platinum:
• Press “Start”. It will be defaulted to cook at 375°F for 1 hour.
• Set temperature and press “Start”. Default is 1 hour cooking.
• Set cooking time and press “Start”. Default temperature is 375°F.
• Set temperature and time, then press “Start”.
The NuWave™ PIC Platinum will automatically stop cooking once time has expired and a “beep”
sound will alert users. The display will always show the current temperature during the cooking
cycle. To display time lapse, press “Time”.
NOTE: After 3 seconds, the display will revert to the cook temperature.
Pause/Clear Function:
NOTE: See page 13 for LED Display.
1. To interrupt cooking time, press the “Pause/Clear” button once.
This will pause the NuWave™ PIC Platinum at the current stage.
2. The temperature will remain listed in the display panel, but the “F” will be blinking.
3. To resume, press “Start.”
4. To clear the cooking mode or display while the NuWave™ PIC Platinum is in operation,
press the “Pause/Clear” button twice. The screen will be fully cleared and a “0” or the current
time will appear and the unit will turn off.
Setting Temperature:
The NuWave™ PIC Platinum is defaulted to cook on Med/High (375°F).
1. To start, press temperature key “Low” - “Max/Sear,” the TEMP indicator will ash, then press
“Start.” The temperature range will appear on the display panel.
2. To start, press the “Cook Temp” button. The TEMP indicator will ash and 375F will be displayed.
•To raise or lower the temperature in 5°F increments, press the “+” and “-” buttons until desired
temperature is displayed.
Refer to chart below for setting temperature and preset temperatures.
The minimum temperature is 100°F while the maximum temperature reaches 575°F.
NOTE: Display temperature represents temperature of 1.5L of oil in the NuWave™ 3.5-quart Stainless
Steel Pot. Thermometer location for test at the origin (middle) of the NuWave™ 3.5-quart Stainless
Steel Pot and an equidistant length between the pot base and top of the oil.
100°F (38°C)
175°F (79°C)
275°F (135°C)
375°F (191°C)
425°F (218°C)
575°F (302°C)
Press Button Range Temperature Examples
Low
Med Low
Med
Med High
High
Max/Sear
Warm
Simmer
Steam
Stir/Deep Fry
Boil/Saute
Sear
100F / 38C
175F / 79C
275F / 135C
375F / 191C
425F / 218C
SEAR
Panel Display
Desired
Temp Display
220°F
221°F
222°F
223°F
224°F
225°F
220F
220F
220F
225F
225F
225F
Setting Temperature Continued:
The desired cooking temperature can be set by pressing the
number pad. See right for examples.
1. Press “Cook Temp” button.
2. Press a desired cooking temperature by using the number pad.
If a number not ending in “5” or “0” is entered, the PIC Platinum
will automatically set itself to the nearest temperature ending in a
“5” or “0”. For example, when you press “2,2,2” for cooking at
222ºF, the LED display will read 220F.
three times, then press “Start”
press
Owner’s Manual • 15
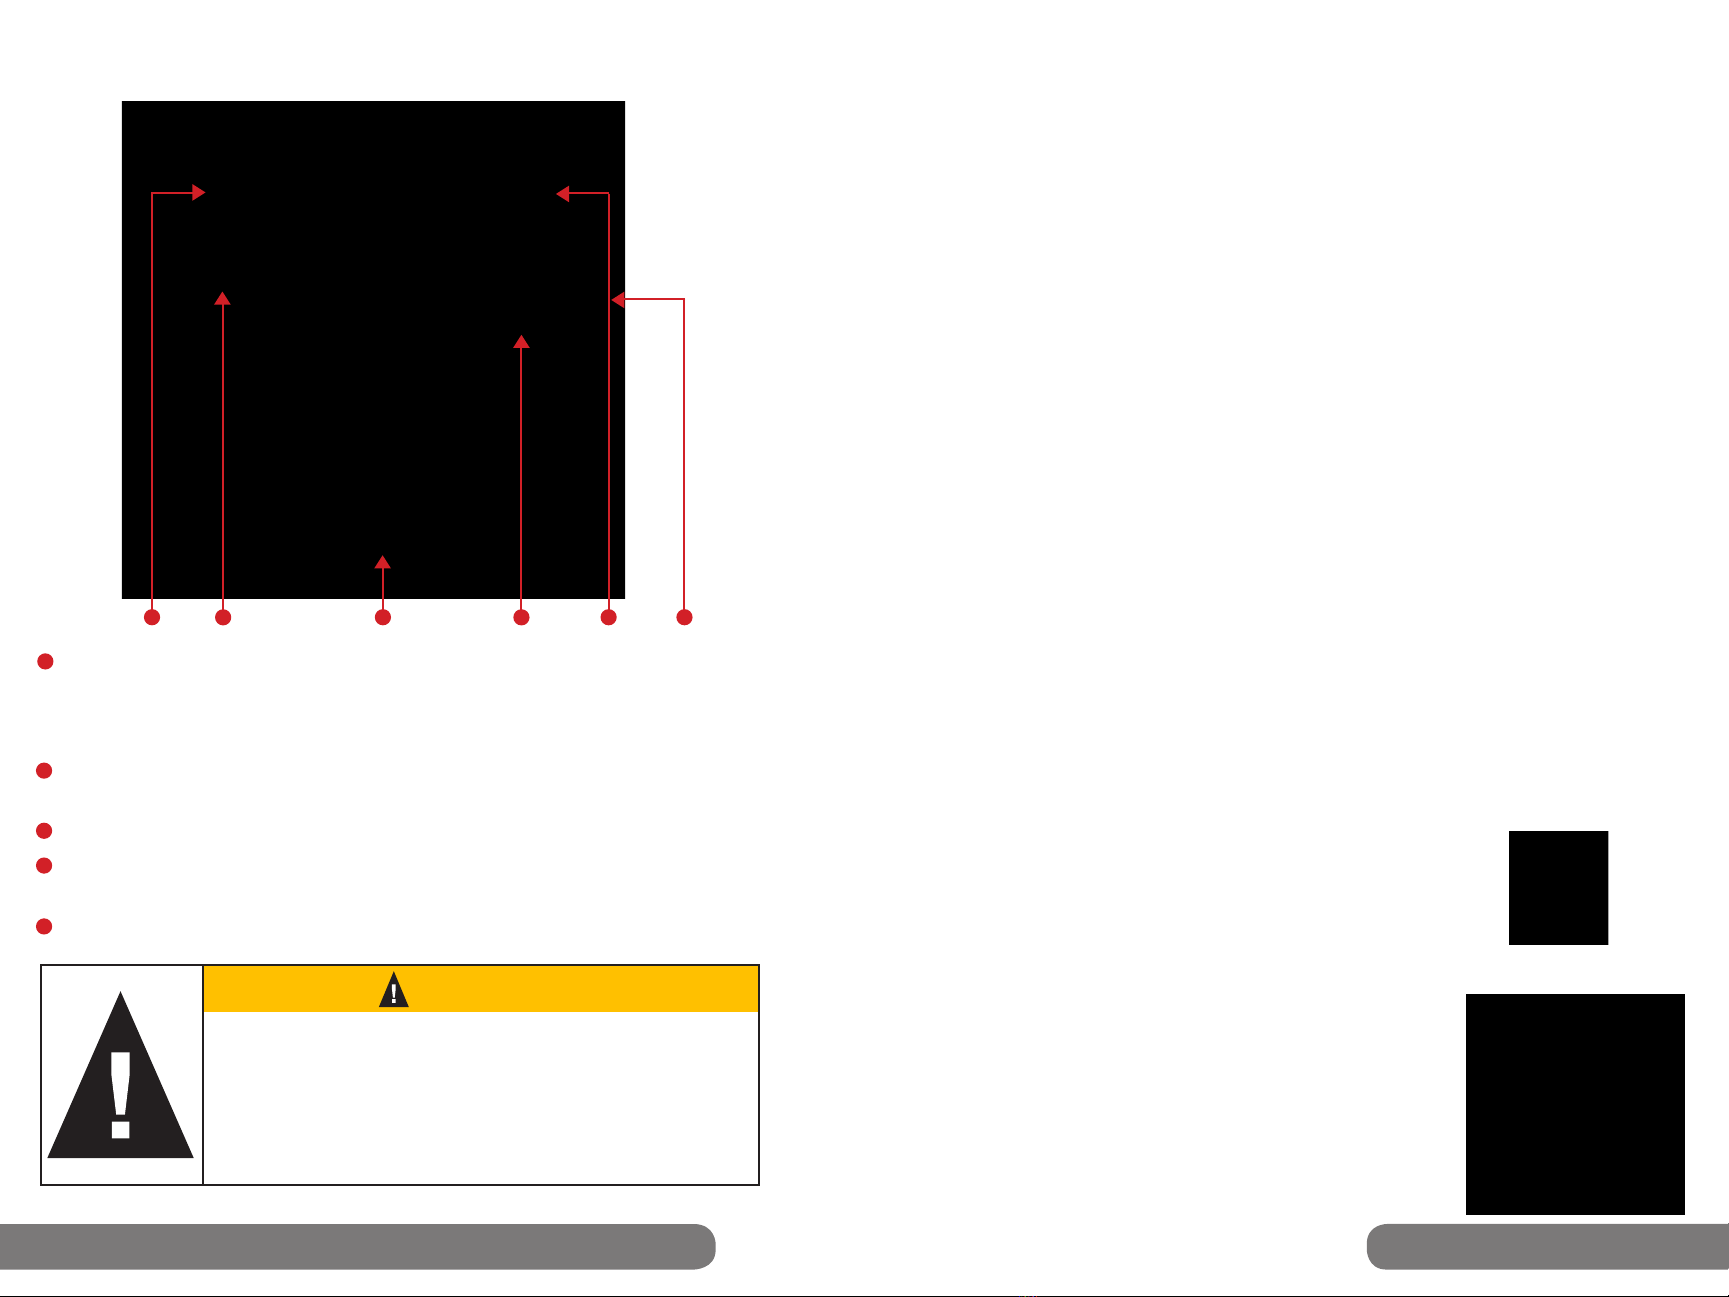
Setting Cooking Time:
1. Press the “Cook Time” button. The “TIME” indicator will ash.
2. Enter the time in hours and minutes by pressing the corresponding numbers.
•For example, 1 hour and 30 minutes
would be entered by pressing “1,3,0”.
The display panel will show 1:30.
• The time can be adjusted in
1 minute increments by pressing
the “-” or “+” arrows.
• To check the time during the cooking process, press the “Cook Time” button,
the PIC will automatically revert to the temperature in 3 seconds.
3. If the required time is in minutes, you only need to enter 1 or 2 numbers.
•For example, for 5 minutes just enter “5”; for 46 minutes, enter “4,6”.
4. If the number needs to be corrected, clear the entry by pressing “0” button
four times.
• The blinking TIME indicates that the time can be adjusted.
The maximum amount of programmable time is 99 hours and 60 minutes.
• The display shows hours and minutes, but not seconds.
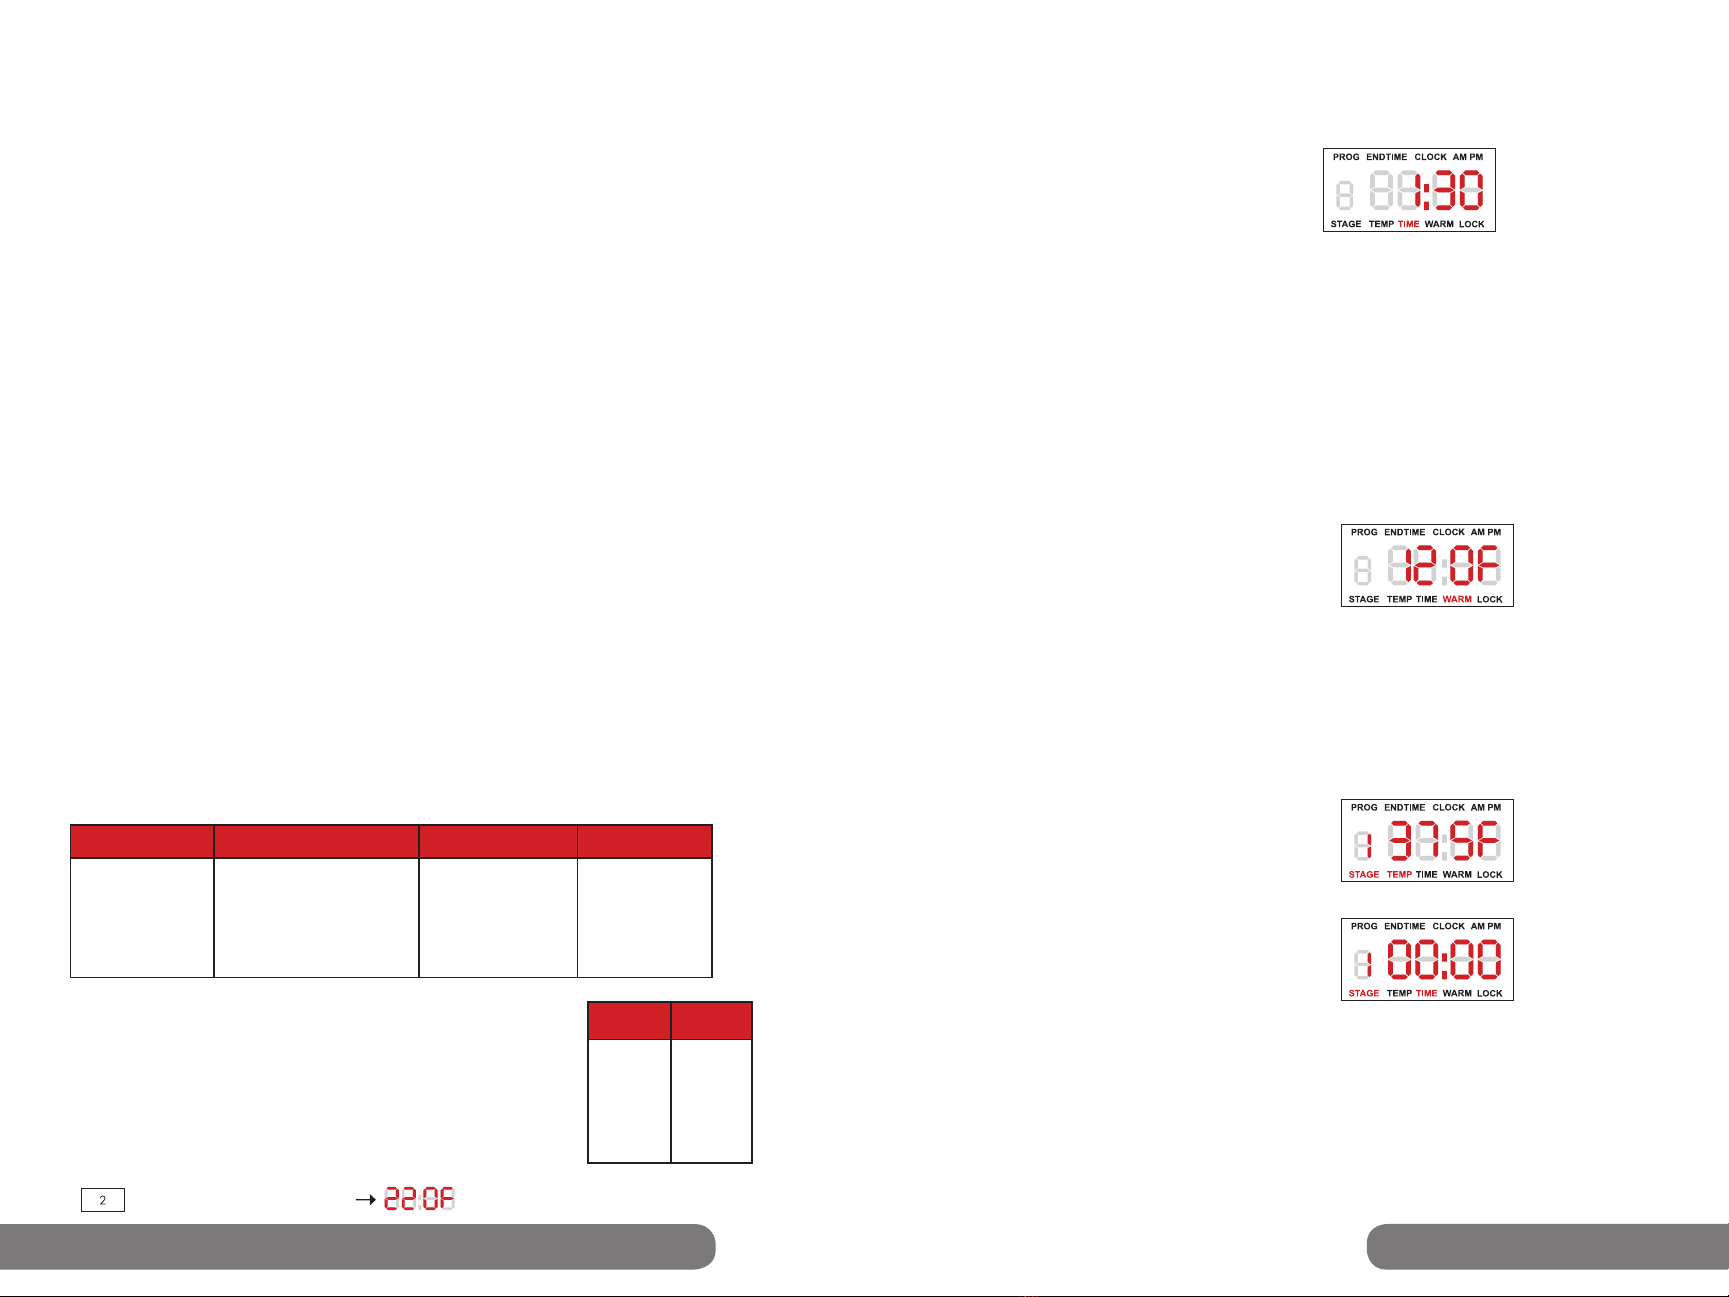
Warm Function:
After the initial cooking is complete, the cooktop can be used to keep the
food warm (100ºF - 200ºF). The default setting is programmed at 120ºF for 2 hours.
1. Press the “Low” and “Med/Low” buttons simultaneously
until the display ashes “WARM”.
The “WARM” indicator will blink.
2. 120F will be displayed, then press “Start”.
3. To change the time, enter the desired time
and proceed. The PIC can be programmed
to keep foods warm for up to 100 hours.
4. Once the initial cooking cycle is nished, the PIC will “beep” twice before switching
to the WARM function. Warm will always be the last stage in the program.
•The temperature of the WARM function can be increased or decreased by pressing
“+” or “-” buttons or using the numeric keypad.
• To change the cooking time press “Cook Time” button. You can increase/decrease the
cooking time by pressing the “+” or “-” buttons or using the numeric keypad.
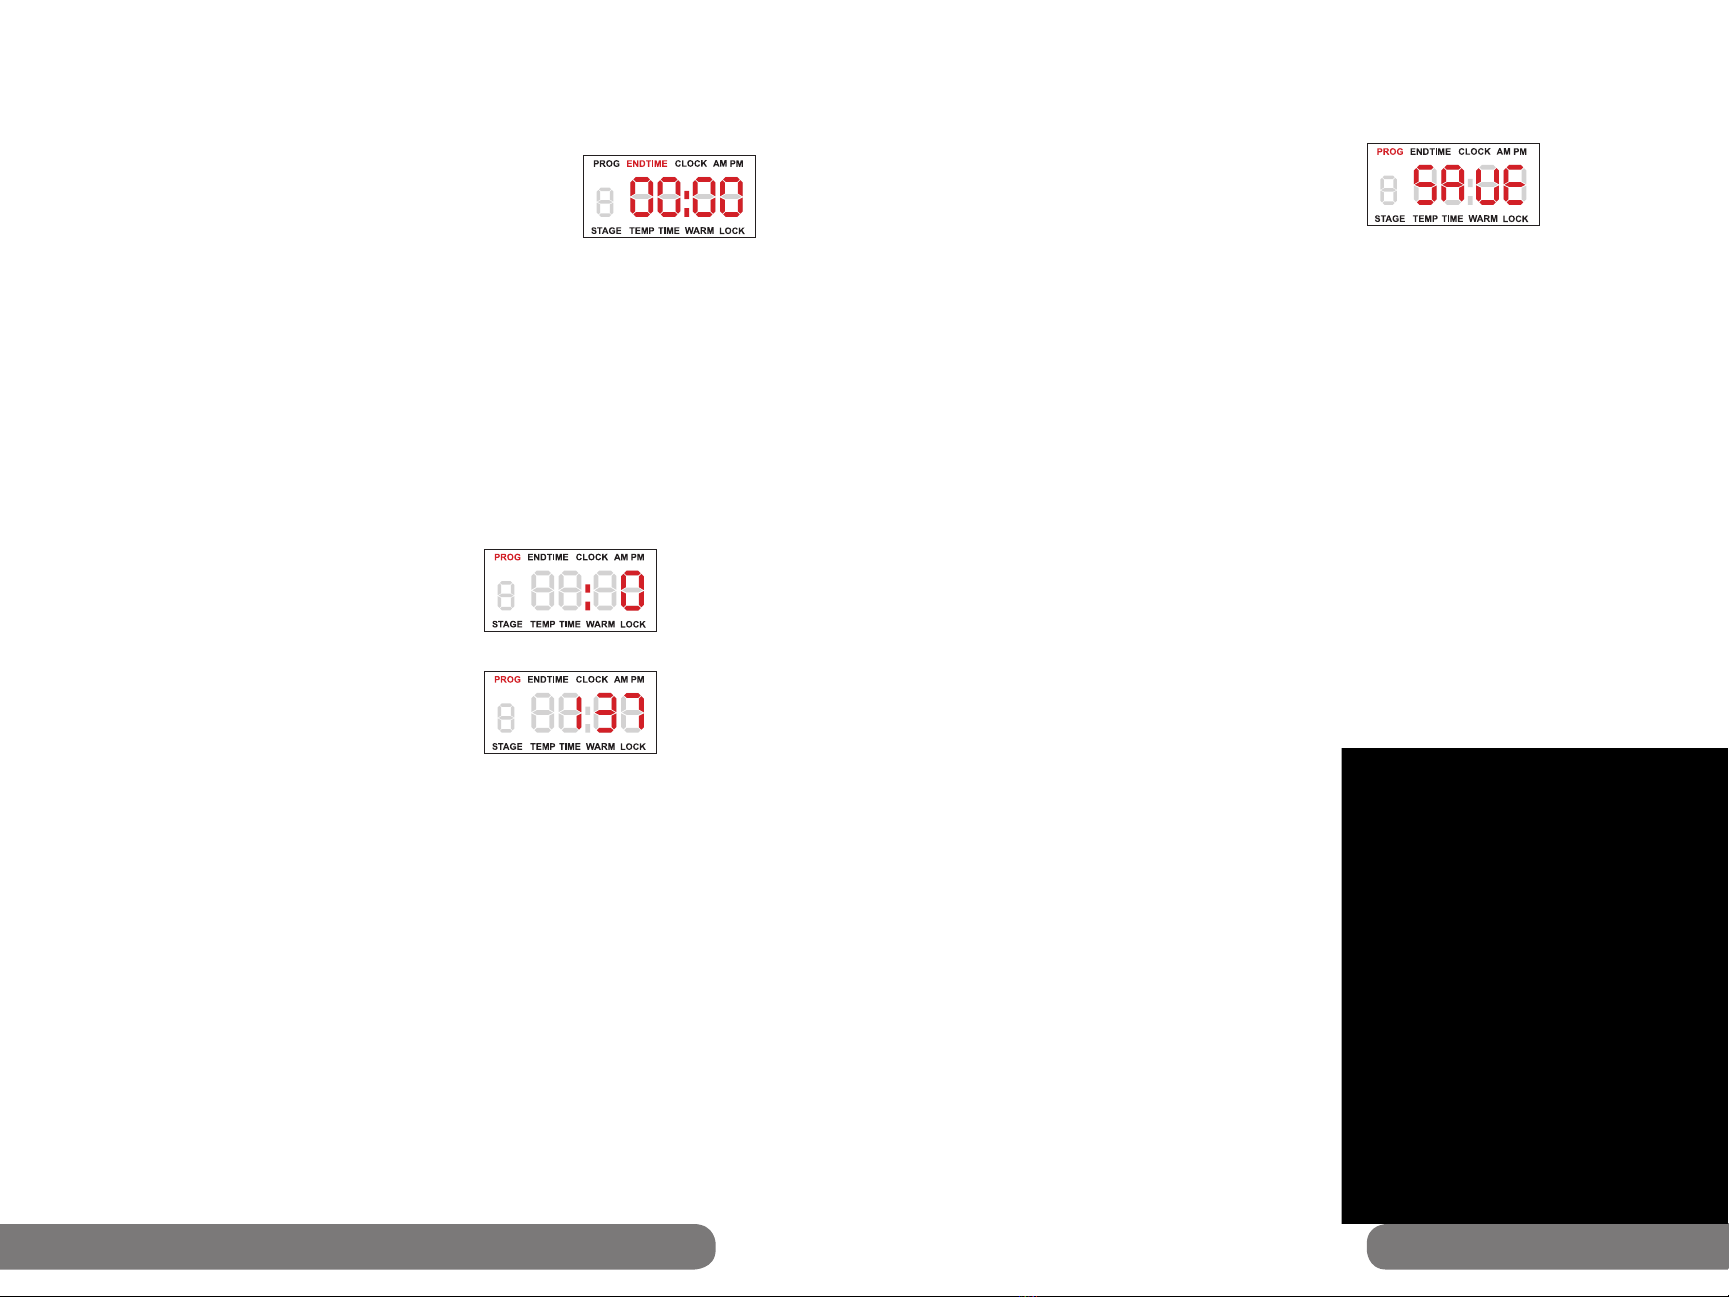
Stage Cook Function:
This function is used when storing, programing or cooking for more
than one time and temperature setting.
1. Press the “Stage” button. STAGE will
begin ashing on the display. All the stages
have a default temperature of 375ºF.
2. To change the temperature, press the
“Cook Temp” button. TEMP will ash on
the display. Enter the desired temperature.
3. Press the “Cook Time” button. TIME
will ash on the display.
4. Input the desired cooking time. You
can also start with the “Cook Time”,
followed by the “Cook Temp”.
5. Press the “Stage” button to move onto programming stage “2”.
6. Repeat the process until all desired stages are programmed.
• There is a maximum number of 10 programmable stages.
Stage 10 will be displayed as “0.”
• If would like to edit an already programmed stage at any time, press the “Stage”
button until desired stage is displayed. At that point, you may change the
COOK TEMP, COOK TIME or both.

16 • NuWave™PIC®Platinum Complete Cookbook
Save Function:
You can adjust and save the cooking time or temperature of an existing programmed recipe at
any point during the cooking process. Once cooking is done, “SAVE” will be displayed on the
LED display. At this point, you may choose to
save your new recipe onto the NuWave™ PIC
Platinum by pressing the “ Program” button
and entering your desired recipe number.
• If you choose to save the adjusted recipe
in a slot that is already taken by another
programmed recipe, the new recipe will override the old recipe.
THIS OPTION IS ONLY AVAILABLE FOR RECIPE SLOTS 51-200.
End Time Function:
IMPORTANT: the correct “CLOCK” time must be set before “END TIME” function can be used
(see “Setting Clock Time” on page 13). This feature is designed to allow cooking to end at a
specic time. It is possible to delay the end of a program for up to 24 hours.
1. Press the “End Time” button, “END TIME” indicator will ash
on LED display with AM and “00:00” being displayed.
2. Use the numeral keys to input the desired end time.
•For example, 5:00 would be entered by pressing “5,0,0”.
Press “am/pm” button to change from “AM” default if appropriate.
3. After programming the cooking temperature and time, press “Start”.
NOTE: “COOK TIME” cannot overlap with the “END TIME”.
Programming Function:
NOTE: Numbers 1-50 are pre-programmed recipes.
NOTE: Numbers 51-200 are your own programmed recipes.
See Programmable Recipe Example.
NOTE: Programs 1-50 – wattage is automatically set for 1800 watts, if you are using programs
1-50 and you press the wattage button it will display “Err” and default back to cook temperature.
NOTE: Programs 51-200 – after you program your appropriate wattage, you are not able to
change the wattage unless you override the programmed recipes. If you press the wattage
button while cooking it will display “Err” and default back to cooking temperature.
The “Program” button represents a variety of functions available to users of the NuWave™ PIC
Platinum, including Memory Entry (the storage of frequently used stage cooking programs),
Memory Recall (retrieval of stage cooking sequences), and Stage Cooking Mode.
Using Pre-Programmed Recipes:
1. Press the “Program” button. “PROG” indicator will
ash and “0” will appear on the display screen.
2. Enter the number associated with the pre-programed
recipe using the numeric keypad. Exp “3,1” is 31.
3. Then press “Start”.
Programming Your Own Recipes:
1. Enter your stages with temperatures and times,
then press “Program”. Enter the number you wish
to save it as. Exp: “1,3,7” is 137.
2. Press the “Program” button to conrm
the number you selected.
• Up to 10 cooking functions can be stored with each Memory Entry
(10 additional stages of cooking time and temperature).
• If you are unsure of the remaining cooking time at the current stage while the
NuWave™ PIC Platinum is cooking, press “Cook Time” to display the remaining time.
The display will automatically revert to the cooking temperature after several seconds.
Total Cooking Time:
Before starting a programmed recipe, you can view the total number of cooking stages and
total cooking time.
1. Press the “Program” button, then enter the appropriate recipe number on the numeric keypad.
2. Then press the “Program” button again.
•The total number of cooking stages will be displayed above “STAGE” and the total
cooking time will be displayed on the LED display.
NOTE: Individual stages may also be edited and saved when displaying the total cooking time.
1. Press the “Stage” button to select which stage to edit.
2. To change the temperature press the “Cook Temp” button and enter the desired temperature
using the numeral keys or the “+” and “-” buttons. To change the time, press the “Cook Time”
button and enter the desired time using the numeral keys or the “+” and “-” buttons.
3. Press the “Start” button to begin your edited recipe.
NOTE: You can also save your edited recipe.
1. Press the “Program” button, and “PROG” will ash and a “0” will show on the screen.
2. Enter the desired number for your program using the numeral keys or the “+” and “-” buttons.
3. Press the “Program” button again to save your new program.
Owner’s Manual • 17
Programmable Recipe Example
Golden Beets
Serves: 6-8
Pre-Programmed Cooking Stages:
Stage 1: Max/Sear - 1 minute
Stage 2: 375°F - 20 minutes
Total Cook Time: 21 minutes
Ingredients:
4 large golden or red beets,
washed and trimmed
1 quart water
1 teaspoon salt
½ teaspoon freshly ground
black pepper
Prep Directions:
1. Add beets and water to
Pressure Cooker.
Programming:
Stage1: Max/Sear - 1 minute
1. Press “Stage” button. Stage
will ash on the display panel.
2. Press “Cook Temp” button and
press “5, 7, 5” buttons or “Max/Sear”
button. “SEAR” will be displayed.
3. Press “Cook Time” button and press
“1” to cook for 1 minute.
Stage 2: 375˚F - 20 minutes
1. Press “Stage” button again, Stage
will ash on the display panel.
2. Press “Cook Temp” button and
press “3, 7, 5” buttons or “Med/High”
button. “375˚F” will be displayed.
3. Press “Cook Time” button and press
“2,0” to cook for 20 minutes.
Cooking Directions:
To cook immediately:
1. Cover and lock in push plate.
2. Turn pressure regulator to 2
for high pressure.
3. Press “Start”.
To save the recipe
1. After entering all your stages,
press “Program”.
2. Enter any number between 51-200
using the numeric keypad.
Exp: “1,3,7” is program 137.
3. Press Program again to set it.

18 • NuWave™PIC®Platinum Complete Cookbook
Troubleshooting
Solution
Error
Message
E2
E3
E4
E5
E6
E7
E8
E9
FULL
E1
The unit is malfunctioning. Contact customer service.
An E1 reading typically means that your NuWave™ PIC Platinum
does not detect cookware on its surface. This can occur for one of
two reasons.
1. The induction coils contained within the NuWave™ PIC Platinum
will only work when they are in direct contact with a piece of
cookware. To maintain your appliance’s effectiveness, always
ensure that it rests on a at surface and that contact is consistent
with your cookware.
2. An E1 message may also occur if your chosen cookware is
not induction-ready.
The unit’s voltage is too low. Minimum = 85 volts
The unit’s voltage is too high. Maximum = 144 volts
Overheating, or air ventilation is obstructed. If internal temperature
exceeds 230ºF, operation will cease and a “beep” noise will be
produced. Press “Pause/Clear” twice. Wait for the unit to cool.
In programming mode, when the total entered time reaches the
appliance’s limit of 99:60, no additional stages can be inputted.
Overheating, if unit exceeds a temperature 20ºF higher than sear,
the appliance will turn off. Contact customer service.
The unit is malfunctioning. Contact customer service.
• When any of the above error messages display on the LED, the unit will “beep” at
least once.
• The fan will run up to a maximum of 60 seconds after pressing the “Pause/Clear
button once. Continue cooking by pressing the “Start” button within 45 minutes.
• The unit will turn off after 45 minutes if no buttons (such as “Start”) are pressed.
When the unit shuts off, it will clear all previous cooking history.
• After pressing the “Pause/Clear” button twice or cooking has stopped, the fan will run
up to a maximum of 60 seconds until the unit cools. At that point the NuWave™ PIC
Platinum will turn off.
Beep sound Display Reference
Initial
< 10 seconds
11- 70 seconds
After 70 seconds
Single beep
None
Yes
None
“F” or “C” or
“Sear” Flashing
“F” or “C” or “Sear”
or “:” Flashing
E1
0
After returning the pot,
NuWave™ PIC Platinum
will automatically resume
cooking.
Resume cooking by
pressing “Start” button.
Cooking stops.
After removing
cookware
Trouble Shooting • 19
THE MANUFACTURER WARRANTS: The induction cooktop and all electrical
components to be free from defects and workmanship under normal household use, when
operated in accordance with the Manufacturer’s written instructions provided with each
unit for one (1) year from date of purchase. The Manufacturer will provide the necessary
parts and labor to repair any part of the induction cooking system at NuWave, LLC Service
Department. After the expiration of the warranty, the cost of the labor and parts will be the
responsibility of the owner.
THE WARRANTY DOES NOT COVER: Any coating (if applicable) on any part of the
cooking system. The Limited Warranty is voided if repairs are made by an unauthorized
dealer or the serial number data plate is removed or defaced. Normal deterioration of
nish due to use or exposure is not covered by this Warranty. This Limited Warranty does
not cover shipping costs, failure, damages or inadequate performance due to accident,
acts of God (such as lightning), uctuations in electric power, alterations, abuse, misuse,
misapplications, corrosive type atmospheres, improper installation, failure to operate in
accordance with the Manufacturer’s written instructions, abnormal use or commercial use.
TO OBTAIN SERVICE: The owner shall have the obligation and responsibility to: pay
for all services and parts not covered by the warranty; prepay the freight to and from
Service Department for any part or system returned under this warranty; carefully package
the product using adequate padding material to prevent damage in transit. The original
container is ideal for this purpose. Include in the package: owner’s name, address,
daytime telephone number, a detailed description of the problem, and your
RETURN GOODS AUTHORIZATION NUMBER (RGA number):
Call 1-877-689-2838 or e-mail help@nuwavenow.com to obtain the RGA number. Provide
the cooking system model & serial number and proof of date of purchase
(a copy of the receipt) when making claims under this warranty.
MANUFACTURER’S OBLIGATION:
The Manufacturer’s obligation under this Limited Warranty is limited to repairing or
replacing any part of the induction cooktop expressly covered by this Limited
Warranty which upon examination is found to be defective under normal use. The
Limited Warranty is applicable only within the continental United States and only to the
original purchaser of manufacturer’s authorized channels of distribution.
The Limited Warranty may not be altered, varied or extended except by written instrument
executed by the manufacturer. The remedy of repair or replacement as provided under
this limited warranty is exclusive. In no event shall the manufacturer be liable for any
consequential or incidental damages to any person, whether or not occasioned by
negligence of the manufacturer, including without limitation, damages for loss of use,
costs of substitution, property damage, or other money loss. Some states do not allow
the exclusion or limitation of incidental or consequential damages, so the above limitation
exclusions may not apply. This Limited Warranty gives specic legal rights, and there may
also be other rights which vary from state to state. Except as otherwise expressly provided
above, the manufacturer makes no warranties expressed or implied arising by law or
otherwise, including without limitation, the implied warranties of merchantability and tness
for a particular purpose to any other person.
READ YOUR OWNER’S MANUAL: If you still have any questions about operation or
warranty of the product, please contact NuWave, LLC at
1-877-689-2838 or e-mail help@nuwavenow.com.

20 • NuWave™PIC®Platinum Complete Cookbook
Cooking Tips
This recipe book contains valuable information designed to assist
in the incorporation of the NuWave™ PIC Platinum into daily life.
We’ve provided easy-to-prepare recipes along with helpful tips at
the beginning of each section for perfect results every time.
Here are a few general suggestions to help you start cooking:
• Place a garbage bowl next to your cutting board for discarding
food scraps.
• Flexible cutting boards are very convenient. Just chop and lift
- no mess, no spills.
• Glass measuring cups are optimal for liquids while plastic
measuring cups work well for dried ingredients.
• After you have juiced lemons, put them in the garbage
disposal to freshen the surrounding air.
• Pay close attention to butter as it’s melting. Butter melts when
its internal temperature reaches a range between 82.4°F and
96.8°F. This means it melts fast, so be prepared to remove it
from the PIC quickly.
• Some of the enclosed recipes suggest prepping and/or
cooking items in the NuWave® Oven. Contact customer
service for more information or to place an order.
Delicious Details!
1 square of baker’s chocolate = 1 ounce
4 pecks = 1 bushel
8 tablespoons = 1/2 cup
1 pound of chopped nuts = 2 cups
1/2 cup of butter = 1 stick
2 cups granulated sugar = 1 pound
2 cups butter = 1 pound
16 uid ounce = 1 pint
1 cup = 1/2 pint
• Add a teaspoon of water for each egg and whip for ufer results. Heat pan
on high for 1 minute to ensure fast cooking.
• Cool down boiled eggs by placing them in a bowl of ice cubes while running
eggs under water. This will help peel eggs with ease.
•
• If, while cracking, a small egg shell fragment gets into the mix, take a larger
piece of the shell and place it into the egg mixture. The larger shell will serve
as a magnet, drawing the small fragment towards it.
• To prevent cheese from adhering to grater, spray utensil with non-stick
cooking spray.
• Spilled egg on PIC surface? Wipe clean, in seconds with hot soapy water.
Breakfast
Tips for Eggs
When storing your eggs, keep refrigerated, as they can lose more freshness
in one day at room temperature than they can in one week in the fridge. Eggs
should be kept in their original cartons in order to keep their moisture and avoid
getting odors from other foods. Keep them on the fridge shelf, not in the door to
avoid frequent temperature uctuations.

22 • NuWave™PIC®Platinum Complete Cookbook
Scrambled Eggs
Serves: 2
4 eggs
1/3 cup milk
1/2 teaspoon of salt
1/4 teaspoon black pepper
1 tablespoon butter or
non-stick cooking spray
Directions:
1. In medium bowl, combine eggs, milk,
salt and black pepper.
2. Beat eggs with rotary or
electric beater.
3. Pour egg mixture into
large sauté pan.
4. Cook eggs on Medium (275°F),
without stirring, until mixture begins
to set on bottom and around edges.
5. Using spatula or wooden spoon, lift
and fold partially cooked egg mixture
so that uncooked portion ows
underneath.
6. Cook for 2-3 additional minutes until
eggs are cooked through and still
glossy.
Omelette
Serves: 1-2
2-3 eggs
1 tablespoon cold water
Salt and pepper to taste
1 tablespoon butter
Directions:
1. Whisk eggs in bowl with salt, pepper
and cold water.
2. Heat small sauté pan on
High (425˚F). Add butter and cook
until butter starts to melt.
3. Reduce heat to Medium (275˚F) and
add egg mixture all at once.
4. Swirl with rubber spatula and cook
eggs until almost set.
5. Occasionally tilt pan and lift and fold
partially cooked egg mixture so that
uncooked portion ows underneath.
6. Using spatula fold the omelette in half
or thirds.
7. Flip over onto plate to serve.
Tip: Sprinkle the omelette with shredded
cheese, ham, bacon and
vegetables.
• Make sure vegetables are small for
even cooking.
Breakfast Potatoes
Serves: 4
2 cups coarsely chopped tiny new
potatoes or round red potatoes
½ cup chopped onion
½ cup chopped green or
red bell pepper
2 tablespoons olive oil
½ teaspoons salt
½ teaspoon pepper
½ cup shredded cheddar cheese
(optional)
Directions:
1. In medium sauce pot, add potatoes
and enough water to cover.
2. Season with salt to taste and
heat on Medium-High (375˚F)
until water boils.
3. Once water boils, cook potatoes for
an additional 4-5 minutes.
4. Drain potatoes to remove any
excess water.
5. In large sauté pan, heat olive oil
over Medium (275°F).
6. Add potatoes, onions, and bell
peppers to skillet.
7. Cook for 15-20 minutes until tender,
stirring occasionally.
8. Season with salt and pepper and
sprinkle with cheese before serving.
Homemade Yogurt
Yield: 1 quart or 8 Yogurt Jars
1 quart whole milk
1 packet (5 grams) yogurt starter
(powdered culture)
Directions:
1. Pour milk into medium sauce pot.
2. Press High (425°F) to bring milk up
to 180°F (or until milk starts to boil)
then let milk cool down to 108-112°F.
3. Dissolve powdered culture into milk,
mix well.
4. Pour mixture into yogurt jars.
5. Place yogurt jars in pot then ll pot
with water to ensure water covers at
least ¼ of the jars throughout
cooking process.
6. Press Low (100°F) and then press
“+” until display shows 130°F to
heat water (this allows milk to
maintain 110°F inside yogurt jars).
7. Continue heating for 4-4½ hours
or until yogurt has reached
desired rmness.
8. Refrigerate to stop incubation.
9. Fruit and nuts can be added to
yogurt before serving.
Tip: For the best results, use
Jump-Start yogurt starter.

24 • NuWave™PIC®Platinum Complete Cookbook Breakfast • 25
Homemade Pancakes
Serves: 4
1½ cups self-rising our
1 teaspoon baking powder
2 tablespoons white sugar
2 eggs, lightly beaten
1 cup milk
2 ounces butter
Pinch salt
Maple syrup
Butter
Directions:
1. Sift our, baking powder, and salt
into bowl.
2. Make a well in center of bowl.
3. Mix eggs, milk, and melted butter in
small bowl.
4. Pour egg mixture into well all at
once, whisking to form
smooth batter.
5. Cover the bowl and let sit for
10 minutes.
6. Lightly brush sauté pan or griddle
with canola oil and heat on
Medium-High (375°F).
7. Pour ¼ cup batter into pan. Swirl
gently to form pancake.
8. Cook until bubbles form or bottom
gets golden brown and ends
begin to dry.
9. Flip pancake and cook other side
for 30 seconds.
10. Transfer to plate and repeat with
remaining batter.
11. Serve with butter and maple syrup.
Tip: Use buttermilk in place of regular
milk for buttermilk pancakes.
• Add ½ cup shredded potatoes for
potato pancakes.
Fried Eggs
Serves: 2
2 teaspoons olive oil, butter
non-stick spray
4 eggs
1-2 teaspoons water
Directions:
1. In large sauté pan, melt oil or butter
on Medium (275°F).
2. Break eggs into skillet.
3. When whites are set, add water.
4. Cover skillet and cook eggs for
3-4 minutes or until yolks begin
to thicken.
Garden Vegetable Frittata
Serves: 6
2 tablespoons olive oil
6 small red potatoes, sliced
2 cups torn fresh spinach
1 bunch green onions, sliced
1 cup grape tomatoes, sliced
1 cup asparagus, diced
1 teaspoon crushed garlic
Salt and pepper to taste
6 eggs
½ cup milk
1 cup shredded Asiago cheese
Directions:
1. Heat olive oil in medium sauté pan
on Medium (275°F).
2. Add potatoes to pan, cover and cook
for 6-8 minutes.
3. Uncover pan and mix in spinach,
green onions, tomatoes,
asparagus and garlic.
4. Season vegetables with salt and
pepper and cook for 1-2 minutes,
until spinach is wilted.
5. In separate bowl, beat eggs and milk
together and pour into sauté pan.
6. Sprinkle eggs with cheese and
reduce PIC to Low (100°F).
7. Cover pan and cook for 5-7 minutes.
Crepes
Serves: 4
2 large eggs
¾ cup milk
½ cup water
1 cup our
3 tablespoons melted butter
Butter to coat the pan
Directions:
1. Combine eggs, milk, water, our and
melted butter in blender and pulse
for 10 seconds.
2. Refrigerate batter for 1 hour.
3. Coat small non-stick pan with butter
and heat on Medium (275°F).
4. Pour 1 ounce batter into center of
pan and swirl to spread evenly.
5. Cook for 30 seconds and ip.
6. Cook for additional 10 seconds
and transfer crepe to cutting
board to cool.
7. Repeat steps 4-6 with
remaining batter.
8. Once cool, you can store crepes
in refrigerator for several days or in
freezer for up to 2 months.
Tip: For savory crepes, add ¼
teaspoon salt and ¼ cup chopped
herbs to batter.
Tip: For sweet crepes, add 2½
tablespoons sugar, 1 teaspoon
vanilla extract and 2 tablespoons
liqueur to batter.

26 • NuWave™PIC®Platinum Complete Cookbook
Poached Eggs Benedict
Serves: 4
Water, enough to ll fry pan
2 tablespoons white vinegar
1 tablespoon salt
8 slices Canadian bacon
8 large eggs
3 large egg yolks
1 tablespoon fresh lemon juice
1 stick unsalted butter,
melted and divided
2 teaspoons hot water,
plus extra as needed
½ teaspoon cayenne pepper
Salt and pepper to taste
4 English mufns, split in half
and toasted
3 tablespoons chopped chives
Directions:
1. Cook bacon in large sauté pan
on Medium (275°F) until
well-browned on each side.
2. Transfer bacon to paper towel-lined
plate and cover with foil to keep
warm; set aside.
3. Fill large fry pan to brim with water.
4. Add vinegar and salt and bring to
gentle simmer on Medium (275°F).
5. Crack egg into cup and carefully
slide into simmering liquid. Quickly
repeat with remaining eggs.
6. Using slotted spoon, carefully corral
eggs whites around yolks.
7. Poach eggs for 3-5 minutes, turning
them occasionally with slotted
spoon, until whites are rm.
8. Using slotted spoon, remove eggs
and transfer to kitchen towel.
9. Lightly dab eggs with towel to
remove excess water.
10. Arrange English mufns on
individual plates and top with bacon
and eggs; keep warm and set aside
until sauce is ready.
French Toast
Serves: 4
1 teaspoon ground cinnamon
¼ teaspoon ground nutmeg
2 tablespoons sugar
4 tablespoons butter
4 eggs
¼ cup milk
½ teaspoon vanilla extract
8 slices challah, brioche, or white bread
½ cup maple syrup, warmed
Directions:
1. In small bowl, combine cinnamon,
nutmeg, and sugar and set aside.
2. Melt butter in large sauté pan on
Medium (275°F).
3. Whisk together cinnamon mixture,
eggs, milk and vanilla and pour
into shallow dish.
4. Dip bread in egg mixture,
coating both sides.
5. Cook slices on skillet for 3-4 minutes
per side, until golden brown.
6. Serve with warm syrup.
11. Blend egg yolks and lemon juice
together in blender until smooth
and frothy.
12. Add half melted butter and continue
to blend for about 1½ minutes, until
mixture thickens.
13. Blend in hot water and remaining
butter for about 1 minute.
14. Blend additional water, 1 teaspoon
at a time, as needed until sauce
coats back of a spoon.
15. Stir in cayenne pepper and season
with salt and pepper.
16. Top each mufn with sauce and
garnish with chives.
• To avoid losing the vibrant colors of
vegetables, those that grow above
ground should not be covered
during the cooking process.
• Store purchased vegetables in
the same manner in which you
bought them from the grocery. For
example, potatoes should never be
stored in the refrigerator.
• Do not cook with or eat potatoes
that have roots growing from
them. This usually means they
are past their prime and could be
detrimental to your health.
Vegetables
• Save vegetable scraps such as
carrot peels, celery stalks and
onions as ingredients for soup and
stew stock. Freeze until needed.
• Steaming vegetables is a great
way to retain their nutrients. It
helps preserves color and ensures
the intake of maximum vitamins.
To steam, place water in a pot and
bring it to boil. Insert steam basket
in pot, situated above water line.
Place vegetables in basket and
cook until they reach al dente (rm
to the bite) consistency.
Tips for Vegetables

28 • NuWave™PIC®Platinum Complete Cookbook
Perfectly Cooked Vegetables
in the Induction Steam Basket
Guidelines below are for al dente (rm to the bite). Place water in 8-quart
stock pot. Bring 2 cups water to boil while covered on Max/Sear. Cut
temperature to medium-high (375°F) once rolling boil has developed.
Uncover and add Stainless Steel Steamer Basket. Place vegetables in basket.
Cook vegetables for listed time, or add 2-4 minutes for softer vegetables.
Asparagus 3-5 minutes
Broccoli 4-5 minutes for orets
6 minutes for stalks
Cauliower 4-5 minutes
Zucchini 3 minutes Cut into ½ inch pieces
Red, Yellow & Green Peppers 3 minutes Cut into ½ inch strips
Carrots 5-6 minutes Cut in ½ inch slices
Cabbage 10-12 minutes Cut into 6 wedges
Parsnips 5-6 minutes Cut into ½ inch pieces
Collard Greens & Spinach 2-3 minutes Chopped
Kohlrabi 6-7 minutes Peel & cut into ½ inch slices
Sugar Snap Peas 3-4 minutes
Pea 2-3 minutes
Leeks 3-4 minutes Cut into ½ inch slices
Turnips 8-9 minutes Peel & cut into ½ inch slices
Summer Squash 15 minutes Cut in half & remove seeds
Vegetables Time Special Preparations
Green Beans Almondine
Serves: 4
8 ounces green beans
2 tablespoons slivered almonds
2 tablespoons butter
1 tablespoon lemon juice
Ice water bath
Directions:
1. Wash and trim green beans to
desired length.
2. Blanch green beans in boiling salted
water for 3-4 minutes or until still
crisp, but not raw.
3. Drain beans and place in ice water
bath to stop cooking process;
set aside.
4. In large sauté pan, cook and stir
almonds in melted butter on Medium
(275°F) until almonds turn golden,
while not letting butter brown.
5. Remove blanched beans from ice
bath and add to almonds.
6. Continue to cook until green beans
reach desired temperature.
7. Remove from heat and
add lemon juice.
Vegetables • 29
Grilled Japanese Eggplant
with Feta & Sun-dried
Tomatoes
Serves: 4
4 Japanese eggplants, stemmed and
halved lengthwise
1 tablespoon salt
¼ cup oil-packed sun-dried tomatoes,
chopped and drained
3 tablespoons fresh lemon juice
3 tablespoons olive oil, divided
2 tablespoons olive oil for grilling
1 clove minced garlic
1 tablespoon fresh-chopped
Italian parsley
½ cup crumbled Feta cheese
Directions:
1. Place eggplant halves in large
colander and toss with salt.
2. Let eggplant stand for 30 minutes
then pat dry.
3. Meanwhile, stir tomatoes, lemon
juice, 1 tablespoon oil, garlic and
parsley in medium bowl.
4. Stir in Feta cheese and season with
fresh ground pepper.
5. Prepare grill pan or sauté pan by
placing on PIC and warm on
Max/Sear for 3-5 minutes.
6. Turn PIC down to
Medium-High (375°F).
7. Brush eggplant with oil and place on
grill pan or sauté pan.
8. Grill eggplant for 3 minutes per side,
until tender.
9. Place eggplant on platter and serve
with prepared Feta topping.
Tip: Use a mandolin to cut the eggplant
evenly into 1-inch strips
Stir-Fried Tofu & Vegetables
Serves: 4
½ cup natural peanut butter
¾ cup hot water
¼ cup cider vinegar
4 tablespoons soy sauce
2 tablespoons molasses
½ teaspoon crushed red pepper akes
4 teaspoons canola oil
1 pound rm tofu, cut into small pieces
2 tablespoons garlic, minced
2 teaspoons gingerroot, divided
1-1½ pounds broccoli
1 cup red onion
1 red pepper, cut in strips
1 yellow pepper, cut in strips
1 cup peanuts, unsalted
Directions:
1. In bowl, mix peanut butter, hot water,
vinegar, soy sauce, molasses and
red pepper akes until smooth;
set aside.
2. Add 2 tablespoons oil to wok or large
sauté pan and heat on High (425°F).
3. Add tofu and stir on High (425°F)
for 5 minutes or until edges start
to brown.
4. Transfer tofu to bowl using slotted
spoon; set aside.
5. If wok or large sauté pan is dry, add
2 teaspoons oil.
6. Stir-fry garlic and ginger for 30
seconds, stirring constantly.
7. Add broccoli and stir-fry
for 2 minutes.
8. Add peppers, peanuts and sauce.
9. Cook for 3-5 minutes on
High (425°F).
10. Serve over rice.

30 • NuWave™PIC®Platinum Complete Cookbook Vegetables • 31
Broccoli & Carrot Stir-Fry
Serves: 4
¼ cup vegetable broth or
chicken stock
1 tablespoon balsamic vinegar
1 teaspoon cornstarch
1 tablespoon cooking oil
1 teaspoon grated fresh ginger
1½ cups carrots, thinly sliced
2 cups broccoli orets
1 teaspoon grated fresh garlic
Directions:
1. To make sauce, stir together broth,
vinegar, and cornstarch in small
bowl; set aside.
2. Pour oil into wok or large sauté pan
and heat on Max/Sear.
3. Add ginger to pan and stir-fry for
15 seconds while constantly
moving pan.
4. Add carrots and stir-fry for 1 minute.
5. Add broccoli and garlic and stir-fry
for 3-4 minutes.
6. Add prepared sauce and cook until
thick and bubbly, stirring constantly.
7. Serve with your favorite meat
or over rice.
Artichokes with
Butter Sauce
Serves: 2
2 (10-ounce) artichokes
1 full lemon plus 1 tablespoon, juiced
and separated
¼ cup butter
1 teaspoon herbs (dill, tarragon, or
oregano)
Directions:
1. Wash artichokes, trim stems and
remove loose outer leaves.
2. Cut off 1 inch from top and snip off
sharp leaf tips.
3. Brush cut leaves with lemon juice.
4. In large stock pot, bring large
amount of water, enough to cover
artichokes, to boil on Max/Sear.
5. Add salt and artichokes to boiling
water.
6. Reduce heat to Medium (275°F).
7. Simmer covered artichokes for
20-25 minutes or until leaves
pull out easily.
8. Drain artichokes upside down on
paper towels.
9. Melt butter on Medium-Low (175°F)
and stir in herbs and 1 tablespoon
lemon juice.
10. Transfer butter sauce to bowl and
dip artichokes leaves in butter.
Marinated Zucchini and
Summer Squash
Serves: 4-6
2 tablespoons white wine vinegar
2 tablespoons fresh lemon juice
1 tablespoon minced garlic
2 teaspoons chopped, fresh thyme
Salt and freshly ground black
pepper to taste
¼ cup extra-virgin olive oil
1 pound zucchini, trimmed and sliced
diagonally into ¼-inch slices
1 pound yellow crookneck squash,
trimmed and sliced diagonally
into ¼-inch slices
Directions:
1. Whisk vinegar, lemon juice, garlic,
and thyme in large bowl and season
with salt and pepper.
2. Gradually whisk oil into
vinegar mixture.
3. Spoon 3 tablespoons marinade
into small bowl and set aside.
4. Add zucchini and squash
to remaining marinade and
toss to coat.
5. Transfer vegetables to
large baking dish.
6. Cover dish and let vegetables
marinate at room temperature for 3
hours, or refrigerate for up to 1 day.
7. Heat large sauté pan on
Medium-High (375°F).
8. Sauté vegetables for about
8 minutes,
turning occasionally.
9. Transfer vegetables to serving
platter and drizzle with
reserved marinade.
Ratatouille Stew
Serves: 4-6
2 tablespoons extra-virgin olive oil
3 cloves garlic, minced
1 yellow onion, diced
1 small eggplant, diced
1 small yellow squash, diced
1 small zucchini, diced
Kosher salt and cracked black pepper
to taste
½ cup fresh basil leaves, chopped,
plus extra for garnish
1 (15-ounce) can diced tomatoes
1 cup chicken broth
Directions:
1. Heat oil in medium stock pot on
Medium-High (375°F).
2. Add garlic and onions to pot
and cook for 3-5 minutes,
stirring constantly.
3. Add eggplant, squash and zucchini
and season with salt and pepper.
4. Cook for 5 minutes,
stirring frequently.
5. Stir in basil and cook for
1 additional minute.
6. Stir in tomatoes and chicken broth
and bring to boil on Max/Sear.
7. Reduce PIC to 220°F and simmer
for 10 minutes.
8. Remove pot from PIC and
let cool slightly.
9. Garnish with chopped basil and
serve with side of bread.

32 • NuWave™PIC®Platinum Complete Cookbook
Sugar Snap Peas and
Spinach with Ginger
Serves: 2
Kosher salt
Ice
Water
1 pound sugar snap peas stem end
and strings removed
Extra-virgin olive oil
1 (1-inch) piece of ginger,
nely chopped
2 cloves garlic, smashed
1 scallion, thinly sliced
½ pound baby spinach, washed but
not dried, and stems removed
Directions:
1. Bring a medium stock pot of well-
salted water to a boil on Max/Sear.
2. Set up bowl of well-salted ice water.
3. Blanch the snap peas in boiling
water until they are cooked,
but still crunchy and then
immediately plunge them into the
salted ice water.
4. Remove snap peas from ice
water and reserve.
5. Coat large sauté pan with oil.
6. Add ginger, garlic, and scallions
to pan and cook at 350°F until the
scallions are soft and translucent.
7. Add snap peas to pan and
toss to coat.
8. Add spinach and toss with the peas
until the spinach starts to wilt.
9. Remove pan from the PIC and
season vegetables with salt.
10. Toss or stir the spinach to
nish wilting and transfer to
a serving bowl.
Tip: Serve with Asian-Marinated
Pork Chops
Grilled Vegetable Medley
Serves: 4-6
1 green bell pepper, sliced
1 red bell pepper, sliced
1 yellow bell pepper, sliced
10 small tomatoes, sliced
1 red onion, sliced
1 crookneck squash, sliced
1 zucchini, sliced
½ cup fresh basil leaves, chopped
¼ cup olive oil
Salt and black pepper to taste
Directions:
1. Add peppers, tomatoes, onion,
squash, zucchini and basil to bowl
and toss with olive oil.
2. Season vegetables with salt and
pepper to taste.
3. Let vegetables sit for 10 minutes.
4. While vegetables marinate, heat
grill pan or sauté pan on
Medium-High (375°F).
5. Transfer vegetables to pan and
cook for 8 minutes, or until tender,
stirring occasionally.
6. Serve vegetables immediately.
Vegetables • 33
¼
Grilled Vegetables with
Balsamic-Garlic Sauce
Serves: 6-8
1 cup extra-virgin olive oil
¼ cup balsamic vinegar
3 tablespoons minced fresh
Italian herbs
1 tablespoon minced garlic
1½ teaspoons salt
¾ teaspoon freshly ground
black pepper
1 pound yellow squash or zucchini,
ends trimmed and sliced lengthwise
into ¼-inch slices
2 large red onions, sliced
crosswise into -inch slices and
secured with toothpicks
1 large eggplant, ends trimmed and
sliced lengthwise into -inch slices
1-2 fennel bulbs, sliced lengthwise into
¼-inch wedges
Sea salt (optional)
¼cup nely grated Parmesan cheese
(optional)
Directions:
1. Heat grill pan or large sauté pan
on Medium-High (375°F).
2. Add olive oil, balsamic vinegar,
herbs, garlic, salt and pepper to
mixing bowl and whisk to combine.
3. Lightly brush zucchini slices on both
sides with marinade.
4. Place zucchini on hot grill and cook
for 3-4 minutes per side.
5. Transfer zucchini to serving platter
and sprinkle with sea salt.
6. Repeat steps 3-5 with remaining
vegetables, tting as many onto
grill as possible.
7. Garnish with Parmesan cheese
and serve.
Tip: We recommend using oregano,
basil, marjoram or parsley for
your herbs.
¼

34 • NuWave™PIC®Platinum Complete Cookbook
• Internal meat temperature*
according to taste preferences:
Rare: 135°F-140°F
Medium-rare: 140°F-150°F
Medium: 150°F-160°F
Well-done: 160°F-170°F
• Meat should be thawed in the
refrigerator.
• Cut meat across the grain. If you’re
not sure how to do this, consult
your butcher.
• Inexpensive cuts of meat may be
marinated to promote tenderness.
Beef
• When it comes to searing meat, the
cut is not ready to be ipped if it is
sticking to pan.
• Let all meats (chicken, beef, lamb,
pork, etc.) sit for 3-5 minutes after
cooking time is complete, but
before cutting.
• 1 pound of raw ground beef equals
2 cups of cooked meat.
* A meat thermometer is essential for
checking internal temperature.
Tips for Beef Bistro Beef & Mushrooms
Serves: 4
4 beef sirloin steaks, cut ½-inch thick
1 tablespoon Dijon mustard or coarse
grain brown mustard
¼ cup dry red wine or sherry
1 tablespoon Worcestershire sauce
½ cup beef broth
2 tablespoons butter
2 tablespoon all-purpose our
2 (4-ounce) packages sliced button,
Shiitake or Portobello mushrooms
2 teaspoons fresh thyme
½ teaspoons salt
½ teaspoon pepper
Directions:
1. Trim fat from steaks. Spread
mustard evenly over both sides.
2. In large sauté pan or grill pan, sear
steak on both sides for 3-4 minutes
on Max/Sear for medium-rare.
3. In medium saucepan, heat red
wine and Worcestershire on
Medium (275°F) heat for 3 minutes
or until au sec.
4. Add broth and butter to sauce.
5. Once butter has melted, in small
increments, pour in our and stir with
silicone spatula until sauce thickens.
6. Cook for 1 minute or until our taste
has been removed.
7. Add mushrooms, thyme, salt and
pepper and cook for 2 minutes to
incorporate avors.
8. Slice beef in ½-inch slices on bias
and add to mushroom sauce
9. Simmer for 5 minutes.
10. Serve with egg noodles or rice.
Tip: Au sec is a French culinary term
meaning nearly dry. The liquid has
been reduced until nearly gone.
You may cut temperature down
to Medium-Low (175°F) heat to
slow down the speed of the liquid
reducing.
Hometown Chili
Serves: 6-8
2 pounds ground beef
1 cup chopped yellow onion
1 cup chopped celery
2 tablespoons chopped garlic
2 cans light red kidney beans
4 (15-ounce) whole tomatoes
3 tablespoons chili seasoning
2 cups cold water
3 tablespoons fresh parsley, minced
½ teaspoon black pepper
½ teaspoon salt
1 cup grated cheese (optional)
½ cup chopped green onions (optional)
1 cup crackers (optional)
Directions:
1. In large stock pot, cook ground beef
and 1 tablespoon chili seasoning on
Medium High (375°F).
2. Drain any fat and add the meat back
to large stock pot
3. Add onions, celery, and garlic. Sauté
with ground beef for about 2 minutes
until onions are translucent, stirring
every 30 seconds.
4. Add kidney beans, tomatoes,
remaining chili seasoning, water,
parsley, salt and pepper.
5. Turn PIC to High (425°F) and bring
to boil.
6. Turn PIC down to
Medium-Low (175°F) and let
simmer for 45 minutes.
7. Serve with cheese, chopped onions,
and crackers.
Tip: If you don’t have fresh parsley,
substitute 1 tablespoon dry parsley.
• 35
Beef

36 • NuWave™PIC®Platinum Complete Cookbook • 37
Beef
Steak au Poivre
Yield: 4
½ cup black peppercorns
4 (6-ounce) tenderloin steaks
2 teaspoons sunower oil
½ cup French brandy or cognac
1 cup heavy cream
1 tablespoon unsalted butter
Salt to taste
Directions:
1. Coarsely grind peppercorns and
spread onto a plate.
2. Press meat into peppercorns,
covering both sides completely.
3. Heat oil in large sauté pan
on Medium-High (375°F).
4. Add steaks to pan and cook for 2-4
minutes per side.
5. Remove pan from PIC and
add brandy.
6. Return pan to PIC and cook on
Medium-High (375°F) for
1-2 minutes, until liquid has
reduced by half.
7. Remove steaks from pan
and set aside.
8. Add cream and butter to pan
and cook until cream reduces
to thick sauce.
9. Return steaks to pan and let
sit until warm.
10. Serve steaks and cover in sauce.
Grilled Sirloin with
Mushrooms & Red Peppers
Serves: 4
4 (6 – 7-ounce) sirloin steaks
1 tablespoon olive oil
1 medium red bell pepper, cut
into strips
6 ounces sliced button mushrooms
1 small onion, thinly sliced
½ teaspoon salt
½ teaspoon pepper
Spiced Beef with Dumplings
Serves: 4-6
1 (3-pound) boneless chuck roast
2 tablespoons olive oil
1 (16-ounce) can tomatoes
1¾ cup water, divided
¼ cup red wine
2 tablespoons beef bouillon
Salt to taste
2 cloves garlic, minced
1 (8-count) package refrigerated
biscuits
1 tablespoon minced parsley
2 tablespoons cornstarch
Directions:
1. Trim excess fat from roast.
2. Heat oil in large stock pot on
Medium (275°F).
3. Brown roast on all sides.
4. Add tomatoes, 1½ cups water, red
wine, bouillon, salt and garlic to
large stock pot.
5. Cook on Medium-Low (175°F) for
2-2½ hours or until tender.
6. Place biscuits on roast and sprinkle
with parsley.
7. Cover and steam dumplings for
on Medium-Low (175°F) 15 minutes,
shaking pot occasionally.
8. Remove meat and dumplings and
place on platter.
9. Bring cooking liquid and
remaining water up to boil on
Medium-High (375°F).
10. Gradually add cornstarch by
continually stirring it into
cooking liquid.
11. Continue to stir until gravy is thick.
Korean Beef
Serves: 4-6
½ cup soy sauce
¼ cup rice vinegar
3 scallions, nely chopped, plus
additional chopped scallions for garnish
2 tablespoons rmly packed
brown sugar
1 (2-inch) piece fresh ginger,
nely chopped
1½ tablespoons toasted sesame oil
2 teaspoons red pepper akes
2 (¾ pound) skirt steaks
1½ pounds skirt steak, in two pieces
Vegetable oil
1½ ounces cellophane noodles
Kosher salt and freshly ground black
pepper to taste
Directions:
1. Combine soy sauce, vinegar,
scallions, sugar, ginger, sesame oil
and pepper akes in bowl, whisking
well to blend.
2. Set aside ¼ cup marinade and pour
rest into re-sealable plastic bag.
3. Add skirt steak to bag and seal.
4. Place bag in refrigerator and let
steak marinate for at least 4 hours,
or overnight, turning bag often.
5. Fill large, deep sauce pot with
enough vegetable oil until it’s
2 inches deep.
6. Heat medium stock pot
Medium-High (375°F) until
oil reaches 375°F.
7. Pull apart noodle clusters, forming
clumps of about 10 strands.
8. Working in batches, fry noodles in oil
for about 5 seconds per side, until
they puff up and turn white.
9. Using slotted spoon, transfer cooked
noodles to paper towels to drain.
10. Remove skirt steak from marinade
and pat dry with paper towels.
11. In large sauté pan, heat 1½
tablespoons oil on High (425°F).
12. Season meat with salt and pepper
and add to skillet.
13. Reduce PIC to Medium-High
(375°F) for 2-3 minutes per side.
14. Transfer steak to platter and cover
loosely with foil. Let steak rest for
5 minutes.
15. Repeat steps 11-14 with remaining
oil and skirt steak.
16. Cut steak into thin slices,
cutting against the grain.
17. Toss beef with reserved marinade
until well coated.
18. Crumble fried noodles and divide
equally onto plates and top with
sliced beef.
19. Garnish with chopped scallions.
Directions:
1. Add olive oil to grill pan or large
sauté pan and heat on Max/Sear for
20 seconds or until it smokes.
2. Brush vegetables with olive oil and
place on grill.
3. Grill vegetables for 2-3 minutes,
4. Season steak with black pepper
and add to grill.
5. Sear on each side for 4-5 minutes
for medium-rare, 6-7 minutes for
medium or 8-10 minutes for
well-done.
6. Serve steaks over grilled vegetables.
Tip: Create crosshatch marks by
rotating steaks 90° halfway through
cooking process on each side.

38 • NuWave™PIC®Platinum Complete Cookbook
Beef Stroganoff over
Buttered Noodles
Serves: 4-6
13 cups beef stock
1 carrot, chopped
6 sprigs fresh thyme, divided
1 bay leaf
2 pounds chuck roast, cut
into 2-inch cubes
Kosher salt and freshly
ground black pepper
6 tablespoons extra-virgin
olive oil, divided
1 medium onion, chopped
2 tablespoons cognac
5 tablespoons unsalted butter, divided
1 pound mushrooms, sliced
3 cloves garlic, chopped
2 tablespoons sour cream, plus
more for garnish
1 tablespoon Dijon mustard
2 tablespoons chopped fresh parsley
leaves, plus more for garnish
1 (1-pound) package wide egg noodles
Directions:
1. Heat beef stock in a large stock pot
on High (425°F) heat with the carrot,
3 thyme sprigs, and bay leaf.
2. Pat the beef dry and season it with
salt and pepper.
3. Coat large stock pot in
3 tablespoons olive oil and heat
on High (425°F).
4. Cook meat in batches in pan
until browned on all sides. Do not
overcrowd the meat.
5. Lower temperature to
Medium (275°F) and return
all meat to stock pot.
6. Add onions and cook for about
5 minutes, until they soften.
7. Add cognac and continue cooking
for about 5 minutes, until alcohol
has burned off.
8. Add beef stock to pan, discarding
carrot, thyme and bay leaf.
9. Partially cover stock pot and cook at
220°F for 1½-2 hours.
10. In separate large sauté pan, melt
3 tablespoons butter at 350°F and
add remaining olive oil.
11. Add mushrooms, garlic and
remaining thyme sprigs and
cook until mushrooms are
browned. Remove pan from
heat and set aside.
12. Once meat is nished cooking,
remove from heat and fold in
cooked mushrooms, sour cream,
mustard and parsley.
13. Taste beef mixture and add salt
and pepper as needed.
14. Bring large stock pot of salted
water to boil on Max/Sear and
add noodles.
15. Cook noodles until tender, then
drain and toss with remaining
butter and season with salt
and pepper.
16. Serve stroganoff over noodles and
garnish with sour cream and parsley.
Cajun Rib Eye
Serves: 1
3 tablespoons paprika
2 tablespoons granulated garlic
2 tablespoons kosher salt
1 tablespoon cayenne pepper
1 tablespoon onion powder
1 tablespoon dried oregano
1 tablespoon black pepper
1 tablespoon dried thyme
1 (24-ounce) bone-in rib eye steak
1 yellow onion, cut into thick slices
10 cloves garlic
Vegetable oil, for marinating
Directions:
1. Combine paprika, granulated garlic,
salt, cayenne pepper, onion powder,
oregano, black pepper and thyme in
medium bowl and mix well.
2. Place steak on a cutting board and
make several punctures on both
sides using a fork.
3. Coat steak with prepared spice
blend and puncture steak again
with fork, making as many holes
as possible.
4. Combine remaining spice
blend, onion, garlic and oil in
deep container.
5. Add steak to container, ensuring it’s
fully immersed in marinade.
6. Cover container with plastic wrap
and refrigerate for at least 24 hours.
7. Heat large sauté pan on
High (425°F).
8. Remove steak from marinade,
letting excess oil drip off, and place
on hot grill pan.
9. Cook steak for 4 minutes per side
for medium-rare.
Tip: Make sure you add enough oil to
the marinade so that the steak can
be completely submerged.
Bacon, Onion and Cheese
Stuffed Burgers
Serves:8
1½ pounds ground beef
1 clove garlic, minced
1 teaspoon cayenne pepper sauce
Salt and freshly ground black
pepper to taste
4 strips bacon, diced
½ onion, chopped
1 cup grated sharp cheddar cheese
4 burger buns
Lettuce, tomato, pickles for toppings
Directions:
1. Combine beef, garlic, hot sauce, salt
and pepper in bowl and mix well.
2. Form beef mixture into 8 even,
½-inch patties and set aside.
3. Heat large sauté pan on
Medium (275°F) and fry bacon
until crispy.
4. Transfer bacon to paper towel-lined
plate to drain and cool; set aside.
5. Sauté onions on same skillet on
Medium (275°F) for about 5 minutes,
until tender.
6. Transfer onions, bacon and cheese
to bowl and mix well.
7. Form cheese mixture into
4 even balls and place in center of
4 beef patties.
8. Top each cheese-covered patty with
additional beef patty and crimp
edges together until sealed.
9. Cook burgers on
Medium-High (375°F) for
4 minutes per side.
10. Serve in buns with your
favorite toppings.
• 39
Beef
Table of contents
Other NuWave Cooktop manuals

NuWave
NuWave PIC2 User manual

NuWave
NuWave PIC Flex User manual

NuWave
NuWave PIC Gold 30211 User manual

NuWave
NuWave PIC Gold Quick guide

NuWave
NuWave PIC Flex User manual

NuWave
NuWave PIC2 Technical specifications

NuWave
NuWave Precision User manual

NuWave
NuWave PIC Flex 30501 User manual

NuWave
NuWave PIC Gold 30211 User manual

NuWave
NuWave PIC TITANIUM User manual