manuals.online logo
Brands
  1. Home
  2. •
  3. Brands
  4. •
  5. Oase
  6. •
  7. Outdoor Light
  8. •
  9. Oase LunAqua Classic LED Set 1 User manual

Oase LunAqua Classic LED Set 1 User manual

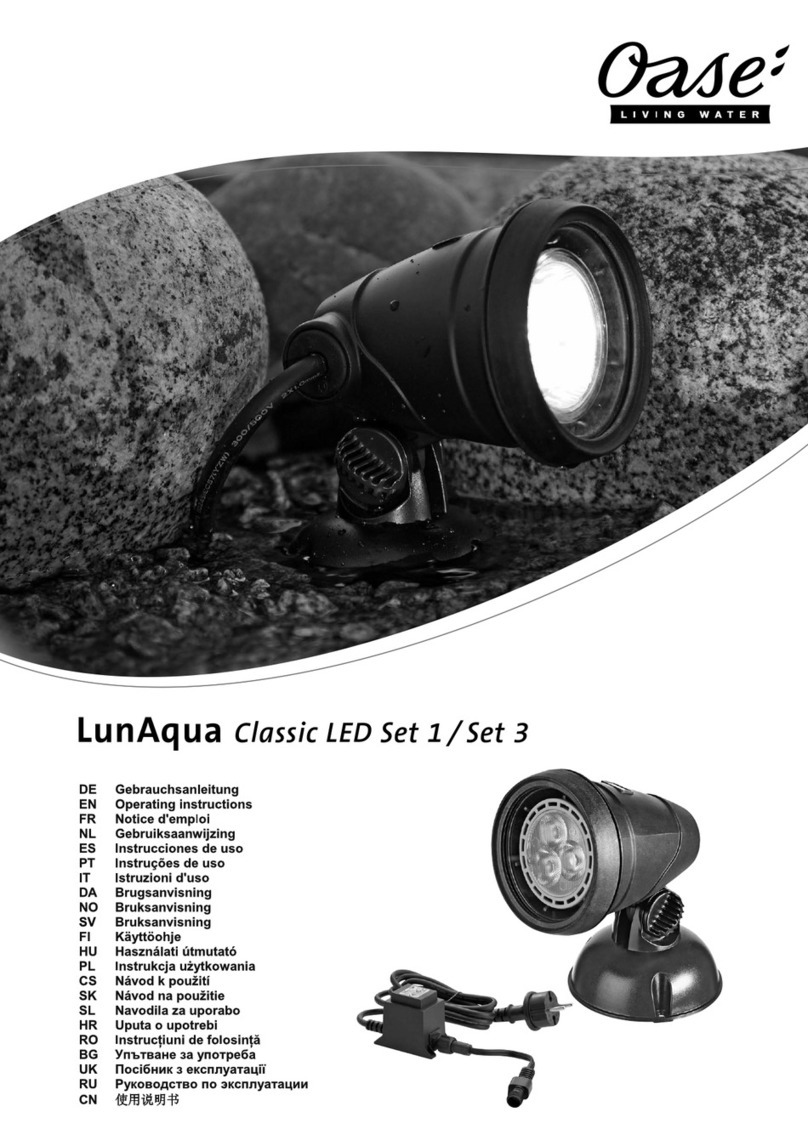
LunAqua Classic LED Set 1 / Set 3
15127 GAW_Lunaqua Classic LED_A6_end_. 17.10.13 09:18 Seite 1
Downloaded from www.watergardeningdirect.com
2
Downloaded from www.watergardeningdirect.com
6
- GB -
Translation of the original Operating Instructions
Information about these operating instructions
Welcome to OASE Living Water. You made a good choice with the purchase of this product Lunaqua Classic LED
Set.
Prior to commissioning the unit, please read the instructions of use carefully and fully familiarise yourself with the unit.
Ensure that all work on and with this unit is only carried out in accordance with these instructions.
Adhere to the safety information for the correct and safe use of the unit.
Keep these instructions in a safe place! Please also hand over the instructions when passing the unit on to a new
owner.
Symbols used in these instructions
The symbols used in this operating manual have the following meanings:
Risk of injury to persons due to dangerous electrical voltage
This symbol indicates an imminent danger, which can lead to death or severe injuries if the appropriate meas-
ures are not taken.
Risk of personal injury caused by a general source of danger
This symbol indicates an imminent danger, which can lead to death or severe injuries if the appropriate meas-
ures are not taken.
Important information for trouble-free operation.
Scope of delivery
Lunaqua Classic
Quantity
Fig. A
Set 1 Set 3
Description
1 1 3 LED spot including bulb
2 1 1 Transformer
3 1 3-way distributor
Intended use
Lunaqua Classic LED Set, in the following termed "unit", and all other parts from the delivery scope may be used
exclusively as follows:
−For use in water fountain systems and ponds.
−For use above and under water.
−Operation under observance of the technical data.
Safety information
Hazards to persons and assets may emanate from this unit if it is used in an improper manner or not in accordance
with its intended use, or if the safety instructions are ignored.
This unit can be used by children from the age of 8 and by persons
with physical, sensory or mental impairments or lack of experience
and knowledge, as long as they are supervised or instructed on how
to use the unit safely and are able to understand the potential haz-
ards. Do not allow children to play with the unit. Do not allow children
to clean or maintain the unit without close supervision.
Hazards encountered by the combination of water and electricity
−The combination of water and electricity can lead to death or severe injury from electrocution, if the unit is incorrectly
connected or misused.
−Prior to reaching into the water, always switch off the mains voltage to all units used in the water.
- GB -
Downloaded from www.watergardeningdirect.com
7
- GB -
Correct electrical installation
−Electrical installations must meet the national regulations and may only be carried out by a qualified electrician.
−A person is regarded as a qualified electrician, if, due to his/her vocational education, knowledge and experience, he
or she is capable of and authorised to judge and carry out the work commissioned to him/her. This also includes the
recognition of possible hazards and the adherence to the pertinent regional and national standards, rules and regu-
lations.
−For your own safety, please consult a qualified electrician.
−The unit may only be connected when the electrical data of the unit and the power supply coincide. The unit data is
to be found on the unit type plate or on the packaging, or in this manual.
−Ensure that the unit is fused for a rated fault current of max. 30 mA by means of a fault current protection device.
−Extension cables and power distributors (e. g. outlet strips) must be suitable for outdoor use.
−Install the transformer at a minimum safety distance of 2 m from the water.
−Ensure that the power connection cable cross section is not smaller than that of the rubber sheath with the identifi-
cation H05RN-F. Extension cables must meet DIN VDE 0620.
−Protect the plug connections from moisture.
−Only plug the unit into a correctly fitted socket.
Safe operation
−Never operate the unit if either the electrical cables or the housing are defective!
−Do not carry or pull the unit by its electrical cable.
−Route cords/hoses/lines in a way that they are protected against damage, and ensure that they do not present a
tripping obstacle.
−Only open the unit housing or its attendant components, when this is explicitly required in the operating instructions.
−Only execute work on the unit that is described in this manual. If problems cannot be overcome, please contact an
authorised customer service point or, when in doubt, the manufacturer.
−Only use original spare parts and accessories for the unit.
−Never carry out technical modifications to the unit.
−The power connection cables cannot be replaced. When the cable is damaged, the unit or the component needs to
be disposed of.
−Only operate the unit with the supplied transformer.
−Keep the socket and power plug dry.
−The power pack and the plug connectors of the power cables supplied are not water-tight, but only rain and splash-
proof. Do not route or fit in the water.
Installation
The unit is supplied fully assembled as a complete set with a transformer and one or three LED spotlights, including
bulbs.
Installation (B-C)
−The foot can either be stood on the ground or bolted to a firm base or load bearing wall (B).
−Position the unit in such a way that it does not present a hazard to anybody.
−Adjust the tilt of the light (C, 1) and fix it at this angle with the screw connection (C, 4).
−Connect the plug of the spotlight connection cable to the socket on the transformer and tighten the union nut (C, 5)
hand-tight.
Downloaded from www.watergardeningdirect.com
8
- GB -
Start-up
Attention! Sensitive electrical components.
Possible consequence: The unit will be destroyed.
Protective measure: Do not connect the unit to a dimmable power supply.
Attention! Dangerous electrical voltage.
Possible consequences: Death or severe injury.
Protective measures:
−Prior to reaching into the water, disconnect the power supply to all units used in the water.
−Disconnect the power plug prior to carrying out work on the unit.
Switching on: Insert the power plug of the transformer into the socket.
−Check the function of the spotlights.
Switching off: Disconnect the transformer power plug.
Maintenance and cleaning
Attention! Dangerous electrical voltage.
Possible consequences: Death or severe injury.
Protective measures:
−Prior to reaching into the water, disconnect the power supply to all units used in the water.
−Disconnect the power plug prior to carrying out work on the unit.
−Ensure that no moisture can enter the unit.
Cleaning the unit
If necessary, clean the unit with clear water using a soft brush.
Replacing the bulb (D)
−Unscrew the threaded ring (6).
−Remove the glass pane (7) and O ring (8) and check for damage. Replace if necessary.
−Remove the defective bulb (9) from the housing (1).
−Insert a new bulb (do not touch with your hands, use a cloth or similar).
Only use original bulbs from OASE. Light bulb rating: max. 1 W.
−Reassemble the unit in the reverse order. Ensure that the O ring (8) is correctly positioned.
−Reconnect to the power supply and check the function.
Remedy of faults
Malfunction Cause Remedy
Power supply interrupted Check power supplyLamp does not light up Bulb defective Replace bulb
Lamp glass soiled CleanLuminosity decreases The brightness of the bulb reduces as the
operating time increases Replace bulb
Water inside the spotlight housing Seal defective Check sealing rings and replace, if necessary
S
Disposal
Do not dispose of this unit with domestic waste! For disposal purposes, please use the return system provided.
Disable the unit beforehand by cutting off the cables.
Downloaded from www.watergardeningdirect.com
69
DE Abmessungen Spot Abmessungen Trafo Kabellänge Trafo Kabellänge Spot Tauchtiefe Gewicht Wassertemperatur
GB Spot dimensions Transformer dimensions Transformer cable
length Spot cable length Immersion depth Weight Water temperature
FR Dimensions spot Dimensions transformateur Longueur de câble
transformateur Longeur de câble
projecteur Profondeur d'immersion Poids Température de l’eau
NL Afmetingen spot Afmetingen Trafo Kabellengte Trafo Kabellengte spot Dompeldiepte Gewicht Watertemperatuur
ES Dimensiones del foco Dimensiones transformador Longitud del cable
transformador Longitud del cable
proyector Profundidad de inmersión Peso Temperatura del agua
PT Dimensões projector Dimensões do transformador Comprimento do
cabo transformador Comprimento do
cabo Spot Profundidade de imersão Peso Temperatura da água
IT Dimensioni spot Dimensioni trasformatore Lunghezza del
cavo trasformatore Lunghezza del
cavo riflettore Profondità d'immersione Peso Temperatura dell'acqua
DK Dimensioner spot Dimensioner transformator Kabellængde
transformator Kabellængde spot Bassindybde Vægt Vandtemperaturen
NO Mål spotlamper Dimensjoner Trafo Kabellengde Trafo Kabellengde Spot Nedsenkningsdybde Vekt Vanntemperatur
SE Mått på spotlight Mått på transformator Kabellängd för
transformator Kabellängd för
spotlight Doppningsdjup Vikt Vattentemperatur
FI Kohdevalon mitat Mittaukset muuntajalla Kaapelipituus
muuntajalla Kaapelipituus
kohdevalossa Upotussyvyys Paino Veden lämpötila
HU Spot-méretek Trafó méretei Trafó kábelhosszú-
sága Spot kábelhosszú-
sága Merülési mélység Súly Vízhőmérséklet
PL Wymiary reflektora Wymiary transformatora Długość kabla
transformatora Długość kabla
punktu świetlnego Głębokość zanurzenia Ciężar Temperatura wody
CZ Rozměry bodové světlo Rozměry transformátoru Délka kabelu
transformátoru Délka kabelu u
bodového světla Hloubka ponoření Hmotnost Teplota vody
SK Rozmery bodové svetlo Rozmery transformátora Dĺžka kábla trans-
formátora Dĺžka kábla svietid-
la Hĺbka ponorenia Hmotnost’ Teplota vody
SI Dimenzije Spot Mere transformatorja Dolžina kabla
transformatorja Dolžina kabla spot
svetilke Potopna globina Teža Temperatura vode
HR Dimenzije spot-svjetiljke Mjere transformatora Dužina kabela
transformatora Dužina kabela
reflektora Dubina uranjanja Težina Temperatura vode
RO Partea pentru racordare la
reţea Dimensiuni transformator Lungimea cablului
de transformator Lungimea cablului
de spot Adâncime de imersie Greutate Temperatura apei
BG Размери на спот -
осветителното тяло Размери трансформатор Дължина на
кабела
трансформатор
Дължина на
кабела спот дълбочина на потапяне Тегло Температурата на
водата
UA Розміри плями Розміри трансформатора Довжина кабелю
трансформатора Довжина кабелю
міні-прожектора Глибина занурення Вага Температура води
RU Размеры Spot Размеры трансформатора Длина кабеля
трансформатора Длина кабеля
мини-прожектора Глубина погружения Вес Температура воды
CN 聚光灯尺寸 变压器尺寸 变压器电缆长度 聚光灯电缆长度 潜水深度 重量 水温
Lunaqua Classic LED
Set 1 80 × 115 × 115 mm 80 × 45 × 60 mm 2 m 5 m max. 4 m 1.25 kg +4 … +35 °C
Lunaqua Classic LED
Set 3 80 × 115 × 115 mm 80 × 45 × 60 mm 2 m 5 m max. 4 m 2.85 kg +4 … +35 °C
Downloaded from www.watergardeningdirect.com
70
DE Leistungsaufnahme Bemessungsspannung Trafo Ausgangsspannung Trafo Bemessungsspannung Spot
GB Power consumption Rated voltage of transformer Output voltage of transformer Rated voltage of spot
FR Consommation Tension de mesure transformateur Tension de sortie transformateur Tension de mesure, projecteur
NL Stroomverbruik Berekeningsspanning Trafo Uitgangsspanning Trafo Berekeningsspanning spot
ES Consumo de potencia Tensión asignada transformador Tensión de salida transformador Tensión asignada proyector
PT Consumo de energia Rated voltagem transformador Voltagem de saída transformador Rated voltage Spot
IT Potenza assorbita Tensione di taratura trasformatore Tensione di uscita trasformatore Tensione di taratura riflettore
DK Strømforbrug Nominel spænding transformator Udgangsspænding transformator Nominel spænding spot
NO Inngangseffekt Dimensjoneringsspenning Trafo Utgangsspenning Trafo Dimensjoneringsspenning Spot
SE Effekt Märkspänning för transformator Utgångsspänning från transformator Märkspänning för spotlight
FI Ottoteho Mitoitusjännite muuntajalla Lähtöjännite muuntajalla Mitoitusjännite kohdevalossa
HU Teljesítményfelvétel Trafó mért feszültsége Trafó kimeneti feszültsége Spot mért feszültsége
PL Pobór mocy Napięcie zwymiarowane transformatora Napięcie wyjściowe transformatora Napięcie zwymiarowane punktu świetlnego
CZ Příkon Jmenovité napětí transformátoru Výstupní napětí transformátoru Jmenovité napětí bodového světla
SK Príkon Dimenzačné napätie transformátora Výstupné napätie transformátora Dimenzačné napätie svietidla
SI Nazivna močNazivna napetost transformatorja Izhodna napetost transformatorja Nazivna napetost spot svetilke
HR Prijemna snaga Nazivn napon transformatora Izlazni napon transformatora Nazivni napon reflektora
RO Putere consumatăTensiune de calcul transformator Tensiune de ieşire transformator Tensiune de calcul spot
BG Консумирана мощност Разчетно напрежение трансформатор Изходно напрежение трансформатор Разчетно напрежение спот
UA Споживана потужність Номінальна напруга трансформатора Вихідна напруга трансформатора Номінальна напруга міні-прожектора
RU Потребляемая мощность Расчётное напряжение трансформатора Выходное напряжение трансформатора Расчётное напряжение мини-прожектора
CN 耗用功率 变压器设计电压 变压器输出电压
Lunaqua Classic LED
Set 1 3 W ~ 230 V, 50/60 Hz ~ 12 V, max. 350 mA ~ 12 V
Lunaqua Classic LED
Set 3 6 W ~ 230 V, 50/60 Hz ~ 12 V, max. 350 mA ~ 12 V
Downloaded from www.watergardeningdirect.com
71
Laser Klasse 1
DE Staubdicht. Wasser-
dicht bis 4 m Tiefe. Staubgeschützt.
Geschützt gegen
Spritzwasser
Der kleinste Abstand
zum beleuchteten
Gegenstand muss
0,5 m betragen
Ersetze jede zer-
sprungene Glas-
scheibe
Schutzklasse 3 Sicherheits-
transformator Nicht direkt in die
Strahlenquelle
blicken!
Nicht mit normalem
Hausmüll entsorgen! Achtung!
Lesen Sie die
Gebrauchsanleitung
GB Dust tight. Water
tight to 4 m depth. Dust protected.
Splash water pro-
tected
The smallest dis-
tance to the illu-
minted object must
be 0.5 m
Replace each broken
glass Protection class 3 Safety transformer Do not look directly
into the beam
source!
Do not dispose of
together with house-
hold waste!
Attention!
Read the operating
instructions
FR Imperméable aux
poussières. Etanche
à l'eau jusqu'à une
profondeur de 4 m.
Protection contre la
poussière.
Protection contre la
projection d’eau
La distance minimale
par rapport à l'objet
éclairé doit être de
0,5 m
Remplacer impérati-
vement chaque vitre
fendue
Classe de protection
3 Transformateur de
sécurité Ne jamais regarder
directement dans le
faisceau lumineux !
Ne pas recycler dans
les ordures ménagè-
res !
Attention !
Lire la notice d'em-
ploi
NL Stofdicht. Waterdicht
tot een diepte van
4 m
Stofvrij.
Beschermd tegen
spatwater
De afstand ten
opzichte van het
verlichte object moet
minimaal
0,5 m bedragen.
Vervang een
gesprongen
glasplaatje altijd
meteen.
Beschermingsklasse
3 Veiligheids-
transformator Kijk niet direct in de
lichtbron! Niet afvoeren met
het normale huisvuil! Let op!
Lees de gebruik-
saanwijzing
ES A prueba de polvo.
Impermeable al
agua hasta 4 m de
profundidad.
Protegido contra
polvo
Protegido contra
chorros de agua
La distancia mínima
al objeto iluminado
tiene que ser de
0,5 m
Sustituya cada cristal
roto Clase de protección
3 Transformador de
seguridad ¡No mire
directamente a la
fuente de radiación!
¡No deseche el
equipo en la basura
doméstica!
¡Atención!
Lea las instrucciones
de uso
PT À prova de pó. À
prova de água até 4
m de profundidade.
Protegido contra pó.
Protegido contra
respingos de água
A distância mínima
do objecto iluminado
deve ser de 0,5 m.
Substituir vidros
defeituosos Classe de
isolamento 3 Transformador de
segurança Manter a vista
afastada da fonte de
radiação!
Não deitar ao lixo
doméstico! Atenção!
Leia as instruções
de utilização
IT A tenuta di polvere.
Impermeabile
all'acqua fino a 4 m
di profondità.
Protetto contro la
povere.
Protetto contro gli
spruzzi d'acqua
La distanza minima
dall'oggetto illumina-
to deve
essere di 0,5 m
Sostituire ogni lastra
di vetro frantumata! Classe di protezione
3 Trasformatore di
sicurezza Non guardare
direttamente nella
sorgente dei raggi!
Non smaltire con
normali rifiuti dome-
stici!
Attenzione!
Leggete le istruzioni
d'uso!
DK Støvtæt. Vandtæt
indtil 4 m dybde. Støvbeskyttet.
Stænkvandsbeskyttet
Mindsteafstanden til
den belyste genstand
skal være 0,5 m
Udskift alle sprængte
glasskiver! Beskyttelsesklasse 3 Sikkerheds-
transformator Se ikke direkte ind i
lyskilden! Må ikke bortskaffes
med det almindelige
husholdnings-affald!
OBS!
Læs
brugsanvisningen
NO Støvtett. Vanntett
ned til 4 m dyp. Støvbeskyttet.
Beskyttet mot
vannsprut.
Minimumsavstand til
gjenstanden som
skal opplyses må
være 0,5 m.
Skift alltid ut
glasskiver med
sprekker!
Beskyttelsesklasse 3 Sikkerhets-
transformator Ikke se direkte inn i
lyskilden! Ikke kast i alminnelig
husholdningsavfall! NB!
Les bruksanvisnin-
gen
SE Dammtät. Vattentät
till 4 m djup. Dammskyddad.
Skyddad mot
droppvatten
Minsta avståndet till
det belysta föremålet
måste uppgå till
0,5 m
Byt ut alla glasplattor
som har spruckit Skyddsklass 3 Säkerhets-
transformator Titta inte direkt in i
ljuskällan! Får inte kastas i
hushållssoporna! Varning!
Läs igenom
bruksanvisningen
FI Pölytiivis. Vesitiivis
4 m syvyyteen asti. Suojattu pölyltä.
Suojattu
tippuvedeltä.
Etäisyyden
valaistuun
esineeseen on
oltava 0,5 m.
Vaihda rikkoontunut
lasilevy uuteen! Suojaluokka 3 Suojamuuntaja Älä katso suoraan
säteeseen! Älä hävitä laitetta
tavallisen
talousjätteen kanssa!
Huomio!
Lue käyttöohje
Downloaded from www.watergardeningdirect.com
73
Downloaded from www.watergardeningdirect.com
15127/10-13
Downloaded from www.watergardeningdirect.com

Other manuals for LunAqua Classic LED Set 1

5

This manual suits for next models

1

Other Oase Outdoor Light manuals

Oase Lunaqua Maxi LED User manual

Oase

Oase Lunaqua Maxi LED User manual

Oase Lunagard 20 Manual

Oase

Oase Lunagard 20 Manual

Oase Waterfall Illumination User manual

Oase

Oase Waterfall Illumination User manual

Oase Luminis 3 User manual

Oase

Oase Luminis 3 User manual

Oase LunAqua Classic LED Set 1 User manual

Oase

Oase LunAqua Classic LED Set 1 User manual

Oase Lunaqua Mini LED User manual

Oase

Oase Lunaqua Mini LED User manual

Oase LunAqua Classic LED Set 1 User manual

Oase

Oase LunAqua Classic LED Set 1 User manual

Oase LunAqua Classic LED Set 1 User manual

Oase

Oase LunAqua Classic LED Set 1 User manual

Oase LUNAQUA User manual

Oase

Oase LUNAQUA User manual

Oase Lunaqua 3 Solo User manual

Oase

Oase Lunaqua 3 Solo User manual

Oase LunAqua 3 LED User manual

Oase

Oase LunAqua 3 LED User manual

Oase LunAqua Power LED XL Series User manual

Oase

Oase LunAqua Power LED XL Series User manual

Oase Profilux LED User manual

Oase

Oase Profilux LED User manual

Oase LunAqua Classic LED Set 1 User manual

Oase

Oase LunAqua Classic LED Set 1 User manual

Oase Lunaqua 35 User manual

Oase

Oase Lunaqua 35 User manual

Popular Outdoor Light manuals by other brands

HIKLE ARA MAXI SOLAR installation instructions

HIKLE

HIKLE ARA MAXI SOLAR installation instructions

Astonica 50402521 instruction manual

Astonica

Astonica 50402521 instruction manual

Anslut 002963 operating instructions

Anslut

Anslut 002963 operating instructions

Knightsbridge LANT1 Series Installation & maintenance manual

Knightsbridge

Knightsbridge LANT1 Series Installation & maintenance manual

Eterna LEDBOLLARD installation instructions

Eterna

Eterna LEDBOLLARD installation instructions

Wisdom WISDOM LAMP 3 Series Product description

Wisdom

Wisdom WISDOM LAMP 3 Series Product description

aquanique QLFL quick start guide

aquanique

aquanique QLFL quick start guide

Thulos TH-LV2033 manual

Thulos

Thulos TH-LV2033 manual

Quoizel BRY8406PN Assembly instruction sheet

Quoizel

Quoizel BRY8406PN Assembly instruction sheet

Top Light Puk Floor Maxi Assembly instruction

Top Light

Top Light Puk Floor Maxi Assembly instruction

Home Decorators Collection PALERMO GROVE 7973HDCANDI Use and care guide

Home Decorators Collection

Home Decorators Collection PALERMO GROVE 7973HDCANDI Use and care guide

Targetti MRS. BO manual

Targetti

Targetti MRS. BO manual

Megavoice LifeLight quick start guide

Megavoice

Megavoice LifeLight quick start guide

IKEA Nymane manual

IKEA

IKEA Nymane manual

Designplan IF installation instructions

Designplan

Designplan IF installation instructions

Maxim Lighting CITADEL 27601CLCHB installation instructions

Maxim Lighting

Maxim Lighting CITADEL 27601CLCHB installation instructions

Prilux Hexagon PLAY instruction manual

Prilux

Prilux Hexagon PLAY instruction manual

PIET HEIN EEK LINE LAMP instruction manual

PIET HEIN EEK

PIET HEIN EEK LINE LAMP instruction manual

manuals.online logo
manuals.online logoBrands
  • About & Mission
  • Contact us
  • Privacy Policy
  • Terms and Conditions

Copyright 2025 Manuals.Online. All Rights Reserved.