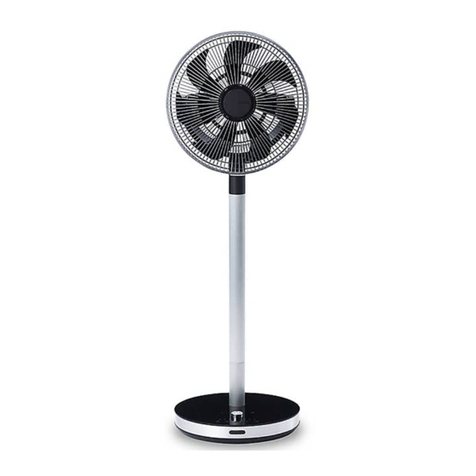
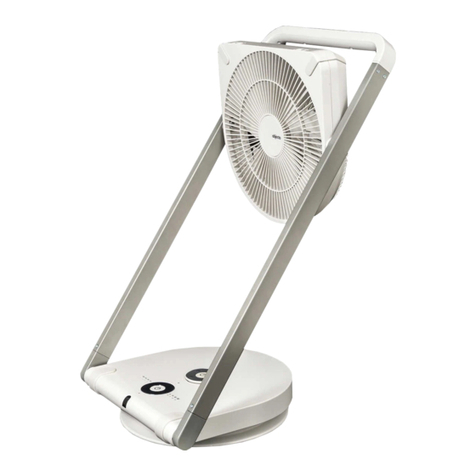
Objecto F3 User manual

USER MANUAL
192001aF3FKLT-251DEng.indd1192001aF3FKLT-251DEng.indd1 2019/04/1010:12:202019/04/1010:12:20

2
English
Safety Information
Before use, be sure to carefully read this manual on safety to ensure
that you use this product correctly. Always follow these instructions
when using the product.
WARNING
In order to avoid any electrical shock, short-circuit, burns, or cause a
fire:
Do not disassemble. This product may only be disassembled by qualified repair technicians. To•
request repair, see Warranty Page at the back of this manual.
Do not use if the power cord or plug is damaged, or if the plug is not fully inserted into the•
outlet.
Do not scratch, damage, modify, forcibly bend, pull, twist, bind/clamp, or place heavy objects on•
the power cord.
Do not insert metal objects, such as pins, wires, or other foreign materials into any gaps of the•
product.
Do not allow children to use this product by themselves, and keep product and power cords out•
of the reach of small children.
Use only with the designated power supply 110 – 120 V.•
If you notice anything unusual during operation (burning smell, smoke ,etc.), immediately stop•
use, and unplug the power cord.
Insert the power plug all the way into the outlet. Use a wall outlet rated at 15A or
greater, with no other devices plugged in.
Wipe off any dust adhering to the power plug blades and plug surface.
If any liquid leaks from the battery of the remote control and gets in your eyes, do not
rub them; rinse them out with water and see a doctor.
When cleaning the product, for safety’s sake be sure to unplug it from the outlet.
Do not plug or unplug the product while your hands are wet.
Never use in a location that produces flammable or corrosive gases, or where they
accumulate.
Always allow the unit to cool down before picking it up for service or storage.
Do not use close to walls or furniture.
Do not use in unstable locations or on flooring that may be easily damaged by heat.
Do not use for other purposes, such as drying things. Do not put clothing or laundry
on or over the fan.
When cleaning the product, do not use household detergent, thinner, benzene,
alcohol or a polishing powder or spray.
192001aF3FKLT-251DEng.indd2192001aF3FKLT-251DEng.indd2 2019/04/1010:12:222019/04/1010:12:22

3
English
For remote control batteries, do not use any other than specified.
Do not leave the battery of the remote control in a hot location or in direct sunlight.
When unplugging the power cord, always unplug by grasping the power plug, not by
pulling on the power cord.
Face the terminals +/- correctly when putting the battery in the remote control.
Remove the battery from the remote control when it will not be used for a long time.
Do not touch areas that get extremely hot, such as the heat grille, the top panel and
the back of the unit while in use and for some time afterwards.
192001aF3FKLT-251DEng.indd3192001aF3FKLT-251DEng.indd3 2019/04/1010:12:222019/04/1010:12:22

4
English
Names of Parts and Their Functions
Front
Front grille
Center mark shell (aroma circle disk)
Fan main unit
Blade
Remote receiver
Power button
Operation part of main unit
Remote control storage position
Base part
Rear grille
Telescopic button
Moves the fan of the main unit up or down.
DC cord Hanging hook
Connect DC plug to DC hook and hang the power cord
on the hook
Handle
Rear
Remote control
192001aF3FKLT-251DEng.indd4192001aF3FKLT-251DEng.indd4 2019/04/1010:12:222019/04/1010:12:22

5
English
DC plug
Connect to DC plug
AC adapter
AC adapter
Accessories included in box
Main unit.............................................................................................1
Coin lithium battery (CR250)................................................................1
AC adapter..........................................................................................1
Replacement felt (1 in aroma circle disk; installed)................................4
Remote control ....................................................................................1
Manual (including Warranty Card)........................................................1
Keep the packaging box to store the product after use.*
Plug the AC adapter into the outlet only after the blades and grilles have
been properly installed.
192001aF3FKLT-251DEng.indd5192001aF3FKLT-251DEng.indd5 2019/04/1010:12:222019/04/1010:12:22

6
English
Correct Use of the Fan
Preparation Before Use
Put the main unit on a stable level place1.
Hold the handle to pick up and move the main unit.•
Make sure that there is no foreign object in the place where the main unit base is located.•
Install adapter2.
Install the battery into the remote control3.
1
Remote control (rear side)
Battery case
1
Turn over the remote control and pull out the battery case.
23
2
Insert the coin lithium battery into the battery case.
Pay attention to the polarity of the battery Insert the coin lithium battery into the battery
case.
3
Re-Insert the battery case into the main unit of the remote control until you hear a click
sound.
Attention
Remove the battery when it is not used for a long time.•
When liquid leakage occurs, clean it completely before inserting a new•
battery.
4
Remote control storage position
4
When the remote control is not in use, mount it on the remote control storage location in
the base of the main unit It will snap into place via a magnet.
Range
About 15 feet in front of the main unit.•
About 30° to the left and right sides in front of the main unit.•
If there is an obstacle between the remote control and the main unit, the remote control•
may not work properly.
WARNING
Do not place the remote control in chest pocket if you are using a cardiac
pacemaker.
Insert the AC adapter into the outlet4.
When it is properly connected to DC jack, the main unit will make a buzzing sound.
192001aF3FKLT-251DEng.indd6192001aF3FKLT-251DEng.indd6 2019/04/1010:12:232019/04/1010:12:23

7
English
Start/stop operation
Start operation1.
Simply press the power button on the main unit or remote control to start the
operation.
In normal use, the air volume and swing angle will default to the setting when it•
was turned off last time because of the memory function.
When the AC adapter is removed from the plug, the device will automatically*
restore the initial settings.
[Initial setting] Air volume: Minimum; Swing: None.
Operation part of main unit
Remote control
Air volume knob
Turn left -Weak
Air volume knob
Turn right +Strong
+Air volume control
Increase button
-Air volume control
Reduce button
[Increase air volume]
Rotate the air volume knob on the main unit to the right.
Press the air volume + button on the remote control.
Press repeatedly to increase the air volume.
[Reduce air volume]
Rotate the air volume knob on the main unit.
Press the air volume - button on the remote control.
Press repeatedly to reduce the air volume.
192001aF3FKLT-251DEng.indd7192001aF3FKLT-251DEng.indd7 2019/04/1010:12:232019/04/1010:12:23

8
English
Start natural /sleep wind function2.
Press the natural/sleep wind button on the main unit or the remote control
during operation to switch functions.
The set natural sleep wind, indicator will turn on.*
Start/stop swing3.
The left/right swing angle of the fan can be set to 30°, 60° or 90°.
When you plug the AC adapter into the outlet and press the• button on the
main unit or the remote control, the 30° LED turns on and the fan start swing.
Every time when you press the• button on the main unit or the remote control,
the swing indicator switches and the swing angle changes accordingly.
90°
60°
30°
During swinging, the fan will move left/right.
The swing angle can be set to 10° down and 90° up. You can support the upper part of the
middle tube and press the upper or lower part of the front grille to slowly move it up and
down.
Swing
About 10°
About 90°
Swing 30°
(“30°” indicator on)
Swing 60°
(“60°” indicator on)
Swing 90°
(“90°” indicator on)
Swing canceled
(Indicator off)
When swing stops, press the swing button several times to make sure that the•
indicator turns off.
192001aF3FKLT-251DEng.indd8192001aF3FKLT-251DEng.indd8 2019/04/1010:12:242019/04/1010:12:24

9
English
The direction can be changed manually
The range of the angle is about 100° vertically (90° upwards (30° × 3) 10°
downwards) and 60° horizontally.
Attention
To switch the direction manually, first turn off the power by pressing the•
button.
Changing direction forcibly may damage the fan.
Be careful to avoid pinching your fingers while adjusting the angle.•
Height setting
Telescopic button
You can set the height to three levels with the telescopic button.
While pressing the circular mark of the telescopic button, press and hold the base•
of the main unit, and then increase the height by holding the handle upwards.
As there are three locks that can lock the height, be sure to determine the fixing•
position.
Please use the telescopic button to set the stop position. If the fan stops and*
starts running at the middle of the two fixed positions, it may cause noise or
accident due to instability.
192001aF3FKLT-251DEng.indd9192001aF3FKLT-251DEng.indd9 2019/04/1010:12:252019/04/1010:12:25

10
English
Set / cancel light off mode4.
Auto-dimmer function
The brightness will automatically be reduced (by about 20%) one minute
after the last operation on the main unit or the remote control. You can
also shut off the light by pressing and holding the Natural air/sleep wind
button for at least 3 seconds.
When dimmer mode or light off mode is canceled in dimmer mode or
light off mode, you can simply press any button other than the Power
button on the main unit or the remote control to cancel the mode.
The indicators will return to normal brightness, and the corresponding
function of the pressed button will start.
In dimmer mode or light off mode, you can press and hold (at least 3 seconds)•
the Natural air/sleep wind button (light off button) to cancel the mode. The
indicators will return to normal brightness, and you can confirm the current
settings.
You can simply press the Power button to stop the operation, and cancel the•
dimmer mode or light off mode.
Stop operation5.
During operation, simply press the power button on the main unit or the remote
control to stop.
Auto-off function
The fan will automatically stop running after 12 hours from the last
operation of the main unit or the Remote control.
Attention
To save power when the fan is unused for long periods of time, unplug•
the AC adapter from the outlet.
When a power failure occurs or the AC adapter is removed from the outlet•
while fan is on, all operations will start from the beginning. When the
stops, all settings are canceled.
Make sure there is ample space available for the fan to swing to the left
and to the right before you start the swing mode.
192001aF3FKLT-251DEng.indd10192001aF3FKLT-251DEng.indd10 2019/04/1010:12:252019/04/1010:12:25

11
English
Timer Setting - Off Timer Setting
When off timer is set, the fan will automatically stop running after
reaching the set time.
Press the1. timer button when fan is on to set the off timer
When you press the timer button on the main unit or the remote control when fan
is on, the 1H timer indicator will turn on, and the schedule off mode is enabled.
The time for schedule off (1H-4H) can be set by pressing the timer button on the
main unit or the remote control.
Please confirm the timer display and set the time before the device stops.•
When the off timer is set, the timer display will show the remaining time before•
the schedule off function starts.
The light off mode will be canceled automatically when the off timer is enabled.*
Cancellation of schedule off2.
The timer indicator will automatically turn off by simply pressing the timer button
on the main unit or the remote control several times.
Timer Setting - On Timer Setting
When on timer is set, the fan will automatically start running after
reaching the set time.
Attention
Do not use the on time where there are children or where strong wind may
cause the device to tip over.
Press the1. timer button to set the on timer when the fan is off
If you press the timer button on the main unit or the remote control when the fan
is off, the timer indicator will start flashing, indicating that the schedule on mode is
enabled.
The indicator for the last air volume (including the swing indicator) also flashes.•
(“Memory function” →see page 7)
You can simply press the timer button on the main unit or the remote control to
set the time to start the schedule on function.
When the on timer is set, the timer display will show the remaining time before•
the schedule on function starts.
192001aF3FKLT-251DEng.indd11192001aF3FKLT-251DEng.indd11 2019/04/1010:12:252019/04/1010:12:25

12
English
Timer display
The timer display will switch in the following order when you press the timer
button on the main unit or remote control.
1H
(1 hour)
2H
(2 hour)
4H
(4 hour)
Off
(Timer disabled)
When the on/off timer has been set, the timer display changes with time, indicating
the remaining time before the timer function is started.
4H
(4 hours)
2H
(2 hours)
1H
(1 hour)
Off
(Timer disabled)
When the off timer is set, the timer indicator will turn on. When the on timer is set,
the timer indicator will flash.
On timer and off timer can’t be set at the same time.*
Setting running air volume when reaching the set time2.
You can simply press the + power/air volume adjustment button on the main
unit or the - air volume +/- button on the remote control to set the running air
volume at the set time. The air volume indicator also flashes.
The wind blowing mode at the set time can be set by pressing the• swing
button and the natural/sleep wind button.
Confirm the settings through the flashing indicator.•
To cancel the scheduled settings:3.
Simply press the timer button on the main unit or the remote control several
times and the timer indicator will turn off automatically.
192001aF3FKLT-251DEng.indd12192001aF3FKLT-251DEng.indd12 2019/04/1010:12:252019/04/1010:12:25

13
English
Use of Aroma Oil
Remove the center mark shell (aroma circle disk) mounted on the front grille1.
You can simply rotate the center mark shell (aroma circle disk) to the left to remove
it.
Remove the felt cover and pour some aroma oil onto the felt placed in the2.
aroma circle disk
Rotate the felt cover to the left to remove it from the center mark shell (aroma
circle disk) and confirm that the felt tab is installed. Pour 2-3 drops of commercially
available aroma essential oil or natural essential oil into it. Pay attention to prevent
the essential oil from overflowing.
Center mark shell (aroma circle disk )
Felt cover
Aroma essential oil or natural
essential oil
Felt tab
Center mark shell
Attention
Be sure to wipe away any aroma oil or natural essential oil that may drip off
the felt tab or cover.
Install the felt cover, and then install aroma circle disk to its original position3.
Rotate the felt cover to the right to mount it on the center mark shell, then rotate
the aroma circle disk to the right and install it on the front grille.
192001aF3FKLT-251DEng.indd13192001aF3FKLT-251DEng.indd13 2019/04/1010:12:252019/04/1010:12:25

14
English
Felt cover
Used felt
Felt tab
Buckle
To prevent the felt from exposing/overflowing from the felt storage area in the center mark
shell (aroma circle disk ), place the felt under the buckle when installing.
Start operation4.
Follow “Start/stop operation” on page 7 and you can enjoy the cool breeze with
aromatherapy.
Felt replacement
When the felt tab is dirty or you need to use different kinds of aroma oil or*
natural essential oil, please replace the felt tab.
To replace the felt tab, rotate it left to remove the felt cover, and then remove and*
replace the felt tab.
Install the felt tab under the buckle as shown in the figure, and then rotate right*
to install the felt cover.
In addition to the felt tab installed in the aroma circle disk, this product also*
supplies three pieces separately.
Please fully clean the center the aroma circle disk with neutral detergent, and*
wipe the water completely.
Felt tab replacements are sold separately.
Please contact the service department.
Attention
Please handle the discarded felt tabs properly.
Aroma oil/natural essential oil sometimes melts plastics.
192001aF3FKLT-251DEng.indd14192001aF3FKLT-251DEng.indd14 2019/04/1010:12:252019/04/1010:12:25

15
English
Aroma oil/natural essential Oil
Keep it away from flames.•
Keep it out of reach of children.•
If some oil spilled on your clothing, rinse with plenty of water and let it dry•
naturally. Do not use a dryer.
Wash hands immediately if some oil spilled on your hands.•
Be sure to read the instructions for use of aroma oil/natural essential oil.•
192001aF3FKLT-251DEng.indd15192001aF3FKLT-251DEng.indd15 2019/04/1010:12:252019/04/1010:12:25

16
English
Cleaning and Storage
WARNING
Always disconnect the AC adapter from the outlet during maintenance.
Attention
Never use household cleaner, thinner, gasoline, alcohol, or abrasive•
powder.
Do not flush the main unit or AC adapter with water. (It may cause electric•
shock and device failure.)
Maintenance
When the main unit is dirty, soak a soft cloth in warm water or neutral
detergent (excluding citrus series), wring it thoroughly, wipe the dirt, and
then wipe with a dry cloth. (Do not rub the resin hard, or else it may cause
scratches on the surface.)
Blade maintenance
Disassemble the front grille before maintenance of the internal blades of
the main unit. The operation requires two persons (one person holds and
the other disassembles). Do not apply excessive force to the main unit.
Tips for removal of front grille
[If it is a large fan, please separate the base part from the fan part]
Keep the fan facing up, and pinch the lower part of the fan with your feet.•
Wet your fingers or wrap your hands with a thin wet towel, and hold the outer•
ring of the front grille to prevent it from slipping.
Rotate the front grille counterclockwise.•
Rotate the outer ring of the front grille about 2cm to open the lock.•
Lift the front grille upwards to remove it.
Please take care to prevent staining your clothes.*
WARNING
Do not run the fan without blades and grilles installed.
Attention
Fully fix the grilles and blades before inserting the AC adapter into the
outlet.
Please be careful to prevent being cut by the blade edge
192001aF3FKLT-251DEng.indd16192001aF3FKLT-251DEng.indd16 2019/04/1010:12:252019/04/1010:12:25

17
English
Removal Method of Blades and Front Grille
Rear grille
Motor concentric shaft
Blade
Front grille
Knob for blade mounting
1
2
2
4
3
Rotate the front grille1.
1
to the left as a whole.
Attention
Do not apply excessive force to rotate the front grille.
Pull out the front grille completely to the point where it cannot continue to2.
rotate
2
.
Hold the blade, turn the knob3.
3
used for mounting blade to the right, and
then pull the blade toward you to remove it
4
.
The structure of the blade mounting knob is the reverse of the ordinary knob.
Rotating left is to install, and rotation right is to remove.
The rear grille can’t be removed. There is a wiring harness inside the rear grille, so*
be sure to pay full attention during maintenance.
Be sure to fully dry after maintenance.*
4
192001aF3FKLT-251DEng.indd17192001aF3FKLT-251DEng.indd17 2019/04/1010:12:262019/04/1010:12:26

18
English
Assembly Method of Blades and Front Grille
4
4
3
3
2
1
Align the pin of the motor concentric shaft and install the blade1.
1
.
Position the pins of the blade pin fixing part and the motor shaft base and install
them.
Fixing part of pin
Motor center shaft
Pin
Blade (reverse)
When installing the blade, align the pin fixing part of the blade with the pin of the motor
concentric shaft
1
.
1
Hold the blade and rotate the blade mounting knob to the left to secure the2.
blade
2
.
Hold the blade, rotate the blade mounting knob to the “left” and fully tighten the
blade.
192001aF3FKLT-251DEng.indd18192001aF3FKLT-251DEng.indd18 2019/04/1010:12:262019/04/1010:12:26

19
English
Align the groove of the front grille with the mark of the rear grille and press3.
the entire front grille into it
3
.
Align the groove of the front grille with the U-shaped recess mark on the rear grille
and press it in
Rotate the front grille4.
4
to the right.
Rotate the front grille to the right until it can’t continue turning.
If it is only installed halfway, grille might disconnect or fan will vibrate.
Recess in front grille
Mark
Align the groove of the front grille with the recess mark of rear grille, press the entire front
grille into it
3
, and then rotate right
4
.
4
Front grille Rear grille
3
Attention
Take care to prevent excessive rotation of the front grille.
It may cause fan damage and malfunction.
Storage Method
Fully dry it after maintenance.•
Put it in a plastic bag, then put in the packaging box, and store it in a dry place•
free of moisture.
Before putting it in a box, make the fan face the front through the swing•
function.
When it is not used for a long time, remove the battery from the remote control.•
192001aF3FKLT-251DEng.indd19192001aF3FKLT-251DEng.indd19 2019/04/1010:12:262019/04/1010:12:26

20
English
Before Requesting Repair or Service
WARNING
Only qualified technicians should disassemble or repair the fan.
Problem Cause Solution
No power. DC plug or AC adapter
not connected properly.
Insert the DC plug of AC adapter
into the DC jack.
Insert the AC adapter into the
outlet.
Blades won’t turn. The blades are not•
properly installed
The blades are stuck•
by the grille
Install blades and grilles properly
(refer to “Assembly Method of
Blades and Front Grille” on page
18)
Air volume pointer
and indicator are off
or have no display.
In light off mode. The dimmer/light off mode can be
canceled by simply holding down
any button other than the
power button on the main unit or
the remote control.
Display part/
indicators are dark.
The dimmer mode will
be enabled automatically
in about one minute
after the last operation.
The dimmer/light off mode can be
canceled by simply holding down
any button other than the
power button on the main unit or
the remote control.
Unit stops running
suddenly.
Auto-off function is
enabled to turn off the
power automatically
(page 10)
Simply press any operation button
on the main unit or the remote
control to turn on the power.
Noise. The blades are not•
properly installed.
The blades are stuck•
by the grille.
The front grille is not•
properly installed.
Install blades and grilles properly
(refer to “Assembly Method of
Blades and Front Grille” on page
18)
Blade mounting knob is
loose.
Tighten the blade mounting knob
(refer to “Assembly Method of
Blades and Front Grille” on page
18)
The installation place•
isn’t stable.
The noise is caused by•
increased shaking in
an unstable place or
high position.
Set it in a stable place.•
192001aF3FKLT-251DEng.indd20192001aF3FKLT-251DEng.indd20 2019/04/1010:12:272019/04/1010:12:27
Table of contents
Other Objecto Fan manuals
Popular Fan manuals by other brands

Kichler Lighting
Kichler Lighting BISC 300710MWH instruction manual

Greenheck
Greenheck G Installation, operation and maintenance manual

GILMAN
GILMAN Gemini GMFH15W manual

Panasonic
Panasonic Whisper Green FV-05VK1 installation instructions

AirFiciency
AirFiciency CF60E manual

Barcol-Air
Barcol-Air CERA-1 installation instructions