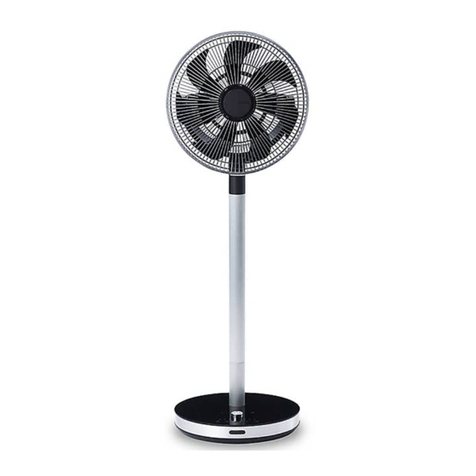
Objecto FLOW F1 User manual

USER MANUAL
180100aF1FLT-253DUSall.indb1180100aF1FLT-253DUSall.indb1 2018/06/1519:26:082018/06/1519:26:08

2
English
Safety Information
This section presents important safety information. Always follow
these instructions when using the product.
IMPORTANT SAFETY INSTRUCTIONS
When using electrical appliances, basic precautions should always be
followed to reduce the risk of fire, electric shock, and injury to
persons, including the following:
1. Read all instructions before using this product.
2. This product is designed for home use only. Do not use for any other purpose.
3. Extreme caution is necessary when any fan is used by or near children or invalids
and whenever the product is left operating and unattended.
4. Always unplug the product when not in use.
5. Do not operate any fan with a damaged cord or plug or after the product
malfunctions, has been dropped or damaged in any manner. Return the product
to an authorized service facility for examination, electrical or mechanical
adjustment, or repair.
6. Do not use outdoors.
7. This product is NOT intended for use on tabletops or desktops, use ONLY ON
FLOORS. It is not to be used in wet or moist locations, such as bathrooms and
laundry areas. Never position this product where it may fall into a bathtub or other
water container.
8. Do not run cord under carpeting. Do not cover cord with throw rugs, runners, or
similar coverings. Do not route cord under furniture or appliances. Arrange cord
away from traffic area and where it will not be tripped over.
9. To unplug the product, first turn controls to the OFF position, then grip the plug
and pull it from the wall outlet. Never pull by the cord.
10. Do not insert or allow foreign objects to enter any ventilation or exhaust opening
as this may cause an electric shock or fire, or damage the product.
11. Always plug the product directly into a wall outlet/receptacle. Never use with an
extension cord or relocatable power tap (outlet/power strip).
12. SAVE THESE INSTRUCTIONS
WARNING
In order to avoid any electrical shock, short-circuit, burns, injury, or
cause a fire:
Do not disassemble. This product may only be disassembled by qualified repair technicians. To•
request repair, see Warranty Page at the back of this manual.
Do not use if the power cord or plug is damaged, or if the plug is not fully inserted into the•
outlet.
180100aF1FLT-253DUSall.indb2180100aF1FLT-253DUSall.indb2 2018/06/1519:26:082018/06/1519:26:08

3
English
Do not scratch, damage, modify, forcibly bend, pull, twist, bind/clamp, or place heavy objects on•
the power cord.
Do not allow children to use this product by themselves, and keep the product and power cords•
out of the reach of small children.
Do not plug in or unplug the product while your hands are wet.•
Do not apply water or sprinkle water over the fan.•
Do not operate without installing the blades and guard.•
Use only with the designated power supply 110 – 120 V.•
If you notice anything unusual during operation (burning smell, smoke, etc.), immediately stop•
use, and unplug the power cord.
Insert the power plug all the way into the outlet.•
Wipe off any dust adhering to the power plug blades and plug surface.•
If any liquid leaks from the battery of the remote control and gets in your eyes, do not rub them;•
rinse them out with water and see a doctor.
After use, be sure to turn off the power, and unplug the power cord from the outlet.•
When cleaning the product, for safety's sake be sure to unplug it from the outlet.•
CAUTION
Do not expose your body to the fan wind for a long period of time.•
Do not put your fingers in the guard.•
Do not bring your hair close to the guard.•
Do not leave the room while the product is on.•
Do not use on an unstable surface.•
Do not use near flames such as oven ranges, or where there is flammable gas.•
Do not use in places subject to rain or splashes.•
When cleaning the product, do not use household detergent, thinner, benzene, alcohol or a•
polishing powder or spray.
For remote control batteries, do not use any other than that specified.•
Do not leave the battery of the remote control in a hot location or in direct sunlight; and do not•
put it into a fire.
Face the terminals (+/-) correctly when putting the battery in the remote control.•
Remove the battery from the remote control when it will not be used for a long time.•
Remove the battery before discarding the remote control.•
180100aF1FLT-253DUSall.indb3180100aF1FLT-253DUSall.indb3 2018/06/1519:26:082018/06/1519:26:08

4
English
Names of Parts and Their Functions
Base
Remote control receiver
Operation unit
Remote control storage compartment
Affix with the magnet on the back of the remote control
Stand
Front guard vent
(Blades inside)
Handle
Front
Remote control
Rear guard vent
Main unit
Rear
DC cord
DC plug
AC adapter
AC adapter
180100aF1FLT-253DUSall.indb4180100aF1FLT-253DUSall.indb4 2018/06/1519:26:082018/06/1519:26:08

5
English
①
③
(D)
(A)
(E)
(B)
②
(C)
(F)
Main unit operation unit
Remote control
④
Manual operation button
The functions of the buttons on the main unit and the remote control are
the same.
(A) Power button
Start / stop operation.
(When all lamps are lit, the fan is in “turbo” mode with the strongest air
flow)
(B) Air flow button
Adjust the air flow during operation.
(C) Oscillate button
Start / stop Oscillate operation.
(D) Timer button
Set the on / off timer time.
(E) Rhythm / Night-time air flow button
Switch between Rhythm and Night-time air flow functions.
* Press and hold (3 seconds or more) to set the lamp to Dimming mode.
(F) Transmitter (remote control only)
Use by pointing at the remote control receiver on the main unit.
Operating lamp
You can check the current operating status.
①Air flow lamp
Indicates the operating air flow. During operation, one to four air flow lamps
will be lit.
(When all lamps are lit, the fan is in “turbo” mode with the strongest air flow)
②Oscillate lamp
Lit during Oscillate operation.
③Timer lamp
Lit when the on / off timer is set.
(When lamp is lit red: On timer When lamp is lit green: Off timer)
④Rhythm (green) / Night-time air flow (red) lamp
The lamp lights green for Rhythm, and red for Night-time air flow.
180100aF1FLT-253DUSall.indb5180100aF1FLT-253DUSall.indb5 2018/06/1519:26:082018/06/1519:26:08

6
English
Correct Use of the Fan
Preparation Before Use
Put the battery in the remote control1.
2
13
4
1 Pull out the battery box from the remote control unit. Pull out the battery from the battery
box.
2 Put a coin type lithium battery into the battery box, paying attention to the orientation of
the battery. Put the + side of the battery facing up.
3 Insert the battery box into the remote control unit.
4 Insert until it clicks.
Usable Range of Remote Control
About 16 feet straight from the front of the main unit• .
About 30° left and right from the front of the main unit• .
If there is an obstacle between the remote control and the main unit, the remote control• may not operate properly.
Hold the base and raise the stand2.
Hold down the base so that it does not move and raise to where the stand stops.•
Raise to where the stand stops
CAUTION
Be careful not to pinch your hands on the base and stand.•
When raising the stand, always raise it to where it stops and do not stop part-way.•
Place the main unit on a stable horizontal surface3.
When raising the stand, hold the handle to move it.•
Plug the AC adapter's DC plug into the main unit4.
Insert the DC plug firmly all the way into the DC jack on the base.• After inserting the DC plug, hook the DC cord into the cable hook.•
Cable hook
DC jack
DC plug
DC cord
Hook the DC cord on the cable hook
CAUTION
Be sure to insert the DC cord into the cable hook.•
Do not place the DC code or power cord under the base.•
The DC cord or power cord may be damaged, causing fire or electric shock.
Plug the power plug into an outlet5.
The fan will “beep”.•
180100aF1FLT-253DUSall.indb6180100aF1FLT-253DUSall.indb6 2018/06/1519:26:082018/06/1519:26:08

7
English
Starting and Stopping Operation
Starting Operation1.
When you press the power button on the main unit or the remote control,
operation starts.
During normal use, operation starts with the previous settings for air flow and• Oscillate, using the memory function.
When you first press the• power button on the main unit or the remote control
after plugging the power plug into the outlet, operation starts with very weak air
flow and no Oscillate.
Adjusting the Air Flow2.
Adjust the air flow by pushing the air flow button on the main unit or the
remote control.
Very weak Weak Medium Strong
(all lights)
Turbo
“Turbo” is the strongest air flow.*
CAUTION
Do not start operation without raising the stand.•
Keep the front and rear guard vents a sufficient distance from the•
surroundings.
Also, for safe operation of air intake and Oscillate, check the distance of the
surroundings before starting operation.
Memory Function
When you press the power button on the main unit or the remote control,
operation starts with the previous settings (air flow / Oscillate).
If you disconnect the power plug from the outlet, the fan will reset to the initial*
settings.
[Initial settings] Air flow: Very weak. Oscillate: None
Operating the Rhythm / Night-time Air Flow Functions3.
When you press the Rhythm / Night-time air flow button on the main unit or
remote control during operation, the function switches.
Green lamp lit
(Rhythm air flow) Red lamp lit
(Night-time air flow)
Lamp off
(Cancel)
180100aF1FLT-253DUSall.indb7180100aF1FLT-253DUSall.indb7 2018/06/1519:26:082018/06/1519:26:08
8
English
Starting / Stopping Oscillate Operation4.
Oscillate operation starts when you press the Oscillate button on the main unit
or the remote control during operation. Press the button again to stop Oscillate
operation.
Oscillate about 75°
You Can Change the Direction Manually.
The direction that can be changed is 6 clicks on each side, with 1 click of about 10°,
totaling about 60°.
CAUTION
For safety, change direction with operation stopped.
Changing the direction by force may cause damage, malfunction, or abnormal
noise, etc.
Stop operation5.
Press the power button on the main unit or the remote control during operation
to stop operation.
Unplug the Power Plug from the Outlet6.
CAUTION
If the power plug is plugged in, current will continue to flow to the AC
adapter and microcomputer, etc.
When not using the fan for a long time, also unplug the power plug from the outlet
to save electricity.
If there is a power failure or the power plug is removed during operation, all*
settings are canceled and operation stops.
Please restart operation from the beginning.
180100aF1FLT-253DUSall.indb8180100aF1FLT-253DUSall.indb8 2018/06/1519:26:092018/06/1519:26:09

9
English
Timer Settings
OFF Timer Settings
By setting the OFF timer, operation can be stopped automatically after the
set time.
Press the1. Timer Button During Operation to Set the OFF Timer
When you press the timer button on the main unit or remote control during
operation, the timer lamp lights up in green and the OFF timer is set.
The OFF timer operation time can be set by pressing the timer button on the
main unit or remote control.
About the Timer Lamp
Each time the timer button on the main unit or remote control is pressed, the
timer lamp switches as shown below.
1H
(1 hour) 2H
(2 hour) 4H
(4 hour)
(Unlit)
(Timer cancel) 8H
(8 hour)
After setting the ON / OFF timer, the timer lamp changes over the passage of time,
and the time until the timer operates is displayed.
8H
(8 hour) 4H
(4 hour) 2H
(2 hour)
(Unlit)
(Timer operation) 1H
(1 hour)
The timer lamp lights up in green when an OFF timer is set, and red when an ON
timer is set.
You can not set both the ON timer and OFF timer at the same time.*
Canceling the OFF Timer2.
Press the timer button on the main unit or the remote control several times to
turn off the timer lamp.
ON Timer Settings
By setting the ON timer, operation can be started automatically after the set time.
Press the1. Timer Button while Operation is Stopped to Set the ON Timer
When you press the timer button on the main unit or remote control while
operation is stopped, the timer lamp lights up in red and the ON timer is set.
Set the Air Flow etc. to Operate at the Set Time2.
Press the air flow button on the main unit or remote control to set the air flow
to operate at the set time. The set air flow lamp blinks.
You can set the air flow to operate at the set time by pressing the• Oscillate
button or the Rhythm / Night-time air flow button.
The settings can be confirmed by the blinking of the lamp.•
180100aF1FLT-253DUSall.indb9180100aF1FLT-253DUSall.indb9 2018/06/1519:26:092018/06/1519:26:09

10
English
Cancel the ON Timer3.
Press the timer button on the main unit or the remote control several times to
turn off the timer lamp.
Adjust the Angle
Support the handle, push the top or bottom of the front guard, and
slowly move the fan up or down.
Before adjusting the angle, be sure to stop operation and check that the blades• have stopped.
Adjust while pressing with one hand so that the main unit does not fall.•
Front Front
Rear Rear
Downward
You can adjust the angle
up to about 45°
Upward
You can adjust the angle
up to about 90°
Handle
Using as a Circulator
If you use the fan together with an air conditioner to circulate the indoor
air, it will improve the effectiveness of the air conditioner.
Carrying
When moving, be sure to move the fan while holding the handle.
180100aF1FLT-253DUSall.indb10180100aF1FLT-253DUSall.indb10 2018/06/1519:26:092018/06/1519:26:09

11
English
Cleaning and Storage
WARNING
When cleaning the product, be sure to unplug the power cord from the outlet.
CAUTION
Do not use household detergent, thinner, benzine, alcohol, or polish, etc.•
under any circumstances.
Do not wash the fan by sprinkling water over the main unit or AC adapter.•
(Doing so may cause electric shock or malfunction.)
Internal Cleaning
Remove the front guards and blades as follows and clean the interior.
Front guard
Blade-mount spinner
Blades
Rear guard
Motor shaft
Recess
(2)(3)
(4)
Removal
(1) Remove each screw at the two lock release switches on the top of the
front guard.
Lock release switch
180100aF1FLT-253DUSall.indb11180100aF1FLT-253DUSall.indb11 2018/06/1519:26:092018/06/1519:26:09

12
English
(2) Move both lock release switches outward at the same time, and pull the
front guard forward to remove it.
Lock release switch
(2)
(2)
(3) Turn the blade-mount spinner clockwise and remove the blades.
Mounting
(4) To mount the blades, fit them to match the shape of the motor shaft,
firmly turn the blade-mount spinner counterclockwise, and tighten.
Fit the blades to match the shape of the motor shaft
(4)
(5) Place the hook at the bottom of the front guard in the recess at the
bottom of the rear guard and then fit the lock release switch on the
top.
Recess
Rear guard
Front guard
(5)(5)
Storage
Clean by removing dust on the front and rear guard vents with a vacuum cleaner.• After thorough cleaning, dry the fan well.• Place in a plastic bag, etc., put in the original box, and store in a location without• humidity.
When not using for a long time, remove the remote control battery.•
180100aF1FLT-253DUSall.indb12180100aF1FLT-253DUSall.indb12 2018/06/1519:26:092018/06/1519:26:09

13
English
How to Fold the Stand
This fan can be stored compactly by folding when not in use.
1 Stop operation, unplug the power plug from the outlet, and remove the
AC adapter from the main unit.
2 Hold the base and the handle, and slowly move the stand down toward
the base side. (Reverse of “2. Hold the base and raise the stand” on
page 6)
The fan can be stored in a narrow space.
(Store the remote control and AC adapter in an appropriate place)
When folded, do not leave leaning against a wall in an area where people*
regularly pass.
CAUTION
Be careful not to pinch your fingers when folding.•
Do not carry by holding any part other than the handle.•
Cleaning
Normal Cleaning (When the Fan is Dirty)
Wipe the dirt on the main unit with a soft cloth that has been immersed
in lukewarm water or dishwashing detergent (excluding citrus type), and
firmly squeezed. Then wipe gently with a dry cloth. (Do not rub the resin
parts vigorously. Doing so may cause scratches.)
Normal Cleaning
Remove dust on the front and rear guard vents with a vacuum cleaner.
CAUTION
After cleaning, be sure to install the blades, the blade-mount spinner, and
the front guard correctly to the main unit.
180100aF1FLT-253DUSall.indb13180100aF1FLT-253DUSall.indb13 2018/06/1519:26:092018/06/1519:26:09

14
English
Before Requesting Repairs or Service
WARNING
This product can be disassembled and repaired by qualified repair
technicians only.
If you find any problems, follow the troubleshooting procedures below.
Problem Primary Cause Solution
The power does not
turn on. The DC plug of the AC
adapter is disconnected
from the DC jack.
Plug the DC plug into the DC jack.
The AC adapter is
unplugged from the
outlet.
Plug the AC adapter into the
outlet.
The air flow is weak. Dust accumulates in the
guards. Remove the dust with a vacuum
cleaner.
The blades do not
turn. The blades are not• installed correctly.
The blades hit the• guard.
Correctly install the blades and
guards (see “Cleaning and
Storage” on page 11).
The lamps of the
operation unit are
dark.
Dimming mode is set. Press any button other than the
power button on the operation
unit or remote control.
Operation stops
suddenly. The Power-off Prevention
Function is working. Press the operation button on the
main unit or remote control to turn
on the power.
There is an abnormal
noise. The front guard or
blades are not installed
correctly.
Correctly install the front guard
and blades.
The stand is not fully
raised. Raise the stand until it stops.
When I press a
button, the lamp
blinks and does not
work.
The ON timer is set. Press the timer button several
times to end the ON timer.
The remote control
does not work. The battery is worn out. Put a new battery in the remote.
The terminals (+/-) of the
battery are reversed. Check the battery terminals (+/-)
and put it in correctly.
Operating the remote• control while it is
mounted in the
storage compartment.
Using it outside the• reception range of the
remote control.
The distance to• the remote control
receiver is too far.
Direct the transmitter to the• remote control receiver.
Get closer to and at an angle to• the receiver on the main unit so
it works.
180100aF1FLT-253DUSall.indb14180100aF1FLT-253DUSall.indb14 2018/06/1519:26:092018/06/1519:26:09

15
English
Specifications
Product name F1 Folding Fan
Power supply 110 – 120 V, 50/60 Hz
Power consumption 10 W
AC adapter cord length Approx. 70 inches
Size Width 13 in × Depth 12 in × Height 29 in
Weight Approx. 8.4 lbs (body only)
Accessories User’s Manual / Warranty × 1, AC adapter × 1, Remote
controller × 1, Coin type lithium battery × 1
Due to a continuous process of product improvement, the specifications and*
other information are subject to change without notice.
180100aF1FLT-253DUSall.indb15180100aF1FLT-253DUSall.indb15 2018/06/1519:26:092018/06/1519:26:09

English
LIMITED WARRANTY POLICY
Thank you for selecting our Products.
Please carefully read the User’s Manual furnished with this product. We believe that you will be very
satisfied with your purchase. We will provide the following LIMITED WARRANTY to you as the original
purchaser.
Should service be necessary for any reason due to manufacturing defect or malfunction during the
90 days period, OBJECTO will provide carry-in repair service at our FACTORY SERVICE CENTER at no
charge, and for the duration of the extended 9 months parts warranty period will replace the defective
part only, not including labor, provided the defect or malfunction is verified along with the date of
purchase. In the event service is necessary, you may return the unit to our FACTORY SERVICE CENTER
listed below.
Pack the unit in a well padded heavy corrugated box. Be certain that the unit is well protected.a) Enclose your check or money order payable to H.S.I in the amount of $40.00.b) Enclose copy of proof of purchase.c) Ship the unit prepaid via UPS or parcel post insured.d)
NOTE: This warranty does not cover.
OBJECTO products which have been damaged by negligence, misuse or accident or which havea) been modified or repaired by anyone other than our FACTORY SERVICE CENTER.
Damage to OBJECTO equipment that has been improperly connected to the equipment of otherb) manufacturers
Costs incurred in the shipping of OBJECTO products to our FACTORY SERVICE CENTER.c)
This warranty is valid only to the original purchaser and does not extend to owners of the product
subsequent to the original purchaser. Any applicable implied warranties, including the warranty of
merchantability, are limited in duration to a period of 90 days from the date of original purchase at
retail and no warranties, whether expressed or implied, shall apply to this product thereafter. Under
no circumstances shall OBJECTO be liable for any loss or damage, direct or consequential, arising
out of the use of, or inability to use this product. (Some states do not allow limitation or implied
warranties or exclusion of consequential damage, therefore these restrictions may not apply to you.)
This warranty gives you specific legal rights and you may also have other rights which may vary from
state to state.
The Limited Warranty Registry Card must be completely filled out and mailed immediately, in ordera) to validate the Limited Warranty.
You must include copy of your purchase slip when you are returning the unit.b)
Register your new product online at WWW.OBJECTO.com
SERVICE INFORMATION:
OBJECTO
935 BROADWAY, 6TH FL.
NEW YORK, NY 10010
TELEPHONE: (844) OBJECTO (844-625-3286)
FAX: 800-433-9099
WWW.OBJECTO.COM
6B18A
180100aF1FLT-253DUSall.indb16180100aF1FLT-253DUSall.indb16 2018/06/1519:26:092018/06/1519:26:09

MANUAL DE USUARIO
180100aF1FLT-253DUSall.indb1180100aF1FLT-253DUSall.indb1 2018/06/1519:26:092018/06/1519:26:09

2
Español
Información de seguridad
Esta sección presenta información de seguridad importante. Siga
estas instrucciones siempre que utilice el producto.
INSTRUCCIONES DE SEGURIDAD IMPORTANTES
Al utilizar aparatos eléctricos, es necesario tomar algunas
precauciones básicas con el fin de reducir el riesgo de incendios,
descargas eléctricas y lesiones en las personas. Entre estas se incluyen:
1. Lea todas las instrucciones antes de utilizar este producto.
2. Este producto se ha diseñado únicamente para su uso en hogares. No lo utilice
para otros fines.
3. Es necesario tomar la máxima precaución cuando un ventilador es utilizado cerca
de niños o de personas discapacitadas y siempre que el producto se vaya a dejar
en operación sin supervisión.
4. Desenchufe siempre el producto cuando no esté siendo utilizado.
5. No opere ningún ventilador que tenga un cable o un enchufe dañado, o si observa
que el producto no funciona correctamente, si se ha caído o ha sido dañado de
alguna forma. Devuelva el producto a un centro de servicio autorizado si necesita
revisarlo, realizar algún tipo de ajuste mecánico o eléctrico en este o repararlo.
6. No lo utilice en el exterior.
7. Este producto NO ha sido diseñado para ser usado sobre mesas o escritorios;
utilícelo ÚNICAMENTE EN EL SUELO. No debe ser usado en lugares mojados o
húmedos, como baños o lavaderos. No coloque nunca el producto en lugares en
los que podría caer dentro de una bañera u otro recipiente de agua.
8. No coloque el cable debajo de ninguna alfombra. No cubra el cable con tapetes,
alfombras de pasillo ni accesorios para cubrir el suelo similares. No coloque el
cable por debajo de muebles u otros aparatos. Coloque el cable en un lugar en el
que no haya tránsito y en el que no se pueda pisar.
9. Para desenchufar el producto, gire los controles primero hacia la posición OFF
(apagado) y, a continuación, agarre el enchufe y tire de él para extraerlo del
tomacorriente. No tire nunca del cable.
10. No ingrese objetos extraños ni permita que estos se ingresen en las aberturas
de ventilación o de escape, ya que podría producirse un choque eléctrico o un
incendio, o el producto podría resultar dañado.
11. Enchufe siempre el producto directamente en el tomacorriente o en el receptáculo
de la pared. No lo utilice nunca con un cable de extensión o con una conexión
eléctrica trasladable (tomacorriente o conector múltiple).
12. GUARDE ESTAS INSTRUCCIONES
ADVERTENCIA
A fin de evitar descargas eléctricas, cortocircuitos, quemaduras,
lesiones o un incendio:
No desarme el producto. Este producto solo puede ser desarmado por técnicos en reparaciones•
calificados. Para solicitar una reparación, consulte la página de la Garantía al dorso de este manual.
180100aF1FLT-253DUSall.indb2180100aF1FLT-253DUSall.indb2 2018/06/1519:26:092018/06/1519:26:09

3
Español
No utilizar si el cable de alimentación o el enchufe está dañado, o si el enchufe no está•
introducido por completo en el tomacorriente.
No raspar, dañar, modificar, doblar por la fuerza, jalar, retorcer, unir/sujetar con abrazadera ni•
colocar objetos pesados sobre el cable de alimentación.
No permitir que los niños utilicen este producto por su cuenta, y mantener el producto y los•
cables de alimentación fuera del alcance de niños pequeños.
No enchufar ni desenchufar el producto si tiene las manos mojadas.•
No mojar el ventilador ni dejar que caiga agua sobre él.•
No utilizar sin instalar las aspas y la carcasa.•
Utilizar solo con la alimentación eléctrica designada: 110-120 V.•
Si observa algo extraño durante la operación (olor a quemado, humo, etc.), deténgalo•
inmediatamente y desenchufe el cable de alimentación.
Inserte completamente el enchufe en el tomacorriente.•
Limpie el polvo de las clavijas y la superficie del enchufe.•
Si sale algún líquido de la batería del control remoto y le cae en los ojos, no se los frote;•
enjuáguelos con agua y vaya al médico.
Después de utilizar el producto, asegúrese de apagarlo y desenchufe el cable de alimentación del•
tomacorriente.
Por su seguridad, asegúrese de desenchufar el producto del tomacorriente si va a limpiarlo.•
PRECAUCIÓN
No se exponga al viento del ventilador por un periodo prolongado de tiempo.•
No ponga los dedos en la carcasa.•
No acerque el pelo a la carcasa.•
No salga de la sala mientras el producto esté encendido.•
No lo utilice en una superficie inestable.•
No lo utilice cerca de lugares en los que se produzcan llamas, como el lugar donde esté colocado•
el horno, ni en lugares en los que haya gas inflamable.
No lo utilice en lugares expuestos a la lluvia o a salpicaduras.•
Al limpiar el producto, no utilice detergentes, solventes, benceno, alcohol ni polvos o spray•
abrillantadores para el hogar.
Utilice únicamente el tipo de baterías para el control remoto que se especifican.•
No deje las baterías del control remoto en un lugar cálido o que reciba luz indirecta del sol, y no•
las coloque cerca del fuego.
Coloque los extremos (+/-) correctamente cuando introduzca la batería dentro del control remoto.•
Extraiga la batería del control remoto cuando no vaya a ser usado por un periodo prolongado de•
tiempo.
Extraiga la batería antes de deshacerse del control remoto.•
180100aF1FLT-253DUSall.indb3180100aF1FLT-253DUSall.indb3 2018/06/1519:26:092018/06/1519:26:09

4
Español
Nombres de las piezas y sus funciones
Base
Receptor del control remoto
Unidad de funcionamiento
Compartimento de almacenamiento del control remoto
Fijar con el imán de la parte trasera del control remoto
Pie
Abertura de la carcasa frontal
(aspas en el interior)
Asa
Parte frontal
Control remoto
Abertura de la carcasa trasera
Unidad principal
Parte trasera
Cable de CC
Enchufe de CC
Adaptador de CA
Adaptador de CA
180100aF1FLT-253DUSall.indb4180100aF1FLT-253DUSall.indb4 2018/06/1519:26:092018/06/1519:26:09
This manual suits for next models
1
Table of contents
Languages:
Other Objecto Fan manuals
Popular Fan manuals by other brands

HKC
HKC 51637 owner's manual

Home Decorators Collection
Home Decorators Collection 51890 Use and care guide

Emerson
Emerson CF550ORB00 owner's manual

Mitsubishi Electric
Mitsubishi Electric EF-35UDT2-GL Installation instructions manual

COOLTRON
COOLTRON PILLAR PLUS instruction manual

NuTone
NuTone 696N220-R01 quick start guide

Taurus
Taurus GRECO 16 ELEGANCE manual

Sulion
Sulion LOLLIPOP 075157 instruction manual

EUROM
EUROM HVF14 Instruction leaflet

Ventamatic
Ventamatic BIG AIR HVFF20BA Instruction & owner's manual

Bestron
Bestron SUMMER BREEZE AFT770WRC instruction manual

Stadler Form
Stadler Form Peter Little operating instructions