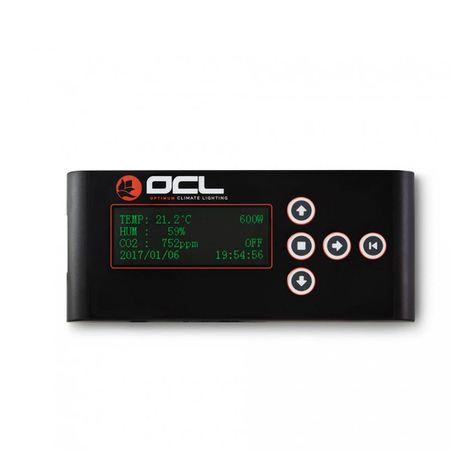
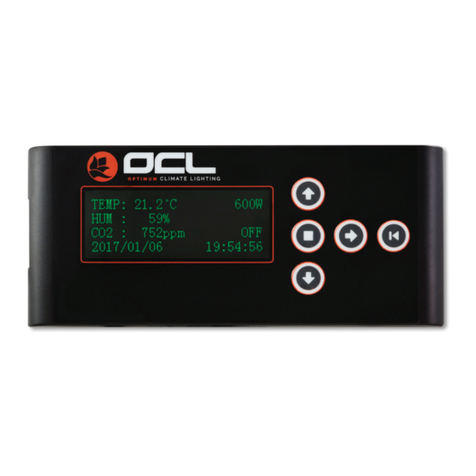
OCL DLC-1.1 User manual

CONTROLLER MANUAL

CONGRATULATIONS ON YOUR PURCHASE OF THE OCL DLC-1.1
DIGITAL LIGHTING CONTROLLER !
The OCL X-series, with extremely powerful and higher Par output than traditional xtures, asks for
a smart controller. That is why OCL designed the world’s smartest and yet easy to operate lighting
controller. All sensors (TEMP/RH/CO2) can be calibrated, it detects sensor failures and when a
connection is not set-up properly it will automatically show a warning in the display.
The OCL DLC-1.1 Smart Lighting & CO2 Controller includes a built-in clock and back-up battery
with a 30-year lifetime. The DLC-1.1 simulates natural growing conditions with the “RISE/FALL”
option, allowing plants to gradually warm up and cool down.
The “AUTO-SAVE TEMP” option can sense when indoor temperatures are getting too high and by
responding automatically by dimming the connected lamps it will reduce or even avoid environ-
mental stress and crop damage.
The “SHUTDOWN-TEMP” is an extra safety feature that will shut down all lighting in the room
when the temperature is not reducing after the “Auto-Save Temp” has set in. Causes could be a
malfunctioning in the extraction or climate control unit. A manual resetting of the “SHUTDOWN
TEMP” is than required to restart the system.
Dierent from other brands, with the OCL DLC-1.1 controller it is possible to combine dierent
types of ballasts. It is therefore possible to connect, say, a OCL XXL 1000 watt xture with a 315
watt CDM xture on one and the same controller.
With the “ CO2-SET ppm” option, the controller is not only managing the lights but also managing
the CO2 levels in the room. Due to the very accurate Dual Beam SenseAir CO2 sensor both CO2
generators and cool CO2 installations can be controlled. When using a OCL DLC1.1 controller, no
additional switch board is required.With the “AUX BOX”, to be ordered separately, it is possible to
connect a dehumidier, extra ventilation or heating. The “AUX BOX” is equipped with a RJ12 UTP
connection and a 16A relay for 3.5KW controlled power.

NEVER BEFORE IT WAS SO SIMPLE TO CREATE THE RIGHT CLIMATE
FOR YOUR PLANTS!
DEHUMIDIFIER
6
AUX
HEATER
DC INPUT
13V Max
1.5A Max
TEMP RH CO2 AUX
CO2
34
5
2
1
BOX CONTENTS:
1 - OCL DLC-1.1 Digital Lighting Controller
2 - AC Adapter 240V
3 - Temperature Sensor
4 - Humidity Sensor
OPTIONAL:
5 - CO2 Sensor
6 - Aux Box

INPUT OUTPUT
30,03
600
750
825
1150
EXT
1000
Output power (W)
600
750
825
1150
EXT
1000
Output power (W)
600
750
825
1150
EXT
1000
Output power (W)
The OCL DLC-1.1 Smart Lighting & CO2 Controller is an innovative yet simple way to control your
lamps. As the rst and only, the OCL Digital Lighting Controller uses the interlink cable to connect
ballasts via the output of the one to the input of the other. Without any problem up to 50 OCL
XXL-SERIE Full Fixtures can be simultaneously controlled by the OCL DLC-1.1.
TIPS & TRICKS:
The temperature sensor should be protected against the radiation heat of the lamp. A simple
piece of paper board is sucient. It is recommended to have the OCL temperature sensor close
to the (if present) temperature sensor of the climate control system. The humidity sensor (RH)
measures the relative humidity and here too it is recommended to protect the sensor against
radiation heat and place it in the shadow.
The CO2 sensor should be facing the light because of its light cell, switching the sensor on
(day-time) and o (night-time). Since plants produce CO2 during the night, there is still sucient
CO2 available in the room when the lights are switched on. In order to save gas, it is possible to
put the “START TIME” on 20 minutes (after the lights switch on).
When dark, the plants do not require any CO2 so it is therefore not necessary to add extra CO2 up
and till the moment the lights are switched o. To save gas, it is possible to put the “STOP TIME”
on 20 minutes (before the lights switch o).
With the “AUX SELECT” option one can choose what piece of equipment will be connected. In the
“NIGHT” setting equipment will be switched on when the lights are switched o. It is recommend-
ed to use this setting because it allows the connection of a heater, dehumidier or extra ventilator.
When growing with CO2, plants will evaporate more and this could require extra dehumidication
of the room.

TEMP: SENSOR FAILURE OFF
HUM : SENSOR FAILURE
CO2 : SENSOR FAILURE OFF
2016/10/28 17:20:20
II. CONTROL KEY
Display screen of
connect sensor
I. PREPARATIONS BEFORE USE
Set the controller output mode to “OFF”, to ensure that it will not be accidentally
activated during the controller setup.
III. FUNCTION OPERATIONAL SPECIFICATION
1. OUTPUT SELECT
In the main menu, press setting key, set the “OUTPUT SELECT”, press set key again, you can
change the “OUTPUT SELECT” to the “AUTO”, “OFF” or ”ON” function by pressing the up and down
key. Then press the set key, this will conrm the function and return to the main menu.
If not, please press ESC key.
AUTO: Auto save dimming function
OFF: Closed output
ON: Opened output
2. OUTPUT POWER
Press setting key, choose “OUTPUT POWER”, press setting key again, you can change the
“OUTPUT POWER” by the up and down key. Then, press setting key again, this will conrm the
function and return to the main menu. If not, please press ESC key. Power setting rate: 50%-115%
In the main menu, press modes key, enter the “OUTPUT POWER” directly.
OUTPUT SELECT
OUTPUT POWER
LIGHT TIMER
AUX SELECT
Main menu
TEMP: 27.4 °C OFF
HUM : 52%
CO2 : 428 ppm OFF
2016/11/02 10:33:46
Display screen of disconnect
sensor “Failure” : disconnect
sensor or connection doesn’t
work.
UP SET DOWN ESC MODES

3.. LIGHT TIMER
Press setting key, choose “LIGHT TIMER”, press setting key again, you can change the setting
“LIGHT TIMER” to on and o by the up and down key. You can change the hours and minutes
with the setting key. Finally, press the setting key again, this will conrm the function and return
to the main menu. If not, please press ESC key.
4.. AUX SELECT
Press setting key, choose “AUX SELECT”, press setting key again, you can change the setting
“AUX SELECT” by the up and down key. Then, press setting key again, this will conrm the
function and return to the main menu. If not, please press ESC key.
O
Day: ballast opened, AUX room output opened; ballast closed, AUX room output closed.
Night: ballast opened, closed AUX room output; ballast closed, AUX room output opened.
5.. AUTO-SAVE TEMP
Press setting key, choose “AUTO-SAVE TEMP.”, press setting key, you can change the setting
“AUTO-SAVE TEMP” with the up and down key. Then, press the setting key again, this will
conrm the function and return to the main menu. If not, please press ESC key.
1. Dimming Temp.: 0.1°/time
2. Temp. setting rate: 0tThe min temp. of SHUTDOWN TEMP.
3. When the sensor temp. is over the setting temp., output power will decrease gradually.
6.. SHUTDOWN TEMP
Press setting key, choose “SHUTDOWN TEMP.”, press setting key, you can change the
“SHUTDOWN TEMP.” with the up and down key. Then, press setting key again, this will conrm
the function and return to the main menu. If not, please press ESC key.
1. Dimming Temp.: 0.1°/time
2. Dimming setting rate: the max temp. of dimming temp. -100°
3. When sensor temp. is over the setting SHUTDOWN TEMP, the output will be closed.
If you want to reopen the output, you need to reset the SHUTDOWN TEMP.

7.. DISPLAY SELECT
Press setting key, choose “DISPLAY SELECT”, press setting key, you can change the setting
“DISPLAY SELECT” by the up and down key. Then, press setting key again, you can choose
connected ballast with the up and down key. After conrmation, press setting key and return
to the main menu. If not, please press ESC key.
600W BALLAST
750W BALLAST
1000W BALLAST
100% others power ballast
8.. RISE/FALL
Press setting key, choose “RISE/FALL”, press setting key, You can change the setting “RISE/
FALL” with the up and down key. After conrmation, press the setting key and return to main
menu. If not, please press ESC key. *NONE: closed this function
*1-30 MIN:
Setting “RISE/FALL”, setting time to 10min, power to 100% (1000W), when opened or closed bal-
last, the power will be changed ??
Rise:“:”
Fall:“:”
When the sensor temp. is over the setting dimming temp. or SHUTDOWN TEMP., “RISE/FALL”
the function will be stopped. It will enter into auto save dimming or will be closed.
9.. SYSTEM DATA/TIME
Press setting key, choose “SYSTEM DATA/TIME”, press setting key again, you can change the
setting “SYSTEM DATA/TIME” with the up and down key. After conrmation, press the setting key
and return to the main menu. If not, please press ESC key.
Setup Years rate: 1970-2099.

10.. HUM CALIBRATE
Press setting key, choose “HUM CALIBRATE”, now, the controller will display the
correct humidity. You can change the setting “HUM CALIBRATE” with the up and
down key. After conrmation, press the setting key and return to the main menu.
If not, please press ESC key.
HUM CALIBRATE rate: ±15%
11.. TEMP CALIBRATE
Press setting key, choose “TEMP CALIBRATE”, at this time, the controller will display the correct
humidity. You can change the setting “TEMP CALIBRATE” with the up and down key.
After conrmation, press the setting key and return to main menu. If not, please press ESC key.
Temp. Calibrate: ±12.5
12. CO2 AUTO CALIBRATE
Press setting key, choose “CO2 AUTO CALIBRATE”, before calibrate, please put CO2 sensor to
the outside bout for 5 minutes, then choose YES, press setting key again and return to the main
menu. If not, please press ESC key.
13. CO2 MANUAL CALIBRATE
Press setting key, choose “CO2 manual CALIBRATE”, the controller will now show the correct
value. Then you can calibrate the CO2 value with the up and down key. After conrmation, press
setting key and return to the main menu. If not, please press ESC key.
14. CO2 SET PPM
Press setting key, choose “CO2 SET”, press setting key again, you will enter the CO2 setup.
Then you can set CO2 with the up and down key. After conrmation, press setting key and
return to the main menu. If not, please press ESC key.
CO2 rate: 0-2750ppm

15. CO2 START/STOP TIME
Press setting key, choose “CO2 START/STOP TIME”, press setting key, you will enter the CO2
START/STOP set time. Press setup key, you can set the CO2 start or stop time. After
conrmation, press the setting key and return to the main menu.
If not, please press ESC key.
CO2 Start time setup: 1-20mins
CO2 stop time setup: 1-20mins
All of the start and stop times are in the cycle time. set ON=5mins, OFF=5mins, controller will
show ON, CO2 start 5 mins and close 5 mins. When CO2 concentration reaches setup date,
CO2 will stop release, controller will show OFF.
When this cycle time is more than 40mins, the system will close the CO2 release. Controller
will show “OVERTIME”
16. FACTORY RESET
Press setting key, choose “FACTORY RESET”, press setting key, then choose “YES”. Press setting
key to conrm and return to the main menu, if not, please choose NO.
If not, please press ESC key.

Other manuals for DLC-1.1
1
Table of contents
Other OCL Controllers manuals
Popular Controllers manuals by other brands

Siemens
Siemens RAJA+ Installation, operation & maintenance instructions

Jetter
Jetter JetControlMobile 631 user manual

Mitsubishi
Mitsubishi FX3UC Series user manual

Neles
Neles ND800PA Installation maintenance and operating instructions

AtriCure
AtriCure CRYO1 installation instructions

Extreme Networks
Extreme Networks Campus Controller E2122 installation guide

CBS ArcSafe
CBS ArcSafe RSK-CS01W instruction manual

Profi-pumpe
Profi-pumpe AC10 operating instructions

Leeson
Leeson SPEEDMASTER instruction manual

Mitsubishi Electric
Mitsubishi Electric MELSEC iQ-F FX5 user manual

Johnson Controls
Johnson Controls METASYS VAV110 Technical manual

Blucave
Blucave CP-1500-1 Original instructions