OCTOPOT Hybrid Grow System User manual

O C T O P O T , L L C
s a l e s @ o c t o p o t . c o m + 1 - 8 5 5 - 6 2 8 - 6 7 6 8
R e v i s e d 1 0 / 2 2 / 2 0 2 1

Get ready to make the most out of Soil &
Hydroponics in this Hybrid Grow System!
Thank you for investing in a new way to grow!
A note from the Inventor, Christopher Jaworski:
Your
valued
purchase
is
promoting
the
continued
growth
and
development
of
our
Octopot
family
and
you
are
greatly
appreciated
.
row
in
Peace
my
Friends

3 Gallon Control Reservoir
Products at a glance
6 Gallon Base6 Gallon Lid, attached caps
Hydro Wick
3 Gallon Base
3 Gallon Depth Gage 6 Gallon Depth Gage
3 Gallon Caps

Only Fits 6 Gallon Grow Systems
The 'OG' OctoGrid
Strapped Gro Sleeve
XXL 12 Gallon Gro Sleeve The XXL OctoGrid
Cupped Gro SleeveOriginal Gro Sleeve
Fits 3 and 6 Gallon Grow Systems
Grow Media
containment options

3 Gallon Octopot Hybrid Grow System
Place Hydro Wick® inside of Gro Sleeve® with cup down,
it should fit tight in the tapered end.
Fold the top of the Gro Sleeve® down no more than two
inches to provide for proper moisture gradients.
Set Gro Sleeve® with Hydro Wick® into the Hydro
Reservoir.
Place Depth Gauge inside hole, as shown to the left
Read System Requirements before filling with growing
media.
Follow Planting Instructions for planting seeds and clones.
Follow Octo-Dome instructions for planting cuttings.
3 Gallon System Includes:
3 Gallon Hydro Reservoir Base, Hydro Wick, Standard Gro Sleeve, &
3 Gallon Depth Gage
3 Gallon Cap
Product Assembly
6 Gallon Octopot Hybrid Grow System
Twist caps off Hydro Reservoir lid.
Insert Depth Gauge into lid with white float down. Set
orange ball on top.
Fit lid inside Hydro Reservoir lip.
Place Hydro Wick® inside of Gro Sleeve® with cup down,
it should fit tight in the tapered end.
Fold the top of the Gro Sleeve® down no more than two
inches.
Set Gro Sleeve® with Hydro Wick® into the Hydro
Reservoir.
Place caps. (optional)
Read System Requirements before filling with growing
media.
Follow Planting Instructions for planting seeds and clones.
Follow Octo-Dome instructions for planting cuttings.

6 Gallon System Includes:
6 Gallon Hydro Reservoir Base & Lid, Hydro Wick, Standard Gro
Sleeve, Depth Gage, & 4 Caps
Control Reservoir
Install Float Valve into Hydro Reservoir:
Insert Float Valve with one rubber washer on the inside of the Hydro Reservoir side
wall.
Adjust the position of the Float Valve making sure that it will rise straight up to shut
off.
Tighten nut firmly after positioning the Float Valve.
Connect the 1/2" Adapter to the outide of the float valve.
Install a 1/2" (or 3/4") bulkhead in the lower hole on your control reservoir
**The OctoBuoy was discontinued in 2021
replaced by an adjustable float valve
Control Reservoir Includes:
3 Gallon Hydro Reservoir Base, with pre-drilled holes,
1/2" adjustable float valve, & (1/2" bulkhead, 1/2" shut
off valve, & 1/2" tubing) for external storage
connection.
see auto-fill plumbing for external connection instructions

Install 1/2” bulkhead into your external water reservoir.
A 1 3/8" hole is required in your external reservoir
Layout 1/2” tubing between your control reservoir and your external water reservoir.
Cut 1/2” tubing into two pieces
Connect one end of the first piece to the 1/2” bulkhead in the external reservoir
Connect 1/2” shut off valve on the other end
Connect second 1/2” piece of tubing to the other end of shut off valve
Connect the other end of the second piece to the control reservoir's float valve
Install bulkhead fittings into the holes provided in each Hydro Reservoir.
Make sure the rubber gasket is installed on the inside of the Hydro Reservoir wall for
each grow system
Determine your optimal plant spacing and set all the Hydro Reservoirs in place.
Layout tubing, tees, and drain valves
One shut-off valve is installed right after control reservoir and the other drain valve is
installed at the end of the line
After all components are laid out for appropriate spacing, measure and cut the tubing
Assemble all plumbing
For easy installation, use a little lubricant on barbed ends of fittings and inside edge
of tube
Assembly Guidelines:
Bulkhead Shut off Valve Barbed Tee Tubing
Auto-Fill Plumbing
NOTE: Carefully measure space requirements and determine layout before cutting your tubing.
This system is designed around the concept that water finds its own level. Your Control
Reservoir & Hydro Reservoirs must be on a level surface (use shims if necessary)
Auto Fill Pluming Includes: Bulkheads, Shut off Valves, Tees, & Tubing. Available in 1/2" and
3/4".

Slowly turn on water supply and check each Hydro Reservoir for leaks. Run water until it
covers the bottom of all the Hydro Reservoirs to make sure each one is at the proper level.
Adjust individual Hydro Reservoirs with shims or blocks as needed.
NOTE: WHEN CHECKING FOR PROPER WATER LEVELS DURING INITIAL SET UP BYPASS THE FLOAT VALVE IN THE CONTROL
RESERVOIR TO FILL HYDRO RESERVOIRS FASTER. SIMPLY RUN YOUR WATER SUPPLY DIRECTLY INTO THE TOP OF THE
CONTROL RESERVOIR. CONTINUE THAT WAY TO FILL FOR FIRST TIME. BE SURE TO PLACE YOUR FLOAT VALVE BACK IN ITS
PLACE, WHEN FINISHED.

Octo-Grid
Unroll the Octo Grid
Place wire braces for Hydro Wick®
6G: 2 Braces positioned in a V shape; across second horizontal wire up from the bottom.
12G: 4 Braces positioned in an # shape; across the first horizontal wire from the bottom.
Place Octo Grid into the Hydro Reservoir
6G sits inside of the lid.
12G sits on top of the lid.
Insert Grid Liner inside Octo Grid
Fold the Liner over top of the Octo Grid, and down the outside of the Grid
Insert the Hydro Wick®
The 'OG' 6 Gallon OctoGrid Includes:
Galvanized Steel 'Grid' - holds 6 Gallons of grow media, 2 braces, & Grid Liner
The 'XXL' 12 Gallon OctoGrid Includes:
Does not fit the 3 Gallon Octopot Hybrid Grow System
Galvanized Steel 'Grid' - holds 12 Gallons of grow media, 4 braces, & XXL Grid Liner
6 Gallon
V Shape
Brace Placement:
12 Gallon
# Shape

Water over the top of the growing media just once approximately one quart to half a
gallon. Watering over the top at the time of planting settles the soil, removes air pockets
and triggers capillary action.
Cuttings are well fed in the Octopot Grow System while they develop the secondary
root system inside of the Hydro Reservoir. It is normal for the top layer of growing
media to feel dry.
WARNING - Do not water over the top of the soil after initial planting. Plants sense
water in the Hydro Reservoir and grow roots in that direction. See
www.Octopot.com/how-octopots-work for information about Hydrotropism.
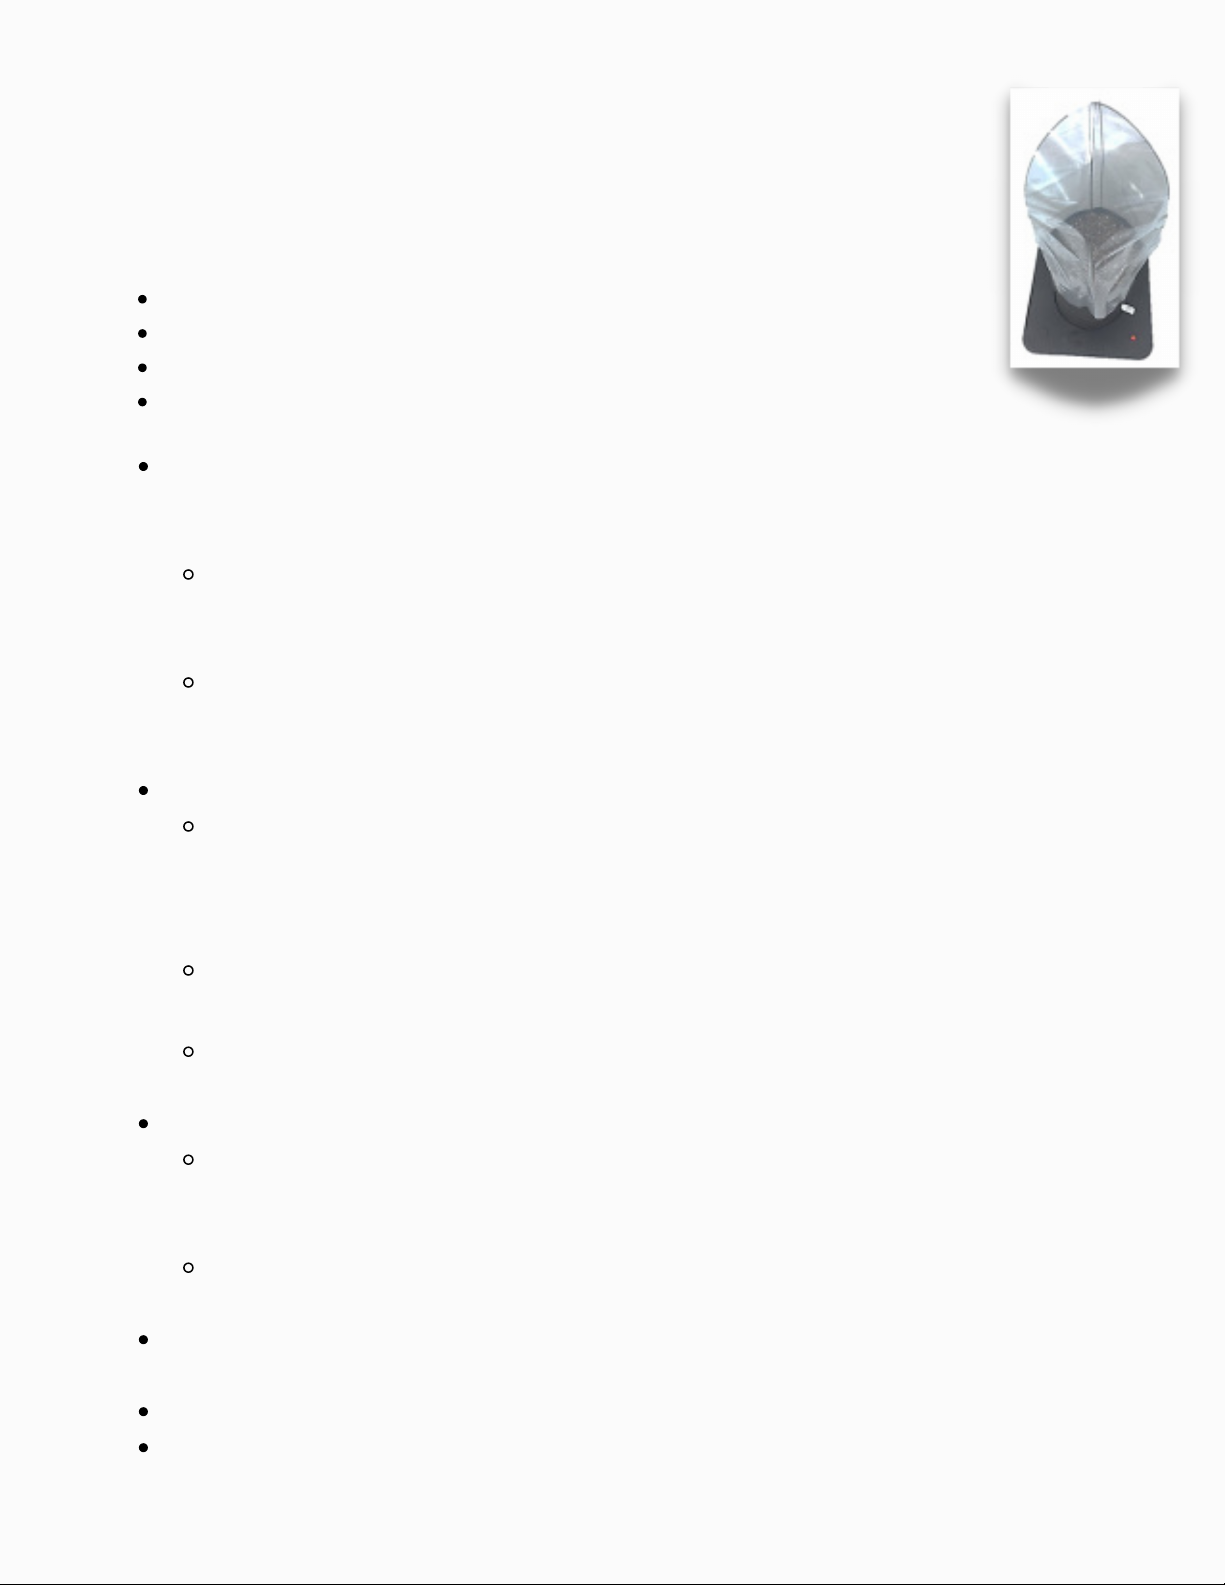
Place plastic humidity dome over the arched wire frame.
For peat-based soil, the humility dome should overlap the outside of the Gro Sleeve®
by only three to four inches. Fold the humidity dome about 4 inches up before placing
onto the Octopot. Peat based soil may be too moist if the dome covers the entire Gro
Sleeve®
When using coco coir, do not fold the humidity dome at all. Coco coir is dryer than
peat-based soil and the extra moisture is needed for the cloning process
When using the XXL OctoGrid or XXL Sleeves, wire frame and bag will not fit over
entire surface. Place it directly over the center and roll the bag up as necessary.
Watering Method:
For peat-based soil, add water to the Hydro Reservoir up to the first mark on the
Depth Gauge. Maintain up to the low level of water for approximately 2 weeks to
initiate the rooting process.
When using extremely light coco coir growing media keep the water level at the
center mark of the Depth Gauge.
The humidity dome has four ventilation holes in the top. If condensation builds up for
more than 48 hours, simply enlarge the ventilation holes with scissors.
Optimum room temperature for the Octo-Dome rooting process is 72 -75° Fahrenheit.
Octo-Dome may be removed after approximately two weeks.
OctoDome
Use Octo-Dome Cloners with all Octopot® Grow Systems. Go from plant cutting to
harvest in one container without transplanting.
Most plants will develop tap roots using this method. Tap roots are a super highway
for nutrient uptake. Plants with tap roots grow faster and grow dense branching.
Assemble your Grow System according to instructions.
Follow Planting Instructions to prepare your grow system for the plant cutting
Prepare plant cutting according to root stimulator or hormone instructions.
Plant the cutting into the growing media of the Gro Sleeve®/Grid Liner, only one cutting
per grow system

System Requirements
**For best results plant seeds, unrooted cuttings, or rooted clones in your Octopot Hybrid Grow
System. Octopot facilitates plant root development, therefore transplanting mature plants with
established root systems will not bear optimal results.
Grow Media
Coco Coir Option
Always follow the 60/40 rule! Specifically, use 60% high quality soilless
mix with 40% perlite.
Always follow the 60/40 rule! Specifically, use 60% high quality Coco Coir
with 40% perlite. Include organic amendments such as guanos, composts,
composted manures, etc.
*Fox Farm Coco Loco is a professional blend that has the correct ratio needed
for the Octopot, including the organic amendments necessary for success.
Grow Media to Avoid
Do not use hydroton, clay pebbles, or rock wool.
Super soils can be too heavy and hold too much moisture, limiting air exchange which
damages plants causing root rot. Also, nutrients in super soils tend to be used up to early and
run out too soon in the growth cycle, which starves the plant. Super soil may work with the
Octopot, IF it has the correct ratio of perlite (40%) and enough controlled release nutrients to
support two root systems, not just one.
Sunshine Mix #4 is a professional blend that has the correct ratio needed for the Octopot.
Premier Horticulture (HP) soil also contains the correct ratio.

Planting Instructions
Assemble your Octopot Grow System according to instructions.
Review System Requirements before choosing growing media and watering method.
Fold down the Gro Sleeve® no more than 2 inches at the top (Does not apply for Octo-Grid
Liners)
Moisten the growing media by adding some water to the bag before filling the Gro
Sleeve®.
If using un-amended media, add organic amendments when moistening
Be sure that your growing media has 40% perlite mixed well throughout – never create
layers of perlite and growing media.
FIRMLY press moistened growing media into the Hydro Wick® before filling the Gro
Sleeve®.
Pull Gro Sleeve® gently upwards while FIRMLY PACKING growing media, make sure to
pack well along the outside edges – firmly packed Gro Sleeves® should not slouch during
the growth cycle.
Alternative Filling Method:
Cut the bottom out of a standard five-gallon bucket.
Place Hydro Wick® inside of Gro Sleeve® with cup down, it should fit tight in the
tapered end.
Set Gro Sleeve® with Hydro Wick® into the Hydro Reservoir.
Place the bucket upside down over the Gro Sleeve.
Fold Gro Sleeve® edge over the bucket
The support of the bucket makes packing the growing media FIRMLY into the Gro
Sleeve® easier.
Simply remove the bucket by pulling it upward after filling the Gro Sleeve®.
Fold the top of the Gro Sleeve® down no more than two inches. .
Insert seed, unrooted cutting, or rooted clone into the grow media of the Gro Sleeve® –
only one plant per grow system.
Follow the directions for Octo-Dome® Cloner for seeds & unrooted cuttings.
Transplanting mature plants with an established root systems is not recommended
for anything exceeding 3 gallons in size.

Water over the top of the growing media just once approximately one quart to half a
gallon. Watering over the top at the time of planting settles the soil, removes air pockets
and triggers capillary action.
Young plants and seeds are well fed in the Octopot Grow System while they develop
the secondary root system inside of the Hydro Reservoir. It is normal for the top layer
of growing media to feel dry.
WARNING-Do not water over the top of the soil after initial planting. Plants sense
water in the Hydro Reservoir and grow roots in that direction. For more information
see www.Octopot.com/how-octopots-work for information about Hydrotropism
Choose a watering method (See System Requirements-Watering) then add water to the
Hydro Reservoir according to your preferred watering method.
Add pre-mixed nutrients/water into the Hydro Reservoir.
Note: Adding fertilizer at the time of planting can be delayed if your growing media is
already infused with fertilizer. (See System Requirements-Nutrients)
NOTE: PLANTS GROW ROOTS BEFORE SHOOTS, SO DON'T WORRY IF THE PLANT APPEARS
UNCHANGED FOR A WEEK OR SO.

Nutrient Requirements
Add premixed water soluble organic or conventional fertilizers and nutrients directly to the Hydro
Reservoir. Adding fertilizer at the time of planting can be delayed if your growing media is already
infused with fertilizer.
Note: You may find that you are using less nutrients with our Hybrid Grow Systems.
Why? Because Octopot Hybrid Grow Systems are closed systems that never waste fertilizer or
nutrients from washout or run off.
THE RULE FOR OCTOPOT IS: LESS IS MORE
pH & PPM
pH performs an enormous role in PPM concentrations. PPM can be spot on but if pH is off, PPM is rendered
meaningless because the plants can’t absorb the nutrients they need.
Learning to adjust PPM and pH can be challenging. As you adjust one, the other will react. As a rule of
thumb, it is more important for pH levels to be correct than PPM levels.
The use of a TDS or EC meter to measure PPM is a precise way of ensuring that your plants receive exactly
the right amount of nutrients.
Note: EC and TDS water meters fit into the Octopot reservoir hole, making it simple to measure and control feeding!
Seedling Stage - 100-400
Early Vegetation - 500-800
Late Vegetation - 800-1200
Early Flower - 1200-1400
Mid Flower - 1400-1600
Late Flower - 1000-500-0
Indica
Growth - 18 hour photoperiod
Bloom - 12 hour photoperiod
Harvest
Seedling Stage - 100-400
Early Vegetation - 400-500
Late Vegetation - 500-600
Early Flower - 600-800
Mid Flower - 800-900
Late Flower - 800-500-0
Sativa
Growth - 18 hour photoperiod
Bloom - 12 hour photoperiod
Harvest
Throughout the plant’s life cycle, cannabis plants have distinct nutritional needs.
There is an optimal level of PPM & pH for each phase of development.
These are only guidelines; please observe your plants and research your strain for more detail specific guidance.
PPM Levels

Optimal pH Range
After mixing nutrient solution or fertilizers, test your pH and adjust your pH if needed, to between 5.5 -
6.5, before adding the solution to your reservoir. This is the optimal range for your Octopot Hybrid
Grow System.
NOTE: PH SWINGS WILL OCCUR AS NUTRIENTS ARE TAKIN IN BY THE PLANT DURING ITS GROWING
CYCLE.
pH affects the availability of nutrients that a plant can absorb during the growth cycle. pH is a RANGE,
not an exact number.
Watering
Octopot Hybrid Grow Systems will water plants for up to 10 days, depending on the size and stage of
the plant. Use to depth gage to determine when to fill your reservoir.
Warning: Do NOT water plants over the top of the soil after initial planting. It will prevent the hydro
roots from forming properly. Plants sense water down in the Hydro Reservoir and grow in that
direction. Check out our website for more on Hydrotropism!
Growing Outdoors: Rain water will escape the system so
plants are never over watered. Excessive rain water during
early stages of plant growth may prevent root growth into
the Hydro Reservoir.
Remove any dead roots inside the water/reservoir
Refill the Hydro Reservoir with fresh water, and continue growing!
If you let the Hydro Reservoir go dry for an extended period of time, you can kill the hydroponic root
system. Typically the terrestrial roots inside the Gro Sleeve/Liner will stay alive for days after the loss
of the hydroponic root system, keeping your plants alive.
Follow these steps to Recover from Dehydration:

Weeks 1-2: Maintain below Level 1 - Root
Migration into the Hydro Reservoir (Approx 2-3
weeks)
Weeks 3-5: Maintain Level 2 - Aids in Root
Establishment and Advancement (Approx 2-3
weeks)
Weeks 6+: Maintain Level 3 - Maximizes Plant
Growth (Approx 4-6 weeks)
Last 2-3 Weeks: Maintain Level 2 - Plant
Growth begins to Slow
Last 1-2 Weeks: Maintain Level 1 - Plant
Growth preparing for Harvest
High Performance Method
GROW PHASE
18-24 hr light schedule
12/12 hr light schedule
1.
HARVEST PHASE
Auto-Fill Float Valve Settings
The original design included the use of a 1/4" fixed valve, paired with Octo Buoys. This design
was discontinued in 2021, and replaced with a 1/2" adjustable float valve, no Octo Buoy
required.
Choose a Watering Method
Fill the Hydro Reservoir at the time
of planting
Refill anytime, just maintain a
water level NO LESS THAN Level 1
Set it and Forget it
1.
2.
For the Octo Buoy:
Level 3 = No Buoy
Level 2 = Single Buoy
Level 1 = Double Buoy
How to Set you're Adjustable Float Valve
Push the float down for
"forward" and pull up for
"backwards"
Start by finding the neutral position
The lines will be in line with each other, on both sides of the
adjuster
Level 3 = Neutral
Level 2 = One Click Forward
Level 1 = Two Clicks Forward

Flushing
Individual Octopot Hybrid Grow Systems
To flush a plant at the end of the growing season, simply stop adding
fertilizer/nutrients to the Hydro Reservoir for the last 7-10 days and add fresh water
instead
Auto-Fill Hybrid Grow Systems
When using the Auto-Fill system, simply shut off the water source and open the line
to drain the system to empty. Refill with fresh water!
There is NO reason to drain Octopot Hybrid Grow Systems DURING the grow cycle,
unless you have over-fertilized your plant
Empty the reservoir with a small pump, siphon, or shop vac
Remove any dead roots inside the water/reservoir
Refill the Hydro Reservoir with fresh water, and continue growing!
Follow these steps to Recover from Over-Fertilization:
In drastic cases, you may need to flush the soil and remove the leachate.

Air Stones
Run 10-15 min per hour, at low pressure
Octopot Hybrid Grow Systems are designed to oxygenate plants without Air
Stones. Octopots are a passive, not active, hybrid hydroponic system. Adding Air
Stones to your Octopot can negatively affect the amount of dissolved oxygen in
the water, causing wider pH swings.
If you feel the use of Air Stones is necessary, or just want to try:
Suspending heavy Organic Teas in the Hydro Reservoir may require
the addition of an Air Stone to keep nutrients well mixed.
Octopots are bottom fed systems, and top watering/feeding is not
generally recommended. However, organic nutrients can be washed
into the soil approximately once per week.
BENDING THE RULES FOR ORGANIC TEAS
Octopot Enhancement Notes
Recirculating Pumps
Ventilation
Lighting
Humidity Control
Temperature Control
IPM
More to come on the following Topics (WIP):

Octopot one year
satisfaction guarantee
Use the Contact form at Octopot.com/warranty
Email [email protected] to begin the process with one of our staff
Call us at 855-628-6768 during normal business hours (EST), Monday through
Friday, 9:00 a.m. to 5:00 p.m.
If for any reason you are not completely satisfied with your Octopot-branded
product, simply return it within one year for a full refund of your purchase price.
This guaranty only applies to Octopot-branded products purchased directly from
Octopot LLC, and does not include shipping and handling.
You can return your Octopot-branded product and receive your full refund in the
following ways:
A copy of your receipt or other proof of purchase is necessary for a full refund.
Used items must be cleaned before returning to avoid handling fees. If there is a
problem with your Octopot-branded product, please see Octopot Limited Warranty
for warranty service.
Octopot is available via email, telephone, Facebook Messenger (available on our
website as well). We gladly welcome customer communication and are willing to
help you along the way, should you need our assistance in any way! Our goal is
100% Customer Satisfaction!

Octopot, llc
limited warranty
This product has been manufactured by Octopot, LLC ("Octopot") and this warranty is our
promise to you to stand behind our product. This warranty is non-transferable and extends
only to you as the original purchaser of a new product from Octopot or its authorized resellers.
This warranty applies to warranty service only. If for any reason you are not satisfied with
your Octopot-branded product, please see Octopot's one-year 100% satisfaction guarantee for
a full refund. Nothing in this warranty is meant to limit our promise to you and your rights
under our guarantee.
This warranty covers any defects in materials or workmanship in the following parts
("Warranted Parts") and gauges ("Warranted Gauges"):
30 Day Warranted parts: GRO Sleeve, 6 Gallon Depth Gauge, 3 Gallon Depth Gauge
5 Year Warranted Parts: 6 Gallon Hydro Reservoir, 6 Gallon Base, 6 Gallon Lid, Hydro
Wick, 3 Gallon Hydro Reservoir
What Does This Warranty Cover?
During the applicable warranty period, Octopot will replace any Warranted Parts or Warranted
Gauges that fail under normal use as a result of a defect in material or workmanship and has
been used according to Octopot’s published instructions. This remedy of replacement is the
exclusive remedy to you under this warranty, and Octopot gives no other guarantee, warranty,
or condition, express, statutory, or implied. No one else, including, without limitation,
Octopot's agents or authorized resellers, may give you any guarantee, warranty, or condition
on Octopot's behalf which is contrary to this warranty.
This warranty does not cover:
Products sold outside the United States or Canada
Products that are used contrary to Octopot's published instructions
Product damages as the result of extreme weather conditions (0 °F/−17.8 °C)
Products subject to accident, mishandling, negligence, alteration, abuse, or
misuse
Scratched, dented, or other cosmetic damage
Repairs made by anyone other than Octopot
What Does This Warranty Not Cover?
Popular Greenhouse Kit manuals by other brands

Dancover
Dancover HGSA1010 manual

Kogan
Kogan CERTA CTGAGH211SA user guide

Robinsons
Robinsons Renown Dwarf Assembly instructions

Palram Applications
Palram Applications BeIIa 8x8 instructions

One Stop Gardens
One Stop Gardens 47712 Owner's manual & safety instructions

ModuLaro
ModuLaro GH192002 Assembly, installation and maintenance manual

STC
STC Clear View Assembly instructions

FarmTek
FarmTek Growers Supply 115554 manual

Palram
Palram CANOPIA AMERICANA 12x12 / 3.7x3.7 How to assemble

Sunnydaze Decor
Sunnydaze Decor HB-876 Assembly instructions

Bio Green
Bio Green GTP Installation and operating instructions

Holman
Holman GH1001 instruction manual