USER GUIDE
IMPORTANT
DUTY CYCLE
This device must be operated
on a duty cycle.
Failure to comply may result in
extreme damage to unit and
may void warranty.
IMPORTANT
NEVER TOUCH
any Halogen Lamp with bare
fingers. Oil from your fingers will
shorten lamp life. Never move
fixture until lamp has enough
time to cool. Lamps are not
covered under warranty.
For service contact your local authorized ODYSSEY dealer or call 626.334.0800
WARNING
CAUTION:
UNPLUG UNIT
To avoid electrical shock unplug
unit before servicing!
For Lamp Replacement:
Only use exact same voltage &
lamp type
LE-313
USER MANUAL
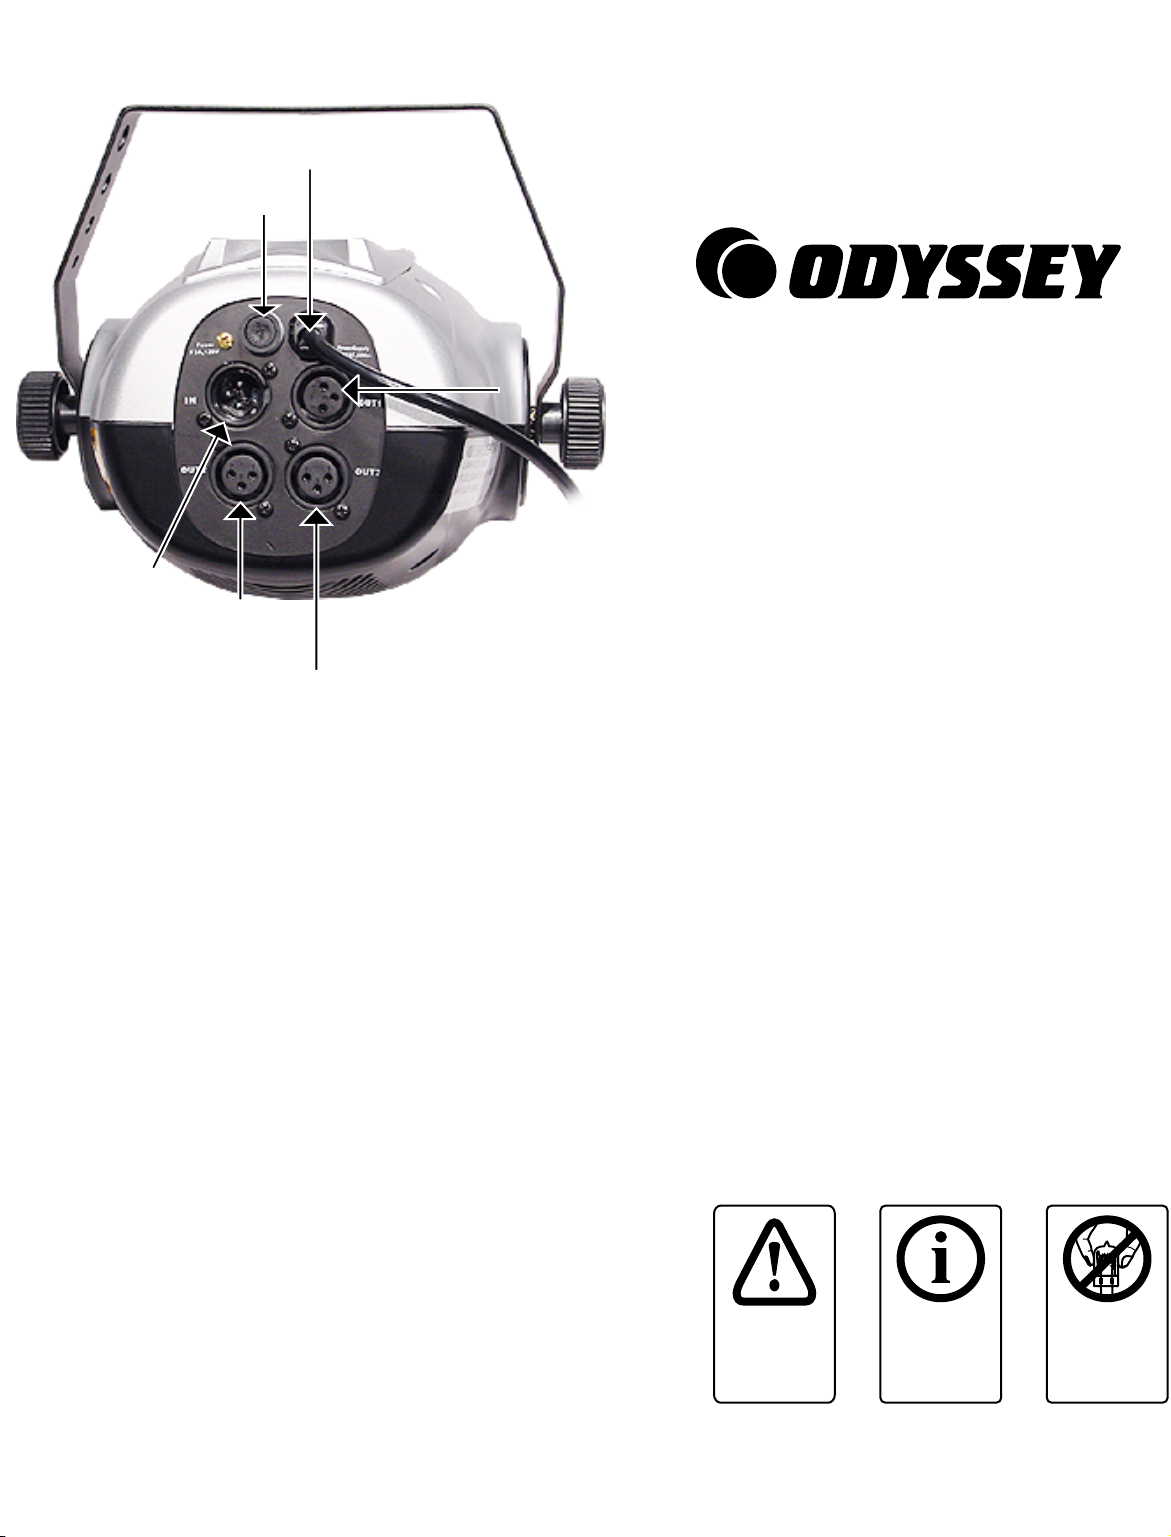
CONTROLS & FEATURES (master fixture)
1. Power cable- Connect only to a 120V power outlet. Do NOT plug in fixture if the ground prong has been removed or broken off.
2. Slave #1 Output- This output plug will control the operation of any slave unit as slave #1.
3. Slave #2 Output- This output plug will control the operation of any slave unit as slave #2.
4. Slave #3 Output- This output plug will control the operation of any slave unit as slave #3.
5. Remote Control Input- This plug input is designed ONLY for the remote enclosed in the box
for this system. (DO NOT plug any other devise, any other devise will damage the unit and
will void the warranty).
6. Fuse Holder- This component holds the 3 amp fuse. When replacing the fuse, always replace
with the same exact size and amperage.
SET UP
DATA CABLE REQUIREMENTS
his G-FORCE system includes three standard 3-pin XLR microphone cables for data
input and data output. If you require extended lengths, you may use any standard
microphone cable. Remember that DMX cable must be daisy chained and can not be split.
SOUND ACTIVE OPERATION
his function allows the G-FORCE to run to the beat of the music without any type
of controller.
1. Install or mount your fixtures in a secure/safe manner.
2. Using the XLR cables connect all 3-"slave" units to the rear of the "master" unit.
3. Connect the Control switch to the rear of the "master" unit. The control switch
will allow you to activate the sound mode and also blackout all your fixtures.
4. Connect ALL (4) fixtures to 120V AC.
5. Now press the button on the Control switch and the green LED will turn "on". Once
the green LED is turned on your G-FORCE system will chase via sound active.
a
e 2
www.ODYSSEYGEAR.com
Thank you for choosing Odyssey Lighting. These lighting effect
features have preinstalled lamps and are ready to be used.
IMPORTANT!
Please read this User Guide before attempting to operate unit.
a1. Power C ble
1. Power C
5.
1. Power Cable
3. Slave 2
Output
4. Slave 3
Output
5. Remote
Control
Input
6. Fuse
Holder
2. Slave 1
Output
STAR BLAZER


