IMPORTANT NOTES
1
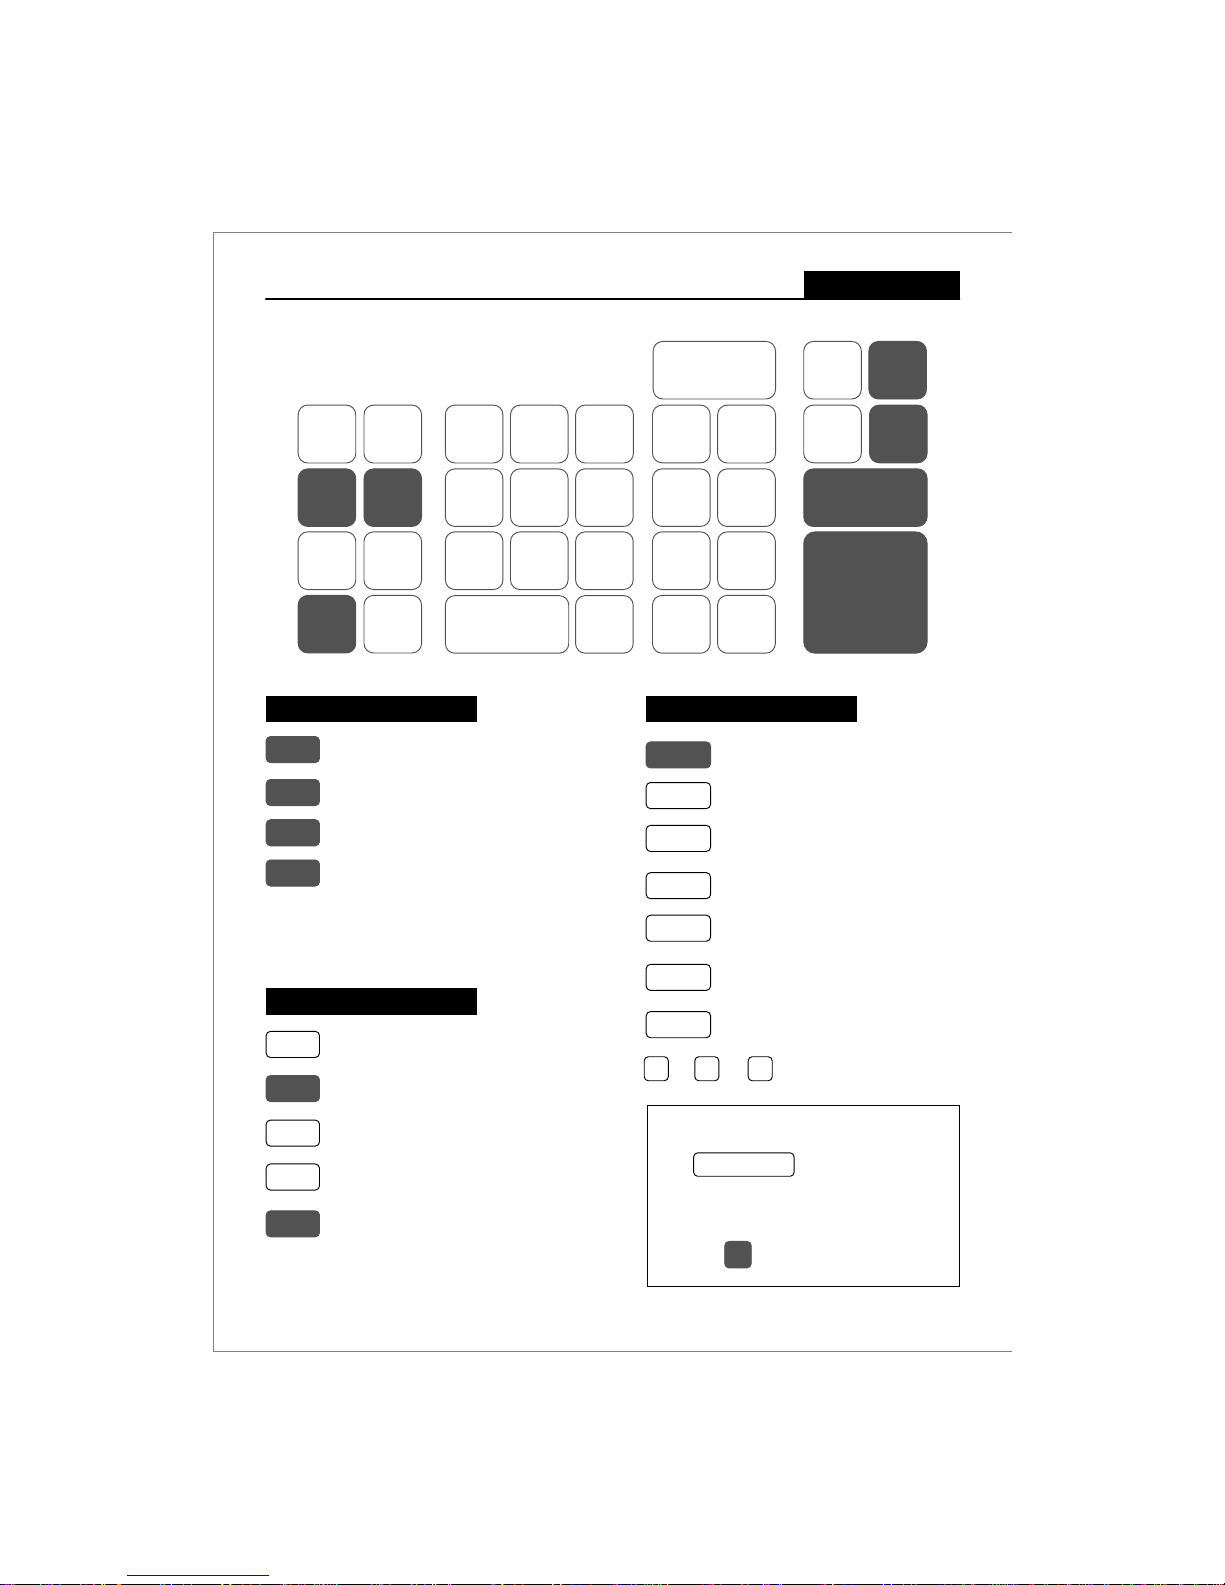
CMS-118LD Electronic Cash RegisterUSER GUIDE:
Safety notes & precautions
Printer mechanism
To ensure long, trouble-free operation, observe the following instructions:
Never
• print without any paper installed.
• pull the paper while printer is operating.
• use poor quality paper.
• insert used paper rolls.
• tamper with the printer using hard objects.
• move the printer drive by hand.
Pay attention to the markings indicated at theend of the paper roll. Change the paper roll immediately.
Have the cash register / printer mechanism serviced regularly by an authorised service agent.
Operation notes
Cash Register Memory Clearance
The CMS-118LD requires a daily clearance of the Departments
Memory. If the Departments are not cleared by Z-Report' daily,
Department keys will not operate and you will have to re-program
your machine.
Data Backup Batteries
Three new “AA” batteries must be installed in the cash register to
prevent data and user-programmed settings from being erased
from the memory in the event AC power is switchedoff, or
accidentally disconnected, or in case of power failure.
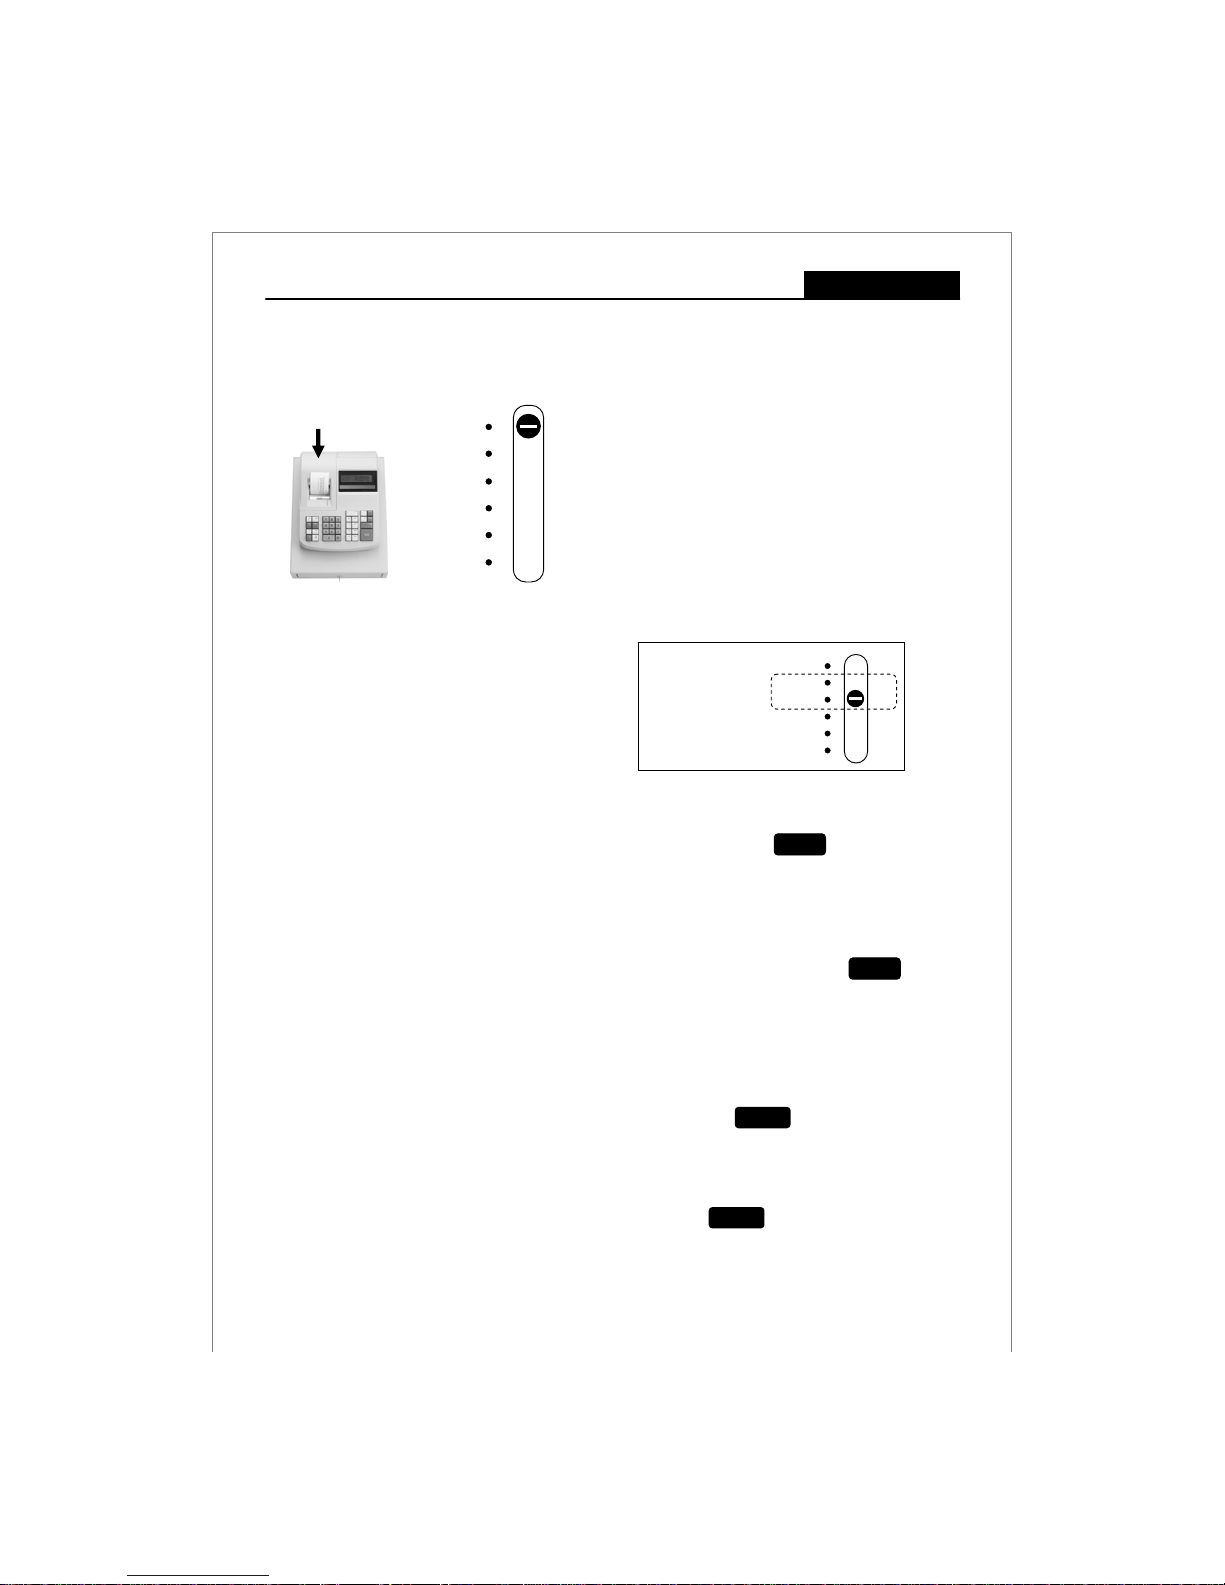
Locate the batteries compartment and
control switch under the printer lid.
Ensure that the mains power supply corresponds
to that specified on the rating label of the ECR.
Use only batteries of the same type as supplied!
Use of other types may cause malfunction.
Install the supplied batteries according to the
polarity (as displayed on the battery compartment). Do not place the ECR next to liquid dispensing
equipment e.g.. wash basin, soda machine, etc.
Dispose off the batteries in an environmentally
friendly manner, according the local regulation.
Clean any dust from the cash register by wiping it
gently with a dry cloth. Never use water or
solvents such as thinner, spirits, etc.
Never attempt to repair the ECR yourself.
Repairs by authorised service agent only.
,
6
#
+
-
aNever insert objects, such asscrewdriver, paper
clip, etc. in the ECR. This could damage the ECR
and exposes you to the risk of an electric shock.
ÃDo not expose the ECR to extreme temperatures.
E.g. – direct sunlight, cooking equipment, etc.
LThis cash register is exclusively intended for use
in processing cash register business indoors. Any
other use is considered unintended use.