OFFNOVA im-pression 2 User manual

User Manual
• Please read carefully before use
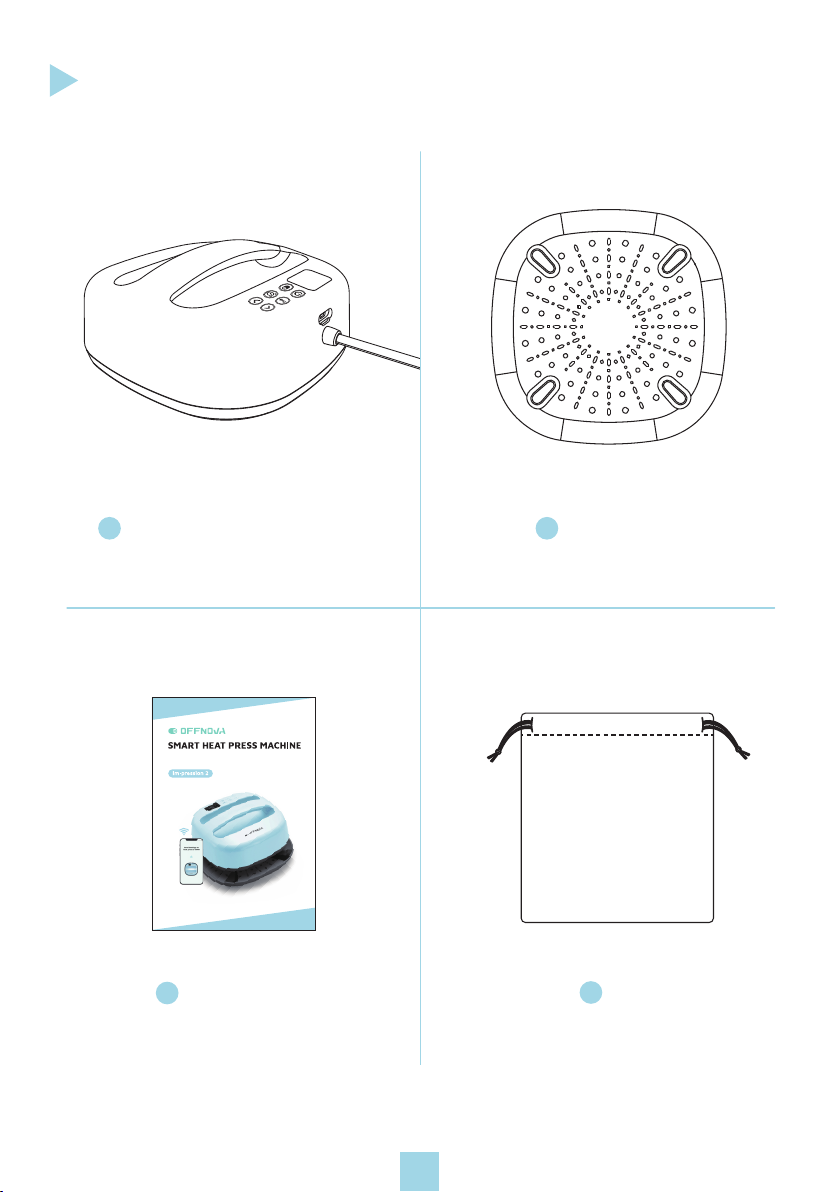
What’s in the box
1Smart Heat Press Machine x1 2Safety Base x1
4Bag x1
3User Manual x1
1
User Manual
• Please read carefully before use
Get to know your OFFNOVA smart heat
press machine
2
13
4
2
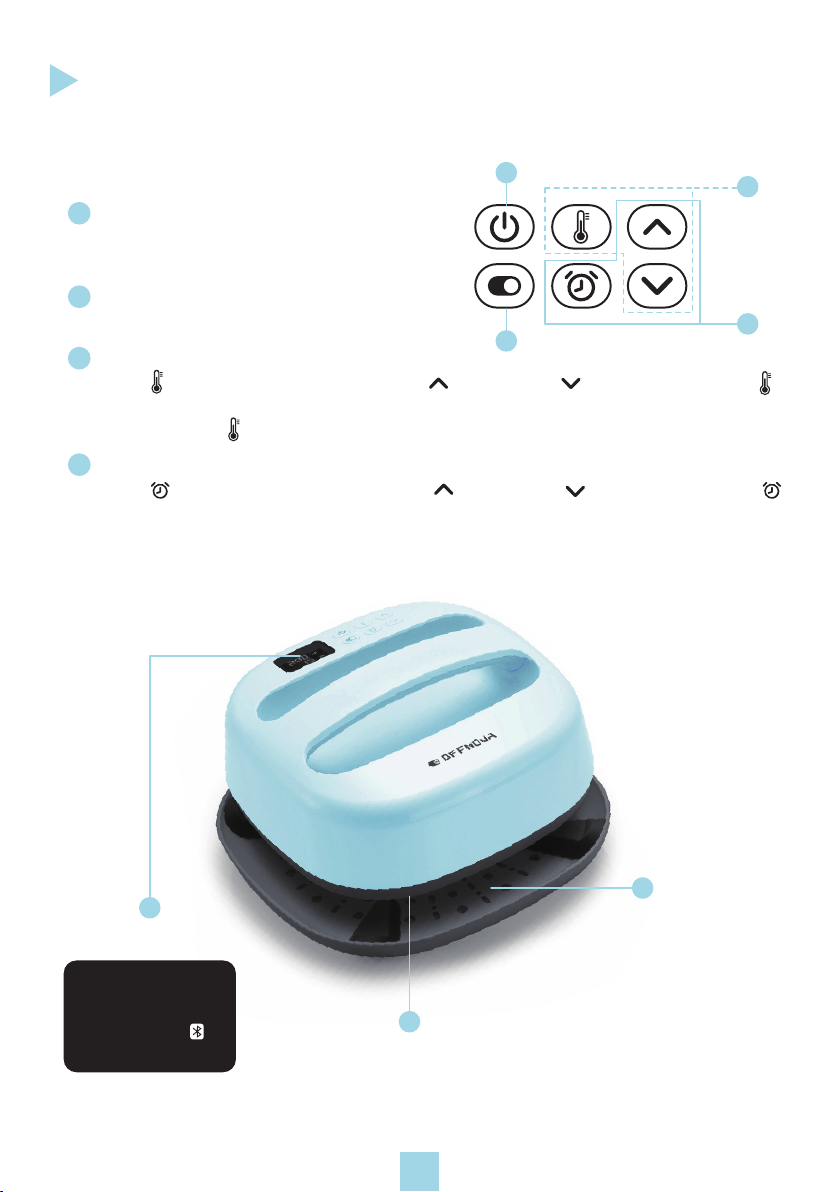
Power ON/OFF
Press to switch on the machine.
Press again to turn off.
Timer Control
Press the button to start the countdown.
Set Temperature
Press button, adjust value with plus ( ) and minus ( ) buttons, then press
to confirm.
Long press the button can switch from Fahrenheit to Celsius.
Set Time
Press button, adjust value with plus ( ) and minus ( ) buttons, then press
to confirm.
3
4
TIPS: Temperature, time and pressure vary by base material and iron-on type.
1
2
Temperature/ Time
5
6
7
55 °C
S
5
Safety Base
Heat Plate
DOT NOT touch during use, It’s very hot.
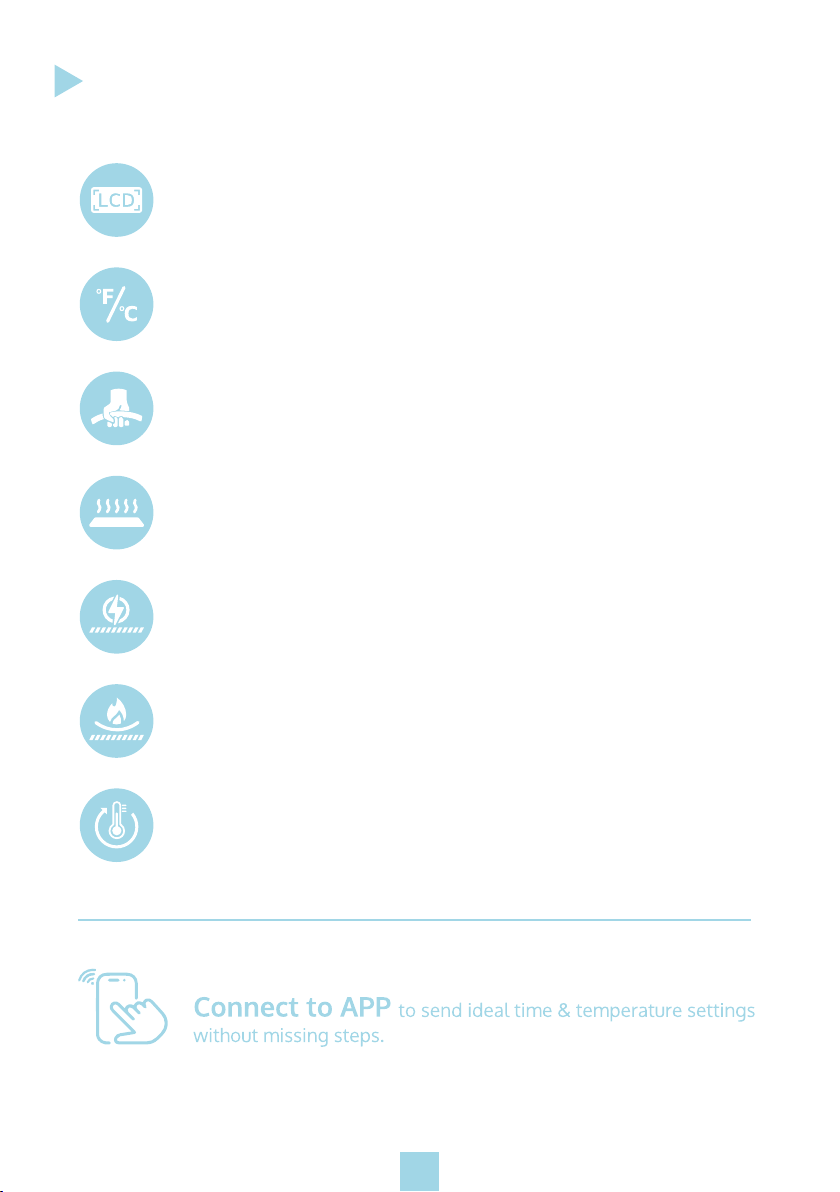
Glance Features
3
LCD Screen Digital Controls
Clear display, easy to set temp and time.
Time: 0~600s
Fahrenheit / Celsius Option
Put the calculator away. No more converting to your preferred setting.
Temp: 210~400°F / 100~205°C
Ergonomic Handle
Counterbalanced, back that mass up, ensure your smooth operation.
Evenly Heated Plate
Highly durable aluminum alloy, provide flawless transfers.
Insulated Antislip Base
Not only a placement to settle the machine also prevent your
workbench away from scorch.
Fireproof Design
Made with premium fire retardant ABS&PA.
Auto shutoff & Overheat protect
The machine shuts off automatically after 10 mins without operation.
Over heat protector is installed.

How-tos
4
1. Operate it with APP
1) Download APP
Download app "Clabel mini" from Google Play Store
or Apple APP Store and install it.
2) Turn on the bluetooth on the phone, click “setting”
and set “bluetooth” on
3) Get connected with smart heat press, create your
project by following the instruction step by step
from your mobile device.
2. Manual control
1) Plug in and power on the machine.
Flick the switch and hold for 2 seconds to switch on the printer. Check if
the LED indicator is on.

5
330
30
OF
S
330
27
O
F
S
210
15OF
S
320
15OF
S
330
18OF
S
325
15OF
S
2. Set temperature and time based on your HTV types.
Set temp: Tap the temperature button, press ( ) to plus or ( ) to minus. Tap he
temperature button again to confirm the setting.
Set time: Tap the timer button, press ( ) to plus or ( ) to minus time. Tap the
time button again to confirm the setting.
3. Wait for the machine’s heat up. Place your vinyls on the canvas bag / T-shirt and
make sure the shiny side is facing up.
4. Click the timer button to count down till the display shows 0s and the machine
beeps. During the process, please gently press the machine.
5. Turn over the canvas bag and reheat for 15s.
6. Checking if your vinyl is warm peel or cool peel,
then peel off the transparent film accordingly.

6
Troubleshooting
Q: Why does the machine start counting down when I press the timer button before the
temperature reaches the setting value? Is this normal?
A: Please do not worry about it, it is normal. If the timer button was tapped by accidence,
we suggest that you can switch off and remove the machine timely to avoid damaging
the patterns and fabrics. After that, please restart the machine and wait for its heat-up.
Q: What are the tips for successful transfers with Hobby Press?
A: For perfect transfers that last, three things are important:
1. A firm, even surface. Iron boards and plastic tables can not provide a firm, even
surface needed for successful transfers. We suggest you can use a silicone mat.
2. Use the recommended settings for the iron-on and base material you're using.
3. Make sure you apply firm pressure when transfer.
Q: How hard do I have to press?
A: Some applications call for "gentle" pressure, and some call for "firm" pressure. Firm
pressure means press down with two hands and 15-40 lbs. of body weight. Gentle
pressure means one hand with 5-15 lbs. of body weight. In all cases, a waist-high
table is recommended for ease in applying the recommended pressure.
Q: When pressed onto the garments, the color of the design is faded?
A: Reason comes from three aspects, the pressure is too low, the temperature is not
hot enough or the design has not been pressed for enough time. You may need to
try more to get right temp, time and pressure.
Q: I followed the instructions and my iron-on didn't stick. What happened? How do I
get it to work?
A: The most common reasons for your images not sticking:
1. Press machine did not make full contact with the base material. This could be because
of seams, zippers or anything else that will cause you to not have a flat surface.
2. Verify that your Press machine is set to the recommended settings.
3. Be sure heat has been applied to both the front and the back of the design for the
recommended time.
4. Re-touch the front and back of material with heat for an additional 10-15 seconds.
Q: The Press Machine temperature goes down when l apply it to the image. ls this
something wrong?
A: Press temperature may fluctuate briefly when placed on the base material after heating.
This is due to the difference in temperature of the heated plate and the base material.
Don't worry, the Machine temperature will quickly return to the selected setting.
Your image adhesion will not be affected.
Q: My machine keeps turning off, and I have to turn it back on. Why?
A: This is the auto-shut off safety feature of Heat Press Machine. After 10 minutes of
inactivity, or no button pushes, the device will alert you and then shut off.

Thank you so much for purchasing!
Register and get extended warranty
www.offnova.com
FCC Warning Statement
This device complies with part 15 of the FCC Rules. Operation is subject to the
following two conditions: (1) This device may not cause harmful interference, and
(2) this device must accept any interference received, including interference that
may cause undesired operation.
Any Changes or modifications not expressly approved by the party responsible
for compliance could void the user's authority to operate the equipment.
NOTE: This equipment has been tested and found to comply with the limits for
a Class B digital device,pursuant to Part 15 of the FCC Rules. These limits are
designed to provide reasonable protection against harmful interference in a
residential installation.This equipment generates uses and can radiate radio
frequencyenergy and, if not installed and used in accordance with theinstructions,
may cause harmful interference to radio communications. However, there is no
guarantee that interferencewill not occur in a particular installation.
If this equipment doescause harmful interference to radio or television reception,
whichcan be determined by turning the equipment off and on, the user isencouraged
to try to correct the interference by one or more of thefollowing measures:
-- Reorient or relocate the receiving antenna.
-- Increase the separation between the equipment and receiver.
-- Connect the equipment into an outlet on a circuit different. from that to which
the receiver is connected.
-- Consult the dealer or an experienced radio/TV technician for help.
This equipment complies with FCC radiation exposure limits set forth for an
uncontrolled environment.This equipment should be installed and operated
with minimum distance 20cm between the radiator&your body.


