Store sweeper away from excessive heat to prevent damage to sweeper brushes and hopper bag.•
Before using your sweeper
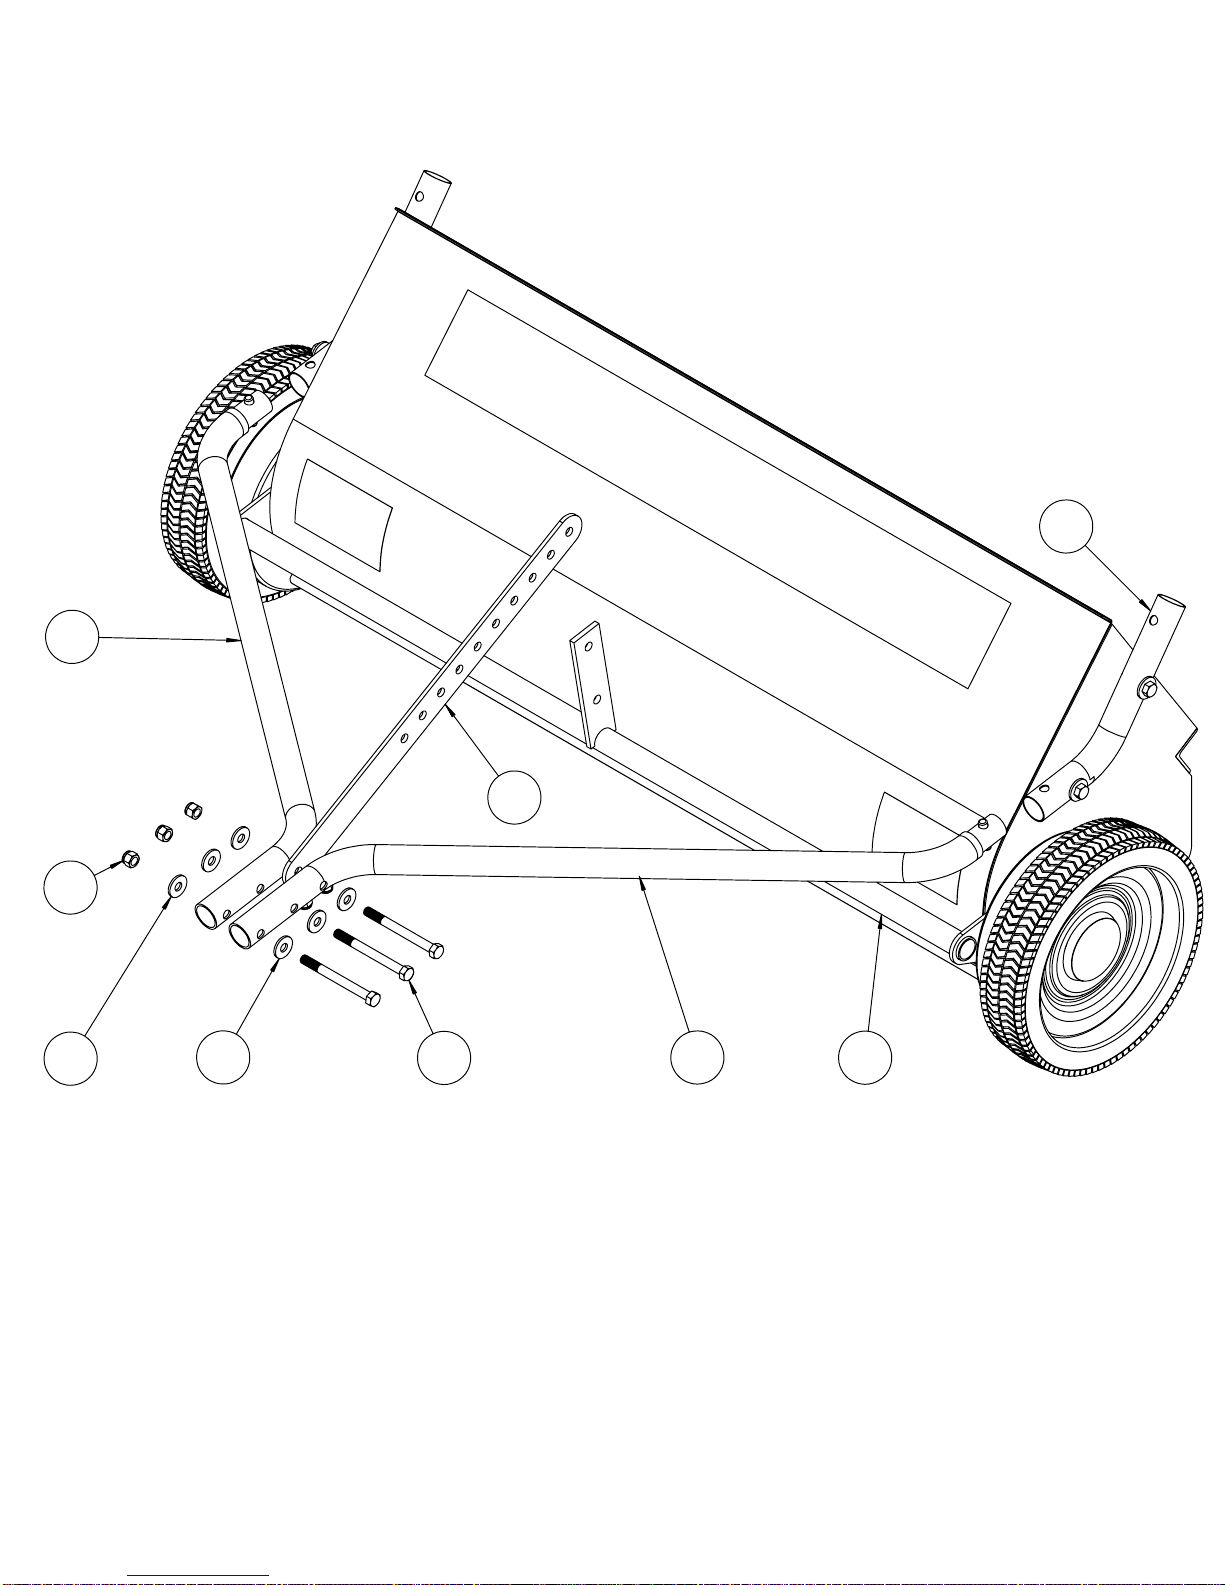
Dumping the sweeper
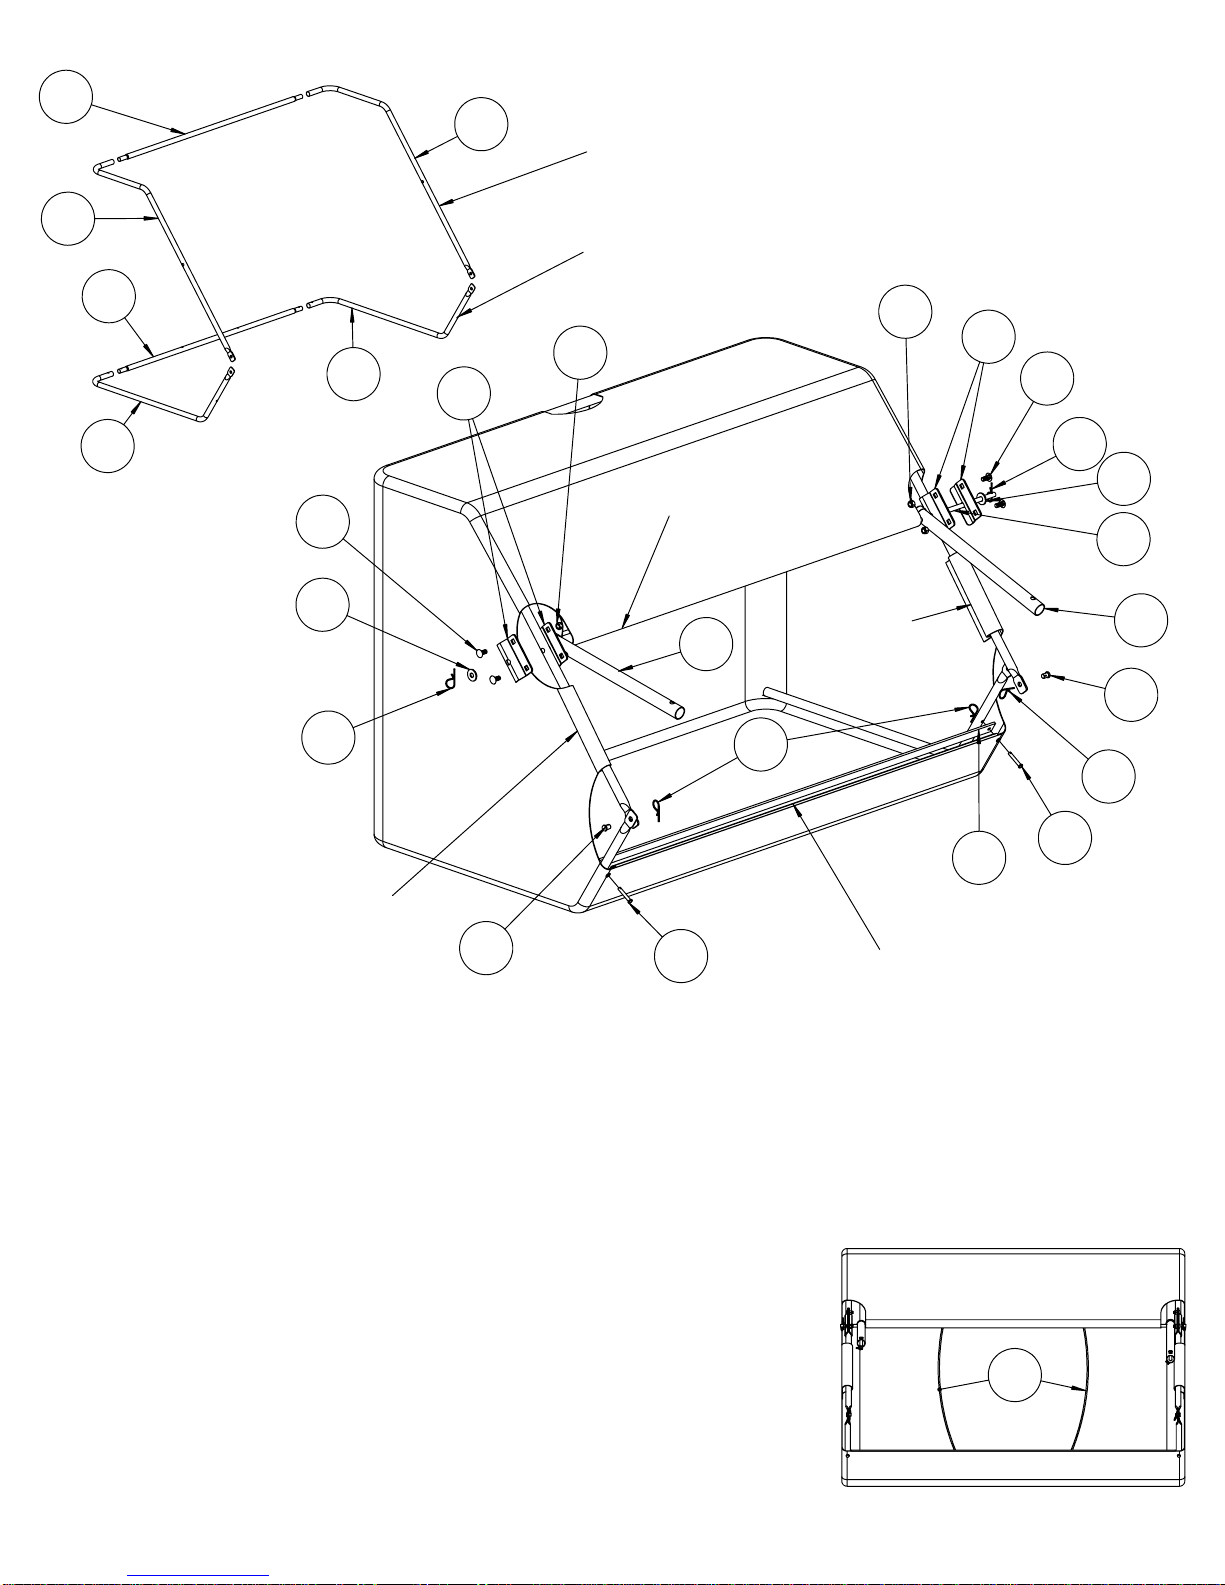
To adjust the height of the brushes, remove clevis pin and move lever forward or backward
• When sweeping heavy or wet materials start with a higher setting, lowering with each pass.
sweeper with brushes 1/2" down into the grass.
Make sure brushes are clean and free of any debris.
•
Visually inspect sweeper for obvious damage.
•
Bag height and brush adjustment
• Use supplied hair pin cotter with hitch pin provided.
•
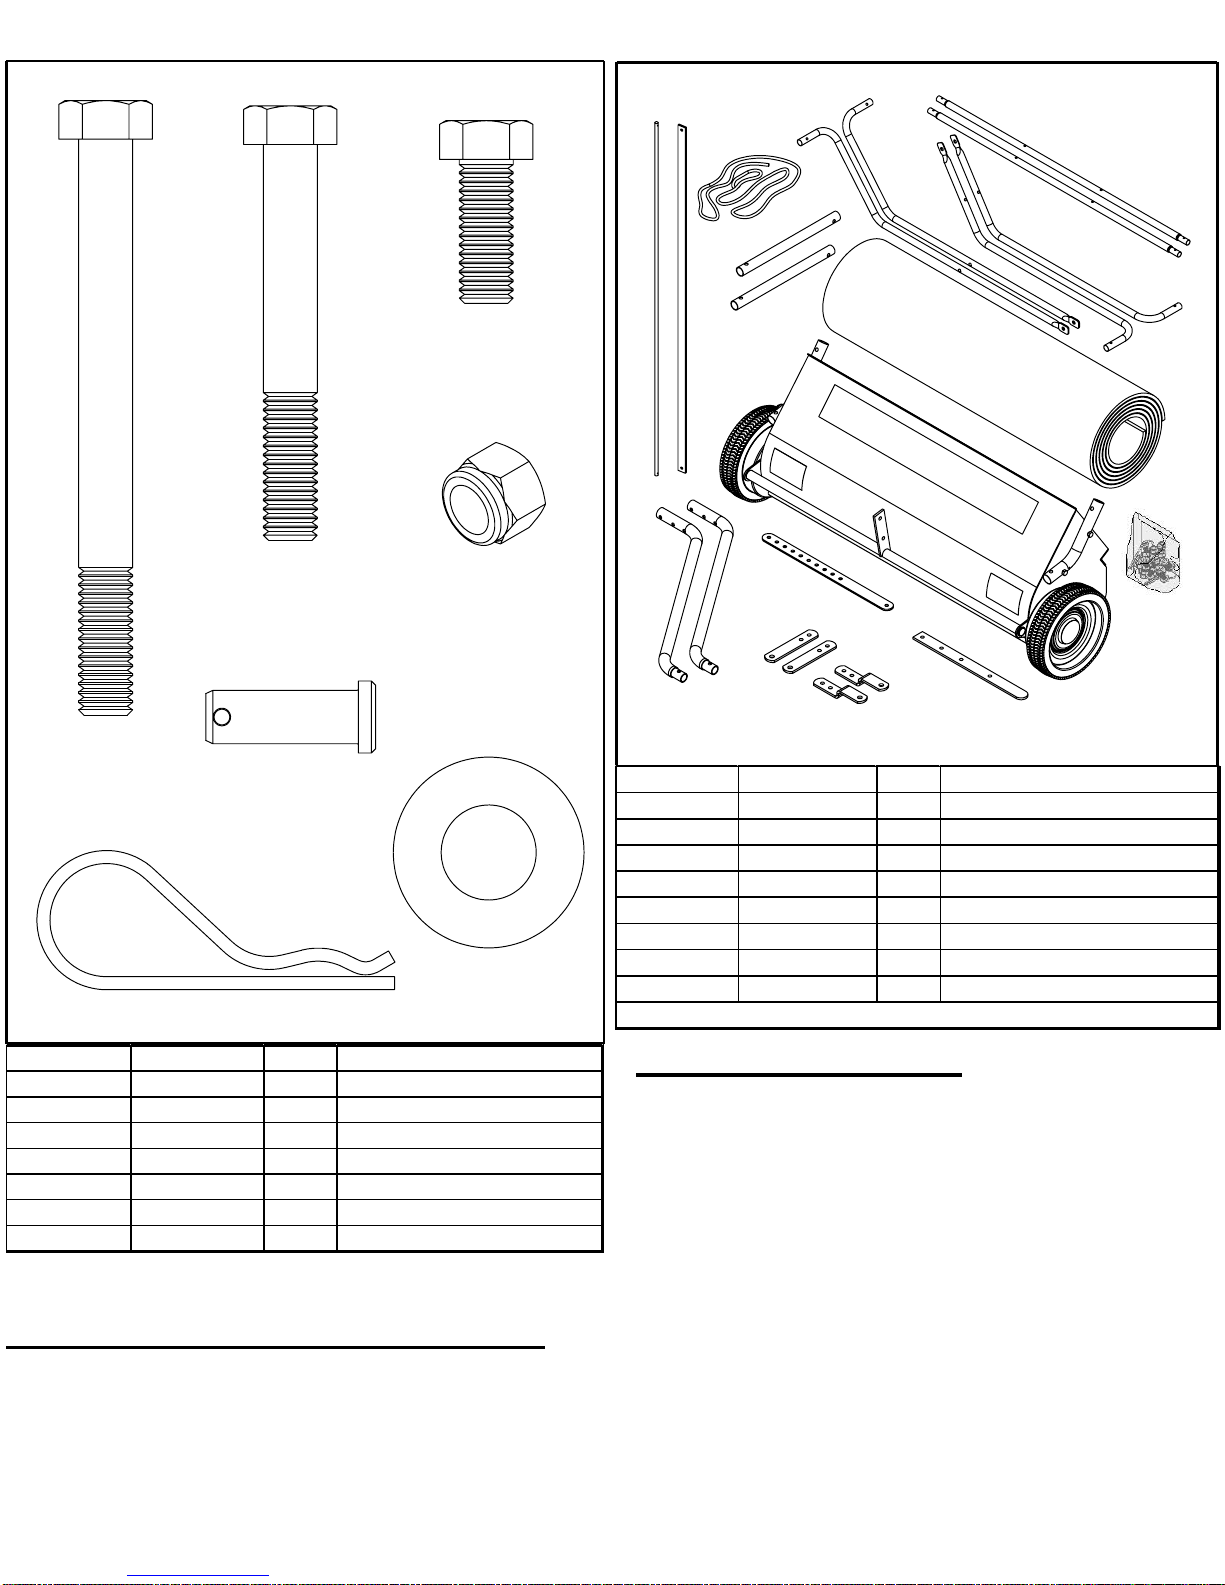
Page 2.
Remove foreign objects from yard before using sweeper.
To remove the hopper bag, pull the two clevis pins from the hopper bag tubes and slide out.•
Always dump contents of hopper after each use.
• Sweeper can also be dumped by grasping hopper frame and swing up, away from hopper.
• If desired, the sweeper can be dumped from the tractor by pulling the rope forward.
• Brushes set too low for conditions will cause unnecessary wear. For best performance operate
• Adjust clevis up or down to make sure that the bag clears the ground when attached to tractor.
Storing the sweeper
• Do not store unit on brushes, permanent damage could occur.
•
• Hopper bag can be collapsed for storage by removing the rear hopper support rods and folding
•to cloth parts.
Maintenance
frame down.
•to achieve desired brush height. Insert clevis pin and lock in place with hairpin cotter.
Using your sweeper
Before storing, clean both the sweeper and hopper bag to prevent rust to steel parts and mildew
To increase the life of the sweeper, clean after each use.•
Inspect sweeper for worn or damaged parts after each use.•
Inspect and remove any materials that may have wrapped around the brushes or the ends of•the brush axle.
Should rust appear on sweeper, sand area and paint with an enamel paint.•
Periodically check all fasteners for tightness.•
For best results, use sweeper when conditions are dry.•
Use caution when backing, jackknifing lawn sweeper can cause damage to the unit.•
Do not over fill the sweeper hopper.•
Do not fasten the rope to any part of your body.•Do not fasten the rope to any clothing.•Do not hold onto rope while pulling the sweeper.•
Always secure the rope to the tractor to ensure rope will not get tangled in wheels or brushes.•
The faster the tractors speed the further the material is thrown into the hopper. Operate at a•speed that will throw material to the back of the hopper.
Depending on conditions it may be necessary to adjust sweeping speed to achieve best results.•