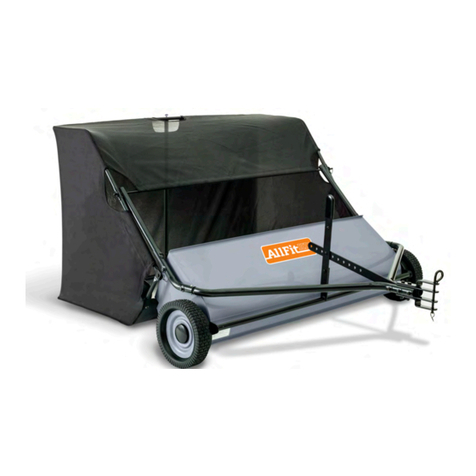
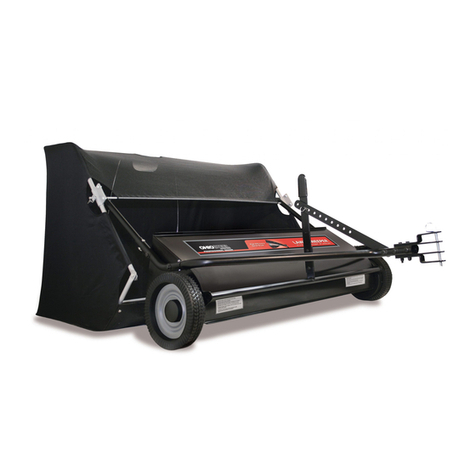
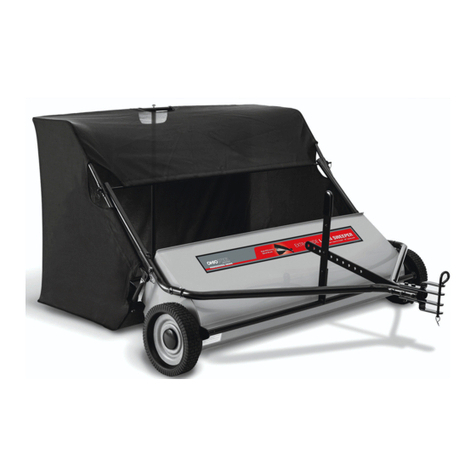
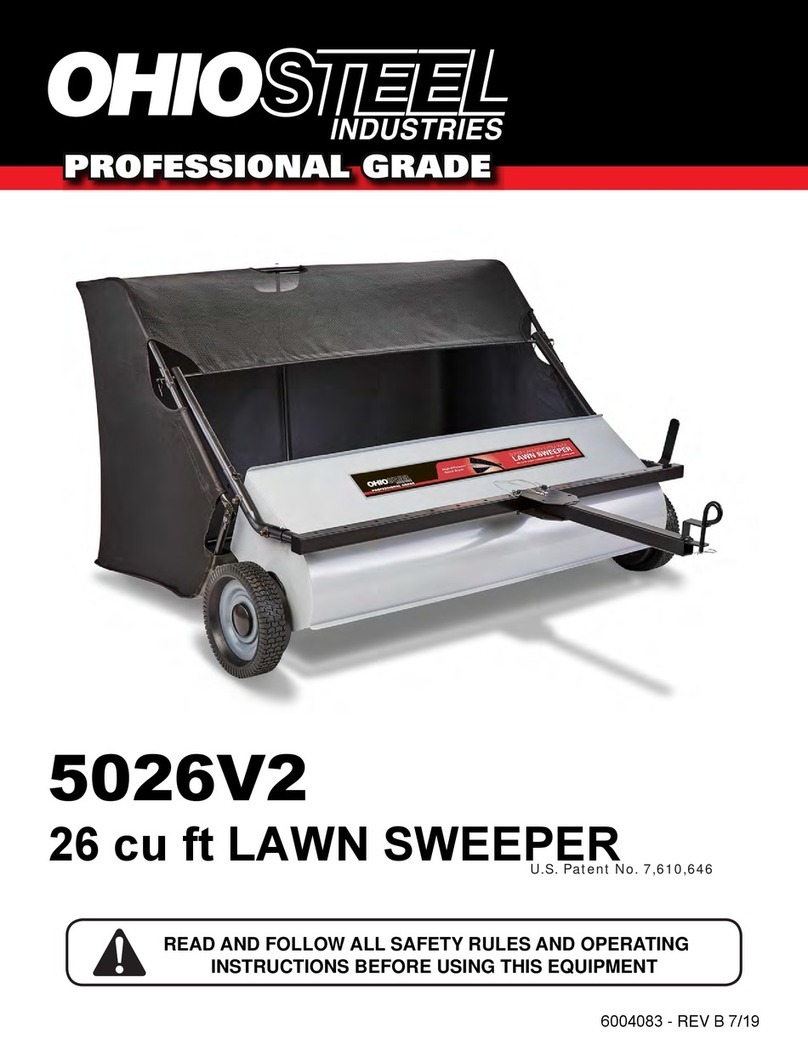
Ohio Steel Cub Cadet CC-5026LS User manual

READ AND FOLLOW ALL SAFETY RULES AND OPERATING
INSTRUCTIONS BEFORE USING THIS EQUIPMENT
CC-5026LS
26 cu. ft. L
A
WN SWEEPER
U.S. Patent No. 7,610,646
6004377 - REV B 9/19

Read and understand all safety rules and operating instructions before using
this tractor attachment.
Follow all safety rules and operating instructions provided by your tractor's
manufacturer when using attachment.
Never allow children or untrained persons to operate tractor or attachment.
Reduce tractor speed to slowest setting when towing or operating on slopes.
Operate up and down slopes, never across the face of slopes.
Do not carry passengers on tractor or attachment.
Avoid sudden turns or maneuvers.
Use caution when backing up to prevent damaging attachment.
Do not tow attachment on public roadways.
Do not remove warning decals from product.
Check product for worn, loose, or damaged parts before each use. If any
damage is present, repair the product before using.
Check product for loose or missing fasteners before each use. Tighten or
replace fasteners as needed before using.
Do not fasten rope to any part of your body or clothing.
Do not hold rope while tractor and Lawn Sweeper are in motion.
Do not use Lawn Sweeper near fire or smoldering debris.
Always fasten rope to tractor to avoid contact with wheels and brushes.
Always empty hopper before storing to avoid spontaneous combustion of
contents.
Do not exceed tractor speed of 6 miles per hour when towing or operating
Lawn Sweeper.
This is the safety alert symbol. It is used to alert you to
potential personal injury hazards. Obey all safety messages
that follow this symbol to avoid possible injury or death.
1
Safety Rules

If this product fails due to a defect in material or workmanship within THREE YEARS from the
date of purchase, we will at our option, only with receipt of purchase, repair or replace it free of
charge. This warranty excludes tires, wheels, brushes and bag, which are expendable and
become worn during normal use.
This warranty does not cover:
Repairs necessary because of operator abuse or negligence.
•
Equipment used for commercial or rental purposes.
•
Paint that is worn or faded due to normal use or exposure.
•
To arrange for product repair visit
ohiosteel.com/customer-support
and fill out the warranty
repair form. You can also call 1-800-652-2321, ext. 212 to speak to our Customer Service Team
This warranty gives you specific legal rights, and you may also have other rights which may vary
from state to state. This warranty applies only while this product is in use in the United States.
IF YOU ARE MISSING PARTS
DO NOT RETURN TO STORE
Email [email protected] or call 1-800-652-2321, ext. 212
Before you call, please email our customer service team at
with the following
:
A description of the issue you are having
1.
Photos of the issue that include an overall view and detailed view from
2.
multiple angles
If applicable, a short video showing the issue
3.
Replacement Parts:
You can place your parts order online at ohiosteel.com/partsstore
You can also reach our Customer Service Department at 1-800-652-2321, ext. 212
•
If you are ordering replacement part(s) for your product, please note that some parts are
•
only available as a repair kit.
AttachReceipt Here:
2
Warranty
37
(x1)
40
(x2)
43
(x1)
42
(x1)
36
(x2)
41
(x1)
18
(x2)
19
(x2)
5
(x2)
6
(x2)
3
(x1)
4
(x1)
45
(x2)
44
(x2)
46
(x2)
26 & 48
(x8)
47
(x2)
51
(x1)
49
(x1)
21
(x10)
22
(x11)
23
(x2)
24
(x2)
25
(x3)
20
(x4)
27
(x4)
(x1)
38
(x2)
39
(x2)
TOOLS REQUIRED FOR ASSEMBLY:
9/16" Wrench and Socket
•
NOTE: Hardware shown to scale
3
Carton Contents

22 27
19
21
20
24
3
22
2
18 19
Attach Hitch Mount Tubes (19) to Sweeper Assembly and tighten hardware.
DO NOT OVERTIGHTEN.
Attach Handle (3) to Height Adjustment (2) and tighten hardware.
Insert Hitch Tubes (18) into Hitch Mount Tubes (19) and snap into position.
4
Assembly Instructions
1
3
2

25
21
21
22
25
21
22
SHOWN INSTALLED
4
H
25
21
21
22
DETAIL H
SCALE 1 : 3
DETAIL P
SCALE 1 : 5
Install hardware through front two holes of Hitch Tubes as shown.
DO NOT TIGHTEN
AT THIS TIME.
Hold Adjustment Lever (4) in position and install third bolt through Lever as shown.
Pin Adjustment Lever to Handle with Hair Pin (26).
DO NOT TIGHTEN
AT THIS TIME.
5
Assembly Instructions
4
5

23
6
5
5
6
22
38
40
38
K
DETAIL K
SCALE 1 : 5.5
DETAIL L
SCALE 1 : 2
Snap Button
UP
Install Clevis Bars as shown (5 & 6); Clevis bolts (23) pass between Hitch Tube bolts.
Tighten Hitch Tube hardware first, then tighten Clevis hardware.
Insert Bottom Frame Tubes (38) into Center Frame Tube (40) and snap into position.
(Note that snap buttons are oriented up)
6
Assembly Instructions
7
6

37
41
M
45
48
37
40
39
39
DETAIL D
SCALE 1 : 4
Snap Button
DOWN
Snap Button
UP
Frame into Hopper
38
38
DETAIL M
SCALE 1 : 6
45 48
Unroll and flatten hopper bag (37) from shipping state. Then, slide
Hopper Stop Bar (43) into pocket of Hopper Bag as shown.
Insert Top Frame Tubes (39) into Center Frame Tube (40) and snap into position.
(Note that snap buttons are oriented down)
Unroll Hopper Bag
37
43
First, place bottom frame assembly into bottom of Hopper Bag (37).
Second, Install Clevis Pins (45) through Hopper Bag (37), Hopper Stop Bar (41), and
Bottom Frame Tubes (38) then secure with Hairpins(48).
7
Assembly Instructions
8
10
9

N
44
48
37
48
42
46
36 36
48
46
39
37
39
Snap Button
Down
39
DETAIL N
SCALE 1 : 9
44
48
38
39
First, Place top frame assembly into Hopper Bag (37). Second, Install
Clevis Pins (44) through Top Frame Tubes (39) and Bottom Frame Tubes (38)
and secure with Hairpins (48).
Slide Hopper Pivot Rod (42) through Top Frame Tube (39) and Connecting Tube (36),
then through pocket of Hopper Bag (37), and then through
both Connecting Tube (36) and Top Frame Tube (39) on other side.
Secure both ends with Washer (46) and Hairpin (48).
Frame into Hopper
44
48
8
Assembly Instructions
11
12

37
41 40
Velcro Tab
37
DETAIL E
SCALE 1 : 2
40
G
DETAIL G
SCALE 1 : 4
Opening
R
DETAIL R
SCALE 1 : 1
T
DETAIL T
SCALE 1 : 1
First, unscrew Thumb Screw from Tension Tube Assembly (41). Next, Hold Hopper Bag (37) open
and carefully insert Tension Tube Assembly (41) through opening in Hopper Bag and into hole
in bottom Center Frame Tube (40). Pull top Center Frame Tube over
tension tube and align holes.
Insert thumb screw that came with Tension Tube Assembly through
top Center Frame Tube (40) and screw into top of Tension Tube.
Secure Hopper Bag around Top Frame Tubes with Velcro tabs.
SHOWN INSTALLED
SHOWN INSTALLED
9
Assembly Instructions
13
14

47
47
48
49
36
19
19
51
40
52
Insert Connecting Tubes (36) into Hitch Mount Tubes (19) and secure with
Quick-Release Pins (47).
Install Hitch Pin (49) and secure with Hairpin (48).
Install handle (52) and tie Dump Rope (51) securely around exposed section of
Center Frame Tube (40).
Do NOT fasten rope to any
part of your body or clothing.
10
Assembly Instructions
15
16

How to Sweep Lawn:
Remove large debris from lawn.
1.
Do not sweep if conditions are too wet or muddy.
2.
Attach Lawn Sweeper to tractor using supplied hitch pin. The multi-pronged
3.
hitch allows the Lawn Sweeper to accomodate varying tractor hitch heights;
choose the appropriate setting so that Lawn Sweeper hitch tubes are
roughly level with the ground.
Attach dump rope to tractor so that it cannot contact the brushes or wheels.
4.
Start tractor engine and tow Lawn Sweeper to lawn.
5.
Adjust brush height so that brushes extend roughly 1/2" below the tips of the
6.
grass. For best performance, always set the brushes as high as possible to
minimize resistance on brushes and wheels.
Engage tractor drive at its slowest speed and begin sweeping. Increase
7.
tractor speed as required to throw material to the back of the hopper bag.
Sweep in straight lines whenever possible and avoid sharp turns.
8.
Periodically check the sweeper while operating to ensure that wheels and
9.
brushes are rotating smoothly and that nothing is wrapped around the
brushes or brush shaft.
When filled, the hopper bag can be emptied by pulling the dump rope
10.
forward.
Before Using Lawn Sweeper:
Read all Safety Rules found on page 1.
1.
How to Adjust Brush Height:
Remove hairpin and detach adjustment lever from handle.
1.
Move handle downwards to raise the brush height or upwards to lower the
2.
brush height.
Align the handle pin with the nearest hole in the adjustment lever. Use the
3.
top or bottom pin on the handle, whichever provides the best alignment.
Secure adjustment lever to handle with hairpin.
4.
11
Operating Instructions

12
Operating Instructions
Periodic Maintenance:
Tighten fasteners as needed before each use
•
Empty hopper and thoroughly clean Lawn Sweeper after each use
•
Remove any materials that have wrapped around brushes or brush shaft
•
after each use
Lubricate wheel bearings and gears annually with a light coating of white
•
lithium grease
Storing Lawn Sweeper:
Empty hopper bag and thoroughly clean Lawn Sweeper before storing.
1.
Store Lawn Sweeper away from excessive heat to prevent damage.
2.
Brushes must not contact ground during storage to prevent damage.
3.
Remove quick-release pins to separate hopper bag from Lawn Sweeper.
4.
Carefully remove tension tube and collapse hopper bag for compact storage.
5.
Unpin and detach adjustment lever from handle and then depress snap
6.
buttons to remove hitch tubes from Lawn Sweeper for compact storage.
4 5
6

31
2
4
9
30
14
34
7
33
32
31
19
20
21
27
35
26
13
24
23
18
25
6
5
15
12
28 8
11
10
17
16
22
ITEM
PART NO.
DESCRIPTION
QTY
ITEM
PART NO.
DESCRIPTION
QTY
1
KIT
6004261-Y1
SWEEPER HOUSING
1 19
307034-B2
HITCH MOUNT TUBE
2
2
HEIGHT ADJUSTMENT
1 20
KIT
307132
3/8"-16 x 2" HEX BOLT
4
3
307181-B2
HANDLE ASSEMBLY
1 21
CURVED WASHER, 3/8" USS
10
4
307113-B2 ADJUSTMENT BAR
1 22
NYLOCK NUT, 3/8-16
11
5
307042-B2
CLEVIS PLATE, FLAT
2 23
3/8"-16 x 2-3/4" HEX BOLT
2
6
307043-B2 CLEVIS PLATE, BENT
2 24
3/8"-16 x 1" HEX BOLT
2
7 307011
WHEEL ASSEMBLY
2 25
3/8"-16 x 3-1/2" HEX BOLT
3
8 6000539
DUST COVER
2 26
HAIR PIN
1
9 307241
CAP, WHEEL
2 27
WASHER, 3/8" USS
4
10
307125-B2
TUBE, 50" BRUSH
1 28
6000733-ZC
1/4" -20 X 1" CARRIAGE BOLT
8
11
307122-ZC
BRACKET, STEEL
4
12
307121-ZC
CLAMP, STEEL
8 30
300081-ZC
COTTER PIN, 1/8" X 1-1/2"
2
13 307322
BRUSH
2 31
KIT
6000828
PINION ASSEMBLY, RIGHT
1
14
3000721-ZC
WASHER, 3/4" SAE
2 32
PINION ASSEMBLY, LEFT
1
15
3000539-ZC
1/4" -20 X 1-1/4" BOLT
20 33
BEARING ASSEMBLY
2
16
3000716-ZC
WASHER, 1/4" SAE
4 34 6000540
WHEEL BUSHING
4
17
300065-ZC
1/4" -20 LOCK NUT
28 35
6000222-ZC
SNAP BUTTON
2
18
307038-B2
TUBE, HITCH
2
13
Repair Parts
OHIO STEEL INDUSTRIES1-800-652-2321
ohiosteel.com/partstore

37
40
39
50
46
48
44
41
42
36
47
40
38 50
43
45
48
51
48
49
52
ITEM
PART NO.
DESCRIPTION
QTY
ITEM
PART NO.
DESCRIPTION
QTY
36
307032-B2
CONNECTING TUBE
2 44
KIT
307133
CLEVIS PIN, 3/8" X 1/2"
2
37 6004318
HOPPER BAG
1 45
CLEVIS PIN, 1/4" X 1-1/4"
2
38
KIT
6004134-B2
BOTTOM FRAME TUBE
2 46
3/8" USS FLAT WASHER
2
39
TOP FRAME TUBE
2 47
QUICK-RELEASE PIN
2
40
CENTER FRAME TUBE
2 48
HAIRPIN
7
41
TENSION TUBE ASSEMBLY
1 49
HITCH PIN
1
42
307053-B2 HOPPER PIVOT ROD
1 50
6000208-ZC
SNAP BUTTON
4
43
307062-B2
HOPPER STOP BAR
1 51 307361
DUMP ROPE
1
52 6003894
DUMP HANDLE
1
14
Repair Parts
ohiosteel.com/partstore
OHIO STEEL INDUSTRIES1-800-652-2321

(800) 652-2321
MODEL # CC-5026LS
(800) 652-2321
Designed And Tested In Columbus, Ohio
Manufactured In The U.S.A. From Domestic
And Imported Components

6004377 - REV B 09/19
CC-
5026LS
BALAYEUSE FEUILLES/GAZON, 623 L (24 pi3)
Brevet américain no7,610,646
LIRE ET OBSERVER TOUTES LES CONSIGNES DE SÉCURITÉ
ET LES DIRECTIVES AVANT D’UTILISER CET ÉQUIPEMENT

1
Consignes de sécurité
Ce pictogramme est le symbole d’alerte de sécurité. Il sert à
prévenir l’utilisateur des risques de blessures corporelles.
Respecter tous les messages de sécurité qui suivent ce
symbole pour éviter des blessures ou la mort.
Lire et bien connaître toutes les consignes de sécurité et les directives avant d’utiliser
cette remorque pour tracteur.
Observer toutes les consignes de sécurité et les directives fournies par le fabricant du
tracteur lorsqu’on utilise cet accessoire.
Ne jamais permettre à des enfants ou à des personnes inexpérimentées de conduire le
tracteur ou d’utiliser cet accessoire.
Avant d’aborder une pente, régler le tracteur à la vitesse minimum.
Ne jamais rouler en zigzag sur une pente; monter et descendre en ligne droite.
Ne pas transporter de passagers sur le tracteur ou sur l’accessoire.
Éviter les brusques coups de volant.
Reculer avec prudence pour éviter d’endommager l’accessoire. Ne pas remorquer
l’accessoire sur la voie publique.
Ne pas enlever les autocollants d’avertissement du produit.
Avant chaque utilisation, s’assurer qu’aucune pièce n’est usée, desserrée ou
endommagée. En cas de dommages, faire réparer le produit avant de l’utiliser de
nouveau.
Avant chaque utilisation, s’assurer également qu’aucune fixation n’est desserrée ou
manquante; resserrer ou remplacer au besoin.
Ne pas attacher une partie du corps ou un vêtement avec la corde.
Ne pas tenir la corde lorsque le tracteur et la balayeuse sont en mouvement.
Ne pas utiliser la balayeuse près d’un feu ou de débris fumants.
Toujours attacher la corde au tracteur pour éviter qu’elle se prenne dans les roues ou dans
les brosses.
Toujours vider la benne avant le remisage pour éviter une combustion spontanée du
contenu.
Rouler à moins de 10 km/h pendant le remorquage ou l’utilisation de la balayeuse.

2
Garantie
NE PAS RETOURNER AU MAGASIN SI DES PIÈCES MANQUENT
Envoyez un courriel à cs@ohiosteel.com ou composez le 1 800 652-2321, poste 212
Attacher le reçu ici :
Avant votre appel, veuillez fournir par courriel, au [email protected] les
renseignements suivants à notre équipe du service à la clientèle :
1.
Un exposé de l’anomalie constatée
2.
Des photos du défaut (vue d’ensemble et vue détaillée prise sous plusieurs angles)
3.
S’il y a lieu, une brève vidéo montrant l’anomalie
Pièces de rechange :
Passez vos commandes sur Internet à ohiosteel.com/partsstore
•
Ou encore, communiquez avec notre service à la clientèle au 1 800 652-2321, poste 212.
•
Commande de pièce(s) de rechange : À noter que certaines pièces sont proposées
uniquement avec une trousse de réparation.
Si ce produit présente des défauts causés par des vices de matériau ou de fabrication dans
les TROIS ANS à partir de la date d’achat, nous le réparerons ou le remplacerons, à notre
discrétion, sans frais, uniquement sur présentation du reçu d’achat. Cette garantie exclut les
pneus, les roues, les brosses et le sac, qui sont des consommables soumis à l’usure lors
d’une utilisation normale.
Cette garantie ne couvre pas :
•
Les réparations dues à une utilisation abusive ou à la négligence de l’utilisateur.
•
L’utilisation de l’équipement à des fins commerciales ou de location.
•
L’usure ou la décoloration de la peinture en raison d’une utilisation ou d’une exposition
normales.
Pour arranger une réparation du produit, visitez ohiosteel.com/customer-support et remplissez
le formulaire de réparation sous garantie. Vous pouvez également joindre notre équipe du service
à la clientèle au 1 800 652-2321, poste 212.
Cette garantie vous confère des droits juridiques précis, auxquels peuvent s’ajouter d’autres droits,
selon la province ou le territoire. Cette garantie s’applique uniquement lorsque le produit est utilisé
aux États-Unis.

Contenu de la boîte
3
3 (x1) 4 (x1) 5 (x2)
(x1)
6 (x2) 18 (x2) 19 (x2)
20 (x4) 21 (x10) 22 (x11)
23 (x2) 24 (x2)
26 et 48 (x8) 27 (x4)
25 (x3)
36 (x2) 37 (x1) 38 (x2) 39 (x2)
40 (x2) 41 (x1)
42 (x1) 43 (x1)
44 (x2) 45 (x2)
47 (x2) 49 (x1) 51 (x1)
46 (x2) REMARQUE : Illustrations de la boulonnerie à l’échelle
OUTILS REQUIS POUR L’ASSEMBLAGE :
•
Clé et douille de 9/16 po
Table of contents
Languages:
Other Ohio Steel Lawn Sweeper manuals

Ohio Steel
Ohio Steel 42TSC User manual

Ohio Steel
Ohio Steel 50SWP26 User manual

Ohio Steel
Ohio Steel 42SWP22 User manual

Ohio Steel
Ohio Steel PROFESSIONAL GRADE 50LS Planning guide

Ohio Steel
Ohio Steel AllFitHD AF-5026LS User manual

Ohio Steel
Ohio Steel 5026V2 User manual

Ohio Steel
Ohio Steel 42LS User manual

Ohio Steel
Ohio Steel 46SWP24 User manual

Ohio Steel
Ohio Steel 4222V2 User manual

Ohio Steel
Ohio Steel 42SWP-REVD User manual