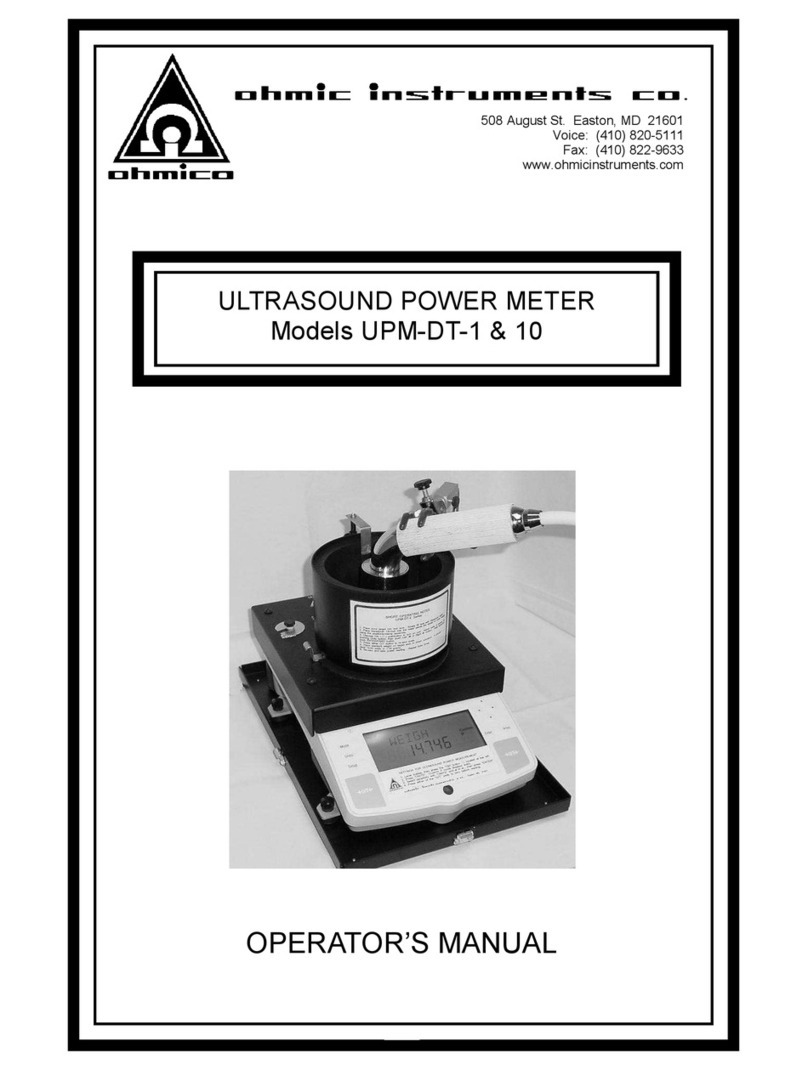
Ohmic instruments UPM-DT-1PA User manual

DIGITAL
ULTRASOUND
WATTMETER
UPM-DT-1PA, UPM-DT-10PA,
and UPM-DT-1000PA
USER MANUAL


i
CALIBRATION INTERVAL, WARNINGS, CAUTIONS, NOTICES...........................................................i
INTRODUCTION.................................................................................................................................................... 1
TEST SETUP........................................................................................................................................................... 2
METER LAYOUT.................................................................................................................................................... 7
TESTING.................................................................................................................................................................10
PRINTING AND COMMUNICATIONS...........................................................................................................11
TROUBLESHOOTING........................................................................................................................................12
MANUAL REVISIONS.........................................................................................................................................13
LIMITED WARRANTY.........................................................................................................................................13
SPECIFICATIONS................................................................................................................................................14
NOTES.....................................................................................................................................................................15
UPM-DT-xPA SERIES ULTRASOUND WATTMETER
TABLE OF CONTENTS
WARNING - USERS
The UPM-DT-xPA Series is for use by
skilled technical personnel only.
CALIBRATION INTERVAL
To ensure the accuracy of the UPM-DT-xPA
Series, Ohmic Instruments recommends that it
be calibrated at least once every 12 months.
Calibration must be done by qualified personnel.
Contact Ohmic Instruments for calibration.

ii
CAUTION - SERVICE
The UPM-DT-xPA Series is intended to be
serviced only by authorized service personnel.
Troubleshooting and service procedures should
only be performed by qualified technical
personnel.
WARNING - USE
The UPM-DT-xPA Series is intended for testing
only and should never be used in diagnostics,
treatment or any other capacity where it would
come in contact with a patient.
CAUTION - MODIFICATIONS
The UPM-DT-xPA Series is intended for use
within the published specifications. Any
application beyond these specifications or any
unauthorized user modifications may result in
hazards or improper operation.
CAUTION - INSPECTION
Inspect the UPM-DT-xPA Series before each use
for wear. It should be serviced if any parts are in
question.
CAUTION - ENVIRONMENT
Exposure to environmental conditions outside
the specifications can adversely affect the
performance and accuracy of the UPM-DT-xPA
Series. If the unit is outside the Operating
Specifications, allow it to acclimate to specified
conditions for at least 30 minutes before
attempting to operate it.

iii
CAUTION - CLEANING
Do not immerse. UPM-DT-xPA Series should be
cleaned by wiping gently with a damp, lint-free
cloth. A mild detergent can be used if desired.
NOTICE – ABBREVIATIONS
C
Celsius
°
degree
DUT
Device Under Test
F
Fahrenheit
g
gram(s)
IEC
International Electrotechnical Commission
kg
kilogram(s)
MHz
Megahertz
mm
millimeter(s)
mW
milliwatt(s)
PPM
Parts Per Million
Lbs
pounds
USA
United States of America
V
Volt(s)
VAC
Volt(s) Alternating Current
VDC
Volt(s) Direct Current
W
Watt(s)
CAUTION - LIQUIDS
Do not submerge or spill liquids on the
UPM-DT-xPA Series. Do not operate the
UPM-DT-xPA Series if internal components not
intended for use with fluids may have been
exposed to fluid, as the internal leakage may have
caused corrosion and be a potential hazard.
NOTICE – SYMBOLS
Symbol
Description
Per European Council Directive
2002/95/EC, do not dispose of this
product as unsorted municipal waste.

iv
UPM-DT-xPA PX Series User Manual Copyright © 2019
www.ohmicinstruments.com Made in the USA
08/19 Rev 01
NOTICE – DISCLAIMER
OHMIC INSTRUMENTS WILL NOT BE RESPONSIBLE FOR ANY
INJURIES SUSTAINED DUE TO UNAUTHORIZED EQUIPMENT
MODIFICATIONS OR APPLICATION OF EQUIPMENT OUTSIDE
OF THE PUBLISHED INTENDED USE AND SPECIFICATIONS.
NOTICE – DISCLAIMER
OHMIC INSTRUMENTS RESERVES THE RIGHT TO MAKE
CHANGES TO ITS PRODUCTS OR SPECIFICATIONS AT ANY
TIME, WITHOUT NOTICE, IN ORDER TO IMPROVE THE DESIGN
OR PERFORMANCE AND TO SUPPLY THE BEST POSSIBLE
PRODUCT. THE INFORMATION IN THIS MANUAL HAS BEEN
CAREFULLY CHECKED AND IS BELIEVED TO BE ACCURATE.
HOWEVER, NO RESPONSIBILITY IS ASSUMED FOR
INACCURACIES.
NOTICE – CONTACT INFORMATION
OHMIC INSTRUMENTS
3081 ELM POINT INDUSTRIAL DR.
SAINT CHARLES, MO 63301
USA
410-820-5111
www.ohmicinstruments.com
sales@ohmicinstruments.com

1
The Model UPM-DT-xPA Series Ultrasound Power Meter is designed to measure the
ultrasonic power output of therapeutic transducers up to 30 Watts. The principle of
measurement is the radiant force method. The UPM-DT-xPA Series uses a positioning
clamp to hold the transducer in degassed water above a conical target. The ultrasonic
energy passes through the water to reflect off the target and is then absorbed by the
rubber lining. The radiant power is directly proportional to the total downward force
(weight) on the target. This force is then transferred through the target support assembly
to the electromechanical load cell inside the meter. The meter processes and digitizes
the data to display an accurate measurement of grams or Watts, selectable by the user.
INTRODUCTION

2
Water as a Measurement Medium
Ultrasound propagation in water closely approximates ultrasound propagation in tissue.
Large areas in the body can consist of low attenuating material such as urine and amniotic
fluid. Other areas of the body, such as the liver, contain higher attenuating materials.
Water is used as a lower limit of the attenuation encountered in the body. This allows
measurements to represent the highest possible intensities that might be encountered in
the body. Degassed water is the widely accepted test medium for ultrasound transducers
(see AIUM/NEMA Standards Publication #UL-1-1981, SAFETY STANDARD FOR
DIAGNOSTIC ULTRASOUND EQUIPMENT).
Degassed Water
Ultrasound Power measurement accuracy is affected if the water contains more than
5-10 PPM of air. To degas, boil distilled water for 30 minutes, then seal the container
tightly and place it in a refrigerator. An alternate method of degassing water is to heat the
water to the boiling point, then pull a vacuum on it for five to ten minutes. The degassed
water storage container should be made of glass or plastic. Polystyrene containers should
not be used since they allow oxygen to permeate and degrade the water quality. Any
unsealed degassed water will absorb oxygen and affect measurement accuracy,
therefore a change of degassed water is recommended before each test. Water
temperature also affects accuracy. It is recommended to use an ambient testing
temperature of 24.0 ±3.0 °C (75.2 ±5.4 °F). Sonic energy agitates the water surface
through heating and scattering. Prolonged testing, particularly at higher power levels, will
show visible signs of air bubbles on the transducer, target, and tank lining. Replace the
tank’s degassed water before each test.
TEST SETUP

3
Conical Target Installation
Tilt the test tank and begin filling with degassed water creating a minimal amount of
turbulence. Fill the tank 1/4” from the top with fresh degassed water. Disengage the
meter’s slide lock (if equipped; see Meter Layout section). Power on the UPM-DT-xPA
and allow the meter to zero. Submerge the conical target into the degassed water at an
angle to minimize disruption of the degassed water; See Figure 1 for conical target
assembly details. Remove the wetted conical target, then lower the conical target
support stem into the target support tube located behind the test tank, while
simultaneously placing the conical target into the tank; See Figure 2 for details. As the
conical target is submerged verify its surface is free of bubbles, including the bottom
surface. If bubbles exist gently wipe them away with your finger. Allow the conical
target support stem to lower completely. Gently tip the conical target assembly back
and forth and allow the target support stem to fully seat.
Figure 1. Conical Target Assembly
Target Support Stem
Target Support Arm
Conical Target

4
Figure 2. Conical Target Installation
Target Support Stem
of Conical Target
Assembly
Target Support Tube
UPM-DT-xPA Series
Test Tank

5
Transducer Placement
To place the transducer, tighten the positioning clamp jaws onto the transducer handle;
See Figure 3 for Positioning Clamp details. Loosen the two positioning clamp knuckles
and insert the transducer head into the degassed water at an angle to minimize disruption
of the degassed water. Verify that the transducer surface is uniformly wetted (no
bubbles). If it is not, gently wipe the surface clean using your finger. Position the
transducer head so it is directly facing the center of the conical target and submerged 1/8”
to 1/4” in the degassed water. Tighten the two positioning clamp knuckles to hold the
transducer in place; See Figure 4 for placement details. Small measurement variations
will occur due to placement of the transducer. Try various positions above the target to
achieve the best results.
Figure 3. Transducer Positioning Clamp Details
Positioning Clamp Jaws
Thumb Screws to tighten
the Positioning Clamp Jaws
Positioning Clamp Knuckles

6
Figure 4. Transducer Placement Details
Transducer Head Submerged
and Positioned Directly Over
the Conical Target.
Transducer Handle
Firmly Clamped in
Position.
Conical Target Assembly
Installed

7
Front
1. Power –Zero Button:
- Press to power on the UPM-DT-xPA and/or to zero the reading.
- Press and hold until OFF is displayed then release to power off the
UPM-DT-xPA.
2. Print –Unit Button:
- Press to print data via the RS232 port (see the Printing and
Communications section).
- Press and hold to display “Unit” menu, then press the “No” or “Back”
buttons to cycle through the available units. Press the “Yes” button
to select the desired unit. To select watts as the unit of measure,
select the custom unit within the “Unit” menu.
3. Function - Mode Button:
Note: this button should not be used unless cycling through a menu
or returning to “Weighing” mode.
- Press and hold to access the Mode menu to change the type of
weighing. Weighing mode is on by default and the mode that must
be used in standard operation.
4. Tare - Menu –Cal Button:
- Press to tare the scale at the current weight.
- Press and hold to access the various calibration and setup menus
(for authorized service personnel only).
METER LAYOUT
5
3
1
2
4
6
7

8
5. 7 Segment Display:
- Displays measurement.
6. Selected Unit:
- Displays the selected unit, grams (“g”) or Watts (“W”).
7. Stability Indicators:
- These icons display once the measurement has stabilized.
Back
1. Power Input Receptacle:
- 12 VDC, 500 mA.
2. Slide Lock (if equipped):
- The Slide Lock is used to protect the sensitive meter during storage
and shipping. The Slide Lock assembly is not required/included
with all models.
- Pull the Slide Lock away from the meter until it is fully extended and
latched in the unlocked position. The Slide lock is not removable
and must remain in the unlocked position during meter use.
- Gently Push the Slide Lock towards the meter until it is fully
engaged. The Slide Lock should remain engaged whenever the
meter is not in use.
2
1
3
4

9
3. RS232 Interface:
- Female DB9 Connector
- Standard RS232 Configuration
4. USB Interface:
- Female USB Type B connector

10
1. Place the UPM-DT-xPA Series on a stable and level surface. Avoid air currents
and vibrations.
2. Review and complete all steps outlined in the Test Setup section.
a. Degas Water
b. Fill the UPM-DT-xPA tank
c. Install the Conical Target
d. Position the DUT’s transducer
3. Allow the UPM-DT-xPA and tank water to stabilize. With no ultrasonic power
applied, press the Power - Zero button to zero the meter.
4. Place the included 1 gram Standard Weight on the arm of the conical target
assembly (the flat part above the water). The UPM-DT-xPA Series should read
1.00 ± 0.10 grams.
5. Remove the 1 gram Standard Weight.
6. Select the desired test measurement unit. Allow the UPM-DT-xPA and tank water
to stabilize. With no ultrasonic power applied, press the Power - Zero button to
zero the meter.
7. Test the DUT, averaging three measurements for the final recording.
a. Once the display’s stability indicators are shown, activate the DUT for
several seconds, allowing the measurement to stabilize, and record the
measurement.
b. Deactivate the DUT and allow all components to stabilize.
c. Zero the meter.
d. Repeat steps 7a, 7b, and 7c two times.
e. Average the three measurements for the final recording.
8. Refer to the DUT manufacturer for acceptable test limits.
9. After testing, unplug the UPM-DT-xPA Series, empty the tank, and place the dry
conical target assembly in the tank for protection.
TESTING

11
RS232 Print Details
RS232 Print Interface: Baud Rate = 9600, 8 Bit Data, No Parity
Print Output Format: “0.0000 g” (grams mode) or “0.000 W” (custom Watts mode)
measurement is displayed as the last line of the printout. An unstable measurement is
indicated by a “?” at the end of the print line (i.e., 0.0000 g?). Sample Printout below:
01/01/2019 16:24:19
Balance ID: 123456789
Balance Name: PX84/E
User Name:
Project Name:
Weighing
1.0249 g
Gross: 1.0249 g G
Net: 1.0249 g N
Tare: 0.0000 g T
Communication Commands
RS232 Communication Interface: Baud Rate = 9600, 8 Bit Data, No Parity
IP
Immediate Print of displayed weight (Stable or Unstable)
SP
Print displayed weight (will not print until measurement is stable)
CP
Continuous Print (reading only)
Z
Same as pressing Zero key
T
Same as pressing Tare key
ON
Turns UPM-DT-xPA on
OFF
Turns UPM-DT-xPA off
PRINTING AND COMMUNICATIONS

12
Symptom
Possible Cause
Solution
The measurement fluctuates.
Unstable Environment
The meter is very sensitive
and is affected by minor air
drafts and/or vibrations.
Place the meter on a solid
surface and shield it from any
air drafts.
The measurement drifts over
a period of time.
The tank water has absorbed
too much air.
Replace the tank water with
fresh, room temperature
degassed water.
The conical target has
developed bubbles on its
surface.
Wipe any bubbles from the
surface of the conical target,
including the bottom.
The transducer head has
developed bubbles on its
surface.
Wipe any bubbles from the
surface of the transducer
head.
The meter will not zero.
- Degassed water has
absorbed too much air.
- Requires Calibration and/or
Repair.
- Refill with fresh degassed
water.
- Contact Ohmic Instruments
for Calibration and/or
Repair.
After zeroing, the
measurement continually
drifts with no transducer
power applied.
The meter does not respond
to the test weight and or
transducer power.
The Conical Target Assembly
and/or the Target Support
Tube is rubbing or binding
against its surrounding.
Verify the Conical Target
Assembly and its Support
Tube are correctly positioned.
Displayed Errors
Description
Possible Solution
Timeout
Operation Timeout
Re-zero / re-tare the meter once the
environment is stable.
Over init. Range
Load During Power On
Remove the conical target assembly
and cycle power.
Under init. range
No Load During Power On
Disengage the slide lock on the back
of the unit (if equipped).
Err 8.3
Over Range
Remove any excess force on the
meter.
Err 8.4
Load Removed During
Measurement
Replace load or transducer and
repeat the test.
------
Busy (tare, zero, printing,
waiting for a stable weight)
Wait until operation completes
If any error persists, contact Ohmic Instruments Sales or Service for repair
TROUBLESHOOTING

13
Revision # Revisions Made
Rev 01 Origination
WARRANTY: OHMIC INSTRUMENTS WARRANTS ITS NEW PRODUCTS TO BE FREE FROM DEFECTS IN
MATERIALS AND WORKMANSHIP UNDER THE SERVICE FOR WHICH THEY ARE INTENDED. THIS
WARRANTY IS EFFECTIVE FOR TWELVE MONTHS FROM THE DATE OF SHIPMENT.
EXCLUSIONS: THIS WARRANTY IS IN LIEU OF ANY OTHER WARRANTY EXPRESSED OR IMPLIED,
INCLUDING, BUT NOT LIMITED TO ANY IMPLIED WARRANTY OF MERCHANTABILITY OR FITNESS FOR A
PARTICULAR PURPOSE.
OHMIC INSTRUMENTS IS NOT LIABLE FOR ANY INCIDENTAL OR CONSEQUENTIAL DAMAGES.
NO PERSON OTHER THAN AN OFFICER IS AUTHORIZED TO GIVE ANY OTHER WARRANTY OR ASSUME
ANY LIABILITY.
REMEDIES: THE PURCHASER'S SOLE AND EXCLUSIVE REMEDY SHALL BE: (1) THE REPAIR OR
REPLACEMENT OF DEFECTIVE PARTS OR PRODUCTS, WITHOUT CHARGE. (2) AT THE OPTION OF
OHMIC INSTRUMENTS, THE REFUND OF THE PURCHASE PRICE.
LIMITED WARRANTY
MANUAL REVISIONS

14
ULTRASONIC POWER MEASUREMENT
POWER RANGE
0 to 30 W
RESOLUTION
Model
Grams
Watts
UPM-DT-10PA
1 mg
20 mW
UPM-DT-1PA
0.1 mg
2 mW
UPM-DT-1000PA
0.1 mg
1 mW
ACCURACY
±3% + One Count Reading
DUT OPERATING
FREQUENCY
0.5 to 10 MHz
DUT MAXIMUM
TRANSDUCER SIZE
4.50 Inches (114.3 mm)
TEST MEDIUM
Degassed Water @ 24.0 ±3.0 °C (75.2 ±5.4 °F)
ELECTRICAL
POWER SUPPLY
12 VDC, 500 mA
PHYSICAL & ENVIRONMENTAL
DISPLAY
7 Segment, Backlit LCD
CONSTRUCTION
TANK LINING
0.5 Inch (12.7
mm) thick
Neoprene
CARRYING CASE
Aluminum
SIZE
OVERALL (Including case):
11 x 15 x 10 Inches
(280 x 381 x 254 mm)
WEIGHT
OVERALL (Including case):
< 16.0 Lbs (7.25 kg)
OPERATING RANGE
15 to 30 °C
(59 to 86 °F)
STORAGE RANGE
-40 to 60 °C
(-40 to 140 °F)
SPECIFICATIONS
This manual suits for next models
2
Table of contents
Other Ohmic instruments Measuring Instrument manuals