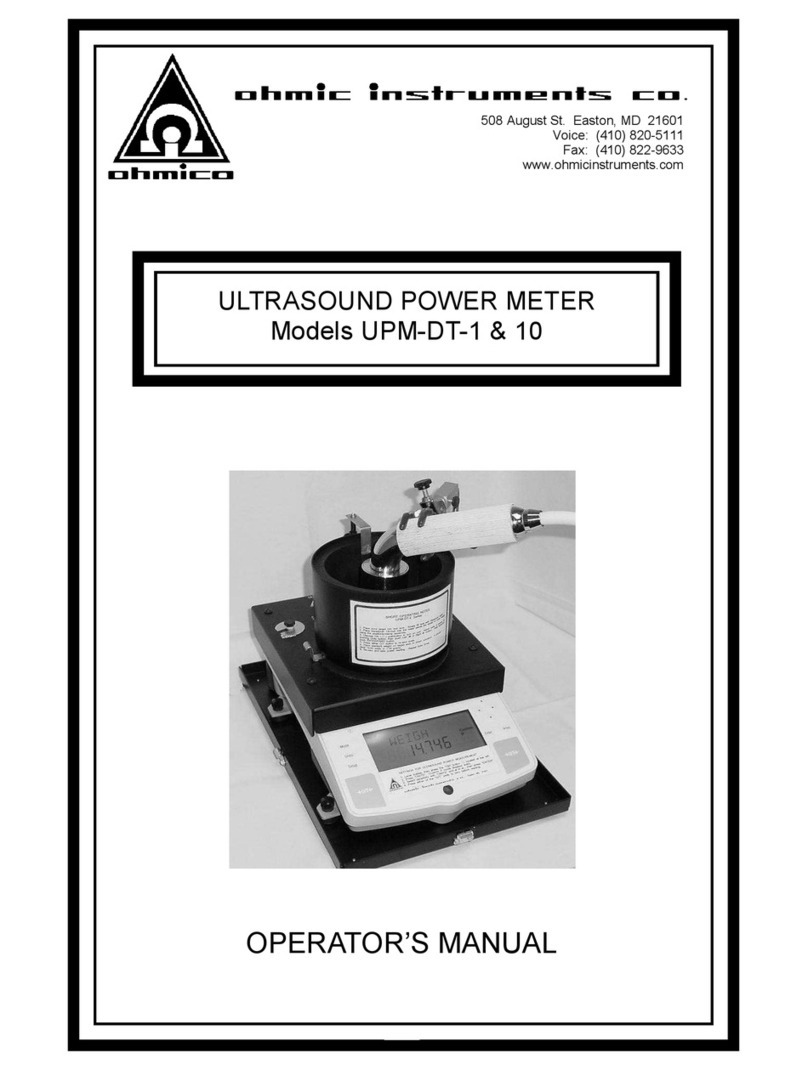
Ohmic instruments UPM-30 User manual

1
UPM-30 MANUAL
ULTRASOUND POWER METER
SF-SLS-565 (B)
Phone (410) 820-5111
Toll Free(800) 626-7713
Fax (410) 822-9633
www.ohmicinstruments.com
Sales: [email protected]
Service: [email protected]
Ohmic Instruments
3081 Elm Point Industrial Drive
St. Charles, MO 63301 USA

2
© Ohmic Instruments
2018
All rights reserved. This manual may not be reproduced in complete form without written permission of Ohmic Instruments. Test
forms may be copied as required by the original purchaser of the instrument. Information contained in this manual is believed to
be accurate and reliable; however, no responsibility is assumed by Ohmic Instruments for its use. Ohmic reserves the right to
supply its instruments with design changes and/or component substitutions that may not be documented in this manual.

3
TABLE OF CONTENTS
Introduction ........................................................................................................................................................................... 5
Setting Up the UPM-30 ......................................................................................................................................................... 5
Operating Procedure............................................................................................................................................................. 6
Water, Tank Size, Transducer Placement & Temperature Considerations.......................................................................... 7
Ultrasound Radiation Levels ................................................................................................................................................. 7
Theory of Measuring Ultrasound Power With the Radiation Force Method ......................................................................... 8
Specifications ........................................................................................................................................................................ 8
Conversion Chart - From Grams to Watts ............................................................................................................................ 9
Ultrasonic Therapy Unit Inspection Record (sample) ................................................................................................... 10, 11
Warranty.............................................................................................................................................................................. 12

4

5
INTRODUCTION
The Ultrasound Power Meter, Model UPM-30, is a time-
tested instrument designed to measure the ultrasonic
power output of diagnostic or therapeutic transducers up
to 30 watts using the radiation force balance method.
The UPM-30 consists of a precision mechanical balance
which measures from 0.01 to 10.00 grams, a conical tar-
get suspended on a bracket, a water tank, a transducer
support rod with clamp, and a carrying case. The trans-
ducer to be tested is center-mounted over the conical
target with the transducer’s radiating area immersed face
-down in the water medium.
The Model UPM-30 Ultrasound Power Meter measures
the average ultrasonic power by measuring the radiant
force exerted by the transducer on the conical target.
This target is coupled to the precision mechanical bal-
ance which is used to measure the gram-mechanical
force due to the ultrasonic radiation. The gram force is
directly proportional to the ultrasound power in watts
when multiplied by a constant of 14.65. Therefore, a
2.05 gram force would be equal to 30 watts of ultrasound
radiation.
The heart of the UPM-30 system is its air-filled conical
target. The weight of this target is nulled to a minimum
by using its own buoyancy. Incident ultrasound energy is
mechanically transferred from the target to the precision
balance where it is manually measured. Reflected ultra-
sound energy is absorbed by a rubber wall inside the
water test tank. This system provides a sturdy instru-
ment with good measurement accuracy and low cost.
SETTING UP THE UPM-30
1. Remove and carefully unpack the conical target
stored in the test tank. Set the target aside until the
tank is filled.
2. Slowly pour recently degassed water into the test
tank and avoid any turbulence which might produce
air bubbles. Fill the test tank to approximately ½
inch from top of tank. The water must be at room
temperature. If degassed water is not available,
sterilized or distilled water may be used; however, a
small error of approximately 3 to 5% may be intro-
duced above the 10 to 15 watt output level.
3. Immerse the conical target into the test tank at an
angle to avoid any air bubbles from being trapped
under the target. Shake the target gently to release
any attached air bubbles. Position the cone target
so it is pointed upright in the center of the tank.
4. A bracket is attached to the conical target using ny-
lon cord. Place this bracket on the upper (or lower)
hook of the precision balance. Verify that the cone
target is centered in the test tank and does not touch
the sides of the tank.
5. Release the spring lock on the precision balance.
6. Balance the scale with the target in place and no
ultrasound power applied. Each UPM-30 system is
set up and balanced at the factory before shipping.
The weight of the conical target, when suspended in
the test tank, is measured, recorded, and marked on
the balance. This is a “zero” or “null” reading and is
approximately 1.5 grams. This weight is a constant
which must be subtracted from all readings when
measuring with this system. If a new target is or-
dered, be sure to indicate this null reading so an
equivalent target can be supplied.
7. To verify the scale’s accuracy, weigh the supplied 1-
gram standard (located on the base plate below the
short instruction notes) by placing it on the cone
bracket or on one of the scale hooks and rebalancing
the scale. The reading should be 1.00 gram higher
than the null reading.
8. When the UPM-30 is not in use, store the target and
bracket inside the test tank and replace the water-
tight lid. The lid will restrain the water during transit,
reduce the absorption of air into the water, and pre-
vent water contamination from foreign particles.
Note: If the unit will not be used for an extended pe-
riod of time, it is highly recommended that the water
be removed from the tank and replaced when use is
required.

6
OPERATING PROCEDURE
1. Place the UPM-30 on a level and stable surface.
2. Remove the carrying case cover and the lid from the
water tank.
3. Pull the cone bracket out of the water in the test tank
and hang it on the upper (or lower) scale hook. The
conical target should not touch the rubber wall and
the axis of the target cone should be perpendicular
to both the surface of the water and the surface of
the transducer under test (TUT).
4. Unhook the scale spring lock from the balance arm.
Note: Always replace the spring lock when the UPM
-30 is in transit.
5. Periodically verify the accuracy of the precision bal-
ance by finding the null (or zero) value and then
weighing the 1-gram standard weight by placing it
on the cone bracket (or the upper or lower scale
hook) and rebalancing the scale. A 1 gram differ-
ence should be measured between this reading and
the null reading.
6. Place the handle of the transducer under test (TUT)
into the positioning clamp with the transducer’s radi-
ating surface centered above the cone target and
immersed about 1/8 to 1/4 inch into the water and
parallel to the water surface. Wipe across the trans-
ducer surface with your finger to remove any
trapped air bubbles.
7. With no ultrasound power applied, balance the scale
(to null value), then record this null reading (for ex-
ample, 1.5 grams). For convenience, this null read-
ing may be adjusted to an even number within the 0
to 10-gram range by using the balance compensator
(a knurled nut) located at the left of the balance arm.
8. Apply power to the TUT. Set the TUT to the desired
power output (for example, new reading is 2.25 mi-
nus the null reading of 1.50 grams which gives a
difference reading of 0.75 total gram force). Multiply
this difference in gram readings by the constant,
14.65. The formula for total radiated power in watts
is equal to the total gram force on the precision bal-
ance (in grams) multiplied 14.65 watts/gram. To
obtain watts per square centimeter, divide the total
radiated power by the effective radiating cross-
sectional area of the transducer (usually, 90% to
95% of the total transducer surface area).
9. For increased measurement accuracy, repeat the
power measurement procedure a few times and
take the average reading.
10. Reading the Main and Vernier dials. Each incre-
mental graduation on the Main dial has a value of
0.1 gram. The Vernier dial is above the Main dial
and sub-divides the 0.1 Main dial increment down to
0.01 increments. To obtain total gram weight, first
record the number of grams and tenths of grams
indicated on the Main dial at the zero vernier gradu-
ation. See Figure 1 below. To obtain the hun-
dredths of grams, read the value on the Vernier
scale whose increment line most closely aligns with
a Main dial graduation. Add the vernier hundredths
value to the Main dial grams and tenths of grams to
find the total gram force. The reading shown in Fig-
ure 1 is 6.74 grams.
Dial
0.04g Vernier
Graduation
Zero Vernier
Graduation
6.70g
Graduation
Figure 1
Vernier

7
WATER, TANK SIZE, TRANSDUCER PLACEMENT &
TEMPERATURE CONSIDERATIONS
Water as a Measurement Medium: The measurements
are to be performed in de-gassed water because ultra-
sound propagation in water closely approximates that in
tissues (see UL-1-1981, AIUM/NEMA Standard Publica-
tion). The ultrasonic attenuation in water can be taken
as a lower limit on the attenuation which will be encoun-
tered in the body. Large areas in the body can consist
of low attenuating material such as urine and amniotic
fluid. The use of water prevents measurements in a
more highly attenuating material such as liver equivalent
gels from representing the highest possible intensities
which might be encountered in the body. A measure-
ment temperature of 24°C ± 3°C (75°F ± 5°) is chosen
for convenience.
De-Gassed Water: Ultrasound power measurement
accuracy is affected (by lowering the power reading) if
the water contains more than five parts per million of air.
To de-gas, boil distilled water for one half-hour, then
pour into a suitable container, seal tightly and place in
refrigerator. This process will give the required quality.
The container should be heat resistant glass; or thick
plastic may be used after the water has been cooled.
Before testing, pour water into tilted test tank to minimize
turbulence. The test tank water surface will absorb oxy-
gen and a change of de-gassed water is recommended
before each test. An alternative method of de-gassing
water is to heat the water to the boiling point, then put a
vacuum to it for five minutes.
Water temperature affects accuracy; use a testing tem-
perature of 21 to 24°C (70° to 75°F) ambient. Sonic en-
ergy agitates the water surface through heating and
scattering. Testing time should be limited to a few
minutes; prolonged testing, particularly at higher power
levels, will drive out dissolved air and air bubbles will be
visible on surfaces in the tank. These bubbles can be
gently brushed off.
Transducer Wetting and Placement: After tilting the
transducer into the water at a 45° angle, verify that the
surface is uniformly wetted; if not, wipe the surface
clean. The transducer should be positioned above the
cone target. Small variations will occur due to place-
ment. Try various positions above target to obtain a
maximum power reading.
ULTRASOUND RADIATION LEVELS
There are no maximum limits in the U.S. for therapy
power, only the verification of the displayed setting accu-
racy to ± 20% of actual output is required. Exposure
levels for physical therapy applicator heads range from
100mW/cm2 to 3W/cm2. Total power requires multiplica-
tion by the radiated cross sectional area in cm2.
The power limits shown in the following table for diag-
nostic ultrasound have been extracted from FDA Section
510(k) guidance to manufacturers on submissions and
clearance as of February 1993. Refer to the AIUM and
FDA publications for complete and up to date testing
standards and interpretations. Measurements are done
in all standard modes of operation. Power intensity is
rated as Spatial Peak Temporal Average (ISPTA) and
Spatial Peak Pulse Average (ISPPA). The values in mW/
cm2 are derated for tissue and in parenthesis for the wa-
ter medium (use the chart below):
PRE-AMENDMENT ACOUSTIC OUTPUT LIMITS
Use ISPTA
Tissue
(mW/cm2)
Water
ISPPA
Tissue
(mW/cm2)
Water
Peripheral Vessel 720 1500 190 350
Fetal Imaging & Other * 430 730 190 350
Cardiac 94 180 190 350
Opthalmic 17 68 28 110
* Abdominal, intra-operative, pediatric, small organ (breast, thyroid, testes, etc.), neonatal cephalic, adult cephalic

8
THEORY OF MEASURING ULTRASOUND POWER WITH THE RADIATION FORCE METHOD
Sound is a form of energy that sets the particles in the isonated medium into vibrational motion. The particles then pos-
sess a kinetic energy. If dPm is the rate of the flow of this energy about an area dA, then the mean acoustic energy is:
Eq. 1 I = dPm/dA I = Acoustic intensity at a point in that area, Watts/cm2
When a plane sound wave propagates through a uniform non-absorbent medium, the intensity must be the same for all
points in the wave. Let E represent the energy density, i.e., the energy per unit volume. When the sound energy pass-
es through a unit cross-sectional area with a speed c, the intensity is:
Eq. 2 I = cE E = Energy density per unit volume, ergs/cm3
c = Ultrasound wave velocity, cm/sec
The radiation pressure effect can be explained by analogy to the application of an alternating electric voltage to a non-
linear load. With the non-linear load it appears that both AC and DC components are present. In ultrasonics the non-
linear element is the density of the fluid and hence acoustic impedance (load) varies in the same periodical manner as
the density. Therefore in ultrasound the two components of pressure, one alternating and the other direct are present.
The average AC pressure per cycle is zero, but the DC pressure of radiation is:
Eq. 3 P = I/C P = Pressure of Radiation, ergs/cm3
Therefore, from the above two equations, the pressure of radiation (P) is equal to the energy density (E).
Eq. 4 P = E
It is this DC pressure of radiation that can be measured. At low frequencies, below 100KHz, a standard high frequency
hydrophone can be used. For higher frequencies, generally used in medical applications, 1-15 MHz, hydrophones are
not available. At these frequencies the force can be measured using a precision balance and a radiation force target
that is perfectly absorptive. The conversion from force to power can be accomplished using the equation:
Eq. 5 p = Wgc W = measured force, grams
g = acceleration, dynes
c = velocity of ultrasound, cm/sec
p = power, ergs/sec
By combining all constants together and converting from ergs/sec to watts, we obtain a simplified equation that is used
to calculate the ultrasonic power once the force is measured:
P = w(14.65) P = Ultrasonic power in watts
w = Ultrasonic force in grams
To determine the ultrasonic watt density (watts/cm2 or watts/in2) of a given transducer the P is divided by the cross sec-
tional area of the transducer.
SPECIFICATIONS
0-30 Watts
± 150mW (± 0.01g)
0.5 to 10MHz
5%
Vernier Dial
Manually Adjusted
0.5” (12.7mm) neoprene rubber
Degassed water
1,200 ml.
5.75” (146mm) dia. x 5.55” (140mm) height
4.5” (114mm) dia. x 5.25” (133mm) deep
3.25” (89mm) dia. x 1.625” (51mm) height
19” H (483mm) x 17” L (432mm) x 7” W (178mm)
18 pounds
Power Range
Resolution
Frequency Range
Accuracy
Display
Zeroing Method
Test Tank Lining
Test Medium
Test Tank Liquid Capacity
Test Tank Dimensions: Outside
Inside
Cone Target
Carrying Case
Shipping Weight

9
Measurement
Difference Watt Output Measurement
Difference Watt Output
0.10 1.47 0.58 8.50 1.06 15.53
0.11 1.61 0.59 8.64 1.07 15.68
0.12 1.76 0.60 8.79 1.08 15.82
0.13 1.90 0.61 8.94 1.09 15.97
0.14 2.05 0.62 9.08 1.10 16.12
0.15 2.20 0.63 9.23 1.11 16.26
0.16 2.34 0.64 9.38 1.12 16.41
0.17 2.49 0.65 9.52 1.13 16.55
0.18 2.64 0.66 9.67 1.14 16.70
0.19 2.78 0.67 9.82 1.15 16.85
0.20 2.93 0.68 9.96 1.16 16.99
0.21 3.08 0.69 10.11 1.17 17.14
0.22 3.22 0.70 10.26 1.18 17.29
0.23 3.37 0.71 10.40 1.19 17.43
0.24 3.52 0.72 10.55 1.20 17.58
0.25 3.66 0.73 10.69 1.21 17.73
0.26 3.81 0.74 10.84 1.22 17.87
0.27 3.96 0.75 10.99 1.23 18.02
0.28 4.10 0.76 11.13 1.24 18.17
0.29 4.25 0.77 11.28 1.25 18.31
0.30 4.40 0.78 11.43 1.26 18.46
0.31 4.54 0.79 11.57 1.27 18.61
0.32 4.69 0.80 11.72 1.28 18.75
0.33 4.83 0.81 11.87 1.29 18.90
0.34 4.98 0.82 12.01 1.30 19.05
0.35 5.13 0.83 12.16 1.31 19.19
0.36 5.27 0.84 12.31 1.32 19.34
0.37 5.42 0.85 12.45 1.33 19.48
0.38 5.57 0.86 12.60 1.34 19.63
0.39 5.71 0.87 12.75 1.35 19.78
0.40 5.86 0.88 12.89 1.36 19.92
0.41 6.01 0.89 13.04 1.37 20.07
0.42 6.15 0.90 13.19 1.38 20.22
0.43 6.30 0.91 13.33 1.39 20.36
0.44 6.45 0.92 13.48 1.40 20.51
0.45 6.59 0.93 13.62 1.41 20.66
0.46 6.74 0.94 13.77 1.42 20.80
0.47 6.89 0.95 13.92 1.43 20.95
0.48 7.03 0.96 14.06 1.44 21.10
0.49 7.18 0.97 14.21 1.45 21.24
0.50 7.33 0.98 14.36 1.46 21.39
0.51 7.47 0.99 14.50 1.47 21.54
0.52 7.62 1.00 14.65 1.48 21.68
0.53 7.76 1.01 14.80 1.49 21.83
0.54 7.91 1.02 14.94 1.50 21.98
0.55 8.06 1.03 15.09 2.00 29.30
0.56 8.20 1.04 15.24 2.50 36.63
0.57 8.35 1.05 15.38
CONVERSION CHART—FROM GRAMS TO WATTS

10

11
9. CONTINUOUS WAVE MODE CERTIFICATION (Average Power)
WATTS
SELECT POWER
ON OFF DIFF. WATTS
OUT
ALLOWABLE
RANGE
3.7 - 6.3
SAT. UNSAT.
Average of 3 Readings
5
WATTS
SELECT POWER
ON OFF DIFF. WATTS
OUT
ALLOWABLE
RANGE
7.4 - 12.6
SAT. UNSAT.
Average of 3 Readings
10
WATTS
SELECT POWER
ON OFF DIFF. WATTS
OUT
ALLOWABLE
RANGE
11.1 - 18.9
SAT. UNSAT.
Average of 3 Readings
15
WATTS
SELECT POWER
ON OFF DIFF. WATTS
OUT
ALLOWABLE
RANGE
14.8 - 25.2
SAT. UNSAT.
Average of 3 Readings
20
WATTS
SELECT POWER
ON OFF DIFF. WATTS
OUT
ALLOWABLE
RANGE
SAT. UNSAT.
Average of 3 Readings
WATTS
SELECT POWER
ON OFF DIFF. WATTS
OUT
ALLOWABLE
RANGE
SAT. UNSAT.
Average of 3 Readings
10. PULSED MODE CERTIFICATION (Amplitude Modulated Waveform)
MAX.
PULSE
MODE
SETTING
POWER
ON OFF
DIFF. WATTS
OUT
CALCULATIONS
(Pp)
Average of 3 Readings = Measured Average Power (Av)
Pp RTPA
CALC.
AVERAGE
POWER
(Pp / RTPA)
Difference
Between
Measured AV
And
Calculated AV
Is Difference < ± 0.6% Of
(Pp / RTPA)
YES NO
REMARKS
11. SHORT TERM LIFE TEST COMPLETE? YES NO
12. ADDITIONAL TEST (Describe in Detail):

12
WARRANTY
Not withstanding any provision of any agreement the following
warranty is exclusive.
Ohmic Instruments warrants each instrument it manufactures to
be free from defects in material and workmanship under normal
use and service for the period of 1-year from date of purchase.
This warranty extends only to the original purchaser. This war-
ranty shall not apply to fuses or any product or parts which have
been subjected to misuse, neglect, accident, or abnormal condi-
tions of operation.
In the event of failure of a product covered by this warranty,
Ohmic Instruments. will repair and recalibrate an instrument
returned within 1 year of the original purchase, provided the
warrantor's examination discloses to its satisfaction that the
product was defective. The warrantor may, at its option, replace
the product in lieu of repair. With regard to any instrument re-
turned within 1 year of the original purchase, said repairs or
replacement will be made without charge. If the failure has been
caused by misuse, neglect, accident, or abnormal conditions of
operations, repairs will be billed at a nominal cost. In such case,
an estimate will be submitted before work is started, if request-
ed.
THE FOREGOING WARRANTY IS IN LIEU OF ALL OTHER
WARRANTIES, EXPRESSED OR IMPLIED, INCLUDING BUT
NOT LIMITED TO ANY IMPLIED WARRANTY OF MER-
CHANTABILITY, FITNESS, OR ADEQUACY FOR ANY PAR-
TICULAR PURPOSE OR USE. OHMIC INSTRUMENTS COM-
PANY SHALL NOT BE LIABLE FOR ANY SPECIAL, INCI-
DENTAL, OR CONSEQUENTIAL DAMAGES, WHETHER IN
CONTRACT, TORT, OR OTHERWISE.
If any failure occurs, the following steps should be taken:
1. Notify Ohmic Instruments. giving full details of the difficulty,
and include the model, type, and serial numbers (where
applicable). On receipt of this information, service data, or
shipping instructions will be forwarded to you.
2. On receipt of shipping instructions, forward the instrument,
transportation prepaid. Repairs will be made and the instru-
ment returned, transportation prepaid.
SHIPPING TO MANUFACTURER FOR REPAIR OR ADJUST-
MENT
All shipments of Ohmic Instruments products should be made
via United Parcel Service or "Best Way" prepaid. The instru-
ment should be shipped in the original packing carton, or if it is
not available, use any suitable container that is rigid and of ade-
quate size. If a substitute container is used, the instrument
should be wrapped in packing material and surrounded with at
least four inches of excelsior or similar shock absorbing materi-
al.
CLAIM FOR DAMAGE IN SHIPMENT TO ORIGINAL PUR-
CHASER
The instrument should be thoroughly inspected immediately
upon delivery to purchaser. All material in the shipping contain-
er should be checked against the enclosed packing list. The
manufacturer will not be responsible for shortages against the
packing sheet unless notified immediately. If the instrument is
damaged in any way, a claim should be filed with the carrier
immediately. (To obtain a quotation to repair shipment damage,
contact Ohmic Instruments.) Final claim and negotiations with
the carrier must be completed by the customer.
Ohmic Instruments will be pleased to answer all application or
use questions, which will enhance your use of this instrument.
Please address your requests or correspondence to:
Ohmic Instruments
3081 Elm Point Industrial Drive
St. Charles, MO 63301
ATTN: Technical Support.
Or call Ohmic Technical Support at 410-820-5111.
All rights reserved. This manual may not be reproduced in com-
plete form without written permission of Ohmic Instruments
Company. Test forms may be copied as required by the original
purchaser of the instrument. Information contained within this
manual is believed to be accurate and reliable. However, Ohmic
Instruments Company assumes no liability for its use. Ohmic
Instruments Company reserves the right to supply its instru-
ments with design changes and/or component substitutions that
may not be documented in this manual.
Phone (410) 820-5111
Toll Free(800) 626-7713
Fax (410) 822-9633
www.ohmicinstruments.com
Sales: [email protected]
Service: [email protected]
Table of contents
Other Ohmic instruments Measuring Instrument manuals
Popular Measuring Instrument manuals by other brands

National Geographic
National Geographic Tempy 9070210 operating instructions

Ingersoll-Rand
Ingersoll-Rand ETA2 Operator's manual

Endress+Hauser
Endress+Hauser dosimass technical information

GW Instek
GW Instek PEL-3000 Series user manual

Riken Keiki
Riken Keiki RS-400 Series operating manual

GTC
GTC CT8027 quick start guide

Compur Monitors
Compur Monitors Statox 501 IR manual

PCB Piezotronics
PCB Piezotronics 340A65 Installation and operating manual

Leuze electronic
Leuze electronic AMS 335i Technical description

National Instruments
National Instruments NI PXIe-4138 CALIBRATION PROCEDURE

LSI LASTEM
LSI LASTEM Alpha-Log user manual

Emerson
Emerson MicroMotion HPC010 installation manual