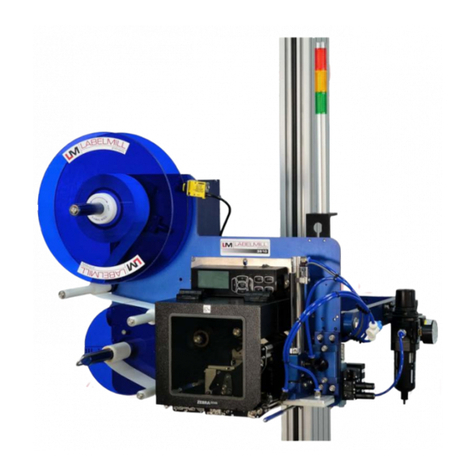
Godex AG3000T User manual

AG3000T
USER MANUAL
AG3000T AG3000T-LS
AG3000T (print & apply system) with optional labelunwinder
User Manual: AG3000T
Version: 1.0
Issue Date: May 2016

2
Contents
1. Introduction................................................................................................................................................4
1.1 Overview ...................................................................................................................................................4
1.2 Applicator Specifications Summarized .....................................................................................................4
3. Basic Safety Precautions.............................................................................................................................5
3.1 Coverage.............................................................................................................................................5
3.2 Following the instructions in this operating manual ..........................................................................5
3.3 Possible device handling risks.............................................................................................................5
3.4 Environmental conditions of the device operation ............................................................................5
3.5 Occupational health and safety rules .................................................................................................6
3.6 Safety instructions ..............................................................................................................................6
3.7 Never: .................................................................................................................................................7
3.8 Applied harmonized standards and the safe use of electrical appliances ..........................................7
3.9 The possible risks of electric shocks if working with the applicator...................................................8
3.10 Configuring the pneumatic unit, safety ..............................................................................................8
4. Contents of delivery - what’s in the box? ...................................................................................................9
4.1 Standard configuration with 170 mm effective stroke.......................................................................9
3.2 Checking the box contents (AG-3000-110060 / AG-3000-110100) ..........................................................9
3.2.1 Box 1: Printer + Accessories ..............................................................................................................9
3.2.2 Box 2: Applicator components ....................................................................................................... 11
5. Assembling the system ............................................................................................................................ 13
5.1 Required Tools................................................................................................................................. 13
5.2 Assembling the stand ...................................................................................................................... 13
5.3 Installing the internal rewinder in the printer................................................................................. 17
5.4 Installing the applicator interface.................................................................................................... 19
5.5 Integrating the printer and applicator unit ..................................................................................... 21
6. Operating your AG3000T(-LS).................................................................................................................. 26
6.1 Print & apply cycle: the basics ......................................................................................................... 26
6.2 Printer configuration for applicatoruse........................................................................................... 26
6.2.1 Power on the printer ................................................................................................................... 26
5.2.2 Firmware......................................................................................................................................... 27
5.2.3 Setting the printer in applicatormode ........................................................................................... 27
5.2.4 Formatting the applicator interface (!)........................................................................................... 29
5.2.5 Smart backfeed............................................................................................................................... 29

5.2.6 Create a label and load media ........................................................................................................ 29
6.3 Putting the applicator into service .................................................................................................. 29
6.3.1 Air supply ..................................................................................................................................... 29

3
5.3.2 Checking the mechanical settings (!).............................................................................................. 29

5.3.3 Run a test cycle............................................................................................................................... 31
5.3.4 The “START” menu ......................................................................................................................... 31
5.3.5 The “SERVIS1” menu....................................................................................................................... 33
5.3.6 The “MANUAL” menu..................................................................................................................... 33
5.3.7 The “LANGUAGE” menu ................................................................................................................. 34
6. Mechanical and pneumatic adjustments................................................................................................. 35
6.1 Manual menu ................................................................................................................................... 35
6.2 Applicator head alignment ............................................................................................................... 35
6.2.1 Height adjustment .......................................................................................................................... 37
6.2.2 Horizontal adjustment after vertical adjustment ........................................................................... 37
6.2.3 Horizontal adjustment without vertical adjustment ...................................................................... 37
6.3 Air settings i: blowing ...................................................................................................................... 38
6.4 Air settings ii: vacuum...................................................................................................................... 39
7 Connecting to auxiliary systems .............................................................................................................. 40
7.1 Introduction..................................................................................................................................... 40
7.2 Triggering devices – input signals .................................................................................................... 41
7.3 Outgoing signals............................................................................................................................... 41
8 Options .................................................................................................................................................... 42
9 Maintenance............................................................................................................................................ 42
10 Wire diagrams...................................................................................................................................... 43
10.1 Power and signals schematic............................................................................................................ 43
10.2 Control unit picture.......................................................................................................................... 43
10.3 Power circuits................................................................................................................................... 44
10.4 Connector rack - detailed view......................................................................................................... 44
10.5 Connector rack diagram................................................................................................................... 41
10.6 Electro-pneumatic diagram ............................................................................................................. 42
10.6 PLC / Printer applicator port diagram .......................................................................................42

4
1. Introduction
1.1 Overview
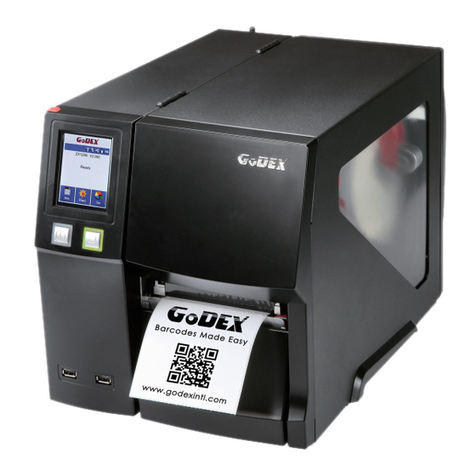
Godex AG3000 print & apply systems match ZX1000i printers, either with 203, 300 or 600dpi print
resolution, with high end, air-driven tamp applicators with the purpose of print and apply labels
on demand.
AG3000 print & apply systems are available as easy to install, ready-to-use solutions, but you can
also configure your own customized systems by combining the components in a different way. The
AG3000 enables you to attach unique information to each single product coming down the
production- or packaging line. The systems come with standard applicator heads of either 60mm
x 60mm or 100mm x 100mm. With optional heads they can handle any label size from 20mm x
20mm up to 100mm x 200mm. Tamp applicators are typically used to label non-moving items on
intermittent conveyor systems, in robotized processes, and in manual workflows. With roll-on and
blow-on heads, available on request, they will also label moving items accurately. The AG3000T
delivers an effective stroke of 170mm (total stroke 300mm) and the AG3000T-LS of 370mm (total
stroke 500mm). Various options are available to tune the AG3000T/AG3000-LS to your particular
needs.
1.2 Applicator Specifications Summarized
Type:
Item no:
AG3000
AG-3000-110060 /AG-3000-110100
AG3000-LS
AG-3000-22L060 /AG-3000-22L100
Std. head size: 60mm x 60mm / 100mm x100mm 60mm x 60mm / 100mm x100mm
Opt. head sizes: 20mm x 20mm up to 110mm x200mm 20mm x 20mm up to 110mm x200mm
Stroke 300mm 500mm
Effective Stroke 170mm 370mm
(The effective stroke equals the maximum allowed height difference between the products in
one production batch)
Label sizes min 20mm x 20mm, max 100 x200mm
Label roll diameter 200mm standard inside the printer
280mm optional with external holder
Performance up to 30 labels/min of 100mm x 100mm at an effective stroke of 170mm
up to 60 labels/min of 20mm x 20mm at an effective stroke of 10mm
Compatibleprinters ZX1200i (203dpi) / ZX1300i (300dpi) / ZX1600i (600dpi)
)*: the process speed depends on variables such as label size, the type and source of the data
processed, stroke length (product height), required product contact time and conveyor speed.

5
Basic Safety Precautions
Coverage
Safety rules and instructions either written or referred to in this manual apply to the installation, the
usage and the maintenance of both the applicator- and the printer components within AG3000
systems. They do however not replace any safety instruction published in separate Godex
ZX1(X)00i user- and service manuals, and must be considered complementary to those instead.
Therefore, personnel working with AG3000 systems must be familiar with the safety instructions
stated in the applicable Godex printer manuals as well.
Following the instructions in this operating
manual
A thorough knowledge of basic safety instructions and safety regulations is an essential
prerequisite for using this device in accordance with safety requirements, while ensuring its fault-
free operation. This operating manual, and in particular the safety instructions contained herein,
must be adhered to by any personnel using the device. All relevant standards and regulations
pertaining to the prevention of accidents and injuries relevant to the device installation site must
also be adhered to.
Possible device handling risks
The device was manufactured in accordance with relevant technical requirements and
internationally recognized safety and technical standards. However, situations might still arise
during the use of the device that could pose a risk to the health and/or lives of operators and/or
third parties, or cause damage to the device and/or otherproperty.
The device may only be used:
• In accordance with the purpose for which it wasmanufactured
• If it is free of any defects in terms of safety and technical requirements.
Any defects that could potentially compromise safety must be rectified immediately.
Environmental conditions of the device
operation
• Operation ambient temperature within the range of 5 °C to 40 °C (41 °F to 104 °F)
• Storage and transport temperature: -20 °C to 55 °C (-4 °F to 131 °F); the device can withstand
temperatures of up to 64 °C (149 °F) for a period of up to 24hours
• Operation ambient non-condensing relative air humidity within the range of 20% to 85% RH

6
• Storage ambient non-condensing relative air humidity within the range of 20% to 85% RH
Occupational health and safety rules
The device contains moving parts that can pose a risk to the operator unless the safety rules are
adhered to. In order to prevent a potential injury, read the following safety rules carefully:
• Only persons trained in operating the device and acquainted with associated risks should be
authorized to enter the space where the device isinstalled.
• A safe distance from the application plate must be maintained when the device is being
connected to a source of compressed air and/or when it is being switched on or off, as the
device may begin to move unexpectedly.
• Crumpled and/or detached labels may only be removed when pressurized air is not being
supplied to the device or if the device has moved into an errormode.
• An error or pause mode must be invoked before print material is replaced in the device.
Safety instructions
• When working with the device the operator must adhere to all relevant generally binding
safety regulations as specified in the labor code of his/her country and in other legal safety
regulations that may apply.
• The device’s keeper must ensure the performance of regular maintenance. Routine
maintenance must be carried out by properly trained and authorized personnel. Failure to do so
could result in device failure or injury and may breach health and safetylaws.
• The device may only be operated by properly trained and authorized personnel.
• The device may only be used for those purposes for which it is technically fit in accordance with
the terms and conditions specified by the manufacturer, while the structure, design and technical
condition must comply with the relevant safetyregulations.
• The device’s operator must perform a visual inspection of the device regularly, along with
regular basic maintenance andservicing.
• Should there be a discovery of any defect and/or damage that might compromise operating
safety and/or the operation of the printer that cannot be rectified on the spot, the device must
not be brought into operation / must be switched off immediately, and the defect must be
reported to the device’s keeper and other relevant persons.
• The legibility of safety signs, symbols and notices on the device must be maintained at all times.
In the event of damage and/or illegibility, any such signs must be restored by the device’s keeper
to their original condition.

7
Never:
• Connect the device to a source of electric power if any of the protective parts (electric
component covers, safety labelling and/or safety elements of the device) have been removed
and/or damaged.
• Modify the mechanical design and/or electrical circuitry of the device in any way.
• Perform any maintenance tasks before the device has been secured in its off state and the
device has been disconnected from the mainpower.
Applied harmonized standards and the safe
use of electricalappliances
• AG3000 Print & Apply systems are class I electrical devices in terms of the necessary protection
against electric shock in accordance with harmonized standard EN 61140, ed. 2 and hence also
meet generally acknowledged standards such as, but non only CE, meaning that all non-live
conductive parts are mutually conductively connected and are further connected to the
protective earth conductor of the printer’s power supply. Other harmonized standards that have
been applied, are EN 60439-3, applicable to low-voltage switch gear and EN ISO 12100 regarding
the safety ofmachinery.
• Connection to the power network supply must be made in compliance with the
requirements specified in regulations and technical standards valid and applicable in the
country of operation.
• Any work on the device may only be performed by persons who are duly qualified according to
the legislative code of the country where the device is installed (1) and who has been
acquainted to the necessary extent with the device (2).
• The keeper of the device is obliged to secure the performance of inspections of the electrical
device in prescribed intervals and to do so in accordance with the legislation regarding such
inspections applicable in the country of operation.
• The device may not bedismantled.
• If shielded data cables are used with the device, they must comply with international standards
governing devices producing electromagnetic radiation. The utilised data cables must be
completely shielded. The use of shielded data cables is necessary in order to prevent the
production and/or reception of electromagnetic noise. Using non-shielded data cables may
result in electromagnetic radiation exceeding permitted limits.

8
The possible risks of electric shocks if working
with theapplicator
Despite the application device being manufactured in accordance with relevant technical
regulations pertaining to safety, its technical design cannot preclude all risks that may occur,
especially in the event of careless or negligent behavior during use of the device. The device must
be used with full awareness of the following risks of electric shock:
• Resulting from direct or indirect contact with parts designed to conduct electric current (live
parts), direct or indirect contact during the removal of electric equipment covers, or direct or
indirect contact in the event of damage caused to insulating parts of a movable powercord;
• Caused by damaged parts of electricalequipment;
• Resulting from a failure to observe instructions regarding equipment connected to the power
mains.
Configuring the pneumatic unit, safety
Excessive operating pressure maycause:
• Injury by crushing;
• Mechanical damage to parts of the labellingmachine.
The equipment manufacturer configures the pneumatic unit of the labelling machine in a manner
that ensures all pneumatically controlled parts of the device (e.g. the piston) can be stopped by
hand without the use of excessive force (max.150N)
The customer shall bear responsibility for any adjustments that are not made by the equipment
manufacturer prior to delivery.

9
Contents of delivery - what’s in the box?
Standard configuration with 170 mm effective
stroke
Most likely you ordered a standard configuration with a 203dpi printer 170mm effective stroke: the
AG-3000- 110060 or AG-3000-110100 (the only difference between those two is the size of the
applicator heads included: 60mm x 60mm versus 100mm x 100mm). Therefore, and because the
installation and operation of most configurations are identical, we will use this standard
configuration to guide you through the installation and make you familiar with the usage of the
AG3000 print & apply solution. Further in this manual you find an option list.
3.2 Checking the box contents (AG-3000-110060 /AG-3000-110100)
You have received two boxes. Please check whether their content has arrived undamaged. §
3.2.1 and 3.2.2 will help you to check whether nothing is missing. Please inform your supplier
immediately if anything seems to be wrong.
3.2.1 Box 1: Printer + Accessories
If you have received the printer parts for your AG3000 directly from a Godex subsidiary the printer
box contains the printer components described below here. In case you have purchased the
printer and options through a Godex distributor or dealer you may receive them in separate
boxes. In that case it is also possible the internal rewinder and applicator interface have been pre-
installed.
• 1x GoDEX ZX1200i 203dpi printer (optional: ZX1300i dpi printer, ZX1600i 600dpi printer)

10
• 1x GoDEX ZX1(X)00i applicator interface, item no. GP-031-Z2i003-001:
• 1x GoDEX ZX1(X00i) peeler/rewinder unit, item no. GP-031-Z21005-000

11
3.2.2 Box 2: Applicator components
A- Parts to build heavy duty floor stand item AG-2000-123322
B-From left to right: C- Applicatormachine clamp D- Control Unit
Positioner(AG-2000-110110) (AG-2000-110108)
700mm tube (AG-2000-110112)
90° clamp for use with positioner(AG-110106)

12
E- AG3000T applicator base plate, piston, mounting material, applicator head.
(Item AG-3000-110060, AG-3000-110100, AG-3000-22L060, or AG-3000-22L100)

13
Assembling the system
Required Tools
• Hex wrenches 4, 5, 6, 8
• Socket wrench 15
• Screwdriver set
• Phillips head screwdriver set
Assembling the stand
Please previewall stepsand parts described below here before you start assembling. It will help you
to anticipate on every step to come.
Picture 1 – 3: mount the four round feet to the corners of the 2 longer alloy profiles (check also pic.
4 + 5!):
Pic. 1 Pic. 2 Pic. 3
Picture 4: mount the feet on the faces which do not have screw holes
Picture 5: let the narrow ends of the screw holes face each other on the inside whilst mounting the
feet.
Pic. 4 Pic. 5

14
Picture 6: the height of each foot is adjustable to level the stand on uneven surfaces
Picture 7: close the ends of the alloy profiles with the black plastic covers
Pic. 6 Pic. 7
Picture 8: place the shorter alloy leg (the one with holes on two faces) between the longer
legs. Make sure the wider ends of the screw holes are on the same side as thefeet.
Picture 9 - 10: firmly connect the threelegs
Pic. 8 Pic. 9
Pic. 10

15
Picture 11 - 13: take the remaining profile (pic. 11) and mount it firmly onto the central leg:
Pic. 11 Pic. 12 Pic. 13
Picture 14 - 16: mount the adapter plate and clamp on the top of the vertical profile.
Pic. 14 Pic. 15 Pic. 16
Picture 17-18: insert the 700mm tube into the floorstand:
Pic. 17 Pic. 18
i:now first see the appendix “AG3000 OPTIONS” plier in case you also received the
demonstration / exhibition kit AG-3000-EXHKIT.

16
Picture 19-20: mount clamp 110106 onto the slide inside positioner 110110 and then mount the
positioner on the upper end of the 700mmtube:
POSITIONER
AG-2000-110110
CLAMP
AG-2000-110106
Pic. 19 Pic. 20
Picture 21: at a later stage the end of the horizontal positioner must be inserted in- and firmly
attached to clamp 110108, which is pre-mounted on the applicatorunit:
Pic. 21

17
Picture 4:
Installing the internal rewinder in the printer
Picture 1:
Step 1. Open the main printercover
Step 2. Remove the three screws holding the left side
cover
Step 3. Remove the lower frontcover
Step 4. Remove the plug from the centerplate
(The rewinder bearings will be insertedhere)
Picture 2:
Step 5. Remove the leftcover
Picture 3:
Step 6. Insert the first bearing from the rightside

18
Picture 4:
Step 7. Insert the second bearing from the left sight
Picture 5:
Step 8. SKIP this step! Not relevant for applicator use.
Step 9. SKIP this step! Not relevant for applicator use.
Step 10. Install the diverterpulley
Step 11. Insert the rewinder shaft into thebearings
Step 12. Install the “rewinder full”sensor
Step 13. Plug in the sensorconnector
Picture 6:
Step 14. Remove themotor.
Step 15. Install the 22T cogwheel and its retainingring.
Step16. Install the motor and the rewinder drive belt
Step 17. Install this gearset
Step 18. Install this gearset
Step 19. Install theclutch
i:The default torque setting of the clutch suits the AG3000 requirements. Please check the
printer service manual in case the torque needs to be adjusted at somepoint.
i: GO TO § 4.4 (APPLICATOR INTERFACE INSTALLATION) BEFORE RE-INSTALLING THE PRINTER
COVER!

19
Installing the applicator interface
The GoDEX ZX1X00i applicator interface can be used with both 24V and 5V peripheral systems,
both in terms of power supply and in- and outgoing signals. Hence, the correct voltage levels of
the in- and outgoing signals must be configured before installation in the printer. Even in case the
interface board has been pre-configured you must verify the setup is correct. You may need to
(re)configure the board to be compatible with the AG3000. The AG3000 requires the 24Volt
configuration. A wrong configuration may damage your equipment!
Picture 1: check whether the configuration of the applicator interface board is set correctly for use
with the AG3000 applicator series. Adjust it if necessary. Picture 1 shows the correct configuration.
A. The two pins on J4
must be connected.
B. Pin 2 and 3 on J5
must be connected.
C. Pin 2 and 3 on J6
must be connected.
Pic. 1
Picture 2: the applicator interface board with the three loose jumpers and mainboard flat cable.
Pic. 2

20
Picture 3 and 4: remove this cover on the back of theprinter
Pic. 3 Pic. 4
Picture 5 and 6: connect the applicator interface to the socket on the mainboard:
Pic. 5 Pic. 6
This manual suits for next models
2
Table of contents
Other Godex Label Maker manuals

Godex
Godex DT4C User manual

Godex
Godex GE300 User manual

Godex
Godex BP1000i Series User manual

Godex
Godex T-10 User manual

Godex
Godex G E300 User manual

Godex
Godex GE300 User manual

Godex
Godex EZ6000 Plus Series User manual

Godex
Godex ZX1000i Series User manual

Godex
Godex EZ-DT-2 User manual

Godex
Godex BZB-2U User manual

Godex
Godex ZX400+ Series User manual

Godex
Godex DT200 Series User manual

Godex
Godex RT700 SERIES User manual

Godex
Godex C690LJ User manual

Godex
Godex HD830i User manual

Godex
Godex EZPi-1300 User manual

Godex
Godex STE5 User manual

Godex
Godex EZ-4TT Plus User manual

Godex
Godex MX3 series: MX30 User manual

Godex
Godex ZX1000i Series User manual