Page 10 www.oldschoolmodels.com Construction Manual
n Step 68 - Fuselage - FSP, F2A/F2B
Locate FSP from LP1. This is
the port side of the inner lite-
ply structure. Place this on your
board so the thin end (with the
wing saddle cutout) is on the left,
and the bigger end on the right.
Glue the F2A/F2B assembly in
place as shown here, noting it's
orientation. Make sure it is 90° to FSP and it's tab is completely
inserted into FSP's pre-cut slot.
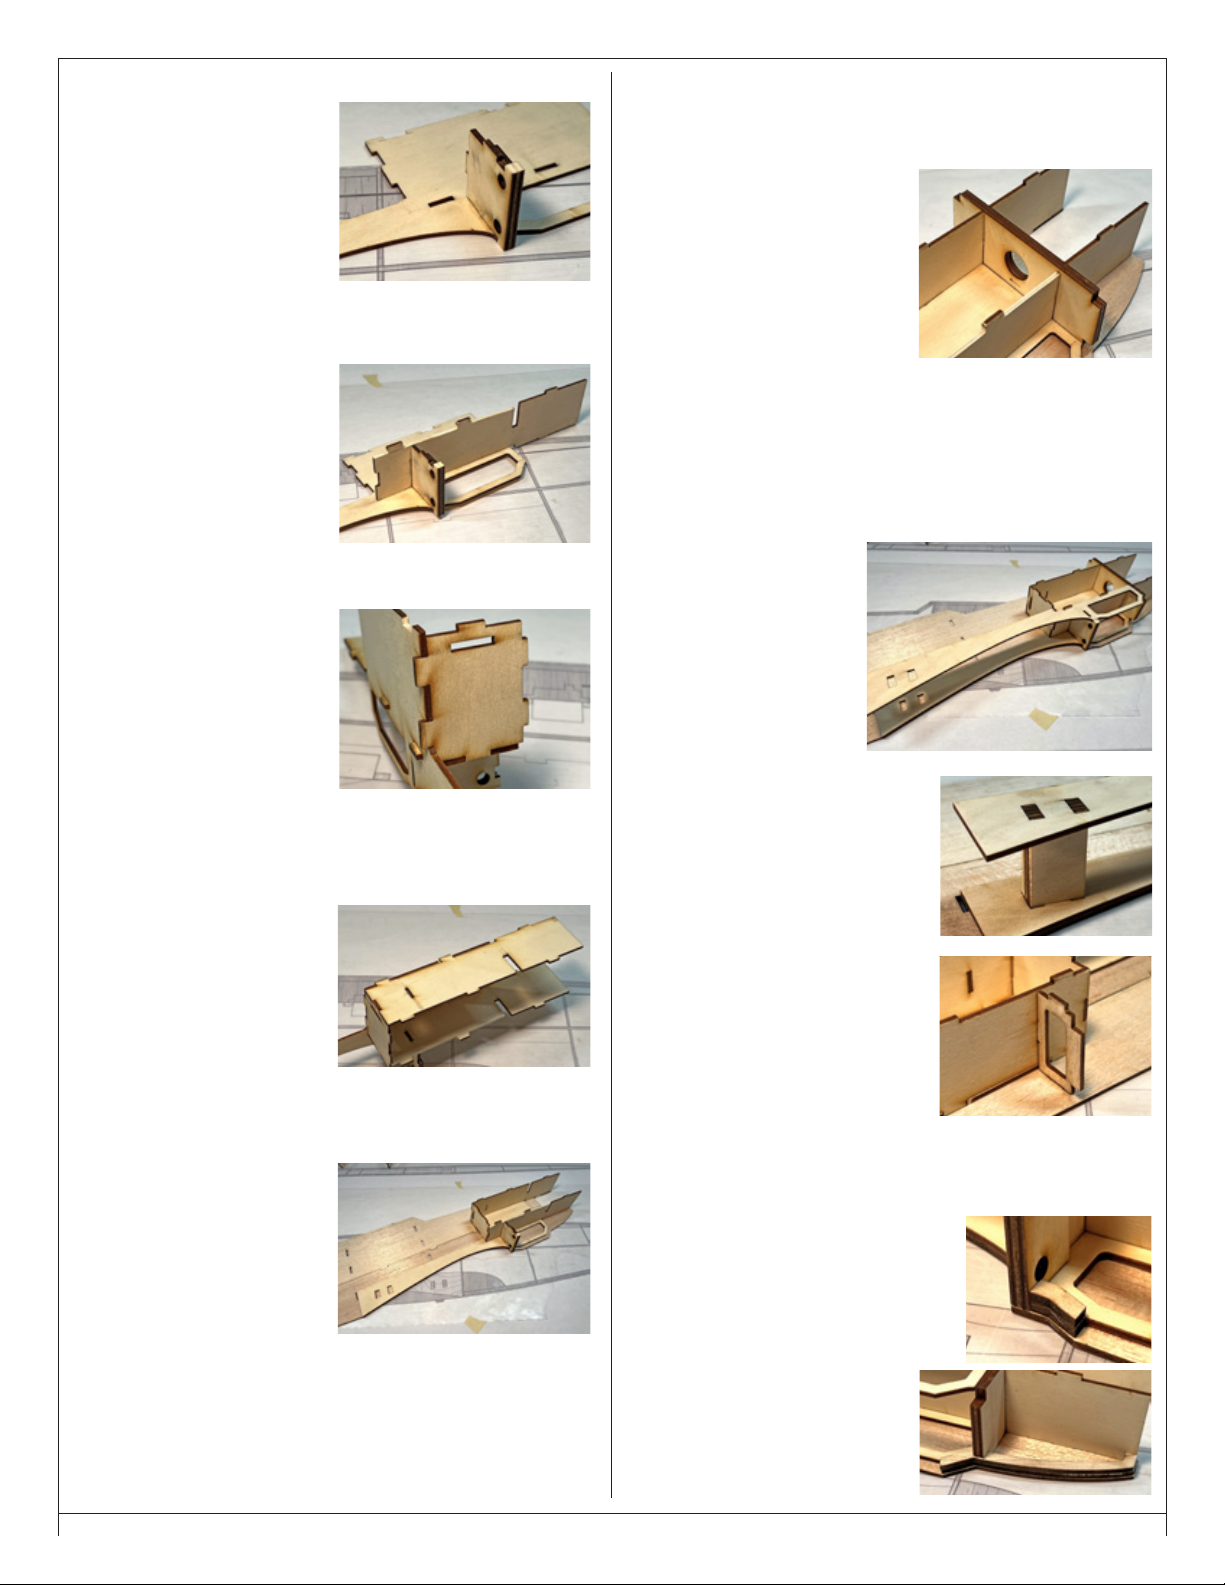
n Step 69 - Fuselage - BB
Locate BB from LP2. Test fit it in
position as shown, making sure
you know how all the tabs/slots
fit together. Note that the tabs
will extend through FSP and
slightly protrude from the other
side of the sheet - by design.
When satisfied on how this goes
together, remove the piece, apply glue and attach it to FSP and
FS2A/B.
n Step 70 - Fuselage - F3
Locate F3 from LP2. Test fit it in
position as shown, making sure
you know how all the tabs/slots
fit together. Note that F3 has an
etched circle which designates
the top and starboard side.
Also note that F3's tabs will also extend through FSP and slightly
protrude from the other side of the part.
When satisfied on how this goes together, remove F3, apply glue
and attach it to FSP and BB.
n Step 71 - Fuselage - BT
Locate BT from LP2. Test fit it in
position as shown, making sure
you know how all the tabs/slots
fit together. Note that BT's tabs
will also extend through FSP and
slightly protrude from the other
side of the part.
When satisfied on how this goes together, remove the piece, apply
glue and attach it to FSP and F3.
n Step 72 - Fuselage - BT
Now it's time to attach the
lite-ply structure to the port
side sheeting. Grab one of the
fuselage side sheets you made
earlier and place it so the tail is
on the left, nose is on the right.
Now carefully test fit the lite-ply structure to the sheet as shown,
making sure you know how all the tabs/slots fit together. This is
where the extra long tabs on the lite-ply parts will aid in getting the
proper alignment to the sheeting.
When satisfied that you know how this goes together, remove the
lite-ply structure, apply glue, and then attach it to the sheeting.
Pay close attention that the structure is completely flat against the
sheeting along it's entire length, and that it is aligned properly, even
in the area around the wing saddle. Apply weights as necessary to
hold this in place as the glue cures.
n Step 73 - Fuselage - FG
Locate the FG assembly you made
a few steps back. Test fit into
position as shown here, noting the
engraved arrow pointing towards
the top of the fuselage. Lightly
sand as necessary for a good, snug
fit.
When satisfied with the fit, remove FG, mix up some 30 minute
epoxy and glue this in position. Make sure it is completely inserted
into the lite-ply structure as the glue cures.
If you're powering your One-O Nine via a glow engine, this piece
will be the firewall that your mount will attach to.
n Step 74 - Fuselage - FSS
Locate the FSS from LP1.
Test fit it in position as
shown, making sure you
know how all the tabs/slots
fit together.
When satisfied on how this
goes together, remove the
piece, apply glue and attach
it to BB, F3, F2A/B, and FG.
n Step 75 - Fuselage - WH4
Locate the WH4 assembly from a few
steps back. This is now glued in place
between FSP and FSS as shown here.
Use epoxy for this step as well. Make
sure to weigh down FSS while glue
cures.
n Step 76 - Fuselage - F1
Locate the F1 from BP7. It is glued
in place on top of BT, with F1's tabs
fitting into the slots on the fuse side
and on BT. This is not a highly stressed
piece, so it's made of balsa to save
weight - but I will tell you I broke
this piece, several times after I installed it, and on each of the
prototypes. Hopefully you'll keep a lookout for it and not have the
same luck.
n Step 77 - Fuselage - FS7
Locate two FS7s from BP2. These are
glued together, stacked on top of each
other, then glued in place as shown here,
just forward of F2A/B.
n Step 78 - Fuselage - FS6
Locate two FS6s from BP2. These
are glued together, stacked on top
of each other, then glued in place
as shown here, underneath BB.