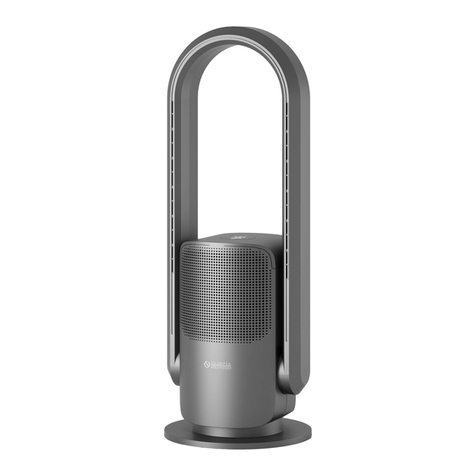
Olimpia splendid PELER 4 Specification sheet

PELER
4
ISTRUZIONI PER USO E MANUTENZIONE
INSTRUCTION FOR USE AND MAINTAINS
MODE D'EMPLOI ET D'ENTRETIEN
HINWEISE FÜR DIE VERWENDUNG UND PFLEGE
INSTRUCCIONES DE USO Y MANTENIMIENTO

2
ITALIANO
L’UTILIZZO DI APPARECCHI ELETTRICI RENDE
INDISPENSABILE L’OSSERVANZA DI FONDA-
MENTALI NORME DI SICUREZZA AL FINE DI RI-
DURRE IL RISCHIO DI INCENDI, SCOSSE ELET-
TRICHE E GRAVI LESIONI.
L’apparecchio deve essere utilizzato nel pieno rispetto
delle speciche riportate nel presente manuale. Il suo utilizzo
per scopi diversi da quello qui specicato potrebbe essere
causa di gravi lesioni.
1. L’apparecchio può essere utilizzato da bambini di almeno 8
anni di età e da persone con ridotte capacità siche, senso-
riali o mentali o con mancanza di esperienza e di conoscenza
solo a condizione che siano sorvegliati o abbiano ricevuto
istruzioni riguardo l’utilizzo in sicurezza dell’apparecchio
e abbiano compreso i rischi che esso comporta.
2. I bambini non debbono utilizzare l’apparecchio come gioco.
3. Non consentire ai bambini di eseguire interventi di pulizia
o manutenzione dell’apparecchio in assenza di opportuna
sorveglianza.
4. Ove il cavo di alimentazione apparisse danneggiato, farlo
sostituire dal fabbricante, da un centro di assistenza auto-
rizzato o da personale comunque qualicato onde prevenire
ogni possibile rischio.
5. Durante le operazioni di riempimento e pulizia, staccare
la spina dalla presa di corrente.
6. Prima di rimuovere il carter di protezione, assicurarsi che
la ventola sia disconnessa dalla rete di alimentazione.
7. Quando l’apparecchio non è in uso, disconnetterlo dall’a-
limentazione. Per il distacco della spina dalla presa di
corrente, non tirare il cavo di alimentazione ma agire sulla
spina medesima.
8. Non smontare o modicare l’apparecchio.

3
ITALIANO
PELER 4
9. Non utilizzare l’apparecchio in ambienti con temperature
eccessivamente alte o basse ed evitare la sua esposizione
alla luce diretta del sole.
10 Non utilizzare l’apparecchio nelle vicinanze di liquidi in-
ammabili o in atmosfera esplosiva.
11. Non appoggiare sull’apparecchio oggetti pesanti perché
da ciò potrebbero derivare danni o anomalie di funziona-
mento.
12. Essendo l’apparecchio dotato della funzione umidicante,
non utilizzarlo per un lungo periodo di tempo in ambienti
privi di circolazione d’aria (come ad esempio in ambienti
chiusi di ristrette dimensioni) onde evitare eccessiva umidità.
13. Per mantenere l’apparecchio pulito, cambiare l’acqua di
frequente.
14. Durante il funzionamento, l’apparecchio deve essere po-
sto in posizione verticale.
15. Non esporre l’apparecchio a gocce o a spruzzi di acqua.
16. Non posizionare l’apparecchio in spazi ristretti, come ad
esempio su una mensola o all’interno di un armadietto.
17. Prima di procedere all’introduzione dell’acqua, spegnere
l’apparecchio e staccare la spina dalla presa di corrente.
Fare attenzione a non superare il livello massimo indicato
con la scritta “MAX”.
18. Prima di eseguire qualsiasi intervento di pulizia o ma-
nutenzione, spegnere l’apparecchio e disinserire la spina
dall’alimentazione.
19 Per qualsiasi operazione di regolazione o riparazione,
rivolgersi esclusivamente a personale specializzato.
20. Per ridurre il rischio di incendio o scosse elettriche, non
utilizzare il prodotto vicino ad alcun altro dispositivo elet-
tronico.

4
ITALIANO
PRINCIPALI CARATTERISTICHE E FUNZIONAMENTO
Funzione raffreddamento
Temporizzazione 0,5,1,2,4 ore
Protezione basso livello dell’acqua
Ventola a tre velocità: alta, media, bassa
Oscillazione orizzontale automatica
All’accensione, l’apparecchio è impostato per default sulla velocità massima.
Funzione spegnimento di sicurezza quando viene rimosso il ltro dell’aria
Ionizzatore d’aria.
SCHEMA E FUNZIONI
Parti componenti del prodotto
A. Pannello di controllo
B. Flap
C. Griglia di protezione
D. Alloggiamento anteriore
E. Alloggiamento posteriore
F. Cavo di alimentazione e spina
G. Serbatoio dell’acqua
H. Basamento
I. Indicatore del livello dell’acqua
J. Coperchio superiore
K. Filtro dell’aria
L. Telecomando
APPARECCHIO DESTINATO ESCLUSIVAMENTE AD USO DOMESTICO

5
ITALIANO
PELER 4
DISPLAY E PANNELLO COMANDI
TELECOMANDO
Prima del primo utilizzo,
installare la batteria (non inclusa)
TIPO CR2032 3V
A. Pulsante della modalità
B. Pulsante di accensione
C. Pulsante di Raffreddamento
D. Pulsante del Timer
OPERAZIONI PRELIMINARI
Posizionare l’apparecchio su un piano stabile, non inclinato, ad almeno 15 cm. dalla
parete o da qualsiasi altro oggetto, al ne di garantire la corretta circolazione dell’a-
ria. Collocarlo su una supercie resistente all’acqua perché l’eventuale fuoriuscita di
acqua potrebbe danneggiare mobili o pavimento.
Non collocare l’apparecchio direttamente su
tappeti, asciugamani, coperte o altre superci
assorbenti.
RIEMPIMENTO
Per l’utilizzo dell’apparecchio in funzione
Raffreddamento, introdurre acqua nell’apposito
serbatoio. Aprire il serbatoio e versarvi dentro
acqua fredda e pulita.
E. Pulsante ION
F. Pulsante Swing
G. Pulsante di Velocità
Indicatore di energia
slare il serbatoio
dell’acqua
immettere acqua
Indicatore della modalità
Indicatore ION
Indicatore di Raffreddamento
Pulsante ION
Pulsante di Raffreddamento
Pulsante Swing
Ricevitore IR
Pulsante della modalità
Indicatore di Velocità
Indicatore del Timer
Pulsante del Timer
Pulsante di Velocità
Pulsante di accensione
Tappo per scarico
acqua

6
ITALIANO
Per l’aggiunta di acqua nel serbatoio:
Staccare la spina dalla presa di corrente
Prima di procedere al riempimento, scaricare l’eventuale acqua residua (mediante il
relatvo tappo di scarico, posto nel serbatoio dell’acqua).
Usare esclusivamente acqua pulita
Introdurre l’acqua nel serbatoio lentamente
Controllare il display di livello dell’acqua facendo attenzione a non superare il livello massimo.
ISTRUZIONI DI FUNZIONAMENTO
Pulsante di ACCENSIONE
1. Inserire la spina nella presa di corrente, verrà emesso un segnale acustico.
2. Premere il pulsante di ACCENSIONE, l’Indicatore VENTOLA e l’Indicatore ALTA velocità si accenderanno
con un segnale acustico. L’unità funzionerà con l’aria più forte della modalità normale.
3. Premerlo il pulsante di nuovo per spegnere, l’unità si arresta.
Pulsante della MODALITÀ
Premere il pulsante della MODALITÀ, l’Indicatore NATURA si accende. Premere il pulsante di ACCENSIONE
2volte per commutare alla modalità RISPARMIO; premere il pulsante di Accensione 3 volte per commutare
nuovamente alla modalità “normale”.
ALTA velocità + modalità RISPARMIO:
In modalità ALTA velocità, premere la modalità RISPARMIO.
Premere il pulsante RISPARMIO quando la modalità VELOCITA’ è impostata in modalità RISPARMIO con ve-
locità dell’aria ALTA. Entrambi gli indicatori ALTA e RISPARMIO saranno accesi. La velocità dell’aria cambierà
automaticamente come segue: ALTA e MED durante la prima mezz’ora, MED durante la seconda mezz’ora,
BASSA velocità per un’ora e poi STOP
MEDIA velocità + modalità RISPARMIO:
Premere il pulsante RISPARMIO quando la modalità VELOCITA’ MED è impostata in modalità RISPARMIO
con velocità dell’aria MEDIA. Entrambi gli indicatori MED e RISPARMIO saranno accesi. La velocità dell’a-
ria cambierà automaticamente come segue: MED e BASSA durante la prima mezz’ora, BASSA velocità per
mezz’ora e poi STOP.
BASSA velocità + modalità RISPARMIO:
Premere il pulsante RISPARMIO quando la modalità VELOCITA’ è BASSA per impostare la modalità RISPAR-
MIO con velocità BASSA. Entrambi gli indicatori BASSA e RISPARMIO saranno accesi. La velocità dell’aria
BASSA esce per 10 secondi e si arresta 5 secondi alternativamente ogni 15 secondi no allo spegnimento.
Nota: Per evitare un eccessivo raffreddamento, non regolare la direzione dell’aria verso il corpo umano.
ALTA velocità + modalità NATURA:
Premere il pulsante NATURA quando la modalità VELOCITA’ è ALTA per impostare la modalità NATURA con
l’ALTA velocità. Entrambi gli indicatori ALTA e NATURA saranno accesi. La velocità dell’aria cambierà automa-
ticamente con il tempo come segue: ALTA, MED e BASSA, alternativamente.
MEDIA velocità + modalità NATURA:
Premere il pulsante NATURA quando la modalità VELOCITA’ è MEDIA per impostare la modalità
7
ITALIANO
PELER 4
NATURA con la MEDIA velocità. Entrambi gli indicatori MED e NATURA saranno accesi. La velocità
dell’aria cambierà automaticamente con il tempo come segue: MED e BASSA, alternativamente.
BASSA velocità + modalità NATURA:
Premere il pulsante NATURAquando la modalità VELOCITA’è BASSAper impostare la modalità NATURA
con la BASSA velocità. Entrambi gli indicatori BASSA e NATURA saranno accesi. La velocità dell’aria
cambierà automaticamente con il tempo come segue: BASSA e MED, alternativamente.
Pulsante della VELOCITA’
1.Quando si preme il pulsante di ACCENSIONE, l’Indicatore dell’ALTA velocità “ALTA” sarà
acceso e fuoriesce l’aria quella più forte.
2.Premere il pulsante VELOCITA’ una volta, l’Indicatore della velocità MEDIA “MED” sarà
acceso e fuoriesce l’aria mite.
3.Ora premere nuovamente il pulsante VELOCITA’, l’Indicatore della BASSA velocità
“BASSA” sarà acceso e fuoriesce l’aria debole.
Pulsante SWING
Premere il pulsante “SWING” per attivare o disattivare la funzione di oscillazione
Pulsante del TIMER
1.Premere il pulsante “TIMER” per regolare l’impostazione del timer. Ad ogni pressione si
incrementa di 30 minuti no a 7,5 ore. Il periodo impostato è indicato sul display.
2.Per cancellare la modalità timer, premere il pulsante “TIMER” 16 volte (un’ulteriore pres-
sione dopo aver raggiunto le 7,5 ore); l’Indicatore “TIMER” sarà spento.
Pulsante di RAFFREDDAMENTO
1.Premere il pulsante di RAFFREDDAMENTO. Se l’acqua raggiunge il livello, l’Indicatore
“RAFFREDDAMENTO” sarà acceso e la pompa inizia a lavorare.
2.Dopo circa 3 minuti, fuoriesce l’aria fresco e umido.
3.Premerlo di nuovo per spegnerlo. L’Indicatore RAFFREDDAMENTO si spegne e poi fuo-
riesce l’aria fresco e asciutto.
Note:
1.Se si preme il pulsante RAFFREDDAMENTO quando l’acqua è al di sotto del livello inferiore
oppure l’acqua è assente, l’allarme suonerà dopo 90 secondi, e l’Indicatore RAFFREDDA-
MENTO continuerà a lampeggiare per circa 10 secondi. Dopo 10 secondi, l’allarme cessa di
suonare e anche l’Indicatore RAFFREDDAMENTO si disattiverà.
2.L’unità può essere utilizzata senza acqua come un normale ventilatore elettrico. In questa
situazione, il pulsante RAFFREDDAMENTO deve essere in modalità OFF.
Pulsante ION
Premendo il pulsante ION, l’indicatore ION sarà acceso, lo ionizzatore inizierà a lavorare e
lo ione negativo fuoriuscirà mentre l’aria sofa.
NOTA
- Al primo utilizzo l’apparecchio potrebbe emettere un leggero odore.
- Ogni volta che l’apparecchio viene riavviato, sulla griglia si potrebbe vericare la
formazione di condensa.

8
ITALIANO
MANUTENZIONE QUOTIDIANA
Disconnettere l’apparecchio dall’alimentazione.
Controllare che la ventola sia spenta.
Smontare il ltro dell’aria, pulirlo con un detersivo (non usare benzina, alcool, gasolio o altri
prodotti similari) e asciugarlo.
Smontare il panno acqua, pulirlo con un detersivo (non usare benzina, alcool, gasolio o altri
prodotti similari) e asciugarlo.
Scaricare l’acqua presente nel serbatoio e pulire il serbatoio con un panno bagnato o una
spazzola.
Pulire il corpo dell’apparecchio con un panno asciutto. Non utilizzare un panno bagnato o
un getto d’acqua perché ciò potrebbe compromettere la sicurezza dell’apparecchio e il suo
corretto funzionamento.
Rimontare il panno acqua.
Rimontare il ltro dell’aria
PRIMA DI RIPORRE L’APPARECCHIO A FINE STAGIONE
Pulire i ltri e il panno acqua seguendo le istruzioni fornite per la manutenzione quotidiana.
Assicurarsi che il ltro dell’aria e il panno acqua siano asciutti e vericare che il serbatoio
dell’acqua non contenga acqua residua.
Riporre l’apparecchio nella sua confezione originale e conservarlo in un luogofresco e asciutto.

9
ITALIANO
PELER 4
SMALTIMENTO
Il simbolo sul prodotto o sulla confezione indica che il prodotto non deve essere considerato
come un normale riuto domestico, ma deve essere portato nel punto di raccolta appropriato
per il riciclaggio di apparecchiature elettriche ed elettroniche. Provvedendo a smaltire questo
prodotto in modo appropriato si contribuisce ad evitare le potenziali conseguenze negative
per l’ambiente e per la salute che potrebbero derivare da uno smaltimento inadeguato del
prodotto. Per informazioni più dettagliate sul riciclaggio di questo prodotto, contattare l’uf-
cio comunale, il servizio locale di smaltimento riuti o il negozio in cui è stato acquistato il
prodotto. Questa disposizione è valida solamente negli Stati membri dell’UE
DATI TECNICI
Per i dati tecnici sotto elencati consultare la targa dati caratteristici applicata sul prodotto.
Tensione (V) 220-240 V~
FREQUENZA (Hz) 50 Hz
POTENZA (W) 70 W
DIMENSIONI (L×W×H) 308mm x 292mm x 883mm

10
ENGLISH
WHEN USING ELECTRICAL APPLIANCES, BASIC
SAFETY PRECAUTIONS SHOULD ALWAYS BE FOL-
LOWED TO REDUCE THE RISK OF FIRE, ELECTRIC
SHOCK, AND INJURY TO PERSONS, INCLUDING
THE FOLLOWING:
This product should be used only in accordance with
the specications outlined in this manual. Usage other than
what has been specied here may result in serious injury.
1. This appliance can be used by children aged from 8 years
and above and persons with reduced physical, sensory or
mental capabilities or lack of experience and knowledge if
they have been given supervision or instruction concerning
use of the appliance in a safe way and understand the ha-
zards involved.
2. Children shall not play with the appliance.
3. Children should not be allowed to clean or maintain the
appliance without supervision.
4. If the supply cord is damaged, it must be replaced by the
manufacturer, its service agent or similarly qualied persons
in order to avoid a hazard.
5. Unplug the appliance during lling and cleaning.
6. Ensure that the fan is switched off from the supply mains
before removing the guard.
7. When not in use, disconnect the plug from the power sup-
ply. Grasp the plug, not the main power cord, when discon-
necting the plug.
8. Do not disassemble or alter the unit.
9. Do not use the unit in areas where the temperature is extre-
mely high or low where it may be exposed to direct sunlight.
10 Do not operate the unit near ammable liquids or in explo-

11
PELER 4
ENGLISH
sive atmospheres.
11. Do not put heavy objects on the unit; this may cause da-
mage or malfunctions on the unit.
12. Since the unit has the humidifying function, please do
not use it for a long time in an airtight place (such as a small
closed room) to avoid too much humidity.
13. Change the water frequently to keep it clean.
14. This unit must be operated in a vertical position.
15. This unit shall not be exposed to dripping or splashing
water.
16. Do not install the unit in a conned space, such as a bo-
okcase or built-in cabinet
17.Switch OFF and unplug the unit before lling with water.
Make sure the water is below the MAX water level line.
18. Switch OFF and unplug the unit before cleaning and
maintenance.
19 The unit should not be adjusted or repaired by anyone
except specialized technicians.
20.To reduce the risk of re or electric shock, do not use this
fan with any speed
control device.

12
ENGLISH
MAIN FEATURES AND OPERATING
Cooler function
0.5,1,2,4 hours timing
Low level water protection
Three fan speeds: high, mid, low
Automatic horizontal oscillation
Maximum speed is the default conguration when the machine is turned on
Safety power off function, when air lter is removed
Air ionizer.
APPEARANCE AND FUNCTIONS
A.Control panel
B. Flap
C. Protection grid
D. Front housing
E. Rear housing
F. Power cord and Plug
G. Water tank
H. Base
I. Water level indicator
J. Top Cover
K. Air Filter
L. Remote control
FOR HOUSEHOLD USE ONLY

13
PELER 4
ENGLISH
DISPLAY PANEL AND OPERATION PANEL
REMOTE CONTROL
Before rst using,
install battery (not included)
TYPE CR2032 3V
A. Mode Button
B. Power Botton
C. Cool Button
D. Timer Button
PRE-OPERATING INSTRUCTION
Select a rm, level, at location at least 15cm from any wall or object for proper air
ow. Place the air-cooler appliance on a water-resistant surface, as water can damage
furniture and some ooring. Do not place the unit directly on carpets, towels, blankets
or other absorbent surfaces.
We will not accept responsibility for
damage caused by water spillage
FILLING
To use the Cooling function, water must be
added to the water tank. Open the tank
and pour in cool, clean water.
E. Ion Button
F. Swing Button
G. Speed Button
draw out water tank
pour water
Cap for water
draining

14
ENGLISH
Please pay attention when adding water to:
Unplug the appliance
Before relling, remove any remaining water
Use only clean water
Fill the water tank slowly
Pay attention to the front water level display window to not exceed the maximum level.
OPERATING INSTRUCTIONS
POWER button
1.Connect the plug into the power outlet, a beep tone will be heard.
2.Press the POWER button, the FAN indicator and HIGH speed indicator will turn on with
beep tone. The unit will operate in the strongest air of normal mode.
3.Press it again to shut off, the unit stops.
MODE button
Press the MODE button, the NATURE indicator will turn on. Press POWER button 2 times
to turn to the SLEEP mode; press Power button 3 times to turn to the “normal” mode again.
HIGH speed+ SLEEP mode:
In HIGH speed mode, press SLEEP mode,
Press the SLEEP button when SPEED mode is to set SLEEP mode with HIGH wind speed.
Both HIGH and SLEEP indicators will be on. The wind speed will automatically change as
follows: HIGH and MED during the rst half hour, MED during the second half hour, LOW
speed for one hour and then STOP.
MED speed + SLEEP mode:
Press the SLEEP button when SPEED mode is MED to set SLEEP mode with MED wind spe-
ed. Both MED and SLEEP indicators will be on. The wind speed will automatically change as
follows: MED and LOW during the rst half hour, LOW speed for half an hour and then STOP.
LOW speed + SLEEP mode:
Press the SLEEP button when SPEED mode is LOW to set SLEEP mode with LOW speed.
Both LOW and SLEEP indicators will be on. LOW wind comes out 10 seconds and stops 5
seconds alternately every 15 seconds until power off.
Note: To avoid overcooling, do not adjust the direction the wind to the human body.
.
HIGH speed+ NATURE mode:
Press the NATURE button when SPEED mode is HIGH to set NATURE mode with HIGH
speed. Both HIGH and NATURE indicators will be on. The wind speed will automatically
change with time as follows: HIGH, MED and LOW, alternatively.
MED speed + NATURE mode:
Press the NATURE button when SPEED mode is MED to set NATURE mode with MED spe-
ed. Both MED and NATURE indicators will be on. The wind speed will automatically change

15
PELER 4
ENGLISH
with time as follows: MED and LOW, alternatively.
LOW speed + NATURE mode:
Press the NATURE button when SPEED mode is LOW to set NATURE mode with LOW spe-
ed. Both LOW and NATURE indicators will be on. The wind speed will automatically change
with time as follows: LOW and MED, alternatively
SPEED button
1.When the POWER button is pressed, HIGH speed indicator “HIGH” will be on and the
strongest wind comes out.
2.Press the SPEED button once, the MED speed indicator “MED” will be on and the mild
wind comes out.
3.Now Press the SPEED again, the LOW speed indicator “LOW” will be on and the weak
wind comes out.
SWING button
Press “SWING ”button to turn oscillation function on or off.
TIMER button
1.Press the “TIMER” button to adjust timer setting. Every press adds 30 minutes up to 7.5
hours. The set period is indicated on the display.
2.To clear timer mode, press “TIMER” button 16 times (one more press after reaching 7.5
hours); the “TIMER” indicator will be off.
COOL button
1.Press COOL button, If the water reach the level, the “COOL” indicator will be on and the
pump starts to work.
2.After about 3 minutes, the comfortable cool wind with moisture comes out.
3.Press it again to shut off. The COOL indicator turns off then fresh and dry wind comes out.
Note:
1.If press the COOL button when water is under low level or no water, the alarm will sound
after 90 seconds, and COOL indicator will continue to blink about 10 seconds. After 10 se-
conds, the alarm sound stops and COOL indicator will also turn off.
2.The unit can be used without water as normal electrical fan. In this situation, please keep
the COOL button in OFF mode.
ION button
Press the ION button, the ION indicator will be on and the ionizer will start to work, the ne-
gative ion will come out with the wind blowing.
NOTE
- At rst use, the appliance may have a slight odor
- At each re-starting, the appliance may have water condensate on the grid

16
ENGLISH
DAILY MAINTENANCE
Disconnect the appliance from the power supply.
Check that the fan is switched off
Remove the air lter, clean it with detergent (not petrol, alcohol, gas oil or similar products)
and dry it.
Remove the water cloth, clean it with detergent (not petrol, alcohol, gas oil or similar products)
and dry it.
Drain the water contained in the tank and clean it with a wet cloth or brush.
Clean the body of the unit with a dry cloth. Do not use a wet cloth or any water jet because
it could affect the safety of the appliance and its appropriate working.
Reinstall water cloth.
Reinstall the air lter.
END OF SEASON STORAGE
Follow the daily maintenance suggestions to clean lters and water cloth.
Ensure the air lter and the water cloth are dry, ensure that the water tank contains no ac-
cumulated water.
Pack the unit in its original carton and store in a cool, dry location.

17
PELER 4
ENGLISH
DISPOSAL
This symbol on the product or its packaging indicates that the appliance cannot be treated as
normal domestic trash, but must be handed in at a collection point for recycling electric and
electronic appliances. Your contribution to the correct disposal of this product protects the
environment and the health of your fellow men. Health and the environment are endangered
by incorrect disposal. Further information about the recycling of this product can be obtained
from your local town hall, your refuse collection service, or in the store at which you bought
the product. This regulation is valid only in EU member states
SPECIFICATIONS
For the technical data listed below, consult the characteristic data plate applied to the product.
Voltage (V) 220-240 V~
FREQUENCY (Hz) 50 Hz
POWER (W) 70 W
PRODUCT DIMENSION (L×W×H) 308mm x 292mm x 883mm

18
FRANÇAIS
L’EMPLOI D’ÉQUIPEMENTS ÉLECTRIQUES REND
INDISPENSABLE LE RESPECT DE RÈGLES FON-
DAMENTALES DE SÉCURITÉ, AFIN DE RÉDUIRE
LES RISQUES D’INCENDIE, D’ÉLECTROCUTION
ET DE GRAVES BLESSURES.
Cet appareil doit être utilisé dans le respect des spécic-
ations fournies dans le présent manuel. Son emploi pour des
buts autres que celui qui est spécié dans le présent manuel
pourrait provoquer de graves lésions.
1. L’appareil peut être utilisé par des enfants d’au moins 8
ans et par des personnes ayant des capacités physiques,
sensorielles ou mentales réduites, ou bien sans expérience
et connaissance, exclusivement si ceux-ci sont surveillés
ou bien s’ils ont reçu des instructions concernant l’emploi
sûr de l’appareil et s’ils ont compris ses risques.
2. Les enfants ne doivent pas utiliser cet appareil comme un
jouet.
3. Ne pas permettre aux enfants d’effectuer toute interven-
tion de nettoyage ou d’entretien sur l’appareil en l’absence
d’une surveillance appropriée.
4. Si le câble d’alimentation est endommagé, le faire rempla-
cer par le fabricant, par un centre d’assistance agréé ou
bien par du personnel qualié, an de prévenir tout risque.
5. Pendant les opérations de remplissage et de nettoyage,
détacher la che de la prise de courant.
6. Avant d’ôter le carter de protection, veiller à ce que le ven-
tilateur soit débranché du secteur.
7. Quand l’appareil n’est pas utilisé, le débrancher. Pour
débrancher la che de la prise de courant, ne pas tirer le
câble d’alimentation mais agir sur la che.
8. Ne pas démonter ou modier l’appareil.

19
PELER 4
FRANÇAIS
9. Ne pas utiliser l’appareil dans des milieux avec des tem-
pératures trop élevées ou trop basses et éviter son expo-
sition à la lumière directe du soleil.
10. Ne pas utiliser l’appareil près de liquides inammables
ou bien dans un milieu explosif.
11. Ne pas appuyer sur l’appareil d’objets lourds, car cela
pourrait provoquer des dommages ou bien des anomalies
de fonctionnement.
12. Cet appareil étant équipé de la fonction humidicateur,
ne pas l’utiliser pendant longtemps dans des milieux sans
circulation d’air (tels que par exemple des milieux fermés
ayant des dimensions réduites) an d’éviter une humidité
excessive.
13. Pour garder l’appareil bien propre, remplacer l’eau fréq-
uemment.
14. Pendant le fonctionnement, l’appareil doit être mis à la
verticale.
15. Eviter toute projection d’eau sur l’appareil.
16. Ne pas placer l’appareil dans des endroits étroits, tels que
par exemple une étagère ou bien à l’intérieur d’une armoire.
17. Avant d’introduire l’eau, éteindre l’appareil et débrancher
la che de la prise de courant. Veiller à ne pas dépasser le
niveau maximum indiqué par “MAX”.
18. Avant toute intervention de nettoyage ou d’entretien,
éteindre l’appareil et débrancher la che de la prise de
courant.
19. Pour toute opération de réglage ou réparation, s’adresser
au personnel spécialisé.
20. An de réduire le risque d’incendie ou d’électrocution, ne
pas utiliser le produit près d’autres équipements électron-
iques.

20
FRANÇAIS
CARACTERISTIQUES PRINCIPALES ET FONCTIONNEMENT
Fonction refroidissement
Temporisation : 0.5, 1, 2, 4 heures
Protection contre le bas niveau de l’eau
Ventilateur à trois vitesses : haute, moyenne, basse
Oscillation horizontale automatique
Lors de l’allumage, l’appareil est paramétré par défaut sur la vitesse de pointe.
Fonction extinction de sécurité lorsque le ltre de l’air est enlevé.
Ioniseur d’air.
SCHEMA ET FONCTIONS
Parties du produit
A. Tableau de contrôle
B. Bord
C. Grille de protection
D. Logement avant
E. Logement arrière
F. Câble d’alimentation et che
G. Réservoir d’eau
H. Base
I. Indicateur du niveau de l’eau
J. Couvercle supérieur
K. Filtre de l’air
L. Télécommande
APPAREIL A USAGE DOMESTIQUE
Other manuals for PELER 4
1
Table of contents
Languages:
Other Olimpia splendid Air Cleaner manuals

Olimpia splendid
Olimpia splendid AURA DI Specification sheet

Olimpia splendid
Olimpia splendid AURA CARE Specification sheet

Olimpia splendid
Olimpia splendid AURA LI Specification sheet

Olimpia splendid
Olimpia splendid FUTURA Specification sheet

Olimpia splendid
Olimpia splendid AURA Parts list manual

Olimpia splendid
Olimpia splendid VERTIGO Specification sheet

Olimpia splendid
Olimpia splendid AURA ABSOLUTE Specification sheet