Olympus LG-LSLED User manual

Instructions
Notes
This instruction manual is for the Olympus LED light source for light guide.
To ensure the safety, obtain optimum performance and to familiarize yourself fully with the use of
this product, we recommend that you study this manual thoroughly before operating this product,
and always keep this manual at hand when operating this product.
Retain this instruction manual in an easily accessible place near the work desk for future reference.
For details of products included in the configuration of this system, see page 8.
LED light source for light guide
LG-LSLED
Optical Microscope Accessory

This product is applied with the requirements of standard IEC/EN61326-1 concerning
electromagnetic compatibility.
- Immunity Applied to industrial and basic environment requirements.
NOTE: This product has been tested and found to comply with the limits for a Class A digital device,
pursuant to Part 15 of the FCC Rules. These limits are designed to provide reasonable protection
against harmful interference when the product is operated in a commercial environment. This product
generates, uses, and can radiate radio frequency energy and, if not installed and used in accordance
with the instruction manual, may cause harmful interference to radio communications.
Operation of this product in a residential area is likely to cause harmful interference in which case the
user will be required to correct the interference at his own expense.
FCC WARNING: Changes or modifications not expressly approved by the party responsible for compliance
could void the user’s authority to operate the product.
FCC Supplier's Declaration of Conformity
Hereby declares that the product
Product name: Optical Microscope Accessory
Model Number: LG-LSLED
Conforms to the following specifications:
FCC Part 15, Subpart B, Section 15.107 and Section 15.109
Supplementary Information:
This device complies with part 15 of the FCC Rules. Operation is subject
to the following two conditions: (1) This device may not cause harmful
interference, and (2) this device must accept any interference received,
including interference that may cause undesired operation.
Responsible Party Name: Olympus Scientific Solutions Americas Corp.
Address: 48 Woerd Ave Waltham, MA 02453, U.S.A.
Phone Number: 781-419-3900
In accordance with European Directive on Waste Electrical and Electronic Equipment, this
symbol indicates that the product must not be disposed of as unsorted municipal waste, but
should be collected separately.
Refer to your local Olympus distributor in EU for return and/or collection systems available in
your country.
For Korea only
이 기기는 업무용 환경에서 사용할 목적으로 적합성평가를 받은 기기로서
가정용 환경에서 사용하는 경우 전파간섭의 우려가 있습니다.

LG-LSLED
Concept of this instruction manual............................................................................................. 1
Product Concept.......................................................................................................................................... 2
Safety precautions...................................................................................................................................... 3
Handling precautions............................................................................................................................... 6
Maintenance and storage ................................................................................................................... 7
1 System diagram....................................................................................................................................... 8
2 Nomenclature of main operating portions....................................................................... 9
3 Operating procedures......................................................................................................................10
1Turning ON the main switch and adjusting the brightness .................................................................10
2Attaching the filter (Optional)...........................................................................................................................................10
3Adjusting LG-DI/LG-DFI (Dual light guide/Dual light guide) ................................................................ 11
4 Troubleshooting.....................................................................................................................................12
5 Specifications...........................................................................................................................................13
6 Assembly......................................................................................................................................................15
6-1 Attaching the light guide............................................................................................................................15
1Attaching the light guide to LG-LSLED (LED light source for light guide)................................15
2Attaching LG-DFI (Dual combination light guide) ..........................................................................................15
3Attaching LG-R66 (Ring light guide)..........................................................................................................................16
4Replacing the light guide socket to LG-KLADP (Socket for KL light guide) [Optional] .... 17
6-2 Connecting the AC adapter and the power cord................................................................18
Contents


1
LG-LSLED
How to read this instruction manual
Concept of this instruction manual
Applicable user of this instruction manual
This instruction manual applies to users who use this product according to "Intended use" and Olympus distributors.
i
GX53
1
1
2
を登りながら
6
6-1 OOOOOOOOOO
OOOOOOOO
OOOOOOOOOO
OOOOOOOOOOOOOOOOOOOOOOOOOOOOO
OOOOOOOOOOOOOOOOOOOOO
This instruction manual is created as follows.
Title in second layer
OOOOOOOOOOOOOOOOOOOOOOOOOOOOO
Title in third layer
Title in first layer
2
1
1
,
2
... indicates the operating
procedure and A, B... indicates
the portion you operate.
Operating procedure
Loosen the
clamping screw
A
using
the screwdriver.
Remove the product B
.
TIP
NOTE
CAUTION
B
A
The following symbols are used in this instruction manual.
WARNING : Indicates a potentially hazardous situation which, if not avoided, could result in death
or serious injury.
CAUTION : Indicates a potentially hazardous situation which, if not avoided, may result in minor
or moderate injury.
NOTE
: Indicates a potentially hazardous situation which, if not avoided, may result in
damage to the product or other property and/or may cause problems.
TIP
: Indicates the useful knowledge or information for use.
Cautions and references
This instruction manual describes only the contents related to LG-LSLED (LED light source for light guide).
When using this product, read all the instruction manuals supplied with the products (option) you purchased together
with this manual.

2
Product outline
Using this LG-LSLED (LED light source for light guide) in combination with the Olympus microscope via light guide
allows you to illuminate the sample.
Product Concept
Cautions and confirmation before use
This product includes the following items. If any item is missing or damaged, contact Olympus.
· Instruction manual for LG-LSLED (this instruction manual)
· AC adapter
This product is designed as the illumination unit for microscope.
This product is intended to used in combination as a system, refer to the instruction manual for the system product to be
combined.
Intended use

3
LG-LSLED
Safety precautions
If the product is used in a manner not specified by this manual, the safety of the user may be imperiled. In addition, the
product may also be damaged. Always use the product according to this instruction manual.
Electric safety
·Always use the power cord provided by Olympus.
If the proper AC adapter and the power cord are not used, the electric safety and the EMC (Electromagnetic
Compatibility) performance of the product cannot be assured. If no power cord is provided, please select the
proper power cord by referring to the section “Proper selection of the power cord” at the end of this instruction
manual.
·Always connect the ground terminal.
Make sure that the ground terminal of the power cord and that of the power outlet are connected properly.
If the product is not grounded, our intended electric safety and EMC performance of the product cannot be
assured.
·Do not use the product in close proximity to the sources of strong electromagnetic radiation.
Proper operation may be interfered. The electromagnetic environment should be evaluated prior to operation
of the product.
·Disconnect the power cord in case of emergency.
In case of emergency, disconnect the power cord from the power cord connector on the product or from the
power outlet.
Install the product at the location where you can reach the power cord connector or the power outlet at hand
to disconnect the power cord quickly.
·Do not connect or disconnect the power cord, cables and products (optional) while the power is on.
CAUTION
Installation
·Do not block the air vents.
・ Do not install the product on a table or bench which has soft surface, as the product may sink and the air
vents of the bottom surface may be blocked, which creates a fire hazard.
・ Do not to block the air vents on the back of the product. Secure the space of 10 cm or more around the
air vents.
·Install the product on a level table or bench.
WARNING
CAUTION
Prevention of electric shock
·Never disassemble each part of this product.
It could cause electric shock or failure of the product.
·Do not touch the product with wet hands.
In particular, if you touch the main switch of the power unit or the power cord with wet hands, electric shock,
ignition or failure of the product may be caused.
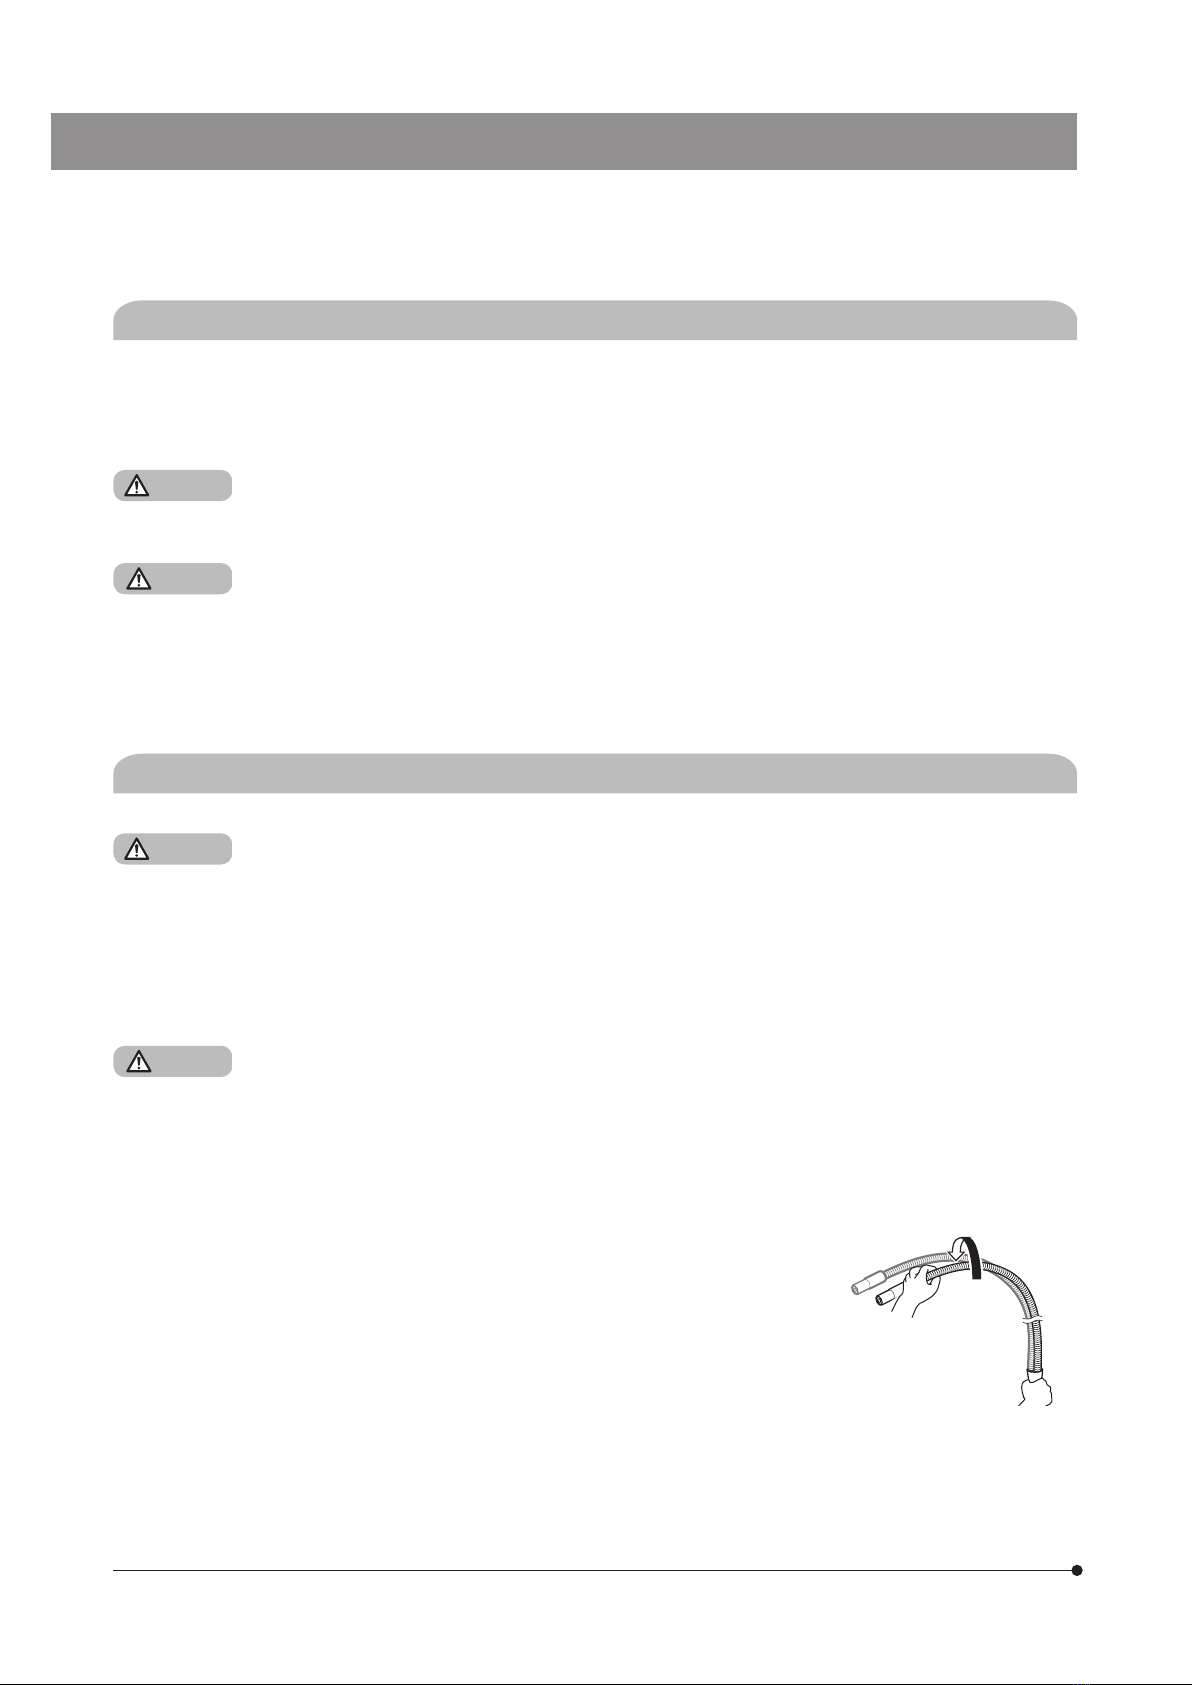
·Do not bend, pull or tie the power cord/cables in a bundle.
Otherwise they could be damaged, causing a fire or an electric shock.
·Never insert any tools or metal fragments in the air vents of the product.
As this product contains the cooling fan, if you insert metal fragments or similar, the fan may be damaged or
fire may be caused.
WARNING

4
LED
This product emits high-intensity visible light. Because light-absorbing materials have the physical property
of converting incident light into heat, damage can arise to heat-sensitive or flammable light-absorbing
materials. To avoid such thermal damage and the potential danger of fire or burns, please obey the following
instructions:
·Never cover up the light guide socket or light guide exit (danger of fire).
·Never cover up the open light guide socket or light guide exit with your hands or other parts of the body
(danger of burns).
Do not look at the LED light directly.
LG-LSLED is classified as Risk Group 2 regulated by IEC62471 “Photobiological Safety of Lamps and Lamp
Systems”.
Possibly hazardous optical radiation emitted from this product.
Do not stare at operating lamp. May be harmful to eyes.
WARNING
CAUTION
·When turning ON the LED unit, do not cover the hole of the light guide socket of LG-LSLED or the distal
end of the light guide. Otherwise, it may cause fire or burns.
·If there is a light guide that is not illuminating the sample when turning ON the LED unit, be sure to
secure the space of 10 cm or more between the flammable light-absorbing materials and the distal end
of such light guide. Otherwise, it may cause fire or burns.
·When illuminating heat-sensitive or flammable light-absorbing objects, special care must be taken
to ensure that an appropriate suitable distance between light guide and object, and a suitable lamp
brightness level are selected so that no thermal damage occurs.
·Be careful, the distal end of the incident fiber of light guide and the portions connected with the light
guide socket are very hot during use or immediately after use.
·In order to prevent breaking the fiber in the light guide (reduction of light intensity), do not bend the light
guide forcibly.
·If you bend the light guide, twist it as little as possible. The lifetime of the light guide may become shorter.
·When using the dual light guide LG-DI or LG-DFI, the twist of the light guide may be loosened and it may
be bent spontaneously when determining the illumination position.
You can prevent the light guide from bending spontaneously by twisting the
light guide in the arrow direction shown in the picture. However, do not twist
the light guide too firmly.
WARNING
CAUTION
Light guide

5
LG-LSLED
The following symbols are placed on the product.
Study the meaning of the symbols and always use the product in the safest possible manner.
Symbol Meaning
Indicates a non-specific general hazard. Follow the description given after this symbol or
in the instruction manual.
Indicates that the surface becomes hot.. Be careful, it may cause burns.
Indicates that the seesaw type main switch is ON.
(Seesaw type is the type of switch where ON or OFF is selected by pressing it to ON or
OFF side.)
Indicates that the seesaw type main switch is OFF.
Label position and instruction
The labels are attached to the portions which require special cautions during use and operation. Be sure to follow these
instructions.
Label position Label Instructions in instruction
manual Page
Back of LG-LSLED Caution for electric safety 3
Front of LG-LSLED Warning and caution for LED 4
High temperature 4
When caution labels are dirty or peeled off, contact Olympus for replacement or inquiries.
Safety warning symbols

6
Handling precautions
·This product is a precision instrument. Handle it with care and avoid subjecting it to a sudden or
severe impact.
·Never disassemble any part of the product. Otherwise, failure could be caused.
·Do not use the product in areas where it may be subjected to direct sunlight, high temperature and/or
humidity, dust or vibrations.
(For conditions of operating environments, see “5 Specifications” (P.13).)
·For products (option) attachable to this product, see “1 System diagram” (P.8).
The use of this product in combination with other separately available items not only creates the risk
of abnormal operation, but it also may damage the product.
· The power cord is for exclusive use of this product. Do not use it with other product.
· Before disposing of this product, be sure to follow the regulations and rules of your local government.
NOTE
TIP
General

7
LG-LSLED
Lifetime
The lifetime of this product is approximately 8 years after purchase if the product is used properly according to this
instruction manual. (except consumables)
Maintenance and storage
Do not leave stains or fingerprints on the lenses and filters. If they get dirty, blow away dust with a
commercially available blower and gently wipe the lens or filter with a piece of cleaning paper (or clean
gauze).
Only when cleaning fingerprints and oil stains, slightly moisten a piece of cleaning paper with commercially
available absolute alcohol and wipe them off with it.
Since the absolute alcohol is highly flammable, it must be handled carefully. Be sure to keep it away
from open flames or potential sources of electrical sparks. For example, the electrical equipment that
is switched ON and OFF may cause the ignition of a fire. Also, always use absolute alcohol only in a
well-ventilated room.
Wipe the portions other than the lens with a dry soft cloth. If the dirt cannot be removed by dry-wiping,
moisten a soft cloth with diluted neutral detergent and wipe the dirty surface with it.
Do not use organic solvents because they may deteriorate the coated surface or plastic parts.
As the cooling fan is used with this product, the dust may pile up when using the product for a long time.
Clean the product on a regular basis.
WARNING
NOTE
Cleaning of each unit

8
1System diagram
LG-DF*1
(Dual flexible light guide)
LG-DI
(Dual light guide)
LG-DFI
(Dual combination light guide)
LG-R66*3
(Ring light guide)
LG-KLADP
(Socket for KL light guide)
Light guide for
KL1600LED
(SCHOTT Co.)
SZX2-ILLC 16 *1 /
SZX2-ILLC10
*1
(Coaxial illuminator)
SZX series*1
SZ2 series*1
SZX-LGR66*2
(Ring light guide adapter
for SZX)
SZ-LGR66
(Ring light guide
adapter for SZ)
LG-SF
*1
(Flexible light guide)
LG-LSLED
(LED light source for light guide)
*1 Refer to the instruction manual provided separately.
*2This adapter is necessary for attaching LG-R66 (Ring light
guide) to SZX7 and SZX10.
*3LG-R66 (Ring light guide) can be attached to SZX16 directly.

9
LG-LSLED
2Nomenclature of main operating portions
Light intensity adjustment knob (P.10)
Lock screw (P.15)
Carrying handle
Power socket (P.18)
Filter slider (P.10)
This section describes the nomenclature of main operating portions of the product.
Filter slider (P.10)
Main switch (P.10)
(ON) / (OFF)

10
3 Operating procedures
This section describes the basic operating procedures of each portion.
Set the main switch Ato (ON).
Rotate the light intensity adjustment knob Btoward the scale 5 (arrow
direction) to increase the brightness or rotate it toward the scale 0 to
decrease the brightness.
If you set the light intensity level to scale 0, the light is
not emitted, but the power of the LG-LSLED is ON (The
indicator Cis ON). To turn OFF the power, set the main
switch Ato (OFF).
1
2
NOTE
A
B
C
2
Before replacing the filter with another filter, set the power to (OFF) and make sure that the filter
slider is fully cooled down in order to prevent looking at LED light directly.
· The filter is not provided.
· The filter with a diameter of 28 mm and a thickness of 2 mm can be attached.
· Use the optional 28LBA15 (LBA filter) if you want to change to the light bulb color.
CAUTION
TIP
Remove the cap that covers the distal end pf the light guide before turning ON the main switch.
As the cap absorbs the light, heat damage, fire or burns may be caused.
WARNING
1
A
A
Remove the filter slider Afrom LG-LSLED.
1
Attach the LBA filter Bto the filter slider Ain the following procedure.
Push the filter slider Cof the filter slider in arrow direction.
Insert the bottom of the filter Binto the filter slider as follows.
Fit in the top of the filter B.
When cleaning fingerprints and oil stains attached to
the filter, slightly moisten a piece of cleaning paper with
commercially available absolute alcohol and wipe them
off with it.
2
NOTE
B
C
1Turning ON the main switch and adjusting the brightness
2Attaching the filter (Optional)

11
LG-LSLED
3
A
Insert the filter slider Ainto LG-LSLED completely to the end.
During operation, keep the filter slider inserted completely
or pulled out to the click position.
If you operate LG-LSLED with the filter slider placed at the
position other than two positions described above, the
cooling in LG-LSLED may be impacted adversely or the
filter slider may be damaged.
3
NOTE
3Adjusting LG-DI/LG-DFI (Dual light guide/Dual light guide)
A
A
B
1
Illuminate the light to the sample from the position where the distal
ends Aof the light guide do not interfere with operation.
For procedures to prevent the light guide from bending
spontaneously, see page 4.
1
TIP
Using HLL301 (Spot lens)
Loosen the clamping screw Aof HLL301 (Spot lens), insert HLL301
into the distal end Bof LG-DI or DFI, and tighten the clamping
screw A.
1

12
Problem Cause Remedy Page
A light is not emitted. The AC adapter is not connected. Connect the outlet plug to the AC adapter
properly. 18
Make sure that the outlet plug is
connected to the commercial power
supply and the DC power jack is
connected to the LG-LSLED properly.
18
The power is not supplied to the AC
adapter.
Check the commercial power supply. –
The power is not ON. Turn ON the main switch. 10
The light guide is disconnected. Connect the light guide to the LG-LSLED
(LED light source for light guide) and the
microscope properly.
15
The distal end of the light guide is
covered by the cap.
Remove the cap. –
The light intensity is
reduced.
The light source unit is overheated. Make sure that the cooling fan is working
properly. –
Make sure that air vents or exhaust ports
are not covered by obstacles. –
The light guide is about to be
disconnected.
Connect the light guide to the LG-LSLED
(LED light source for light guide) and the
microscope properly.
15
The filter is engaged in the light path. Pull out the filter slider to the click position. 10
The filter slider is not inserted
completely to the end.
Make sure that the filter slider is inserted
completely to the end. 10
The distal end of light guide or the top
surface of filter is dirty.
Remove the dust/dirt. 7
4Troubleshooting
If problems occur, please review the following list and take remedial action as needed.
If you cannot solve the problem after checking the entire list, please contact Olympus for assistance.
Repair request
If you cannot solve the problems even though taking actions described in Troubleshooting, please contact Olympus
for assistance. At that time, please tell them the following information as well.
· Product name and abbreviation (Example: LED light source for light guide LG-LSLED)
· Product number
· Problem
This section describes the possible problems of this product and their remedies.

13
LG-LSLED
5Specifications
LG-LSLED
Item Specifications
Power supply Use AC adapter.
Input voltage range: AC 100-240 V 50-60 Hz
Input current: Max: 1.4 A
Output voltage: DC 24 V
Output current: 2.71 A
Power consumption: 65 W
Dimension: 115 (L) x 53 (W) x 38(H) mm
Weight: 310 g (reference value)
Rating Rated input voltage: DC 24 V 1.5A
Power consumption: Max: 37 W
Illumination light source Lifetime of LED
Coler: White
Design value: Approx. 60,000 hours
(Value derived by calculating the LED element alone based on LM80/TM21)
Light intensity adjustment Continuous variable knob
Scale: 0 (turned OFF) to 5)
Light guide Mounting diameter: Ø15 mm
Maximum valid fiber diameter: Ø9 mm
(Total luminous flux when LG-SF is combined: 360 lm or more)
Filter slider Attachable filtersize
Ø28 mm / Thickness: 2 mm
Dimension 114 (W) x 231 (D) x 137 (H) mm
Weight Approx. 2.45 kg
Operating environment · Indoor use
· Altitude: Max. 2000 meters
· Ambient temperature: 5 to 40 °C (41 to 104 °F)
· Relative humidity: Max 80% (31 °C (88 °F) or less) (without condensation)
In case of over 31 °C (88 °F), the relative humidity in operating environment is decreased
linearly through 70% at 34 °C (93 °F), 60% at 37 °C (99 °F), and to 50% at 40 °C (104 °F).
· Supply voltage fluctuation: ±10 %
· Pollution degree 2 (in accordance with IEC60664-1)
· Installation/Overvoltage category: II (in accordance with IEC60664-1)
Cooling method Air cooling (low noise)
This section describes detail specifications, such as shape, functions and performances, etc. of this product.

14
28LBA15 (LBA filter) [Optional]
Item Specifications
Filter type Color temperature conversion filter
Color temperature conversion
capability
15 decamired
Dimension Ø28 mm / Thickness: 2 mm
Weight Approx. 4 g
LG-KLADP (Socket for KL light guide) [Optional]
Item Specifications
Attachable light guide SCHOTT light guide for KL1600LED
Dimension Ø23 mm / Length: 39.3 mm
Weight Approx. 15 g
Other light guides
Item Specifications
Product name LG-R66 LG-DI LG-DFI LG-DF LG-SF
Corrugated
tube
Type
Flexible tube Interlock tube Flexible tube Interlock tube Flexible tube Flexible tube
Length 1000 mm 500 mm 1000 mm 500 mm 1000 mm 1000 mm
Fiber Type Multicomponent glass: Ø50 μm
Bundle
diameter
Light-incident
side Ø8 mm Ø8 mm Ø8 mm Ø6 mm Ø6 mm
Light-emitting
side Ø70 x 0.22 mm Ø5.66 mm Ø5.66 mm Ø4.24 mm Ø6 mm
Minimum bending radius 33 mm 60 mm 33 mm 60 mm 33 mm 33 mm
Light intensity balance
between two light guides
of dual light guide
– 90% or more 90% or more 90% or more –

15
LG-LSLED
6 Assembly
6-1 Attaching the light guide
For procedures to attach LG-DF or LG-SF, refer to the respective instruction manual.
TIP
Align the mount holes Aat the center of the light guide with the screw
holes Bof SZX-FOF, and attach them with the provided clamping
screws C(2 pcs.) using the Allen screwdriver provided with the
microscope frame.
1
2Attaching LG-DFI (Dual combination light guide)
1Attaching the light guide to LG-LSLED (LED light source for light guide)
A
C
B
When the light guide is not attached yet, set the power to (OFF) in order to prevent looking at the
LED light directly.
Do not use light guides other than the exclusive light guides.
For details of the exclusive light guides, see page 8.
CAUTION
NOTE
TIP
This light guide must be attached to SZX-FO (SZX coarse focusing unit) or SZX-FOF (SZX coarse/fine focusing
unit) as well when attaching to LG-LSLED (LED light source for light guide).
TIP
Loosen the lock screw Aat the light guide socket hole by rotating it
in counterclockwise direction (arrow direction).
Insert the light guide completely to the end with its groove Bfacing up.
Tighten the lock screw Ain clockwise direction. (There is a space
of approx. 2 mm.)
1
2
3
B
2
1
3
A
2mm

16
SZX10, SZX7
Loosen the clamping knob Bof LG-R66 (Ring light guide) A.
Insert SZX-LGR66 (Ring light guide adapter for SZX) Cinto
LG-R66 Acompletely to the end and tighten the clamping knob B.
Loosen the clamping screw Dof SZX-LGR66 Csufficiently using
the Allen screwdriver provided with the microscope frame.
Insert SZX-LGR66 Cinto the objective of SZX, align the surface of
objective with the bottom surface of LG-R66, and tighten the clamping
screw Dusing the Allen screwdriver.
1
2
3
4
3Attaching LG-R66 (Ring light guide)
1
3B
A
C
SZ61, SZ51
Screw in SZ-LGR66 (Ring light guide adapter for SZ) Acompletely to
the thread of the auxiliary objective of the SZ2 microscope.
Loosen the clamping knob Cof LG-R66 (Ring light guide) B.
Insert LG-R66 Binto SZ-LGR66 Acompletely to the end and tighten
the clamping screw C.
1
2
3
SZX16
Loosen the clamping knob Bof LG-R66 (Ring light guide) A.
Insert LG-R66 Aupward until it contacts the objective bottom surface
C, and tighten the clamping knob B.
1
2
A
A
B
B
C
C
D
2
2
4
Table of contents
Other Olympus Lighting Equipment manuals