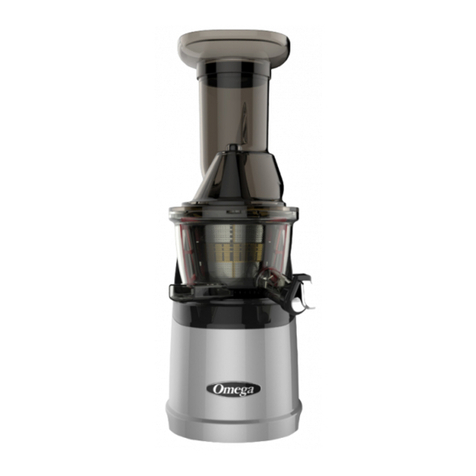
Omega Effortless JC2022 User manual

www.OmegaJuicers.com
JC2022
USER MANUAL
Effortless™Batch Juicer
LOW SPEED MASTICATING COLD PRESS JUICER
MODE D’EMPLOI
PRESSE-AGRUMES PAR LOT SANS EFFORT™
PRESSE A FROID A MASTICATION A BASSE VITESSE
MANUAL DEL USUARIO
EXPRIMIDOR POR LOTES SIN ESFUERZO™
EXPRIMIDOR DE PRENSA EN FRÍO MASTICADOR DE BAJA VELOCIDAD
022023

CONGRATULATIONS on the purchase of your new Omega product.
At Omega, we strive to develop technologically advanced machines that help
deliver nutrition and avor of the highest kind and closest to nature’s purest form.
We are driven by you, our brand supporters. Your enthusiasm helps us continue to
reinvent and renew our line of juicers, high speed blenders and beverage equipment.
Our team at Omega thanks you for supporting us for over 50 years!
PRODUCT REGISTRATION, VISIT:
www.omegajuicers.com/omega-warranty-registration
RECIPES,VISIT:
www.omegajuicers.com/recipes
CUSTOMER SERVICE,VISIT:
www.omegajuicers.com
After using your Omega, we kindly ask you to rate the machine on
www.OmegaJuicers.com
FOLLOW OMEGA JUICERS ON SOCIAL:
Congratulations!

TABLE OF CONTENTS
04 - 05 Important Safeguards
06 - 07 Precautions for Safe Use
08 - 09 Precautions Before Juicing
10 - 11 Power Button Guide
12 - 13 Know Your Omega
14 - 15 Quick Start Assembly
16 - 17 How to Assemble
18 - 19 How to Use
20 - 21 When Auger Stops During Use
22 - 23 Assembly and Disassembly of Silicone
24 - 25 How to Disassemble and Clean
26 - 27 Troubleshooting
28 - 29 Product Specications
30 - 35 Recipes & Notes
36 - 69 French Manual
70 - 103 Spanish Manual

4
IMPORTANT SAFEGUARDS
WARNING: GROUNDING INSTRUCTIONS
This appliance must be grounded while in use to protect the operator from electrical shock.
The appliance is equipped with a 3-conductor cord and a 3-prong grounding-type plug to
t the proper grounding-type receptacle. The appliance has a plug that looks like sketch A
in Figure 73.1. An adaptor, sketch B, should be used for connecting sketch A plugs to two-
prong receptacles. The grounding tab which extends from the adaptor must be connected
to a permanent ground such as a properly grounded outlet box as shown in sketch C using a
metal screw.
FIGURE 73.1
Grounding Methods
(C)
ADAPTER
(A)
Circuit grounding
conducter connected
properly (B)
Metal
mounting
scew
Cover of grounded
outlet box
Grounding means
AA220

5
IMPORTANT SAFEGUARDS
When using electrical appliances, basic safety precautions should always be followed
including the following.
1. READ ALL INSTRUCTIONS BEFORE USING.
2. To protect against electrical shock, do not immerse cord, plug, or main body (motor) in
water or other liquid.
3. Close supervision is necessary when any appliance is used by or near children.
4. Unplug from outlet when not in use, before putting on or taking off parts, and before
cleaning.
5. Avoid contact with moving parts.
6. Do not operate any appliance with a damaged cord or plug or after the appliance
malfunctions or has been damaged in any manner. Please contact Omega Customer
Service for Support.
7. The use of attachments not recommended or sold by manufacturer may cause re,
electric shock or injury.
8. Do not let cord hang over edge of table or counter or touch heated surfaces.
9. Always make sure juicer cover is clamped securely in place before motor is turned on.
Do not unfasten clamps while juicer is in operation.
10. Be sure to turn button to OFF position after each use of your juicer. Make sure the motor
stops completely before disassembling.
11. Do not put your ngers or other objects into the juicer while it is in operation. If food
becomes lodged in opening, use food pusher or another piece of fruit or vegetable to
push down the lodged food. When this method is not possible, turn off the machine,
remove the plug from wall outlet and disassemble juicer to remove the remaining food.
12. Do not use outdoors.
13. Do not place on or near a hot gas or electric burner or in a heated oven.
14. Do not use appliance for anything other than its intended use.
15. Keep hands and utensils away from moving blades or discs while processing
food to reduce the risk of severe injury to persons or damage to the food processor.
A scraper may be used but must be used only when the food processor is not running.
16. Blades are sharp. Handle carefully.
17.
Keep the appliance clean. Refer to the Care & Cleaning instructions in this manual.
18. DO NOT plug in until familiar with all the instructions and operating procedures.
19. DO NOT unplug from electrical outlet by pulling on the cord. To unplug, grasp the
plug, not the cord, and pull.
20. Turn off all controls before unplugging from or plugging into an electrical outlet.
21. This appliance cannot grind meat.
22. Check hopper for presence of foreign objects before using.
23. Moving parts – Keep ngers out of discharge openings.
24. Sharp blade – Always use food pusher.
SAVE THESE INSTRUCTIONS

6
PRECAUTIONS
FOR SAFE USE
BEFORE READING MANUAL
1. Read all safety precautions (p. 04~09) and use the appliance properly.
2. After reading the manual, keep it in a convenient location for future reference.
3. Do not use it abroad which has different power supply and voltage.
4. Any quality improvements is subject to change without notice
1. PRECAUTIONS FOR SAFE USE
1. Make sure to read Precautions for Safe Use.
2. Follow Precautions for Safe Use.
3. Precautions are classied as follows.
WARNING A violation of any of the warning marks may cause a serious injury or death.
•Do not insert or pull the power cord with wet hands.
•Do not use any current other than that speciedon the warranty card and product specications.
It may cause electric shock, re and/or performance impairment. Connecting to a different voltage
may reduce the motor’s lifespan or lead to a malfunction.
•Securely insert the power cord plug all the way into an outlet.
•Do not bend, tie, damage or pull the power cord by force, or place it near a high temperature or
heat such as a gas stove. Also, do not place any heavy object on top of the product, wedge it into a
narrow space, or alter it.
•Do not remodel it under any circumstances. Also, do not attempt to dismantle or repair it yourself.
•Do not insert any foreign objects such as a nger or iron pin into any crack or hole in the product
body. It may cause a re, electric shock, injury and/or malfunction. For after-sales service and
maintenance of a product, contact Omega Customer Service.
•When the power plug is damaged, do not repair or remodel it yourself and, instead, visit an after-sales
service center or branch store.
•Do not get wet or splash water on the product body. Make sure that no water or foreign material goes
into the product’s power button.
•Do not control the power button with wet hands. For safety, ground the power outlet at all times. Also,
do not ground it to a gas pipe, plastic water pipe, or telephone line. Make sure to use a grounded outlet.
•Do not attempt to dismantle any parts of the chamber set or insert foreign objects such as a nger or
spoon into the inlet or juice outlet during operation.
•Do not use it within children’s reach. Children should be carefully supervised so that they do not play
with this device. There is a risk of an injury or malfunction if children accidentally hit and knock it down.
•A person who is not familiar with handling the product should not use it him/herself. Anyone with
physical or mental problems or who lacks experience and knowledge should not use it without a
supervisor present.
•Do not use the product while wearing or holding any items with magnetic force (e.g. magnetic
bracelets). Placing magnetic objects near the product may cause malfunction.
CAUTION A violation of any of the caution marks may lead to a serious injury or death.
•Do not operate the product unless the product body set and chamber set are securely connected.
•If there is a gas leak, etc., do not touch the power cord but, instead, open the windows and
thoroughly ventilate the area.
•If the auger stops during operation, the product automatically rotates in reverse and then starts
normal operation again. If the power is unstable and a reverse rotation does not work while the auger
rotation is stopped during operation, press the power button for over 1 second to activate a reverse
rotation and then press the power button again briey to start a normal operation.
•Do not move the product body, or disassemble or assemble the chamber set or parts during
operation. Make sure to stop the operation and pull out the power cord beforehand.
•When using the product, be careful so that a tie, long necklace, scarf, etc. doesn’t get into the inlet.
Place this product on an even and stable surface for use. When inserting ingredients into the inlet, do

7
PRECAUTIONS FOR SAFE USE
not use a chopstick, spoon, any hard object or anything other than the pusher.
•Do not use the product for more than 30 minutes continuously each time. It may overheat the motor
to cause malfunction. To operate it again, completely stop the device for about 5 minutes before use.
•Do not exert any excessive shock to or drop the product.
If the device produces any unusual sounds, excessive heat or smoke, stop using it immediately and
contact the Customer Service Center. The smell experienced when using a new product will naturally
go away over time. Pull the power cord plug from the outlet when it is not in use. Also, when pulling the
power cord, make sure to grab the plug to pull it.
•Do not clean the product at a temperature of 80°C or higher.
•Do not place it in a dishwasher, dryer, microwave, etc. It may cause malfunction and/or deformation
of parts. The product weighs approximately 13.7lbs. (6.2 kg.) When moving the product, make sure to
securely hold the product body with both hands. If you move it by holding just the chamber or the sides of
the product body, the body may fall to cause a bodily injury or malfunction.
•Do not use this household-use product for commercial purposes. Excessive extraction of a large amount
of ingredients may cause damage to the parts. In case it is to be used for commercial purposes, please
contact the Customer Service Center on the method of use.
2. Precautions During Use
•Make sure to thoroughly understand how to prepare ingredients and prepare them properly
before inserting them.
-Poorly prepared ingredients may hinder the extraction process and/or cause damage to the product.
•Ingredients in need of extra care
-When using soft ingredients alone such as bananas, ripened kiwi and tomatoes, the juice may stagnate
inside the chamber, which can make juicing difcult. Please add other ingredients that are not too soft.
-When inserting walnuts, peanuts, almonds, sunower seeds, pine nuts, beans, etc., add only a small
amount or add them with other ingredients after soaking them in water.
•Ingredients unable to be juiced
- Do not insert ingredients that cannot be juiced such as sesame seeds, coffee beans, Chinese peppers,
tree barks and pine needles. Do not insert mudsh, eels, shrimp, marsh snails, squids, etc.
- Do not insert fruits soaked in alcohol, honey or sugar (grapes, raspberries, mulberries, etc.) and enzymes
(glasswort, rock pine enzymes, etc.).
- Do not insert ingredients whose attributes make them difcult to be juiced such as silverberries, aloe,
cactus, quince, yams, kudzu root, sugar cane, acorn and dandelions.
- Do not insert boiled ingredients such as boiled potatoes and sweet potatoes.
- Do not insert ice made by freezing water. It is recommended that you consume extracted vegetable
juice immediately, if possible, and do not refrigerate it for a long period of time.
•Do not use this product for pulverizing grains. It may cause damage or malfunction.
•Do not re-extract juice from pulp that has already been juiced.
•Do not conduct any idle run of the product before inserting any ingredients.
•Do not insert ingredients into the hopper above the guided limit mark.
•Do not use it for more than 30 minutes continuously.
- It may overheat the motor to cause malfunction. However, when using it continuously, pause the
operation and use it after a break of over 5 minutes.
•Do not insert a chopstick or spoon into the juice/ pulp outlet during operation.
•When inserting ingredients, do not use anything other than the pusher. It may damage the parts or
cause a bodily injury and/or malfunction.
•Do not operate the power button with wet hands.
- It may cause electric shock, short circuit and/or re.
•Do not get foreign substances on or near the power button.
•Use it with the juice cap open.
- The juice can ow backwards into the hopper if the juice cap is closed while juicing.
Do not use it when the top of the product body is wet from extracted juice or water.
Note
1. Withered ingredients, which have been stored for a long time in the refrigerator, or frozen fruits may
produce only a small amount of juice or none at all.
2. If the product is not cleaned immediately after use, the pulp may dry up, which makes it difcult to
disassemble and clean it and also cause performance impairment. So, if possible, clean it immediately
after use.
8
PRECAUTIONS
BEFORE JUICING
•If you have an allergy, make sure to select proper ingredients for your body when
preparing the ingredients.
•For the method of and notes on using the device for each ingredient, please refer
Omega recipes.
•Prepare ingredients in sizes able to be inserted into the hopper. If you want to juice
a large volume or perform fast juicing, cut the ingredients into smaller pieces before
inserting them. For about 2.2lbs. (1 kg), repeat the “disassemble and clean after juicing”
step for use.
•Do not insert ingredients into the hopper above the guided limit mark.
•When juicing soft fruits, the juice of the ingredients may stagnate inside the chamber.
•When juicing brous fruits and vegetables, the juice may thicken.
•Inserting the following ingredients, which are impossible to be juiced, may lead to
damage or malfunction.
- Ingredients that cannot be juiced such as sesame seeds, coffee beans, Chinese
peppers, tree barks and pine needles, as well as mudsh, eels, shrimp, marsh snails,
squids, etc.
- Fruits soaked in alcohol, honey or sugar (grapes, raspberries, mulberries, etc.) and
enzymes (glasswort, rock pine enzymes, etc.)
- Ingredients whose attributes make them difcult to be juiced such as silverberries,
aloe, cactus, quince, bananas, yams, kudzu root, sugar cane, acorns and dandelions
- Boiled ingredients such as boiled potatoes and sweet potatoes
- Ice made by freezing water
•Do not use it for pulverizing grains.
•Refer to the instructions in Precautions During Use (refer to p.7).
• As certain ingredients need extra care during preparation, please refer to the following
instructions on how to prepare the ingredients.
• When juicing several times or in bulk, make sure to cut ingredients into
small pieces,
and then repeat the “disassemble and clean after juicing” step.
• For faster juicing, mince the ingredients into ne pieces.
CITRUS FRUITS
Grapefruit, oranges, lemons, etc. Prepare the ingredients by peeling and cutting them
into smaller pieces to t in the hopper inlet. Remove all hard, unchewable seeds before
insertion.
FRUITS WITH THICK PEEL
Pineapples, dragon fruit, melons, watermelons, pomegranate, etc. Prepare the
ingredients by peeling and cutting the into smaller pieces to t in the hopper inlet.
Remove all hard, unchewable seeds before insertion.

9
PRECAUTIONS BEFORE JUICING
SEEDED FRUITS
Grapes, apples, peaches, persimmons, plums, cherries, pears, melons, etc.
For ingredients containing hard, unchewable seeds or large-sized seeds such as those
in peaches, make sure to remove the seeds rst and cut and prepare only the esh.
Hard seeds may stop the operation or damage the parts. Apple seeds contain toxicity
so remove them as much as possible. For grapes, pluck each grape from the bunch
after cleaning them thoroughly. Do not extract only the ingredients that are too soft;
instead, mix them with other fruits and vegetables.
SOFT FRUITS
Single extraction (berries, cherry tomatoes, etc.)
• Thoroughly clean and cut the ingredients into
small pieces that can t in the hopper inlet. For fruits and vegetables with stalks,
remove the stalks rst.
Mixed extraction (strawberries, kiwi, tomatoes, mangoes, etc.)
• For dry and viscous ingredients, mix them with other ingredients for extraction.
Remove the peel and stalks, and also remove seeds, if there are any.
ROOT VEGETABLES
Carrots, beets, ginger, sweet potatoes, potatoes, garlic, etc. Wash the ingredients in
running water to remove dirt and other foreign substances. For brous ingredients such
as ginger, peel the outer skin and cut them into small pieces. For long ingredients, cut
them vertically for extraction.
LEAF AND STEM VEGETABLES
Celery, kale, cabbage, water parsley, wheatgrass, chives, etc. Cut the ingredients into
3-cm or shorter pieces for extraction. Since leaf and stem vegetables are rough and
brous, they are not easily juiced and can get caught in the auger.
• When juicing ingredients other than root, leafy and stem vegetables, the juice may
stagnate.
FROZEN FRUITS
Fruits with thick peels, such as watermelons and melons
Peel the outer skin and cut the ingredients into smaller pieces to t in the hopper inlet
before freezing them.
Seeded fruits, such as mangoes, peaches and grapes
Use only frozen, seedless fruits. For fruits that have hard, unchewable seeds, such as
mangoes, peaches and lemons, make sure to remove the seeds and then freeze
them before use. For grapes, freeze the seedless kind for use.
Soft fruits and vegetables, such as bananas, strawberries, kiwi and tomatoes
Peel bananas, kiwi, etc. completely and cut them into pieces that are 3 to 4cm-long
that can t in the inlet before freezing them. For cherry tomatoes, strawberries, etc.,
remove the stalks and then freeze them.
• It is used to make slushes, smoothies, ice cream, etc. that use frozen fruits.
• Cut the fruits into 2-cm pieces and freeze them before use.
• Never use it for crushing or grinding ice or other ingredients.
• Adding a large amount or large chunks at once may jam the product so please add
the ingredients in small portions.

10
POWER BUTTON GUIDE

11
정지상태
OPERATE / WHITE LED BLINKS
• It works when the power button is briey pressed in the
Standby Mode.
• It is used when activating the product for juicing.
• During operation, the white light blinks.
• If the hopper cover is opened during operation, the
• product stops and the white light is lit. If the hopper
cover is closed again within 60 seconds, the operation
continues. But, if 60 seconds elapse, the operation
automatically stops and it switches to the Standby (stop)
state.
STOP / WHITE LED ON
• This is used to stop the product’s operation.
• The product stops when the power button is briey
pressed in the operation state.
• When stopped, the white light is lit.
• If the hopper cover is open or the chamber set is not
assembled, the white light is turned off.
• When 1 minute has elapsed from the Standby (stop)
state, the product enters the power saving mode
(light turned off). If the power button is pressed or the
chamber set is assembled, the power saving mode is
deactivated and it switches to the Standby (stop) state.
REVERSE ROTATION / ORANGE LED BLINKS
• This is used when the operation pauses or a reverse
rotation is needed due to excessive insertion of
ingredients during extraction.
• During a reverse rotation, the orange light blinks.
• It works only when the power button is pressed for over
1 second, and it stops when the button is released.
• If the Auger stops during operation, the product
automatically rotates in reverse but, if the power is
unstable, the reverse rotation may not work. In such
a case, press the power button for over 1 second to
activate a reverse rotation and then press the power
button again briey to activate.
BLINKS
BLINKS
Before operating the product,
press the power button.
POWER BUTTON GUIDE

12
KNOW YOUR OMEGA

13
KNOW YOUR OMEGA
APusher
BHopper Cover
CHopper
DBlade
EChamber
FAll-in-one Auger (top part)
GAll-in-one Auger (bottom part)
HJuice Outlet with Flap
IJuice Container
JEasy-Clean Pulp Outlet
KPulp Container
LON/REV/OFF Button
MHousing / Motor
NSturdy Nonslip Feet
ODetachable Power Cord
PCleaning Brush (not pictured)
A
B
C
D
E
F
G
H
I
J
K
L M N
O

14
QUICK START ASSEMBLY

15
QUICK START ASSEMBLY
1
2
3
4
5
6
7
1 Pusher
2 Hopper Cover
3 Hopper
4 All-in-one Auger (top)
5 All-in-one Auger (bottom)
6 Chamber
7 Housing
8 Juice Container
9 Pulp Container
8
9

16
HOW TO ASSEMBLE

17
HOW TO ASSEMBLE
1Insert the bottom part of auger into the chamber, and insert the top part of the
auger as shown in the gure.
2Firmly press down the top part of the auger and the bottom part of auger
assembled in the chamber.
3Assemble the hopper cover vertically onto the hopper.
4Align the hopper assembly guide mark with the chamber assembly guide
mark to assemble them.
5Turn the assembled hopper clockwise up to the chamber assembly guide mark.
If the internal parts are not assembled correctly, the hopper will not close.
6Check if the discharge cover and the loop of the chamber are properly closed.
1. Lift the discharge cover to close it and fasten it with the loop.
2. If the packing is not correctly assembled or the lever is not properly
closed, juice may leak or the lever may open during extraction.
7Place the correctly assembled chamber set onto the top housing.
Assemble the chamber set rst and then install it on the product body.
1 2 3
4 6 7
5

18
HOW TO USE
1. Open the hopper cover.
• Press the lever of the hopper
cover to open it. Insertion of an
excessive amount of ingredients
may damage the product.
2. Add ingredients only up to
the limit mark of the hopper.
• For soft ingredients, mix them
with other ingredients
for extraction.
3. Close the hopper cover and
keep the juice cap open.
• Before pressing the power
button, place the juice
container and pulp container rst.
• The juice may ow backwards
into the hopper if the juice cap
is closed during extraction. If the
juice does not come out even
after opening the juice cap,
open the hopper cover and
empty out the contents. When
the hopper cover is closed, the
white light is lit.
4. Press the power button briey
to start operation.
• The “click” sound during the
operation of the product is the
sound of the chamber set and
the motor being locked together.
• During operation, the white light blinks on the power button part.
• If the auger stops during operation, the product automatically rotates
in reverse but, if the power is unstable, the reverse rotation may not work.
In such a case, press and hold the power button for over 1 second to
activate the reverse rotation and then press the power button again
briey to activate.
• A timer, which automatically stops after about 5 minutes from the start
of operation, is set. If the power button is controlled during operation or
the hopper cover is opened and then closed, which pauses and then
restarts the machine, the timer is reset to 5 minutes again.

19
HOW TO USE
9. Pour any remaining juice
by tilting the chamber
forward.
• For thickly concentrated
juice made of tomatoes,
etc., the juice may still
remain in the chamber.
5. To add more ingredients
during operation, use the
additional inlet or open the
hopper cover.
• When the hopper cover is
opened, the operation stops.
• Do not use anything other
than the designated pusher.
• In case the Auger spins
but the ingredients fail to be
ground in the hopper during
extraction, use the pusher to
press the ingredients down.
6.
Empty out the pulp container
and juice container so that
they are not lled up.
7. Let the machine operate for
about 1 more minute after
all ingredients go down in the
hopper.
• It slowly presses and
squeezes the ingredients so it
takes some time until the last
ingredient is juiced.
• Removing the remaining
pulp by additionally operating
the machine after extraction
makes it more convenient to
detach the hopper and clean
the parts.
8. Once the juicing and pulp
removal are nished, press
the power button to stop the
machine.
•
The machine stops 3 seconds
after it is stopped by the
power button.

20
WHEN AUGER STOPS
DURING USE
정회전
역회전
정지상태
작동스위치정회전
역회전
o(정지)정지
정회전
역회전
정지상태
작동스위치정회전
역회전
o(정지)정지
1
2
Table of contents
Languages:
Other Omega Juicer manuals

Omega
Omega 8003 User manual

Omega
Omega X-LARGE CHUTE C2100S User manual

Omega
Omega MM900 User manual

Omega
Omega MMV700 Series MegaMouth User manual

Omega
Omega JCUBE500 User manual

Omega
Omega VRT352F User manual

Omega
Omega VRT330 User manual

Omega
Omega COLDPRESS 365 User manual

Omega
Omega 8004/8006 User manual

Omega
Omega Nutrition Center 8007 User manual

Omega
Omega MegaMouth MMV700S User manual

Omega
Omega CNC80 User manual

Omega
Omega 9000 User manual

Omega
Omega Nutrition Center 8004 User manual

Omega
Omega MM900HDS User manual

Omega
Omega C-10W User manual

Omega
Omega VRT330 User manual

Omega
Omega C-10 User manual

Omega
Omega COLDPRESS 365 JCUBE500MB User manual

Omega
Omega Nutrition Center 8004 User manual