manuals.online logo
Brands
  1. Home
  2. •
  3. Brands
  4. •
  5. Omnigon
  6. •
  7. Medical Equipment
  8. •
  9. Omnigon Flexima 3S User manual

Omnigon Flexima 3S User manual

1. Before applying the baseplate
2. Preparing the skin
3. Preparing the baseplate
4. Clipping the pouch
1A. Use a measuring guide to determine the size of your stoma.
1B. Cut the skin barrier to the measured size of your stoma.
It is important to cut the baseplate to the right size and
shape of your stoma. Remain within the maximum possible
cutting line on the baseplate and allow about 2mm around
your stoma for a secure fit. The stoma should not be strangled
by the base or the opening too wide to cause skin irritation
from your output.
Note: Regularly check the size of your stoma and adjust the
cutting area if necessary.
Gently clean the skin around your stoma with warm water.
Pay particular attention to where the stoma and skin meet.
Ensure skin is dry before applying the baseplate.
Alcohol, creams and other antiseptics may prevent the
base from staying in place and should be avoided.
3A. Remove the
protective backing off the
baseplate. Position the
baseplate over your stoma
taking care to place the 3
buttons at the top.
4A. Check that the outlet
of the pouch is closed
(urostomy and drainable).
Hold the pouch by its side
wings.
3B. Carefully press
baseplate on and ensure
baseplate is well stuck down
all around stoma and edges
of baseplate.
4B. Insert the guiding tab,
situated at the bottom
of the coupling ring, into
one of the slots at the
bottom of the base ring
(depending on which
position you want to use
the product in).
4C. Clip the pouch’s
upper tab on to the
corresponding base button.
4D. Interlock the two
rings by pressing them
together over the entire
circumference.
4B
3B
1B1A
4A
3A
4C 4D
4E. It is possible to place
the thumbs under the
base plate ring to obtain
a better grip.
4F. Finalise the coupling
of the two rings.
A gentle tug on the
pouch will confirm the
pouch is locked securely
in place.
4E 4F
Instructions for use
0442 - 18
AU 1800 819 274 [email protected]om.au
NZ 0800 440 027 www.omnigon.com.au
5. Removing the pouch
8. Urostomy pouches
6. Drainable pouches
Un-clip the button from the baseplate.
5A. & 5B. While supporting the baseplate with one
hand, separate the two rings by pulling gently on the
upper button from the baseplate of the pouch in a
downward motion.
Handling the drainage tap.
8A. Point the drainage system towards the toilet bowl,
slowly turn the tap counter-clockwise until the desired
flow rate is obtained.
To close the tap once the pouch has been emptied, turn
clockwise until it has returned to its original position.
Connecting to an overnight bag.
8B. Connect the pouch tap to the overnight bag using
the connector.
Leaving a little urine in the pouch before connecting will
mean easier flow into the overnight collection bag
Open the tap on the pouch to allow the urine to flow.
Close the tap before disconnecting.
Closing the drainage outlet.
Fold the outlet four times using the guide and fold the
tab back. To seal the pouch, apply pressure to the two
self-fastening strips facing each other.
Emptying the pouch.
6A. Position yourself to carry out the drainage, release
the two self-fastening strips and unroll the sleeve.
Be careful, the drainage will start at this point. To fully
open the outlet place your fingers on each side.
6B. Once the drainage is complete, expel, as much as
possible, any matter still in the sleeve by pressing lightly
from the top to bottom. Carefully clean using toilet paper.
5A 5B
6A
8A
7
6B
8B
7. Drainable High Flow pouches
Use the cap provided in the box to close the pouch.
To empty your pouch, remove the cap and point the
pouch’s opening towards the toilet bowl.
Once drainage is complete, clean with toilet paper and
close with the cap. If necessary, the pouch can be
connected to a higher capacity collection pouch
(Braun High Flow Collector).

Other Omnigon Medical Equipment manuals

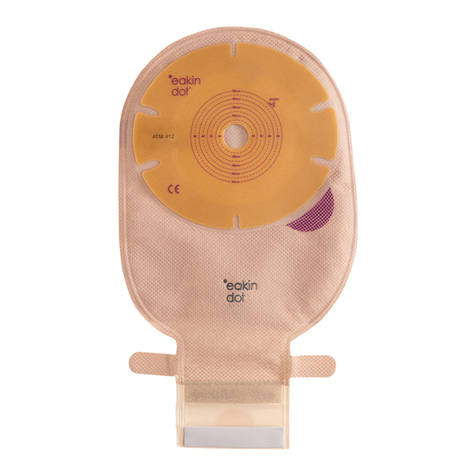
Omnigon eakin dot User manual

Omnigon

Omnigon eakin dot User manual

Omnigon eakin dot User manual

Omnigon

Omnigon eakin dot User manual

Popular Medical Equipment manuals by other brands

prevention circul+ quick start guide

prevention

prevention circul+ quick start guide

BodyMed ZZA250 instruction manual

BodyMed

BodyMed ZZA250 instruction manual

Aivia A-MIP 200 Installation and user guide

Aivia

Aivia A-MIP 200 Installation and user guide

BEYES CareMaster Instructions for use

BEYES

BEYES CareMaster Instructions for use

GIBAUD MALLEOGIB Instructions for use

GIBAUD

GIBAUD MALLEOGIB Instructions for use

Fukuda Denshi DynaScope 7000 Series Service manual

Fukuda Denshi

Fukuda Denshi DynaScope 7000 Series Service manual

Theratrac Pro LT100 instructions

Theratrac Pro

Theratrac Pro LT100 instructions

Mettler Electronics Auto Therm  395 instruction manual

Mettler Electronics

Mettler Electronics Auto Therm 395 instruction manual

College Park Breeze Technical instructions

College Park

College Park Breeze Technical instructions

BMB MEDICAL TIM VELVET SWANN user manual

BMB MEDICAL

BMB MEDICAL TIM VELVET SWANN user manual

Arthrex Synergy Resection quick guide

Arthrex

Arthrex Synergy Resection quick guide

Bexen REANIBEX 300 user manual

Bexen

Bexen REANIBEX 300 user manual

MHC Medical Products SureLife Clearwave user manual

MHC Medical Products

MHC Medical Products SureLife Clearwave user manual

Fona XPan 3D Plus operating instructions

Fona

Fona XPan 3D Plus operating instructions

NightBalance NB-SPT-PX Quick manual

NightBalance

NightBalance NB-SPT-PX Quick manual

Forsteo Forsteo 20 user manual

Forsteo

Forsteo Forsteo 20 user manual

TRAUMA F/X EMITTTMU user guide

TRAUMA F/X

TRAUMA F/X EMITTTMU user guide

VersaMed iVent201 Service manual

VersaMed

VersaMed iVent201 Service manual

manuals.online logo
manuals.online logoBrands
  • About & Mission
  • Contact us
  • Privacy Policy
  • Terms and Conditions

Copyright 2025 Manuals.Online. All Rights Reserved.