manuals.online logo
Brands
  1. Home
  2. •
  3. Brands
  4. •
  5. Omnimount
  6. •
  7. Indoor Furnishing
  8. •
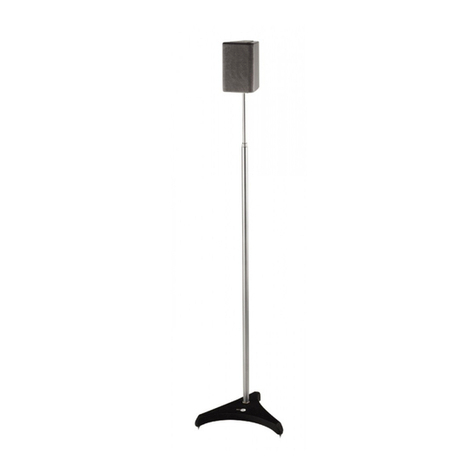
  9. Omnimount AB2 User manual

Omnimount AB2 User manual

�
�
�
Ceiling Wall
Wall
Step 1 Identify parts
Additional installation tools
Phillips Head Screw Driver
Pencil
Electric Drill
Drill Bits: 1/8'' drill bit for drywall
5/16'' masonry bit for cement wall applications
Step 3 Installation of the wall plate Mounting to drywall.
1. Use the wall plate as a template and mark the screw hole locations onto the surface using a pencil.
2. Drill into the drywall with a 1/4'' drill bit. Insert the anchors into the hole as shown in fig. 3.
3. Secure with the #12 x 1-3/4'' screws, see fig. 4.
Mounting to solid concrete or cinder block.
1. Drill into the surface with a 3/16'' masonry drill bit 1-3/4" deep and insert the anchors into the holes as shown in Fig. 3
2. Secure wall plate with the #12 x 1-3/4" , see fig. 4.
1/8”
5/16'' mason bit
�
�
These fasteners and tools are provided
3 /3 2 ''
�
Step 2
Decide on location
�
Extension
Adjusting knuckle
Speaker plate
Mounting plate (1)
Screw covers
Mounting plate (2)
fig . 3
fig . 3
(1) (5) M4 X 12mm Phillips
pan head machine screw
(1) (5) M5 X 12mm Phillips pan
head machine screw
(2) (10) #12 X 3/4" Phillips pan
head self-tapping screw
(2) (10) #12 X 1-3/4'' Phillips pan
head self-tapping screw
(1) (5) 5/32'' Hex key
(2) (10) Plastic anchor
(1) (5) 8-32 X 5/8'' Phillips pan
head machine screw
(1) (5) Circular nut (PEM)
8-32 thread
(1) (5) 1/4-20 X 1" Phillips pan
head machine screw
(1) (2) 3/32'' Drill bit
fig . 4
fig . 4
�
�
�
AB2/AB2 HTS INSTALLATION INSTRUCTIONS
fig . 2
�
1 3 /4 "
fig . 2
�
1 3 /4 "
�
�
�
AB2 HTS AB2 HTS
K n u rle d sid e
Step 3 Installation of wall plate (continued) Step 4 Installation of speaker plate onto speaker
Mounting to solid wood or wood studs.
Drill a pilot hole into center of each location using 3/32" drill bit (provided),
Drill 1-1/4'' into stud. Attach the plate with two #12 x 1-3/4" wood screws.
2. Speakers with single factory installed threaded insert.
3. Speakers with 2 installed 1/4''-20 or 6MM x 15MM threaded inserts.
5. Speakers without mounting holes - wood cabinet only.
fig. 4
wall w all
fig . 5
wall
fig. 6
�
�
O R
O R
O R
#12 x 3/4''
3/32'' drill bit
1. Bose® speakers with 4MM or 5MM inserts.
�Set screw location
Set screw location
Extension
Set screw locations
Screw covers
�
Step 5 Installation of adjusting knuckle
and extension.
OmniMount Systems, Inc.
The Pointe at South Mountain
8201 South 48th Street
Phoenix, Arizona 85044-5355
Toll free 1-800-MOUNT-IT
(480) 829-8000
Fax: (480)756-9000
email: [email protected]
Copyright 2004 OmniMount Systems, Inc.
All rights reserved. OmniMount products
are covered by patents issued and/or
pending. “OmniMount” is a registered
trademark of OmniMount Systems, Inc.
"Audio Basics" is a trademark of
OmniMount Systems, Inc.
AB-2 revision 2, 1/04 Part #1000254.
100% Replacement Warranty
Audio Basics products are engineered and manufactured to the highest standards. In the event that there are defects in materials,
workmanship, or missing parts, OmniMount Systems will, at its discretion, repair or replace your Audio Basics product. Claims that
are submitted must include either the sales slip or proof of purchase.
If OmniMount products are used for purposes other than their original intent, OmniMount Systems, its distributors and retailers shall
not be held responsible or liable for injuries or property damage, direct, indirect or consequential, which may arise from the inability
to use this product safely, properly, and in the manner for which it has been designed and manufactured.
This warranty does not apply to products which have been lost, damaged by misuse, abuse or accident, altered or repaired in any
way other than specified by OmniMount Systems, Inc.
This warranty is non-transferable.
For installation assistance please call our toll free help line at 1-800-MOUNT-IT
4. Speakers with a single keyhole in back.
Insert into keyhole and slide upward then tighten.
�
1 /2 "
1/4''-20 x 5/8'' or
6MM x 15MM
(not supplied) �
# 1 2 x 1 -3 /4 "
fig . 1 fig. 2
fig. 3

This manual suits for next models

1

Other Omnimount Indoor Furnishing manuals
Omnimount Stellar 1002379 User manual

Omnimount

Omnimount Stellar 1002379 User manual

Omnimount 10369 User manual

Omnimount

Omnimount 10369 User manual

Omnimount ECS User manual

Omnimount

Omnimount ECS User manual

Omnimount LS31 User manual

Omnimount

Omnimount LS31 User manual

Omnimount RE2U Shelf User manual

Omnimount

Omnimount RE2U Shelf User manual

Omnimount G303FP User manual

Omnimount

Omnimount G303FP User manual

Omnimount 1004264 User manual

Omnimount

Omnimount 1004264 User manual

Omnimount 1002290 User manual

Omnimount

Omnimount 1002290 User manual
Omnimount BLADE2 User manual

Omnimount

Omnimount BLADE2 User manual

Omnimount Silhouette 48 User manual

Omnimount

Omnimount Silhouette 48 User manual

Omnimount 10270 User manual

Omnimount

Omnimount 10270 User manual

Omnimount G362 User manual

Omnimount

Omnimount G362 User manual

Omnimount RSVS5U User manual

Omnimount

Omnimount RSVS5U User manual

Omnimount ECHO 50 LE User manual

Omnimount

Omnimount ECHO 50 LE User manual

Omnimount MWFS User manual

Omnimount

Omnimount MWFS User manual

Omnimount ECHO38T User manual

Omnimount

Omnimount ECHO38T User manual

Omnimount HTS2 User manual

Omnimount

Omnimount HTS2 User manual

Omnimount VERONA AT User manual

Omnimount

Omnimount VERONA AT User manual

Omnimount OM10020 User manual

Omnimount

Omnimount OM10020 User manual

Omnimount G3FP SHELF User manual

Omnimount

Omnimount G3FP SHELF User manual

Omnimount RSVS2U User manual

Omnimount

Omnimount RSVS2U User manual

Omnimount MWF 8 User manual

Omnimount

Omnimount MWF 8 User manual

Omnimount 20.0 User manual

Omnimount

Omnimount 20.0 User manual

Omnimount DCM-UA User manual

Omnimount

Omnimount DCM-UA User manual
Popular Indoor Furnishing manuals by other brands

Rauch M0003 Assembly instructions

Rauch

Rauch M0003 Assembly instructions

Seconique CORONA SEC/SH/10/20/DS1 Assembly instructions

Seconique

Seconique CORONA SEC/SH/10/20/DS1 Assembly instructions

Royalcraft Faro Assembly instructions

Royalcraft

Royalcraft Faro Assembly instructions

USP DURAMAX Jackson 68050 manual

USP

USP DURAMAX Jackson 68050 manual

Cello Capri 502411029 instruction manual

Cello

Cello Capri 502411029 instruction manual

Rauch Kolding 36199.9080 Assembly instructions

Rauch

Rauch Kolding 36199.9080 Assembly instructions

Home Styles 6661-80 quick start guide

Home Styles

Home Styles 6661-80 quick start guide

Universal Furniture 311-755 instruction sheet

Universal Furniture

Universal Furniture 311-755 instruction sheet

Cooper Lighting METALUX VT2 specification

Cooper Lighting

Cooper Lighting METALUX VT2 specification

Innovex C0886F29 instruction manual

Innovex

Innovex C0886F29 instruction manual

Sjobergs 0042 Assembly instructions

Sjobergs

Sjobergs 0042 Assembly instructions

Mocka Canyon Assembly instructions

Mocka

Mocka Canyon Assembly instructions

SouthShore 010 Assembly instructions

SouthShore

SouthShore 010 Assembly instructions

Hanover Brigantine Dining Table owner's manual

Hanover

Hanover Brigantine Dining Table owner's manual

Lifely Button Series Assembly instructions

Lifely

Lifely Button Series Assembly instructions

Livarno Living 290568 Assembly, operating and safety instructions

Livarno Living

Livarno Living 290568 Assembly, operating and safety instructions

Lightolier Lytespan 8170WH specification

Lightolier

Lightolier Lytespan 8170WH specification

GFW JAK5DRMNG Assembly instructions

GFW

GFW JAK5DRMNG Assembly instructions

manuals.online logo
manuals.online logoBrands
  • About & Mission
  • Contact us
  • Privacy Policy
  • Terms and Conditions

Copyright 2025 Manuals.Online. All Rights Reserved.