8
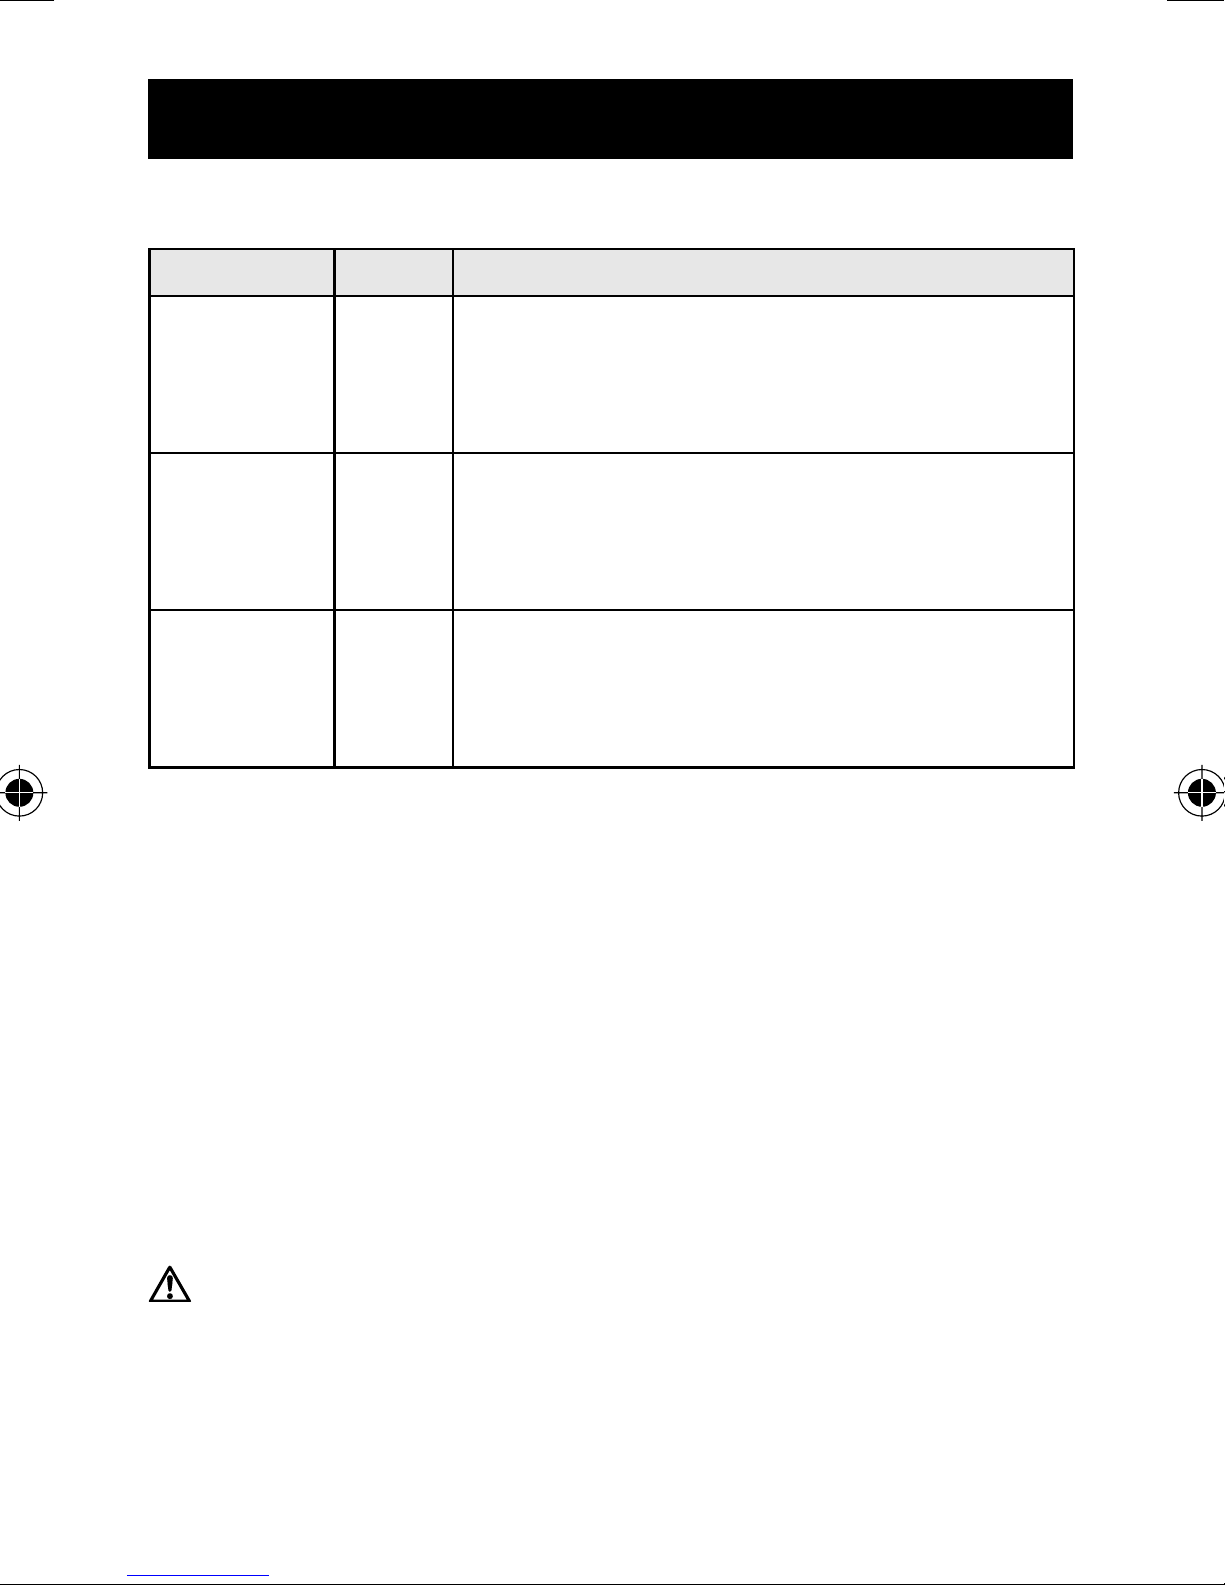
PHYSICAL CONDITION AND WORKOUT
There are three training zones, as described below:
TRAINING ZONE
MHR% DESCRIPTION
Health
Maintenance
65-78%
This is the lowest training intensity
level. It is good for beginners and
those who want to strengthen their
cardiovascular systems.
Aerobic
Exercise
65-85%
Increases strength and endurance. It
works within the body’s oxygen intake
capability, burns more calories and can
be maintained for a long period of time.
Anaerobic
Exercise
78-90%
Generates speed and power. It works
at or above the body’s oxygen intake
capability, builds muscle, and cannot be
maintained for a long period of time.
The upper and lower heart rate limits are calculated by multiplying
your MHR by the percentages of the selected training zone.
For example:
A 40-year-old training for basic health maintenance:
• Upper Heart Rate Limit [220 - 40(age)] ×78% = 140
• Lower Heart Rate Limit [220 - 40(age)] ×65% = 117
IMPORTANT:
Always warm up before exercise and select the training zone
that best suits your physique. Exercise regularly, 20 to 30
minutes per session, three to four times a week for a healthier
cardiovascular system.
CAUTION:
Determining your individual training zone is a critical step
in the process towards an efficient and safe training program.
Please consult your doctor or health professional to help you
determine exercise frequency and duration appropriate for
your age, condition and specific goals.