manuals.online logo
Brands
  1. Home
  2. •
  3. Brands
  4. •
  5. Omron
  6. •
  7. Relay
  8. •
  9. Omron Sti SR101A Operation manual

Omron Sti SR101A Operation manual

1
Safety
Technology
& Innovation
•
2 start behaviors possible:
-Manual start
-Automatic start
•
Short circuit and earth fault monitoring
•
Up to PL d, SILCL 2, category 3
•
It is not allowed to open the device, tamper with the de-
vice or bypass the safety devices.
•
All relevant safety regulations and standards are to be
observed.
•
The overall concept of the control system in which the
device is incorporated must be validated by the user.
•
Failure to observe the safety regulations can result in
death, serious injury and serious damage.
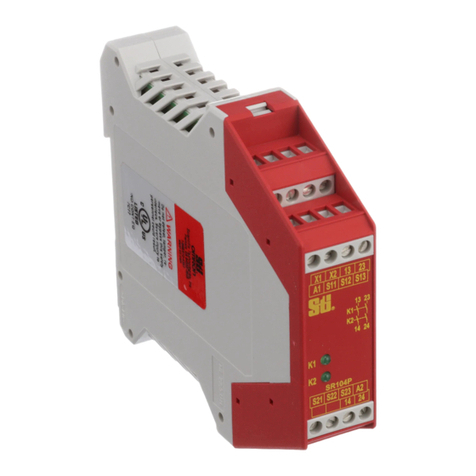
Correct Use SR101A is the low-cost emergency stop safety relay with which
machines and systems can be safely switched off by disconnect-
ing the power supply. Internal fault monitoring takes place
during restarting via the start button.
Applications for the SR101A include single or dual-channel
emergency stop circuits and guard monitoring on machines and
systems.
Features
•
2 safe, redundant relay outputs
•
Connection of:
•
- Emergency stop buttons
- Safety switches
- Non-contact safety switches
•
Single and dual-channel operation possible
•
Feedback loop for monitoring downstream contactors or
expansion modules
•
Cyclical monitoring of the output contacts
•
Indication of the switching state via LED
Function
The emergency stop safety switching device SR101A is
designed for safe isolation of safety circuits according to
EN 60204-1 and can be used up to safety category 3, PL d
according to EN ISO 13849-1.
The internal logical system closes the safety contacts when
the start button is pressed.
If the safety switch is opened, the positively driven safety
contacts are opened and safely switch the machine off. It is
ensured that a single fault does not lead to a loss of the
safety function and that every internal fault is detected by
cyclical self-monitoring no later than when the system is
switched off and switched on again. Only a fault in the
safety switch itself is not detected. This must be checked
regularly as part of a maintenance plan.
Electrical
Connection
•
When the 24 V version is used, a control transformer
according to EN 61558-2-6 or a power supply unit with
electrical isolation from the mains must be connected.
•
External fusing of the contacts (4 A slow-blow or 6 A
quick-action or 10 A gG) must be provided.
•
A maximum length of the control lines of 1000 meters
with a line cross section of 0.75 mm
2
must not be ex-
ceeded.
•
The line cross section must not exceed 2.5 mm
2
.
•
If the device does not function after commissioning, it
must be returned to the manufacturer unopened. Open-
ing the device will void the warranty.
Installation
As per EN 60204-1, the device is intended for installation in
control cabinets with a minimum degree of protection of
IP54. It is mounted on a 35 mm DIN rail according to DIN
EN 60715 TH35.
Safety
Precautions
•
Installation andcommissioningofthe device must be
performed only by authorized personnel .
•
Observe the country-specific regulations when installing
the device.
•
The electrical connection of the device is only allowed to
be made with the device isolated.
•
The wiring of the device must comply with the instruc-
tions in this user information, otherwise there is a risk
that the safety function will be lost.
Fig. 1 Block diagram SR101A
Fig. 2 Installation / removal
Fig. 3Connections
A1: Power supply
A2 : Power supply
S11: DC 24V control voltage
S21: Control line
13-14: Safety contact 1
23-24: Safety contact 2
(not for the plug-in terminals)
SR101A
User Information for SR101A
2
Safety
Technology
& Innovation
Note: The items listed under “Electrical connection” must be observed during commissioning.
Commissioning
Procedure
1. Wiring emergency stop circuit:
Wire the emergency stop circuit according to the required
Performance Level determined (see Fig. 1to Fig. 3).
2. Wiring start circuit:
Wire the start circuit according to Fig. 4 or Fig. 5 to set the
starting behavior.
Warning:
If “Automatic start” is set, bear in mind that the safety con-
tacts will switch immediately after the power supply is
connected. If “Manual start” is set, the start button must be
opened after wiring.
3. Wiring feedback loop:
If your application provides for external contactors or ex-
pansion modules, connect them to the device according to
Fig. 6 and Fig. 7.
5. Starting the device:
Switch the operating voltage on.
Warning:
If the “Automatic start” starting behavior is set, the safety
contacts will close immediately.
If the “Manual start” starting behavior is set, close the start
button to close the safety contacts.
LEDs K1 and K2 are lit.
6. Triggering safety function:
Open the emergency stop circuit by actuating the con-
nected safety switch. The safety contacts open immedi-
ately.
7. Reactivation:
Close the emergency stop circuit. If “Automatic start” is
selected, the safety contacts will close immediately.
If the “Monitored manual start” starting behavior is set, close
the start button to close the safety contacts.
Fig. 4:
Manual start.
Fig. 5:
Automatic start
(e.g. for applications with a
safety door).
Warning:
Safety contacts switch
immediately when the
power supply is connected.
Fig. 6:
Feedback loop.
Monitoring of externally con-
nected contactors or expansion
modules.
Depending on the application or the result of the risk assessment according to EN ISO 13849-1, the device must be wired as
shown in Fig. 1to Fig. 8.
Applications
Fig. 2:
Single-channel emergency stop
circuit without fault monitoring of
the emergency stop button and
the supply cables.
(category 1, up to PL c)
Fig. 1:
Two-channel emergency stop
circuit without fault monitoring of
the emergency stop button and
the supply cables.
(category 3, up to PL d)
Emergency Stop
Circuit
Starting Behavior
Feedback Loop
Fig. 3:
Two-channel sliding guard monitoring
with positively driven limit switches.
(category 3, up to PL d)
SR101A
User Information for SR101A
Safety contacts
Fig. 8:
Connecting load to safety contacts.
(Figure shows example.
Voltage „+V“ according to techn.
Data)
Fig. 7:
Feedback loop for automatic start:
The feedback loop monitors contac-
tors or the expansion modules .
3
Safety
Technology
& Innovation
Maintenance
The device must be checked once per month for proper
function and for signs of tampering and bypassing of the
safety function.
Technical
Data
16026NE;1-94831OSINE;1-40206NEsdradnatsehtotsdnopserroC
Operating voltage SR101A01 SR101A02 SR101A03
V032CAV511CAV42CD/CA
zH06-05ycneuqerfylppusdetaR
%01-/+noitaivedelbissimreP
Power consumption DC 24V AC 230V
AV5.3.acW2.1.ac
V42CD11StaegatlovlortnoC
Am04.xam41S...11StnerruclortnoC
stcatnocON2stcatnocytefaS
V052CAegatlovgnihctiws.xaM
Safety contact breaking capacity (13-14, 23-24) AC: 250 V, 1500 VA, 6 A for ohmic load,
51-CArofA4,V052
;daolcimhorofA52.1,W03,V42:CD
31-CDrofA2,W03,V42
Am02,V42daoltcatnocmuminiM
GgA01ronoitca-kciuqA6rowolb-wolsA4sesuftcatnoC.niM
mm5.2-41.0noitcesssorcenil.xaM
2
mm57.0htiwm0001enillortnocfohtgnel.xaM
2
iNgAlairetamtcatnoC
01x1.xorppa.hcemefilecivrestcatnoC
7
, electr. 1 x 10
5
operating cycles
)stcatnoc/egatlovlortnoc(Vk5.2egatlovtseT
Rated impulse withstand voltage, leakage path/air gap 4 kV (DIN VDE 0110-1)
V052egatlovnoitalusnidetaR
02PInoitcetorpfoeergeD
C°06+otC°51-:V42CDegnarerutarepmeT
C°04+otC°51-:V511/032CA
)1-0110EDVNID(2noitanimatnocfoeergeD
)1-0110EDVNID(3yrogetacegatlovrevO
g032.xorppathgieW
53HT51706NEotgnidroccaliarNIDgnitnuoM
Note:
Additional data can be requested from the manufacturer for
applications that deviate from these conditions.
Safety
Characteristics
According to
EN ISO 13849-1
The device is certified according to EN ISO 13849-1 up to a
Performance Level of PL d.
Device cannot be switched on again after an emergency
stop:
•
Check whether the emergency stop circuit was closed
again.
•
Is the feedback loop closed?
If the fault still exists, perform the steps listed under
“Commissioning Procedure”.
If these steps do not remedy the fault either, return the
device to the manufacturer for examination.
Opening the device is impermissible and will void the
warranty.
Device does not switch on:
•
Check the wiring by comparing it to the wiring diagrams.
•
Check the safety switch used for correct function and
adjustment.
•
Check whether the emergency stop circuit is closed.
•
Check whether the start button (with manual start) is
closed.
•
Check the operating voltage at A1 and A2.
•
Is the feedback loop closed?
What to Do in
Case of a Fault?
The device is otherwise maintenance free, provided that it
was installed properly.
SR101A
User Information for SR101A
Safety characteristics according to EN ISO 13849-1 for all variants of SR101A
Load (DC13; 24V) <= 0,1A <= 1A <= 2A
T10d [years] 20 20 20
Category: 3 3 3
PL d d d
PFHd [1/h]: 1,03E-07 1,3E-07 1,3E-07
nop [cycle / year] <= 400.000 <= 73.000 <= 17.000
4
Safety
Technology
& Innovation
Dimension
Drawing
114
99
22,5
SR101A
User Information for SR101A
©2017Omron Scientific Technologies, Inc. All rights reserved.
Subject to technical modifications.
Manual P/N 99927-0010 Rev.D
Drawing Number: 092361-12-07/17
OMRON SCIENTIFIC TECHNOLOGIES, INC.
6550 Dumbarton Circle, Fremont CA 94555-3605 USA
U.S.A: 800.556.6766
Canada: 866.986.6766
Mexico and South America: 847.843.7900
All other countries: 510.608.3400
www.sti.com/info
Safety,
Technology
& Innovation
EC Declaration of Conformity No. DECL-000044 Rev.K
The manufacturer named below herewith declares that the product fulfills
the provisions of the directive(s) listed below and that the related standards
have been applied.
OMRON Scientific Technologies Inc.
6550 Dumbarton Circle
Fremont, CA 94555, U.S.A.
Directives applied:
Standards applied:
EN ISO 13849-1:2015
EN 62061:2005 + AC:2010 + A1:2013+A2:2015
Fremont, April 2017
The signed EC Declaration of Conformity is included with the product.
EMC directive 2014/30/EU
Machinery directive 2006/42/EC
RoHS directive 2011/65/EU
Vanessa Chen
Quality Manager
(Authorized Signer of Declarations of Conformity)
OMRON Scientific Technologies, Inc.
Representative in EU:J.H.P.W.Vogelaar
European Quality & Environment Operations Manager
Omron Europe B.V
Zilverenbert 2, 5234 GM, ‘s-Hertogenbosch
The Netherlands
Certificate: 01/205/0692.01/14
plus 2017-04-06 TUV "Statement about the further validity of certificates"
TÜV: NB 0035
TÜV Rheinland Industrie Service GmbH - TÜV Rheinland Group AM
Grauen Stein, 51105 Köln, Germany

Other Omron Relay manuals

Omron K8AK-VW User manual

Omron

Omron K8AK-VW User manual

Omron K8DT-AS3 User manual

Omron

Omron K8DT-AS3 User manual

Omron K8AB-VW Series User manual

Omron

Omron K8AB-VW Series User manual

Omron G9SR User manual

Omron

Omron G9SR User manual

Omron K8AK-VW3 User manual

Omron

Omron K8AK-VW3 User manual

Omron G9SB - DATASHEET 1 User manual

Omron

Omron G9SB - DATASHEET 1 User manual

Omron G7L - User manual

Omron

Omron G7L - User manual

Omron G3DZ-F4B User manual

Omron

Omron G3DZ-F4B User manual

Omron MY - User manual

Omron

Omron MY - User manual

Omron G2RV -  1 User manual

Omron

Omron G2RV - 1 User manual

Omron SR104P Operation manual

Omron

Omron SR104P Operation manual

Omron ZEN User manual

Omron

Omron ZEN User manual

Omron SR203M User manual

Omron

Omron SR203M User manual

Omron SR131A User manual

Omron

Omron SR131A User manual

Omron G9SX-EX401 Series User manual

Omron

Omron G9SX-EX401 Series User manual

Omron Sti SR120MP User manual

Omron

Omron Sti SR120MP User manual

Omron G7S User manual

Omron

Omron G7S User manual

Omron G7J - User manual

Omron

Omron G7J - User manual

Omron MK-I - User manual

Omron

Omron MK-I - User manual

Omron K8AK-TH User manual

Omron

Omron K8AK-TH User manual

Omron G70D B7A Series User manual

Omron

Omron G70D B7A Series User manual

Omron MYK User manual

Omron

Omron MYK User manual

Omron K8DT-AS Series User manual

Omron

Omron K8DT-AS Series User manual

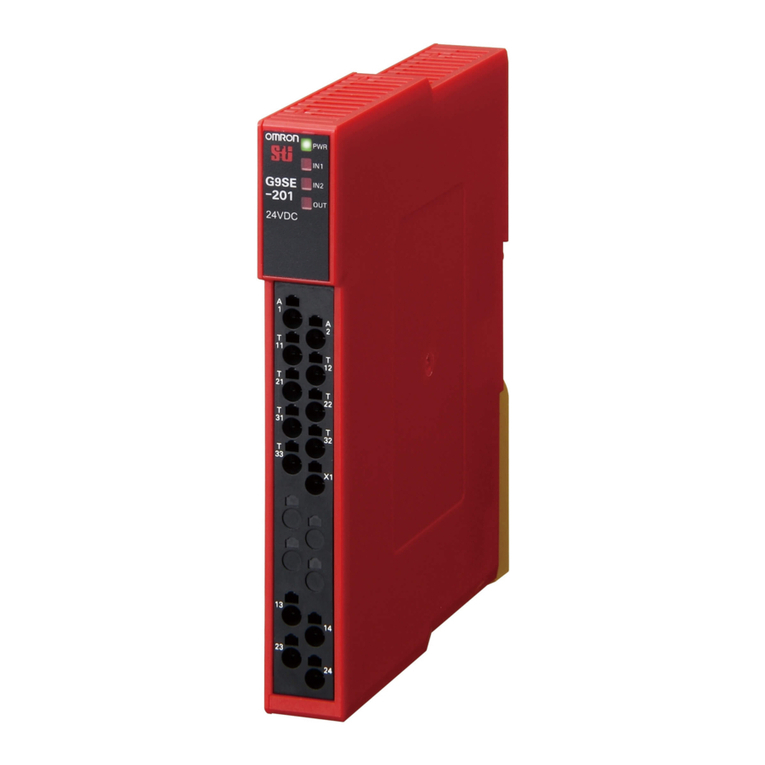
Omron G9SE-201 User manual

Omron

Omron G9SE-201 User manual

Popular Relay manuals by other brands

Arcteq AQ 1000 instruction manual

Arcteq

Arcteq AQ 1000 instruction manual

ABB HU Instruction leaflet

ABB

ABB HU Instruction leaflet

Renu Electronics FPEM-1614RP-V2 quick start guide

Renu Electronics

Renu Electronics FPEM-1614RP-V2 quick start guide

Reer SR ONE Installation, use and maintenance

Reer

Reer SR ONE Installation, use and maintenance

ZIEHL UFR1001E operating manual

ZIEHL

ZIEHL UFR1001E operating manual

Pilz S1EN operating instructions

Pilz

Pilz S1EN operating instructions

Bpt VLS/101M manual

Bpt

Bpt VLS/101M manual

Numato 2 Channel USB Relay Module user guide

Numato

Numato 2 Channel USB Relay Module user guide

GE T60 instruction manual

GE

GE T60 instruction manual

Siemens SIRIUS 3RF24 AB Series operating instructions

Siemens

Siemens SIRIUS 3RF24 AB Series operating instructions

Seg MRM3 manual

Seg

Seg MRM3 manual

ABB CRN-1 Instruction leaflet

ABB

ABB CRN-1 Instruction leaflet

Basler BE1-59NC instruction manual

Basler

Basler BE1-59NC instruction manual

ABB CM Series Operating and installation instructions

ABB

ABB CM Series Operating and installation instructions

GE IAC53A instructions

GE

GE IAC53A instructions

ABB EF19 installation instructions

ABB

ABB EF19 installation instructions

Pilz PU3Z operating manual

Pilz

Pilz PU3Z operating manual

COQON UPSPFMB1 manual

COQON

COQON UPSPFMB1 manual

manuals.online logo
manuals.online logoBrands
  • About & Mission
  • Contact us
  • Privacy Policy
  • Terms and Conditions

Copyright 2025 Manuals.Online. All Rights Reserved.