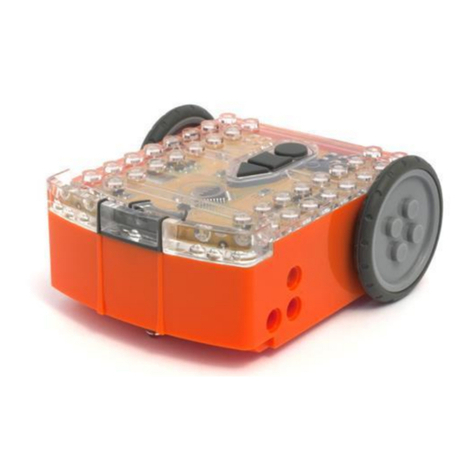
Omron AmigoBot User manual

AmigoBo
t
User’s Guide
With Activ
Media Intelligent Robotics Software
ARIA ▪Saphira ▪Mapper ▪Simulator
i

AmigoBot Users Guide
Copyright 2003, ActivMedia Robotics, LLC. All rights reserved.
Under international copyright laws, this manual or any portion of it may not be copied or in any
way duplicated without expressed written consent from ActivMedia Robotics, LLC.
The ActivMedia Robotics Interface for Applications (ARIA) software on disk or CD and on the
AmigoBot server FLASH ROM that accompany the robot and accessories and which are
available for network download by ActivMedia Robotics customers are solely owned and
copyrighted by ActivMedia Robotics, LLC. The ActivMedia Robotics-licensed Saphira libraries
that accompany the robot and accessories and which are available for network download by
AmigoBot customers are solely owned and copyrighted by SRI International, Inc. AmigoBot
developers and users are authorized by revocable license to develop and operate custom
software for personal, research, and educational uses only. Duplication, distribution, reverse-
engineering, or commercial application of ActivMedia software or hardware without the
expressed written consent of ActivMedia Robotics is explicitly forbidden.
Some ActivMedia Robotics software uses the Fast Light Tool Kit (FLTK) GUI, used and distributed
under the terms of the GNU Library General Public License as published by the Free Software
Foundation. Network audio uses the GSM 06.10 speech compression implementation by Jutta
Degener and Carsten Bormann of the Technische Universitat Berlin (http://kbs.cs.tu
-berlin.de/~jutta/toast.html). ActivMedia Robotics software is based in part on the work
of the Independent JPEG Group (http://www.ijg.org)
The various names and logos for products used in this manual are registered trademarks or
trademarks of their respective companies. Mention of any third-party hardware or software
constitutes neither an endorsement nor a recommendation.
AmigoBot User’s Guide, Version 1.9, August, 2003.
ii

Federal Communications Commission (FCC) Statement
This equipment has been tested and found to comply with the limits for a class B digital device,
pursuant to part 15 of the FCC rules. These limits are designed to provide reasonable protection
against harmful interference when the equipment is operated in a commercial or residential
environment. This equipment generates, uses, and can radiate radio frequency energy, and if
not installed and used in accordance with the instruction manual, may cause harmful
interference to radio communications. There is no guarantee that harmful interference will not
occur, in which case the user will be required to correct the interference at their own expense.
Some possible ways to reduce the interference include:
Reorient or relocate the receiving antenna
Operate the equipment in a different location
Connect the equipment to a different power outlet
Consult with your local dealer or contact support online
Canadian Statement
This Class B digital apparatus meets all requirements of the Canadian Interference-Causing
Equipment Regulations.
Cet appareil numerique de la classe B respecte toutes les exigences du Reglement sur le
materiel brouilleur du Canada.
Warning
It is essential that only the supplied power and radio units be used.
Any changes or modifications to the equipment not expressly approved by the parties
responsible for compliance could void your authority to operate the equipment.
Important Safety Instructions
Read the installation and operations instructions before using the equipment.
Avoid using power extension cords.
To prevent fire or shock hazard, do not expose the equipment to rain or moisture.
Refrain from opening the unit or any of its accessories.
Keep wheels away from long hair or fur.
Inappropriate Operation
Inappropriate operation voids your warranty! Inappropriate operation includes, but is not limited
to:
Dropping the robot, running it off a ledge, or otherwise operating it in an
irresponsible manner
Overloading the robot above its payload capacity
Getting the robot wet
Continuing to run the robot after hair, yarn, string, or any other items have
become wound around the robot’s axles or wheels
All other forms of inappropriate operation or care
iii

AmigoBot Users Guide
Table of Contents
INTRODUCTION .............................................................................................................. 1
WHAT IS AMIGOBOT?...................................................................................................................................... 1
AmigoBot Hardware....................................................................................................................................................................2
AmigoBot Operating System Software .....................................................................................................................................2
AmigoBot Control Mode Software ............................................................................................................................................3
ARIA...............................................................................................................................................................................................3
Saphira..........................................................................................................................................................................................4
Simulator .......................................................................................................................................................................................4
Mapper .........................................................................................................................................................................................4
SYSTEM MODE AND SOUNDS ............................................................................................................................ 4
AMIGOBOT PACKAGE ..................................................................................................................................... 4
Basic Components (all shipments) ............................................................................................................................................5
Optional Components and Attachments ................................................................................................................................5
User-Supplied Components/System Requirements .................................................................................................................5
ADDITIONAL RESOURCES .................................................................................................................................. 5
AmigoBot Server ..........................................................................................................................................................................6
Personal Robots Newsletter ........................................................................................................................................................6
AmigoBot Newsgroup .................................................................................................................................................................6
Support..........................................................................................................................................................................................6
INSTALLATION & SET-UP ................................................................................................. 7
SOFTWARE....................................................................................................................................................... 7
Windows .......................................................................................................................................................................................7
LINUX .............................................................................................................................................................................................7
GUIS AND DISPLAYS......................................................................................................................................... 8
SERIAL PORTS AND CONNECTIONS .................................................................................................................... 8
AmigoLeash .................................................................................................................................................................................8
AmigoBot with Serial Ethernet ....................................................................................................................................................9
JOYSTICK ........................................................................................................................................................ 9
QUICK START ................................................................................................................ 10
INSTALL ARIA ................................................................................................................................................ 10
Client-Server Communications ................................................................................................................................................10
STARTING UP CLIENT AND SERVER.................................................................................................................... 10
Client Server Connection .........................................................................................................................................................11
Demo Startup Options ..............................................................................................................................................................11
A Successful Connection..........................................................................................................................................................12
OPERATING THE ARIA DEMONSTRATION CLIENT............................................................................................... 12
DISCONNECTING ........................................................................................................................................... 12
OPERATION AND MODES ............................................................................................ 13
CONTROLS, SWITCHES, INDICATORS, AND SOUNDS .......................................................................................... 13
Recharge/Power/Battery .........................................................................................................................................................13
Reset, Motors/Test Buttons and System/User LED’s ................................................................................................................14
Sounds.........................................................................................................................................................................................14
MOTORS AND POSITION ENCODERS ................................................................................................................ 15
Sonar ...........................................................................................................................................................................................15
Sonar Sensitivity..........................................................................................................................................................................15
SERIAL AND ACCESSORY PORTS ...................................................................................................................... 16
System Serial Port .......................................................................................................................................................................16
Control Serial Port ......................................................................................................................................................................16
Accessory Connector ...............................................................................................................................................................16
MODES OF OPERATION .................................................................................................................................. 17
Self-Test Mode............................................................................................................................................................................17
iv
Control Mode.............................................................................................................................................................................18
System Mode..............................................................................................................................................................................18
SAFETY FEATURES............................................................................................................................................ 19
Pick It Up! ....................................................................................................................................................................................19
Watchdog ..................................................................................................................................................................................19
Low Battery.................................................................................................................................................................................19
MAINTENANCE & REPAIR............................................................................................. 20
DRIVE LUBRICATION ....................................................................................................................................... 20
AMIGOBOT BATTERIES .................................................................................................................................... 20
Manually Charging the Battery................................................................................................................................................20
FACTORY REPAIRS.......................................................................................................................................... 21
SPECIFICATIONS .......................................................................................................... 22
WARRANTY & LIABILITIES.............................................................................................. 24
v

AmigoBot Users Guide
vi

Introduction
INTRODUCTION
Congratulations on your purchase of AmigoBot and welcome to the rapidly growing community
of ActivMedia’s intelligent mobile robot enthusiasts.
This AmigoBot User’s Guide provides both the general and technical
details you need to operate your AmigoBot. We encourage you also to
use these companion resources:
ActivMedia Robotics software and support services at
http://www.amigobot.com
AmigoBot-users newsgroup
24-hour AmigoBot-support email service
AmigoBot applications online Help
What is AmigoBot?
AmigoBot is an intelligent mobile robot: not a toy, but a powerfully smart moving machine.
Intelligent because it has an onboard microcontroller with software (AmigOS) and sensors that
enable the robot to sense what’s around it and to safely drive in and around its environment.
Combined with state-of-the-art robotics software like ActivMedia Robotics’ Interface for
Applications (ARIA) and Saphira running on your PC, AmigoBot can actually determine where it
is and find its way safely from one place to the next, with your help (teleoperation) and without
your help (self-guided navigation), all the while going around obstacles, through doors, over
bumps, under tables…
Figure 1: AmigoBot's features and dimensions
AmigoBot is the culmination of many years of mobile-robotics research and development by
experts in artificial- and machine-intelligence from around the world. ActivMedia’s Pioneer was
the first device to make intelligent mobile robotics affordable for most colleges and universities.
It quickly became the leading off-the-shelf mobile robot for research and development
institutions around the world. All of ActivMedia Robotics’ commercial robots, including Pioneer,
PeopleBot, and PowerBot, use the same basic sensing, drive system, and robotics software
architecture used by AmigoBot, ActivMedia Robotics’ first personal robot.
1

AmigoBot Users Guide
AmigoBot Hardware
AmigoBot is intended for use indoors, including homes, schools, nursing homes, hospitals, offices,
and research labs. The small, lightweight, and highly maneuverable AmigoBot has two solid 4-
inch rubber tires, each driven by a reversible DC motor. Drive power is differentially pulse-width-
modulated for fine and independent control of translational (forward and reverse) and
rotational (clockwise and counterclockwise) motion. AmigoBot’s drive system includes a passive
rear caster for balance, and, unlike many other robots, it can turn in place so it doesn’t get stuck
in corners.
Each drive motor includes a high-resolution encoder that is used by AmigoBot’s microcontroller
to determine the robot’s immediate translational and rotational speeds. Encoder readings also
help determine how far the robot is traveling and the direction in which it is heading.
Figure 2: AmigoBot's components and controls
The standard AmigoBot comes with eight sonar—the six perforated gold discs around the front
and the two in the rear. AmigoBot’s micro-controller uses sonar like a bat to not only sense
objects forward, side, and aft, but also to determine how far away they are (“range finding”).
AmigoBot Operating System Software
The high-performance, I/O-rich 20-MHz Hitachi H8 microprocessor is the brain of the AmigoBot
microcontroller. It also comes with FLASH read-only memory upon which we have permanently
stored the robot’s operating system software. AmigOS, as we call it, manages all the low-level
systems and electronics of the mobile robot, including running the sonar and reading the wheel
encoders, adjusting the motor speeds for turns and when going up and down ramps and over
bumps, playing pre-recorded sounds, and so on. Like many operating systems, AmigOS is
invisible to most users, doing its job behind the scenes. However, it is an “open” technology: its
interface is freely available for command and control by your own software.
AmigOS also comes with self-contained programs that operate the robot autonomously, without
the need for other computers or intelligent devices. These programs exercise the onboard
motors and sonar and have the robot intelligently wander about on its own, navigating around
obstacles while performing a simple routine of motions and sounds (see “Self-Test Mode”).
2

Introduction
Future versions of AmigOS also may let expert users program their own standalone routines for
autonomous performance by AmigoBot.
AmigoBot Control Mode Software
We don't recommend that you learn H8S machine
language programming just yet. Rather, AmigoBot
prefers to operate by a higher intelligence (you, for
example) by teleoperating the robot with a joystick
from an ARIA program on your PC connected to
and in control of the robot.
Figure 3. Control AmigoBot from your PC
through AmigoLeash or AmigoWirefree
radio modems.
Most people prefer to operate AmigoBot from their
PC because it gives them quick, easy access to the
robot’s functionalities while working with high-level
software on a familiar host computer. Control Mode
employs the power and speed of your PC to perform
complex robotics tasks such as processing the raw
sensor and position information from the robot,
determining where it is in its operating space, and
safely guiding the robot from place to place, room
to room.
Control-mode software applications like the ARIA
demo communicate with AmigoBot through a serial interface, either directly tethered via
AmigoLeash or wirelessly with the Serial Ethernet accessory or radio modems.
Currently available robotics software and development environments for the Microsoft Windows
or Red Hat© Linux-based computing platform of your choice include:1
ActivMedia Robotics Interface for Applications (ARIA)
SRIsim ActivMedia robot simulator
SRI’s Saphira client-development suite with Colbert
Versions and updates for supported computing
platforms are available to password-registered
customers for download from our software website:
Figure 4. ARIA's architecture
http://robots.activmedia.com
ARIA
The ActivMedia Robotics Interface for Applications
(ARIA) is a C++-based open-source development
environment that provides a robust client-side
interface to a variety of intelligent robotics systems,
including your ActivMedia robot’s controller and
accessory systems.
ARIA is the ideal platform for integration of your own
robot-control software, since it neatly handles the
lowest-level details of client-server interactions,
including serial communications, command and
3
1Some software may come bundled with your robot. Other packages require purchase for licensing. Some software is
also available for alternative operating systems, such as Macintosh, SunOS, Solaris, and BSD Unix.

AmigoBot Users Guide
server-information packet processing, cycle timing, and multithreading, as well as a variety of
accessory controls, such as motion gyros, among many others.
What’s more, it comes with source code so that you may examine the software and modify it for
your own sensors and applications.
Saphira
Saphira, including the Colbert language, is a full-featured robotics control environment
developed at SRI International’s Artificial Intelligence Center. Saphira and its ARIA foundation
form the robotics-control and applications-development foundation for much of the
ActivMedia Robotics Interface for Applications (ARIA) and many other ventures.
The complete, licensed Saphira robotics development environment, including C/C++ libraries,
GUI interface and Simulator, comes bundled with your ActivMedia robot.
Simulator
The Simulator is a connection option that provides a virtual replacement for your AmigoBot. By
connecting to the simulator instead of the real robot, you can test your client programs and so
on, when the real robot isn’t practical or available.
Mapper
Mapper provides the tools you need to construct a map of your robot’s real operating space
(“world”).
System Mode and Sounds
Besides self-test and control modes, you may also operate AmigoBot in System Mode. This
special feature is done through the AmigoBot’s system serial port beneath the robot. System-
mode software utilities running on an attached PC (serial ports connected via AmigoLeash) let
you modify AmigOS, the robot’s operating parameters, and its onboard sounds. For instance,
with AmigoSounds, you download new sound themes that give personality to your robot, as well
as provide useful aural cues to its working status, such as when its motors stall or when its battery
is low.
Other AmigOS utilities let you modify the operating parameters of your robot, upgrade AmigOS,
and many other types of system-related tasks. Some system-mode tools like AmigoSounds come
with the basic robot. We provide others, such as an AmigOS download tool, at our AmigoBot
support website along with new AmigOS software as it becomes available. We also provide a
selection of system tools, such as the AmigoConfigurator, with the AmigoBot Technical Manual.
All generally available tools and updates will be available at AmigoBot’s support website (see
“AmigoBot Server” below) as announced over the amigobot-users email news list (see
“AmigoBot Newsgroup” below).
AmigoBot Package
Our experienced manufacturing staff put your AmigoBot Intelligent Mobile Robot and its
accessories through a “burn in” period and carefully tested them before shipping the package
to you. In addition to the companion resources listed above, we warranty the robot and our
manufactured accessories against mechanical, electronic, and labor defects for six months. All
4

Introduction
of these precautions ensure that you have many years to enjoy your new AmigoBot Intelligent
Mobile Robot.
Even though we’ve made every effort to make your AmigoBot package complete, please
check the components again after you unpack them from the shipping box.
Basic Components (all shipments)
One fully assembled AmigoBot Intelligent Mobile Robot
CD-ROM containing licensed ActivMedia software and manuals
Battery charger (may include socket and 110-220 VAC adapters)
AmigoBot User’s Guide
AmigoLeash cable and serial adapter
$10 Off Coupon for the AmigoBot Store (http://www.amigobot.com)
Optional Components and Attachments2
Serial Ethernet radio for connection over a LAN
Replacement battery
High-speed battery charger
Color camera and microphone, onboard A/V transmitter with desktop receiver,
and video framegrabber for your desktop or portable PC
AmigoBot-compatible PCMCIA framegrabber for your subnotebook computer
(Vision AmigoBot only)
PC joystick
AmigoBot Technical Manual and software utilities
User-Supplied Components/System Requirements
586-class or later, preferably 300MHz or faster, PC or subnotebook with Microsoft
Windows® or RedHat Linux® operating system.
Color monitor or subnotebook screen capable of 800 x 600 pixel, 16-bit color
display
One available RS232-compatible serial port on PC or subnotebook
CD-ROM drive
Vision AmigoBots may be purchased with or without PCMCIA framegrabbers; if
you do not have the proper framegrabber for your subnotebook used with Vision
AmigoBot, you will not be able to run ActivMedia Color-Tracking Software (ACTS).
Internet connection for access to AmigoBot through Serial Ethernet radio.
Hardware may include a network interface card, typically Ethernet, and/or a
high-speed modem, either DSL or a 56KB standard unit.
Additional Resources
Every AmigoBot customer may take advantage of four additional and valuable resources:
Access to the AmigoBot Support Web server for downloading software, updates,
and manuals
Access to the amigobot-users newsgroups
Direct access to the AmigoBot technical support team
Free subscription to ActivMedia’s Personal Robots Newsletter
2This is just a partial list of options and accessories; new ones appear regularly. Sign up for amigobot-users to receive
automatic notification or browse the AmigoBot website for details.
5

AmigoBot Users Guide
AmigoBot Server
We maintain a 24-hour, seven-day per week (24/7) World Wide Web server where customers
may obtain AmigoBot software and support materials:
http://www.amigobot.com
Personal Robots Newsletter
You may join ActivMedia’s bi-monthly Personal Robots Newsletter to keep up to date on new
accessories, news, and special offers for AmigoBot.
From: <your return e-mail address goes here>
Subject: subscribe
AmigoBot Newsgroup
We maintain an email-based newsgroup through which AmigoBot owners share ideas, software,
and questions about the robot. To sign up, send an email message to our automated
newsgroup server:
From: <your return e-mail address goes here>
Subject: subscribe
Our SmartList-based email listserver will respond automatically. After you subscribe, send your
email comments, suggestions, and questions intended for the worldwide community of
AmigoBot users:
From: <your return e-mail address goes here>
Subject: <something of interest to amigobot-users>
Access to the amigobot-users newslist is limited to subscribers, so your address is safe from
spam. However, the list currently is unmoderated, so please confine your comments and
inquiries to issues concerning the operation and programming of AmigoBot.
Support
Having a problem? Can’t find the answer in this guide or any of the other manuals? Do you
know a way that we might improve AmigoBot? First consult this guide and check into our online
Frequently Asked Questions (FAQ) section on the http://www.amigobot.com server.
If you can’t find the solution, then contact us:
Please include your robot's serial number—look for it on the underside of your robot. We need
the serial number to understand your AmigoBot's configuration so we can best answer your
questions.
Your amigobot-support message goes directly to the AmigoBot technical support team. A
team member will help you or point you to a place where you can find help.
6

Installation & Set-up
INSTALLATION & SET-UPINSTALLATION & SET-UP
Figure 5: AmigoBot needs little setup out
of the box.
AmigoBot comes pre-assembled for out-of-the-box
operation. All you need to do to prepare the robot for
operation is twist up and position the camera, if you
have the e-Presence surveillance hardware. That’s all
there is to it!
Software
Typical operation of your AmigoBot Intelligent Mobile Robot requires that you install software
and hardware on your PC. We assume that you know how to operate your PC, attach
accessories to it, and install software on its hard drive. Please consult your computer and
operating system manuals for details.
ActivMedia Robotics Interface for Applications (ARIA) software is available for both RedHat
Linux®- and Microsoft’s 32-bit Operating Systems (Win32), such as Windows98®. Choose the
software that matches your PC’s operating system.
Windows
The various AmigoBot software development tools and utilities all are self-extracting or
InstallShield archives that automatically run when you double-click them in ActivMedia Robotics
CD-ROM icon in My Computer. Software typically installs in your C:\Program
Files\ActivMedia Robotics folder on your main hard-disk drive. Therein is a folder named
bin, where you may find the various programs.
Unlike many other installations, you should not have to restart your PC after installing ActivMedia
Robotics software. But from our experience with Windows, re-booting the computer is the first
remedy to try if the software doesn’t operate properly.
LINUX
Insert the ActivMedia Robotics CD-ROM into your PC’s drive and mount it if your system does not
automount the disc. Some of the installation software comes as RPM archives; you will need to
have root privileges to install it on your system. We also assume that the CD device is installed
and described in /etc/fstab and that the /mnt/cdrom directory exists:
# mount /dev/cdrom /mnt/cdrom
# cd /mnt/cdrom/Linux
# rpm –ihv ARIA1.2-0.i386.rpm
Most of the software gets put into /usr/local/. The program executables reside in their
respective bin/ directories. Some libraries and tools get put into /usr/local/bin and
/usr/local/lib.
You need read, write, and execution permissions to operate AmigoBot through your LINUX PC’s
serial port and to operate the Simulator through a special robot file that gets put into /tmp:
7

AmigoBot Users Guide
# chgrp users /dev/ttyS0 // Use ttyS0-Sn, depending on actual port
# chmod g+rwx /dev/ttyS0 // ditto
# chgrp users /tmp
# chmod g+rwx /tmp
We assume that the serial device and the /tmp directory already exist (they usually do when you
install LINUX) and that you and others who wish to operate AmigoBot and the Simulator are
members of the users group. Indicate the alternate serial port name if you have AmigoLeash
or the AmigoBot with Serial Ethernet host radio Ethernet attached to a different port:
/dev/ttyS2, for example.
GUIs and Displays
Saphira makes use of the Fast Light Tool Kit (FLTK) for the Graphical User Interface with both the
RedHat Linux® and Windows® versions. We include the latest FLTK libraries, so you need to install
only the software.
However, for those interested, source code and complete distributions of FLTK may be obtained
from:
http://fltk.easysw.com/software.html
Please be careful. Versions of FLTK other than that which accompanies the software may not
work.
Serial Ports and Connections
Software that runs AmigoBot from your PC communicates with and controls the robot through a
serial connection. Use the AmigoLeash that came with your robot to tether the robot to one of
your computer’s serial ports. Use the AmigoBot with the Serial Ethernet radio accessory to
operate AmigoBot without a tether over a network.
AmigoLeash
AmigoLeash comes in two parts: an adapter
containing both a 9-pin DSUB and an RJ-11/12
socket, and a long cable terminated on each end
with an RJ-11/12 plug (a common telephone cable).
Plug one end of the AmigoLeash cable into the
adaptor, and then plug the adaptor into one of the
serial ports on the back of your PC.
Figure 6: Use AmigoLeash to connect
AmigoBot with your PC.
Adaptors (9-pin to 25-pin) are available for the less
common 25-pin serial port connectors that are on
some of the older PCs. However, don’t confuse that
uncommon serial port connector with the common
25-pin socket to which you typically attach a printer.
One quick way to tell the difference is that serial
ports are plugs (male) and the parallel port usually is
a socket (female).
If you plan to operate your robot tethered to your
PC and do not have a Serial Ethernet radio installed, plug the other end of the AmigoLeash into
the RJ-11/12 receptacle (Control Port) that comes out of the top of the robot. The similar RJ-
11/12 receptacle on the bottom of AmigoBot next to the charger port and power switch also is
8

Installation & Set-up
a serial port connection, but to a different part of the robot’s controller. You’ll eventually use
AmigoLeash in that port, too, but not to operate AmigoBot. Rather, the alternate “System” serial
port is for special tools like AmigoSounds. More about this in later chapters.
a serial port connection, but to a different part of the robot’s controller. You’ll eventually use
AmigoLeash in that port, too, but not to operate AmigoBot. Rather, the alternate “System” serial
port is for special tools like AmigoSounds. More about this in later chapters.
AmigoBot with Serial EthernetAmigoBot with Serial Ethernet
AmigoBot’s Serial Ethernet radio is a popular
accessory that allows tetherless remote
control of your robot over a network. The
special device converts standard TCP/IP
Ethernet packets into serial communications,
thereby eliminating the wire tangles and
limited range of travel when the robot is
connected to your PC with a serial tether like
AmigoLeash.
Figure 7: Use AmigoBot with the Serial Ethernet
radio for tetherless control of AmigoBot.
The Ethernet-to-serial radio is mounted to the
underside of your robot. Connect to it
through a standard Ethernet wireless access
point.
The Ethernet-to-serial radio is mounted to the
underside of your robot. Connect to it
through a standard Ethernet wireless access
point.
JoystickJoystick
Most ActivMedia software lets you drive (“teleoperate”) the robot or its simulator with your PC’s
USB joystick. Sound cards usually have a joystick port or two. We leave the installation details to
you and your joystick/sound card manual, and encourage you to use the joystick’s
accompanying calibration utilities to set the device up properly. And, we make you calibrate
your joystick the first time you try to use it with any of the ARIA programs. Just follow the easy
instructions that appear on the screen. Routine calibration is a must for consistent and reliable
use.
9

AmigoBot Users Guide
QUICK START
This chapter describes how to quickly set up and operate your AmigoBot robot with the ARIA
demonstration software. For more details about programming and operating your AmigoBot
with ARIA or other client software, see their respective programming manuals.
Install ARIA
The ARIA client software-development environment, including the ARIA demonstration program
and robot Simulator, come on CD-ROM with your new robot. AmigoBot customers also may
obtain ARIA and related software and updates from our support website:
http://robots.activmedia.com
When installed, ARIA typically requires eight megabytes of hard-disk space.
The Windows version of ARIA is a self-extracting InstallShield® archive. Simply double-click its
.exe icon and follow the extraction program’s instructions. Normally, ARIA is put into a directory
named C:\Program Files\ActivMedia Robotics\ARIA. The demonstration program and
simulator get put into the bin\ directory. For convenience, you may access all these from the
Start Menu’s Programs option. The demonstration program’s source code and MSVC++
project and workspace files are in the examples\ subdirectory.
Linux users must have superuser (root) permissions in order to install ARIA. It comes as an RPM
installation archive:
rpm -ihv aria...
and gets installed in /usr/local/Aria. The ARIA demonstration program and simulator get put
into the bin/ subdirectory. The demonstration sources and makefile are in the examples/
subdirectory.
Linux users should also be sure they have permission to read/write through their PC’s serial port
that connects with the robot. The default is /dev/ttyS0. ARIA is a terminal application that
does not include a GUI, so its programs do not require X-Windows.
Client-Server Communications
Your robot requires a serial communication link with a client PC for operation. The serial link may
be:
AmigoLeash serial tether to the robot’s Control port
Optional Serial Ethernet; PC connected to a LAN with access to a wireless access
point
Starting Up Client and Server
We recommend that you first test your robot and are confident of its operation before putting it
together with and controlling it from the ARIA demonstration client.
ARIA’s examples are text-based “terminal” applications that do not include a GUI, so its
programs do not require X-Windows over Linux or special software on a remote PC client—a
simple telnet session will do the trick.
10

Client Server Connection
First, please note well that you cannot connect with and control your AmigoBot through its
controller directly from a remote client over the network without special hardware (new radio
Ethernet-to-serial device).
If you are using radio modems or the new Low-Speed Ethernet-to-serial device to communicate
wirelessly from a desktop PC to the robot controller, now is a good time to power the units.
Windows users may select the ARIA demo from the Start menu, in the ActivMedia Robotics
program group. Otherwise, start if from the ARIA bin\ directory.
Linux users will find the compiled demo in /usr/local/Aria/bin/ or in examples/. Start it:
%s ./demo
Demo Startup Options
By default, the ARIA demo program connects with the robot through the serial port COM1 under
Windows or /dev/ttyS0 under Linux. To change those connection options, either modify the
ARIA source code (examples/demo.cpp and related files in src/) and recompile the demo
application, or use a startup argument on the command line. See Table 1.
Table 1. ARIA demo command line arguments
--remoteHost <Host Name or IP> Connect with robot through a remote
host over the network instead of a
serial port; requires special
hardware or IPTHRU software
mediation.
--robotPort <Serial Port> Connect with robot through specified
serial port name; COM3, for example.
--remoteRobotTcpPort <Number> Remote TCP host-to-robot connection
port number; default is 8080.
--laserPort <Serial Port> Connect with laser rangefinder
through the specified serial port
name; /dev/ttyS3, for example.
--remoteLaserTcpPort <Number> Remote TCP host-to-laser connection
port number; default is 8081.
For example, from the Windows Start:Run dialog, choose Browse.. and select the ARIA demo
program: C:\Program Files\ActivMedia Robotics\ARIA\bin\demo.exe. Then, type a
command line argument at the end of the text in the Run dialog as described in Table 1. To
connect through the new Ethernet-to-serial radio device over the wireless network, for example,
try the command:
C:\Program Files\ActivMedia Robotics\ARIA\bin\demo.exe --remoteHost 192.168.100.32
11

AmigoBot Users Guide
A Successful Connection
Table 2. ARIA demo operation modes
MODE HOT
KEY
DESCRIPTION
io i Displays the state of the robot’s digital
and analog-to-digital I/O ports
position p Displays the coordinates of the robot’s
position relative to its starting location
sonar s Displays the robot’s sonar readings
wander w Sends the robot to move around at its own
whim, while avoiding obstacles
teleop t Allows the user to drive and steer the
robot via the keyboard or a joystick
connected to the computer
ARIA prints out lots of diagnostic
text as it negotiates a connection
with your AmigoBot. If successful,
the client requests various AmigOS
servers to start their activities,
including sonar polling, position
integration, and so on. The robot
sounds an audible connection cue,
and you should hear the robot’s
sonar ping with a distinctive and
repetitive clicking. In addition, the
SYSTEM LED should light
continuously (was flashing slowly
while awaiting connection). Note
that the ARIA demo automatically
engages your robot’s motors
though a special client command. Normally, the motors are disengaged.
Operating the ARIA Demonstration Client
When connected with the ARIA demo client, your
AmigoBot becomes responsive and intelligent. For
example, it moves cautiously. Although it may
drive toward an obstacle, your AmigoBot will not
crash because the ARIA demo includes obstacle-
avoidance behaviors which enable the robot to
detect and actively avoid collisions.
Table 2. Keyboard teleoperation
KEY ACTION
↑
Increment forward velocity
↓
Decrement forward velocity
←
Incremental left turn
→
Incremental right turn
space All stop
The ARIA demo displays a menu of operation
options. The default mode of operation is teleop.
In teleop mode, you drive AmigoBot manually,
using the arrow keys on your keyboard or a joystick connected to the client PC’s joystick port.
While driving from the keyboard, each keypress speeds the robot forward or backward or
incrementally changes its direction incrementally. For instance, when turning, it is often useful to
press the left- or right-turn key rapidly several times in a row, because the turn increment is small.
The other modes of ARIA demo operation give you access to your AmigoBot’s various sensors
and accessories, including encoders, sonar, I/O port states, and more. Accordingly, use the
ARIA demo not only as a demonstration tool, but as a diagnostic one, as well, if you suspect a
sensor or effector has failed or is working poorly.
Access each ARIA demo mode by pressing its related hot-key; ‘t’, for instance, to select
teleoperation. Each mode includes onscreen instructions and may have sub-menus for
operating of the respective device.
Disconnecting
When you finish, press the Esc key to disconnect the ARIA client from your AmigoBot and exit the
ARIA demonstration program. Your AmigoBot should disengage its drive motors and stop
moving, and its sonar should stop firing. You may now slide Power switch to OFF.
12

OPERATION AND MODES
Your AmigoBot Intelligent Mobile Robot has just a few simple buttons, switches, indicators, and
connectors that enable a rich variety of operational modes and applications.
Controls, Switches, Indicators, and Sounds
Recharge/Power/Battery
A single slide-switch on the bottom of the
AmigoBot near the caster controls power to the
entire robot and all of its accessories. The red LED
on the top to-wards the rear of the robot is lit when
the AmigoBot has power.
Figure 8: Switches and ports on the bottom of
AmigoBot
Attach the recommended accessory power
charger or equivalent to the Charge port on the
bottom of the robot to recharge AmigoBot’s
battery. The standard AmigoBot comes with a
single, 12-volt DC, 2.2 ampere-hour (26.4 watt-
hour) safety-sealed lead/acid battery which
supplies ample power for the robot’s drives,
electronics, and accessories—typically over 2
hours of operation with continuous activity, and
over a day with the drive motors disengaged.
Disengage the motors when recharging AmigoBot,
but you may continue operating the robot.
Like the battery in your automobile, severe discharge can damage AmigoBot’s battery. We
recommend recharging the battery when it falls below 11 volts, even though the robot may
continue to operate below 10 volts. To be safe, AmigOS sounds a warning when the battery
voltage falls below 11 volts, and the robot automatically stops running, even though power is
ON, when the battery voltage falls below 10 volts.
Typical recharge time depends on the charger and the discharge state of the battery. The
AmigoBot’s standard charger takes overnight (8 hours or more), whereas the two-stage fast
charger accessory will fully recharge the AmigoBot battery in 2-4 hours. With the fast-charger,
you also may continue to operate AmigoBot while charging its batteries, although that will
lengthen the recharge time.
13

AmigoBot Users Guide
Reset, Motors/Test Buttons and System/User LED’s
On top, near the back of AmigoBot
next to the red Power LED, are two
push-button switches and two
additional LED’s. The red
pushbutton switch is the Reset
button. Press it at any time to reset
the AmigoBot controller to its start-
up state with motors disengaged
and not connected for operation
with any software.
The black Motors/Test
pushbutton’s function depends on
the current operating state of the
robot. For instance, after power
start-up or reset, press the black
Motors/Test button once to enable and a second time to begin AmigoBot’s self-tests. Then,
while in self-test mode, pressing the Motors/Test button advances the sonar tests.
Figure 9: Pushbutton controls and LED indicators on top of
AmigoBot
When not in self-test mode, pressing the Motors/Test button in combination with the Reset
button enables System Mode on the controller to download sounds and other special activities.
When connected with the ARIA software, the Motors/Test button manually enables and
disables the motors.
We detail the Motors/Test button’s actions and functions during Self-Tests and other
operations where appropriate throughout this guide.
The green System and amber User LEDs indicate AmigOS activities, depending on the current
mode of operation. For example, on start-up or after reset, the green LED flashes slowly and
rhythmically, while the amber LED is OFF. While connected with software like ARIA, the amber
User LED flashes rapidly indicating Control Mode serial communications activity; the green
System LED flashes rapidly when the motors are disabled, and slowly when the motors are
enabled.
Alternatively, the System LED’s rate of flashing indicates the distance from a target during the
sonar’ self-test, for instance. We detail the User and System LED actions and functions during
self-tests and other functions where appropriate throughout this guide.
Sounds
As part of its microcontroller, AmigoBot has an onboard audio system capable of reproducing
recorded voices, music, and sound effects. Up to 255 sounds can be stored in AmigoBot’s 1MB
of onboard FLASH memory, for a total of about 90 seconds of assorted audio playback. The first
49 sounds are dedicated system cues automatically played when the robot is started up or
reset, during self-tests, after making a connection with software like ARIA, and so on. The
remaining sounds are under user control. ARIA, for instance, lets you play an individual user
sound by name through a simple pull-down menu.
Use AmigoSounds to manage and download sets of system and user sounds (“themes”). The
software contains details about the system sounds, too. Future versions will let you create your
own sound themes.
14
Table of contents
Other Omron Robotics manuals

Omron
Omron LD-250 User manual

Omron
Omron R6YXGL250 User manual

Omron
Omron eCobra 600 User manual

Omron
Omron Quattro 650H User manual

Omron
Omron Adept Viper s1300 User manual

Omron
Omron i4-350L User manual

Omron
Omron SCARA R6Y XE Series User manual

Omron
Omron HD-1500 Platform User manual

Omron
Omron SCARA YRC Series Owner's manual

Omron
Omron SCARA R6Y-XC Series User manual

Omron
Omron TM12 Series Manual

Omron
Omron Viper 650 User manual

Omron
Omron Techman Robot User guide

Omron
Omron YRCX Series User manual

Omron
Omron Cobra s600 User manual

Omron
Omron i4L Series User manual

Omron
Omron LD Series User manual

Omron
Omron Regular Payload Assembly instructions

Omron
Omron LD User manual

Omron
Omron eCobra 600 User manual