AgileX SCOUT MINI User manual

SCOUT MINI
Research and Development Kit and Pro
2021.04
V.2.0.0
User Manual

This chapter contains important safety information, before the robot is powered on for the first time, any
individual or organization must read and understand this information before using the device. If you have
assembly instructions and guidelines in the chapters of this manual, which is very important. Particular
attention should be paid to the text related to the warning signs.

Make a risk assessment of the complete robot system.
Connect the additional safety equipment of other machinery
defined by the risk assessment together.
Confirm that the design and installation of the entire robot
system's peripheral equipment, including software and
hardware systems, are correct.
This robot including but not limited to automatic anti-collision,
anti-falling, biological approach warning and other related safety
functions. Related functions require integrators and end
customers to follow relevant regulations and feasible laws and
regulations for safety assessment , To ensure that the developed
robot does not have any major hazards and safety hazards in
actual applications.
Collect all the documents in the technical file: including risk
assessment and this manual.
Know the possible safety risks before operating and using the
equipment.
Safety Information
1.Effectiveness and responsibility
5.Maintenance
4.Operation
2.Environmental Considerations
3.Pre-work Checklist
The information in this manual does not include the design, installation and operation of a complete robot application, nor does it include all
peripheral equipment that may affect the safety of the complete system. The design and use of the complete system need to comply with the
safety requirements established in the standards and regulations of the country where the robot is installed. SCOUT MINI R&D kit integrators and
end customers have the responsibility to ensure compliance with the applicable laws and regulations of relevant countries, and to ensure that
there are no major dangers in the complete robot application. This includes but is not limited to the following:
For the first use,please read this manual carefully to understand
the basic operating content and operating specification.
Use SCOUT MINI R&D kit always under 0℃~40℃ ambient
temperature.
Make sure each device has sufficient power.
Make sure SCOUT MINI R&D kit does not have any obvious
defects.
Check if the remote controller battery has sufficient power.
When using, make sure the emergency stop switch has been
released.
!
When SCOUT MINI R&D kit has had a defect, please contact the
relevant technical to deal with it, do not handle the defect by
yourself.
Always use SCOUT MINI R&D kit in the environment with the
protection level requires for the equipment.
Do not push SCOUT MINI R&D kit directly.
When charging, make sure the ambient temperature is above 0℃.
In remote control operation, make sure the area around is
relatively spacious.
Carry out remote control within the range of visibility.
When installing an external extension on SCOUT MINI R&D kit ,
confirm the position of the center of mass of the extension and
make sure it is at the center of rotation.
When SCOUT MINI R&D kit has a defect, please immediately stop
using it to avoid secondary damage.
If the tire is severely worn or burst, please replace it in time.
If the battery do not use for a long time, it need to charge the battery periodically in 2 to 3 months.
CONTENTS
0 Product Overview
1 Configuration list and Parameters
1.1 SCOUT mini R&D kit Comparison
1.2 Shipping List
1.2.1SCOUT MINI Lite
1.2.2SCOUT MINI Pro
1.3 SCOUT MINI Introduction
1.3.1SCOUT MINI
1.3.2SCOUT MINI Instruction
1.3.2.1SCOUT MINI Checking
1.3.2.2 Remote Control
1.3.2.3 Remote Control Operation
1.3.2.4 SCOUT MINI Preparation
1.3.2.5 SCOUT MINI Shut down
1.3.2.6 Remote Control Shut down
1.3.3 SCOUT MINI Parameters
1.4 Nvidia Jetson Nano
1.5 Nvidia Xavier
1.6Intel RealSense D435
1.7 EAI-G4
1.8 Velodyne VLP-16
2 Hardware Installation and Electricity
2.1.1 SCOUT MINI Lite
2.1.2 SCOUT MINI Pro
2.2 Electricity and Communication
Connection
2.2.1 SCOUT MINI Lite
2.2.2 SCOUT MINI Pro
2.3 Sensors expansion
3 Development Guide
3.1 ROS Development Introduction
3.1.1 ROS History
3.1.2 ROS Concept
3.1.3 ROS Node
3.1.4 ROS Message
3.1.4.1 ROS Topic
3.1.4.2 ROS Service
3.1.4.3 ROS File System
3.2 Start up and shut down
3.2.1 Installation
3.2.1.1 Tool
3.2.1.2 Sensors holder and mobile base
3.1.1.3 HD Display Installation
3.2.2 Before start up
3.2.3 Mouse and keyboard
3.2.4 Power on
3.2.4.1 SCOUT MINI Lite
3.2.4.2 SCOUT MINI Pro
3.2.5 Computing Unit Login
3.2.6 Shut Down
3.3 SCOUT mini R&D kit Development
Environment
3.4 Remote Desktop
3.5 ROS Installation
3.6 Sensors base node
3.7 Navigation and positioning based
on Gmapping open source architecture
1
1
1
1
1
2
3
3
3
3
3
4
4
4
4
5
5
6
7
7
8
8
8
9
9
9
10
10
11
11
11
11
11
11
11
12
12
12
12
12
12
13
14
14
14
14
15
15
15
17
17
21
22
24

SCOUT MINI R&D Kit SCOUT MINI R&D Kit Pro
SCOUT MINI Research&Development Kit & Pro is an entry-level version and advanced set of ROS developers developed and
customized by Agliex Robotics for ROS scientific research and education applications. Integrated with high-performance
industrial control, high-precision LiDAR and multiple sensors based on the Agliex Robot ROS ecosystem, which is capable to
achieve applications such as mobile robot motion control, communication, navigation, map building, etc. It provides with
complete developer documentation and DEMO resources, lightweight and portable, highly technological industrial design,
and exclusive sensor customized holder. The best experimental platform for rapid secondary development of ROS for
multi-directional applications such as education and scientific research, product pre-research, subjects and product
demonstration.
0 Product Overview
1 Configuration list and Parameters
1.1 SCOUT MINI R&D Kit & Pro Comparison
1.2 Shipping List
1.2.1 SCOUT MINI R&D Kit
Version
Mobile base
Computing
Lidar
Camera
Communication
SCOUT MINI R&D Kit
SCOUT MINI Off-road
Nvidia Jetson Nano
EAI-G4
Intel RealSense D435
GL.iNet GL-AR750S
SCOUT MINI R&D Kit Pro
SCOUT MINI Off-road
Nvidia AGX Xavier
VLP -16
Intel RealSense D435
GL.iNet GL-AR750S
Name
Computing Unit
Laser Sensor
Vision Sensor
Router
Mobile base
Remote Control
Charger
Voltage Stabilizer
Voltage Stabilizer
HD Display
USB To CAN
USB HUB
Quality
1
1
1
1
1
1
1
1
1
1
1
1
Model
Nvidia Nano 4G
EAI-G4
Intel RealSense D435
GL.iNet GL-AR750S
SCOUT MINI
FS-I6S
Agilex UY360
24V To12V
12V To 5V
1

SCOUT MINI R&D Kit Configuration
SCOUT MINI R&D Kit Pro Configuration
1.2.2 SCOUT MINI R&D Kit Pro
Name
Computing Unit
Laser Sensor
Vision Sensor
Router
Mobile base
Remote Control
Charger
Voltage Stabilizer
Voltage Stabilizer
HD Display
USB To CAN
USB HUB
Quality
1
1
1
1
1
1
1
1
1
1
1
1
Model
Nvidia AGX Xavier
VLP -16
Intel RealSense D435
GL.iNet GL-AR750S
SCOUT MINI
FS-I6S
Agilex UY360
24V To 19 V
24V To 12V
2
Nvidia AGX Xavier
Router HD Display USB To CAN SCOUT MINI
Intel RealSense D435 VLP 16 USB-HUB
Nvidia Jetson Nano Intel RealSense D435 EAI G4 USB-HUB
Router HD Display USB To CAN SCOUT MINI

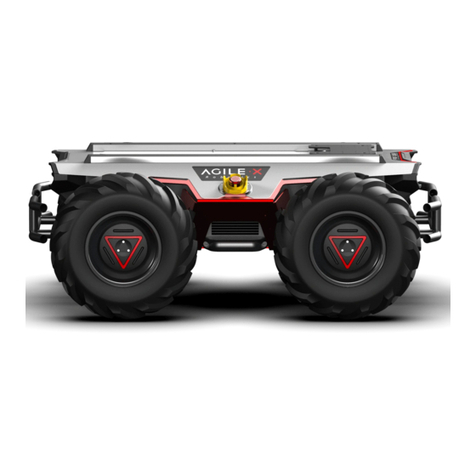
The SCOUT MINI mobile chassis uses 4WD design with powerful off-road performance, compact design and truly "smart like
a swallow, galloping like a heart". SCOUT MINI inherits the advantages of the SCOUT four-wheel differential chassis series
with 4WD, independent suspension, no turning radius and has made innovations in the design of the hub motor. The
minimum turning radius of the chassis is 0m, and the climbing angle is close to 30 degrees. SCOUT MINI is half 50 % smaller
than SCOUT, while still having excellent off-road performance. At the same time, it has achieved a 10.8km/h high-speed,
precise, stable and controllable power control system. The SCOUT MINI development platform has its own control system,
supports standard CAN protocal and connected to various external devices. Furthermore, it supports ROS/Autoware
secondary development and advanced robotics development. Accessories included standard activation plug, 24V@15Ah
lithium battery and endurance mileage up to 10KM.
1.3 SCOUT MINI Introduction
1.3.2 SCOUT MINI Instruction
1.3.1 SCOUT MINI
1.3.2.1 SCOUT MINI Checking
1.3.2.2 Remote Control
3
1. Tire
2. Spring shock absorber
3. Extension support
4. Control interface area
5. Electrical bin panel
6. Tail light
Press the power button of and wait for a few seconds
Charge the battery if the SOC is less than 30%
Please use the standard charger and power off the system while charging
It takes about one and half hour to fully charged the battery
Check the remote control battery
Put SWA、SWB、SWC、SWD all to up positions
Hold the power button 1 and 2 at the same timeuntil turned on
7. Power capacity LCD
8. CAN extension interface
9. Power key
10. Charging interface
11. Font light
12. Front fence
Figure 2.1 Rear View
Figure 2.1 Front View

The remote control has preset switches default setting . Please do not change the switches setting. Any changing may cause
control failure. SWB switch the control mode, the SWC is controlling the light on and off while SWD controls the speed mode,
the left rocker controls the Scout mini move forward and backward while the right rocker controls the rotation. Please note
that the internal mapping motion of the chassis is mapped based on percentage, so when the joysticks are at the same
position,the speed is constant.
Press SCOUT MINI power button and then release。
Hold the power button 1 and 2 at the same time for few seconds until turned off
Please use SCOUT MINI in a relatively open area for the first time to avoid any inappropriate operation and damage.
1.3.2.3 Remote Control Operation
1.3.2.4 SCOUT MINI Preparation
1.3.2.5 SCOUT MINI Shut down
1.3.2.6 Remote Control Shut down
4
SWB control the control mode, top position is the command mode, remote control mode is the middle position, and the
bottom position the constant speed mode.
SWC is the light controlling button. When it is at the bottom position, it is closed, when it is in the middle, the light is open,
and the top position is the breathing light mode. Please note that the lighting control option setting is only valid under the
remote control mode, other modes are invalid.
SWD is the speed gear selection mode, the up position is the low gear mode (the fastest speed is about 10km/h), and bottom
position is the high gear (the fastest speed is about 20km/h). Please note that the gear setting button is only valid under the
remote control mode, other modes are invalid.
Press the SCOUT MINI power button and wait a few seconds;
Set SWB to the middle position;
Try to switch the light mode manually to make sure that the mode is selected correctly;
Try to gently push the left joystick forward, you can see that the car is moving forward slowly;
Try to gently push the left joystick back, you can see that the car is moving backwards slowly;
Release the left joystick and the mobile base will stop;
Try to gently push the right joystick to the left, it can see that the car slowly rotates to the left;
Try to gently push the right joystick to the right, it can see that the car slowly rotates to the right;
Release the right joystick and the mobile base will stop;
Then may try to control the mobile base in the relatively open area and be familiar with the speed control of the vehicle。

Nvidia Jetson Nano is a powerful and compact computer which designed to support entry-level AI applications and devices.
It contains multiple acceleration libraries for deep learning, computer vision, graphics and multimedia based on the
comprehensive NVIDIA JetPack™ SDK. It is installed on the SCOUT MINI R&D Kit version and can be used to expand the
applications of robot navigation and positioning, image processing, voice recognition and various other technologies.
1.3.3 SCOUT MINI Parameters
1.4 Nvidia Jetson Nano
Size
Wheelbase
Wheelbase
Weight
Minimum Ground Clearance
Standard Load
Maximum Speed
Minimum Turning Radius
Maximum Slope
Obstacle Surmounting
Maximum mileage
Drive mode
Temperature
Charger
Charging time
Voltage Output
Battery
Code Wheel
Communication interface
IP protection
Suspension
627mm 550mm 252mm
452mm
450mm
20kg
107mm
10kg(0.5 Coefficient of friction)
10.8km/h
0(Self-turning)
30°(with load)
70mm
10km(without load)
4WD
-20℃~60℃
AC 220
1.5H
24V
24V/15Ah
1024 Photoelectric Incremental
Standard CAN
IP22(IP64 for customization)
Independent swing arm suspension
5
SCOUT MINI Parameters Description
GPU
CPU
Memory
Storage
Encoder
Decoder
Camera
Internet
Display
USB
Extension Interface
128-Core Maxwell
Quad-core ARM57 @1.43Ghz
4GB 64Bit LPDDR4 25.6GB/s
Micro SD卡(default)
4K@30| 4 X 1080p@30 | 9 X 720p@30(H.264/H.265)
4K@60| 2X 4K@30 | 8X 1080p@30 | 18 X 720p@30(H.264/H.265)
2 X MIPI CSI-2 DPHY lanes
Gigabit Ethernet,M.2 Key E interface
HDMI X 1, DP X 1
4 X USB 3.0, USB 2.0 Micro-B
GPIO,I2C,I2S,SPI,UART

The NVIDIA Jetson AGX XAVIER Developer Kit is capable to run modern AI workloads and solve problems in optical
inspection, manufacturing, robotics, logistics, retail, service, agriculture, smart cities, and healthcare. Plus, it delivers up to
32 TOPS and can operate in as little as 10 W.
Jetson AGX Xavier Developer Kit is supported by NVIDIA JetPack, which includes a board support package (BSP), Linux OS,
NVIDIA CUDA, cuDNN, and TensorRT software libraries for deep learning, computer vision, GPU computing, multimedia
processing, and much more. It’s also supported by the NVIDIA DeepStream SDK, which delivers a complete toolkit for
real-time situational awareness through intelligent video analytics (IVA) and NVIDIA Isaac SDK, which delivers a software
toolkit for robot development. These helps boost performance and accelerate software development, while reducing
development cost and effort.
1.5 Nvidia Xavier
6
GPU
CPU
Memory
Storage
PCIe X16
RJ45
USB-C
Camera Connector
M.2 Key M
M.2 Key E
40-Pin Header
HD Audio Header
eSTATp + USB 3.0 Type A
HDMI Type A
µSD/UFS
Tensor Core 512 -Volta GPU
8-Codes ARM v8.2 64 CPU、8 MB L2 + 4 MB L3
32 GB 256-bit LPDDR4x | 137 GB/sec
32 GB eMMC 5.1
X8 PCIe Gen4/x8 SLVS-EC
Gigabit Ethernet
2 * USB 3.1 interfaces、DP interface(optional)、PD interface(optional)
Close-System Debug and Flashing Support on 1 Port
(16*) CSI-2 Lanes
NVMe
PCIe x1 + USB 2.0 + UART (for Wi-Fi/LTE) / I2S + DMIC + GPIOs
UART + SPI + CAN + I2 C + I2 S + DMIC + GPIOs
High-Definition Audio
SATA Through PCIe x1 Bridge (PD + Data for 2.5-inch SATA) + USB 3.0
HDMI 2.0
SD/UFS
Development Kit Technical Parameters

The Intel® RealSense™ depth camera D435 is a stereo solution, offering quality depth for a variety of applications. It's wide
field of view is perfect for applications such as robotics or augmented and virtual reality, where seeing as much of the scene
as possible is vitally important. With a range up to 10m, this small form factor camera can be integrated into any solution with
ease, and comes complete with our Intel RealSense SDK 2.0 and cross-platform support.
YDLIDAR G4 is a 360-degree two-dimensional rangefinder (hereinafter referred to as G4) developed by YDLIDAR team. Based
on the principle of triangulation, it is equipped with related optics,electricity, and algorithm design to achieve high-frequen-
cy and high-precision distance measurement. The mechanical structure rotates 360 degrees to continuously output the
angle information as well as the point cloud data of the scanning environment while ranging.
Velodyne VLP-16 is the smallest, cost-optimized product in Velodyne’s 3D LiDAR product range. Developed with mass
production in mind, the VLP-16 is far more cost-effective than comparable sensors, and it retains the key features of
Velodyne’s breakthroughs in LiDAR:Real-time, 360°, 3D distance and calibrated reflectivity measurements.
The VLP-16 has a range of 100 m, and the sensor's low power consumption, light weight, compact footprint and dual return
capability make it ideal not only for autonomous vehicles but also for robotics, terrestrial 3D mapping and many other
applications.
1.6 Intel RealSense D435
1.7 EAI-G4
1.8 Velodyne VLP-16
7
Indoor/Outdoor
Approximately 10m
Global Shutter, 3um X 3um pixel size
N/A
Active IR Stereo
86° x 57°(±3°)
0.105m
1280 x 720
Approximately 10m
90 fps
1280 x 800
69.4° × 42.5°(±3°)
30fps
90mm x 25mm x 25mm
USB-C 3.1
Use Environment
Range
Image sensor technology
IMU Support
Depth Technology
FOV
Minimum Depth Distance
Depth Output Resolution
Maximum Measurement Distance
Depth Frame Rate
RGB Frame Resolution
FOV
RGB Frame Rate
Size
Interface Type
Item Intel Realsense D435
Features
Depth Camera
RGB
Others

The overall design of the SCOUT MINI R&D Kit research and education kit uses the stacking design and the frame is made of
sheet metal, a high-definition display screen is installed at the rear part which is convenient for customers to develop and
debug. A hollow sheet metal holder is used at the bottom to assemble with the standard aluminum holder of the SCOUT MINI
above. The USB -HUB with independent power supply is located at the second layer along with USB to CAN module and G4
lidar. The third layer is mainly composed of computing units and voltage stabilizing modules and the top layer is currently
mainly installed with Intel RealSense D435 . Please refer to the following figure for detail.
2 Hardware Installation and Electricity
2.1.1 SCOUT MINI R&D Kit
2.1 SCOUT MINI R&D Kit & Pro Kit Installation
8
Item
Measurement Range
Range Accuracy
Scanning speed
Field of View(Vertical)
Angular Resolution(Vertical)
Rotational Rate
Laser Product Classification
Weight
Power consumption
Operating Voltage
Operating Temperature
Parameters
100m
±3cm
Single way 300,000 points/s Round way 600,000 points/s
-15°~+15°
2°
5Hz~20Hz
Class 1
830g
8W
9V~18V
-10℃~+60℃

The SCOUT MINI R&D Kit share the same basic design with SCOUT MINI R&D Kit, the difference between each other are the
sensors location. The computing unit Nvida AGX Xavier is at the bottom of the holder, the USB-HUB with independent power
supply is located at the second layer along with USB to CAN module and Intel RealSense D435 . The third layer is mainly
composed of lidar adapter and voltage stabilizing modules, while the top layer is currently mainly installed with VLP 16 lidar
. Please refer to the following figure for detail.
SCOUT MINI R&D Kit provides power and communication interfaces for devices and sensors through the aviation expansion
interface of the chassis. The SCOUT MINI chassis power expansion interface (maximum power output supports 24V@5A) is
powered by the chassis’ battery, without a voltage regulator and voltage regulation module. In order to provide power
supply to devices and sensors, the voltage regulator and stabilizer is essential. We chose a 12V@20A voltage stabilizer
module. The voltage stabilizer mainly provides power input for 5V voltage stabilizer modules, wireless routers, and USB-HUB.
The 5@10A voltage stabilizer module provide power input for EAI-G4 laser Radar and Nvidia Jetson Nano.
The following figure is the external connection of Nvidia Jetson Nano. Nano's network port is connected to the router's
network port which is designed for remote desktop control to access and debug, also it is easy to expand other network
devices. For the USB expansion, we add a USB-HUB (with additional power supply) to improve the devices expansion
capacity. USB-HUB mainly connect with EAI-G4 lidar, Intel RealSenseD435,HD display, etc.
2.2.1 SCOUT MINI R&D Kit
2.1.2 SCOUT MINI R&D Kit Pro
2.2 Electricity and Communication Connection
9

The following figure is the external connection of Nvidia Jetson Nano. Nano's network port is connected to the router's
network port which is designed for remote desktop control to access and debug, also it is easy to expand other network
devices. For the USB expansion, we add a USB-HUB (with additional power supply) to improve the devices expansion
capacity. USB-HUB mainly connect with EAI-G4 lidar, Intel RealSenseD435,HD display, etc.。
The following figure is the external connection of Nvidia Jetson Nano. Nano's network port is connected to the router's
network port which is designed for remote desktop control to access and debug, also it is easy to expand other network
devices. For the USB expansion, we add a USB-HUB (with additional power supply) to improve the devices expansion
capacity. USB-HUB mainly connect with Intel RealSenseD435,HD display, etc.。
External expansion mainly involves mechanical installation expansion, power supply expansion, and communication
expansion. For the power supply expansion, we took this issue into consideration when selecting the power supply voltage
regulator in the early stage, so the power supply voltage regulator module has a certain margin. For communication
expansion, USB - HUB and wireless gateway are added to the equipment. So it is capable to access more devices.
2.2.2 SCOUT MINI R&D Kit Pro
2.3 Sensors expansion
10

Robot Operating System (ROS or ros) is an open source robotics middleware suite. Although ROS is not an operating system
but a collection of software frameworks for robot software development, it provides services designed for a heterogeneous
computer cluster such as hardware abstraction, low-level device control, implementation of commonly used functionality,
message-passing between processes, and package management. Running sets of ROS-based processes are represented in a
graph architecture where processing takes place in nodes that may receive, post and multiplex sensor data, control, state,
planning, actuator, and other messages. Despite the importance of reactivity and low latency in robot control, ROS itself is
not a real-time OS (RTOS). It is possible, however, to integrate ROS with real-time code. The lack of support for real-time
systems has been addressed in the creation of ROS 2.0,a major revision of the ROS API which will take advantage of modern
libraries and technologies for core ROS functionality and add support for real-time code and embedded hardware.
ROS has three levels of concepts: the Filesystem level, the Computation Graph level, and the Community level. These levels
and concepts are summarized below and later sections go into each of these in greater detail.
A node represents a single process running the ROS graph. Every node has a name, which it registers with the ROS master
before it can take any other actions. Multiple nodes with different names can exist under different namespaces, or a node can
be defined as anonymous, in which case it will randomly generate an additional identifier to add to its given name. Nodes
are at the center of ROS programming, as most ROS client code is in the form of a ROS node which takes actions based on
information received from other nodes, sends information to other nodes, or sends and receives requests for actions to and
from other nodes.
ROS processes are represented as nodes in a graph structure, connected by edges called topics. ROS nodes can pass
messages to one another through topics, make service calls to other nodes, provide a service for other nodes, or set or
retrieve shared data from a communal database called the parameter server. A process called the ROS Master[66] makes all
of this possible by registering nodes to itself, setting up node-to-node communication for topics, and controlling parameter
server updates. Messages and service calls do not pass through the master, rather the master sets up peer-to-peer communi-
cation between all node processes after they register themselves with the master. This decentralized architecture lends itself
well to robots, which often consist of a subset of networked computer hardware, and may communicate with off-board
computers for heavy computation or commands.
Topics are named buses over which nodes send and receive messages. Topic names must be unique within their namespace
as well. To send messages to a topic, a node must publish to said topic, while to receive messages it must subscribe. The
publish/subscribe model is anonymous: no node knows which nodes are sending or receiving on a topic, only that it is
sending/receiving on that topic. The types of messages passed on a topic vary widely and can be user-defined. The content
of these messages can be sensor data, motor control commands, state information, actuator commands, or anything else.
3 Development Guide
3.1 ROS Development Introduction
3.1.1 ROS History
3.1.2 ROS Concept
3.1.3 ROS Node
3.1.4 ROS Message
3.1.4.1 ROS Topic
11
____
_
_

Similar to an operating system, ROS files are also organized on the hard disk in a particular fashion.
Package:The ROS packages are the most basic unit of the ROS software. It contains the ROS runtime process (nodes),
libraries, configuration files, and so on, which are organized together as a single unit. Packages are the atomic build item and
release item in the ROS software.
Package Manifest:The package manifest file is inside a package that contains information about the package, author,
license, dependencies, compilation flags, and so on. The package.xml file inside the ROS package is the manifest file of that
package.
Meta Package:The term meta package is used for a group of packages for a special purpose. In an older version of ROS such
as Electric and Fuerte, it was called stacks, but later it was removed, as simplicity and meta packages came to existence. One
of the examples of a meta package is the ROS navigation stack.
When the product is ready for shipping, the sensor holder is separated from the Scout MINI. User need to use tool to set the
sensor holder on the Scout MINI. Firstly, put the four slider nuts into the slide way each side on the Scout MINI , and then use
the hexagonal tool to screw corresponding four screws on the holder to the platform. Please refer to the figure shown below.
A node may also advertise services. A service represents an action that a node can take which will have a single result. As
such, services are often used for actions which have a defined beginning and end, such as capturing a single-frame image,
rather than processing velocity commands to a wheel motor or odometer data from a wheel encoder. Nodes advertise
services and call services from one another.
3.1.4.2 ROS Service
3.1.4.3 ROS File System
3.2 Start up and shut down
3.2.1.2 Sensors holder and mobile base
3.2.1 Installation
3.2.1.1 Tool
SCOUT MINI R&D Kit
12
Hexagon key

Put the HD display into the display holder horizontally, as shown in the figure below. Then settle the display holder with
screws and nylon posts to the holes on both sides..
When the product is ready for shipping, the sensor holder is separated from the Scout MINI. User need to use tool to set the
sensor holder on the Scout MINI. Firstly, put the four slider nuts into the slide way each side on the Scout MINI , and then use
the hexagonal tool to screw corresponding four screws on the holder to the platform. Please refer to the figure shown below.
3.1.1.3 HD Display Installation
SCOUT MINI R&D Kit Pro
SCOUT MINI R&D Kit
13

Check whether any wiring harness connections are disconnected;
Please make sure to operate in a relatively open area without large area of water . The environment is relatively open and
stable, there are no flammable, explosive and other dangerous goods around;
The whole machine is complete, the wiring harness is intact and there is no break, and the sensors are not damaged.
This Kit is not provided with mouse and keyboard, users can purchase it based on requirement, and can be connected with the
USB interface of the computing unit or the USB HUB.
Press the power button on the Scout MINI, as shown in the figure below.
Put the HD display into the display holder horizontally, as shown in the figure below. Then settle the display holder with
screws and nylon posts to the holes on both sides.
3.2.2 Before start up
3.2.3 Mouse and keyboard
3.2.4 Power on
3.2.4.1 SCOUT MINI R&D Kit
SCOUT MINI R&D Kit Pro
14

Press the power button on the Scout MINI, as shown in the figure below.
After pressing the power button of the Scout MINI , the computing unit will automatically log in and show the following
interface, the root authority password and system login password are agx
If you need to shut down he system, do not press the power button directly because thel computing unit is running. Enter
the command $poweroff in the terminal or click shut down of the drop-down menu, as shown in the figure below, wait until
the display shows no signal input, then press the power button to shut down the system.
3.2.4.2 SCOUT MINI R&D Kit Pro
3.2.5 Computing Unit Login
3.2.6 Shut Down
15

If you need to shut down he system, do not press the power button directly because thel computing unit is running.
Enter the command $poweroff in the terminal or click shut down of the drop-down menu, as shown in the figure
below, wait until the display shows no signal input, then press the power button to shut down the system.
3.2.6 Shut Down
16
Other manuals for SCOUT MINI
3
Table of contents
Other AgileX Robotics manuals

AgileX
AgileX SCOUT 2.0 User manual

AgileX
AgileX SCOUT MINI User manual

AgileX
AgileX BUNKER MINI User manual

AgileX
AgileX RANGER MINI 2.0 User manual

AgileX
AgileX BUNKER User manual

AgileX
AgileX SCOUT MINI User manual

AgileX
AgileX BUNKER User manual

AgileX
AgileX SCOUT 2.0 User manual

AgileX
AgileX BUNKERpro User manual

AgileX
AgileX TRACER MINI User manual