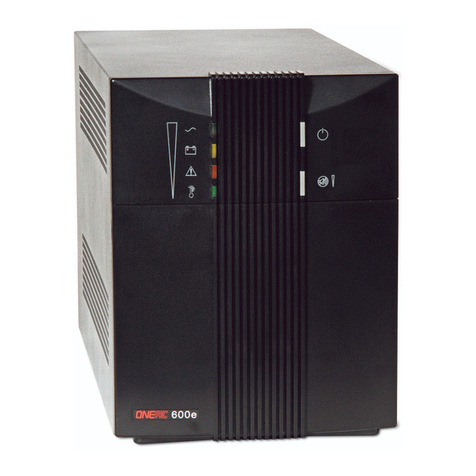
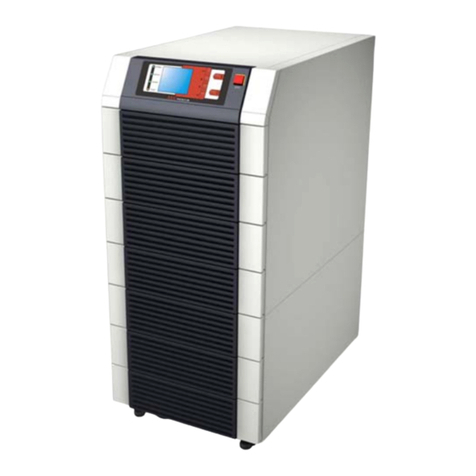
ONEAC SE041XAT Operator's manual

ONEAC Sinergy
®
SE II Series Parallelable UPS User Instruction Manual
IMPORTANT SAFETY INSTRUCTIONS
SAVE THESE INSTRUCTIONS.
Please read and save these instructions. This manual contains important instructions for ONEAC models:
Follow these instructions during installation and maintenance of the UPS and batteries.
If you have a problem with the UPS, please refer to this manual before contacting Technical Services. The
Troubleshooting section on page 31 addresses most UPS-related issues.
ONEAC, Sinergy, and MopUPS are registered trademarks of Chloride Group plc. All other trademarks, product and corporate names are the property of their respective owners.
Entire contents copyright © 2007 Chloride Group plc. All rights reserved. Reproduction in whole or in part without permission is prohibited. All information subject to change without notice.
Manual Part Number 913-599 @ Rev. D 10/07
• SE041XAT
• SE061XAT
• SE081XAT
• SE101XAT
• SEBP610-2
• SE041XIT
• SE061XIT
• SE081XIT
• SE101XIT
• SE041XJT
• SE061XJT
• SE081XJT
• SE101XJT
Chloride North America
27944 North Bradley Road
Libertyville, IL 60048-9700
USA
Telephone: (847) 816-6000
Toll Free: (800) 327-8801
Facsimile: (847) 680-5124
Chloride Europe
George Curl Way
Southampton, Hampshire SO18 2RY
United Kingdom
Telephone: +44 (0) 2380 610311
Facsimile: +44 (0) 2380 610852

ONEAC Sinergy SE II Series UPS User Manual i
Introduction .....................................................................................................................................................................1
Registering Your UPS ........................................................................................................................................................1
Technical Support .............................................................................................................................................................1
FCC Compliance ..............................................................................................................................................................1
Safety Compliance ...........................................................................................................................................................1
About This Manual ....................................................................................................................................................2
Symbols .....................................................................................................................................................................2
Safety ...............................................................................................................................................................................3
Intended Use .............................................................................................................................................................3
General Warnings ......................................................................................................................................................3
Safety Notices ............................................................................................................................................................3
Leakage Currents .......................................................................................................................................................4
Batteries ....................................................................................................................................................................4
Repacking of Unit ......................................................................................................................................................4
Setup ...............................................................................................................................................................................4
Delivery ......................................................................................................................................................................4
Unpacking .................................................................................................................................................................4
Long Term Storage ....................................................................................................................................................7
Environmental Conditions ..........................................................................................................................................7
Floor Loading .............................................................................................................................................................7
Ventilation and Accessibility .......................................................................................................................................7
Installation .......................................................................................................................................................................8
External Overcurrent Protection and Isolation Devices .................................................................................................8
Emergency Switch Device (ESD)/Remote Power Off (RPO) Function .............................................................................8
Connections ..............................................................................................................................................................9
Rear Panel ................................................................................................................................................................11
Cable Sizes and Current ...........................................................................................................................................12
Output Terminal Voltage ..........................................................................................................................................13
External Battery Installation ......................................................................................................................................14
UPS Operation ................................................................................................................................................................15
UPS Mode ................................................................................................................................................................15
Bypass Mode ...........................................................................................................................................................15
Battery Mode ...........................................................................................................................................................15
Control Panel ...........................................................................................................................................................18
Control Panel Menu Flow Chart ..............................................................................................................................19
Control Panel Menus and Displayed Text/Options .....................................................................................................20
Warning and Fault Indicators ...................................................................................................................................22
UPS Start-Up & Shut Down .............................................................................................................................................23
UPS Start-Up Procedure ...........................................................................................................................................23
UPS Shutdown Procedure ........................................................................................................................................23
Maintenance Bypass Procedure ................................................................................................................................23
Return from Maintenance Bypass Procedure ............................................................................................................24
Remote Power Off/Emergency Power Off .................................................................................................................25
Functional Test .........................................................................................................................................................26
Battery Test ..............................................................................................................................................................27
Maintenance ..................................................................................................................................................................27
Storage ....................................................................................................................................................................27
Battery Maintenance and Disposal/Recycling of Batteries ..........................................................................................27
Interfaces .......................................................................................................................................................................28
Serial Interface COM 3 .............................................................................................................................................29
Interface Slot COM ..................................................................................................................................................29
Optional Isolated Contacts Card ...............................................................................................................................30
Troubleshooting .............................................................................................................................................................31

ii ONEAC Sinergy SE II Series UPS User Manual
Appendix A: Features and Specifications ........................................................................................................................ 32
Features .................................................................................................................................................................. 32
Specifications .......................................................................................................................................................... 33
Appendix B: Paralleling UPS Devices ............................................................................................................................... 35
Installing a Parallel System ....................................................................................................................................... 38

Introduction
ONEAC Sinergy SE II Series UPS User Manual 1
Introduction
Thank you for selecting this uninterruptible power supply (UPS). ONEAC’s Sinergy SE II Series UPS
offers the most reliable protection from the harmful effects of electrical line disturbances for your
computing and communications equipment. ONEAC’s ISO 9001 certification represents our commitment
to building world-class products. We take pride in every unit that leaves our facility.
RegisteringYour
UPS
To ensure that your Sinergy SE II Series UPS model and serial number are registered, complete and mail
the enclosed postage-paid warranty card or go on line at www.chloride-na.com.
Technical Support
To contact Chloride’s 24-hour technical services:
• North America: (847) 816-6000, option 3
or toll free (800) 327-8801, option 3.
NOTE:
All emergency calls received before 7 a.m. or after 7 p.m. Central StandardTime returned within
one half hour. All non-emergency calls will be returned the next business day.
Please check with technical services before attempting to repair or return any product. If an product needs
repair or replacement, technical service issues a Return MaterialAuthorization (RMA) number along with
instructions on how to return the product.
FCC Compliance
ATTENTION:
Changes or modifications to this unit not expressly approved by the party responsible or
in FCC compliance could void the user’s authority to operate the equipment.
This equipment was tested and complies with the limits for a ClassA digital device, pursuant to Part 15
of FCC Rules. These limits are designed to provide reasonable protection against harmful interference
when the UPS is operating in a commercial environment. The UPS generates, uses, and can radiate radio
frequency energy. If installation and use is not in accordance with the instruction manual, it may cause
harmful interference to radio communications.
ATTENTION:
Operation of this equipment in a residential area may cause harmful radio
communications interference. The user is responsible for correcting the interference.
Safety Compliance
UL listing to UL1778
TUV compliance to EN62040-1
CE

2ONEAC Sinergy SE II Series UPS User Manual
AboutThis Manual
This manual contains information regarding the installation, operation and use of the Uninterruptible
Power Supply (UPS).
Consult this manual before installation of the equipment, which should be performed only by qualified
personnel. This User’s Manual should be kept for later reference for operation and maintenance of the
UPS.
These instructions may be supplemented with additional sheets, describing specific extensions or options.
Symbols
The following symbols are used in this manual:
ATTENTION:
Indicates instructions, which if not observed, may endanger reliability of your UPS or the
security of your data.
WARNING:
Indicates instructions, which if not observed, present risk of electric shock, may endanger
your life, your health, reliability of your UPS or the security of your data.

Safety
ONEAC Sinergy SE II Series UPS User Manual 3
Safety
This device serves as an uninterruptible power supply for connected loads. The UPS is in compliance with
all relevant safety regulations concerning information technology equipment, for use in an office
environment.
Depending on the type and rating of UPS, certain configurations of battery extensions may be connected.
These battery extensions may only be connected to the compatible basic UPS unit.
GeneralWarnings
WARNING:
We consider the safety of personnel to be of paramount importance. For this reason it is
essential that procedures relating to safety in this manual be carefully reviewed before commencing work,
and properly adhered to thereafter. The User or Operator may intervene in the operation of the UPS
provided that the instructions laid out in the section titled “UPS Start-Up & Shut Down” on page 23 are
strictly followed.
WARNING:
The installation of the UPS, described in the section titled “Installation” on page 8, may
only be carried out by qualified technical personnel according to local and national electrical codes such
as the NEC
®
.
WARNING: Even when all switches and/or circuit breakers are open, dangerous voltages are present
within this unit!
There are no user-serviceable parts inside. Only factory authorized technical personnel
may carry out any operation that requires protection panels to be opened and/or removed. Any repairs or
modifications by the user may result in out-of-warranty repair charges, unsafe electrical conditions, or
violation of electrical codes.
Safety Notices
WARNING:Read thefollowing safetynotices carefully! Disregarding these safetynotes mayendanger
your life, your health, and the reliability of your UPS and the security of your data.
• Transport the unit only in suitable packaging (protected against jolts and shocks).
• If the equipment is moved from a cold environment to a warmer operating location, condensation
may occur. Before you switch on the equipment it must be absolutely dry.An acclimatization period
of at least two hours is required.
• The equipment must be installed in accordance with the environmental conditions specified in
“Environmental Conditions” on page 7 and Table 2, “Installation Data,” on page 8.
• Even with all buttons and circuit breakers in the “OFF” position the UPS is not isolated from the
mains. To isolate completely from the mains, the power cables must be disconnected.
• ThisUPS devicereceivespowerfrommore than one source.The output terminals and/or receptacles
may have voltage present even when the input is disconnected. UPSs present a different safety issue
thanmost electrical equipment because unplugging the UPSmay cause the UPS to operate inbattery
or backup mode. Disconnecting the UPS input does not remove the electrical charge.
• In case of interruption of the mains voltage, the integrated battery maintains the power supply to the
user’s equipment.
• Lay all cables so that nobody can stand on them or trip over them. Only connect input and output
cables (or battery cables when external battery cabinets are used) by following the installation
guidelines provided in this user manual and by referring to applicable codes.
• Make sure that no metal objects (e.g. pins, necklaces, paper clips, etc.) are introduced or left inside
the UPS.
• In emergencies (e.g. damaged case, controls or power cables, penetration of liquids or foreign
matter) switch off the UPS and contact Technical Support for assistance.
• Do not connect equipment that will overload the UPS or equipment that is designed to draw
DC-current.
• When cleaning the unit, follow the instructions in the section titled “Maintenance” on page 27.
• The sum of the leakage currents (protective conductor current) of the UPS and the connected UPSs
exceeds 3.5 mA for all ratings of the UPS. Ground (earth) connection is essential before connecting
supply.
• Data transmission lines should not be connected or disconnected during a thunderstorm.
• The Remote Power Off (RPO/ESD) contacts are located on the rear of the unit (Figure 9).When this
connection is open, the logic circuit will immediately shut down the UPS output.
Intended Use

Setup
4ONEAC Sinergy SE II Series UPS User Manual
• The maintenance bypass switch is intended for use by experienced service personnel only. It is
located at the back of the unit, behind a safety cover (refer to Figure 9). Open the safety cover to
locate and operate the maintenance bypass switch. Instructions for operating the maintenance
bypass switch must be followed or damage to UPS may occur.
Leakage Currents
WARNING:
Connect the ground (earth) safety conductor before any other cables are connected.
Batteries
WARNINGS:
• Battery maintenance should only be performed by authorized personnel.
• Batteries installed in the UPS or within the external battery cabinets contain electrolyte. Under
normal conditions the battery cases are dry. A damaged battery may leak electrolyte that can be
dangerous when it is in contact with the skin and cause irritation to the eyes. Should this happen
wash the affected part with copious amounts of water and seek immediate medical attention.
• Voltage is always present on the battery terminals.
• Even when discharged, a battery has the capacity to supply a high short circuit current, which, in
addition to causing damage to the battery itself and to associated cables, may expose the operator to
the risk of burns.
• Batteries should not be kept in storage for periods exceeding 6 months at 77°F (25°C) without being
recharged (having been charged to 100% at the beginning of any such period). If these conditions
are not respected, the performance of the battery can no longer be guaranteed. It is advisable to
recharge the batteries at least once every 4 months.
• Since new batteries often do not provide full capacity after an initial charge it may be necessary to
carry out a number of discharge/recharge cycles before optimum performance is achieved.
• In order to protect the environment, batteries must be disposed of in accordance with the regulations
governing disposal/recycling of toxic and harmful waste.
Repacking of Unit
Do not pack the UPS or external battery cabinets until at least six (6) hours have elapsed since the last
battery recharge.
Place the equipment in bags made of a material sufficiently porous to allow it to breathe [e.g. 4 mil
(100µm) polyethylene].
Do not remove air from the packaging.
When packing unit for movement by common carrier, place on original, or equivalent pallet and repack
in original, or equivalent crate/carton material. See figures 1-4.
Setup
The equipment has been thoroughly checked before shipment. Upon receipt, check the packaging and
ensure that the contents are undamaged.Any damage must be reported to the shipper and any missing
parts must be reported to the supplier immediately.
Unpacking
Care should be taken when removing the packaging in order to avoid damaging the equipment. Check all
packaging materials to ensure that no items are discarded. Remove the packaging following the sequence
illustrated in figures 1-4.
Tools Required
• Hand operated pallet jack
• Scissors
• Screwdriver
ATTENTION:
The equipment must be kept upright at all times and handled with care; damage may be
caused if dropped or subjected to severe impact.
Delivery

Setup
ONEAC Sinergy SE II Series UPS User Manual 5
Fig. 1: Step 1: Remove Strapping
Fig. 2: Step 2: Lift Carton Cover
2
1

Setup
6ONEAC Sinergy SE II Series UPS User Manual
Fig. 3: Step 3: Remove Bracing
Fig. 4: Step 4: Slide Down Ramp
Included with the UPS are two L-shaped tie-down brackets to prevent the UPS from being moved. These
brackets are secured to the unit and then to the floor where the UPS will be positioned.
ATTENTION:
To ease movement over short distances the UPS is fitted with wheels. Before removing the
UPS from the pallet, raise the leveling feet on the unit.

Setup
ONEAC Sinergy SE II Series UPS User Manual 7
LongTerm Storage
If the UPS is to be stored prior to use, it should be stored in a clean, dry environment and away from
temperature extremes. It is recommended that the equipment be stored in a temperature controlled,
moderate humidity environment. Table 1 below provides the temperature and humidity storage limits:
NOTE:
When storing equipment, every 8°C above 25°C reduces the shelf life of the battery by 50%. More
frequent battery charging is required to maintain the batteries in storage at these greater temperatures.
Environmental
Conditions
The UPS must be installed vertically on a level and even surface and in an area protected from extremes
of temperature, water, humidity and the presence of conductive powder or dust (See Table 2 on page 8).
Do not stack units and do not place any objects on top of a unit.
The functional temperature range of the UPS is 32°F to 104°F (0°C to 40°C).
The ideal ambient temperature range is 60°F to 77°F (15 °C to 25°C).
Expected battery runtimes and battery life is based on operational temperatures between 68°F and 77°F (20°C
and 25°C). Operation of the equipment above 77°F (25°C) reduces the service life of the batteries dramatically.
Floor Loading
Taking into consideration the weight of the UPS as shown in AppendixA: Features and Specifications , it
is necessary that the floor in the chosen location be capable of supporting the weight of the unit.
Ventilation and
Accessibility
The area chosen for the UPS must have sufficient space for the installation to be completed.Access doors
must be sufficiently sized to permit clearance of the unit, see “Installation” on page 8
It is necessary to leave a minimum space of at least two inches (50 mm) around the side and rear panels
to allow a flow of air.
Electrical maintenance and servicing, which may involve removal of the panels (see Figure 5) requires
access to all four sides of the UPS. Provide the necessary space or use a flexible wiring system to allow
movement of the UPS.
Fig. 5: Accessibility - Removable Panels
Table 1. Storage Data
Temperature limits -Batteries ONLY 32°F to 104°F (0°C to +40°C)
Temperature limits - UPS without batteries -13°F to 131°F (-25°C to +55°C)
Temperature limits – UPS with batteries 32°F to 104°F (0°C to +40°C)
Relative humidity (non-condensing) 0% to 90%

Installation
8ONEAC Sinergy SE II Series UPS User Manual
Installation
WARNING:
Before connecting any input wiring to the UPS, take precautions to insure that all circuits
being worked on are de-energized and proper lock-out/tag-out procedures have been followed. This is to
ensure that the live input source cannot accidentally be connected to the UPS during installation.
WARNING:
Installation and operation should only be performed by qualified electrical personnel and in
conformity with local and national codes and applicable safety standards.
WARNING:
Electrical shock hazard: Even when the UPS is disconnected from the mains, hazardous
voltages may still exist inside the UPS. The UPS receives power from more than one source—AC input
and DC input from batteries. All input sources (AC and DC) must, therefore, be disconnected before
carrying out installation or maintenance work inside the UPS.
NOTE:
IEC/EN 62040-1 specifications do not include operation over 1000 meters. Contact ONEAC
Technical Services for other applications.
ATTENTION:
Some particularly sensitive electronic equipment may be susceptible to interference; in
order to prevent this it is suggested that input, output and any external battery cables to the UPS be housed
in properly grounded, metal conduits or that shielded cables be used. Routing of cables (e.g. power
supplies, communication or data lines) to other equipment should be kept separate from that of UPS cables.
External
Overcurrent
Protection and
Isolation Devices
External devices for the protection of wiring and for isolating the UPS should be installed upstream of the
equipment. Select and configure the isolating device by referring to Table 3, “Fuses or Circuit Breakers,”
on page 8. These devices must be designed to work with inductive loads such as transformers. Devices
should be provided in building installations and other locations.
The following table indicates the recommended size of input protection devices (circuit breakers and
fuses) that should be installed for the protection of both wiring and equipment.
To avoid spurious operation using GFCI breakers, these breakers must:
• be rated at differential current NOT LESS THAN 100 mA.
• be a SELECTIVE type (delayed intervention).
Emergency Switch
Device (ESD)/
Remote Power Off
(RPO) Function
For reasons of safety, a device having the characteristics of an Emergency Off button must be installed
externally of the UPS. This UPS is equipped with separate terminals for connecting hardwired customer
protection ESD relays.
These external terminals, labeled “RPO,” are located next to the 9 pin SUB-D (interface COM3)
connector on the upper back section of the unit, see Figure 9.
If the circuit between the two RPO connector pins is “opened,” the output of the UPS is immediately
switched off.
The RPO circuit may be extended by connecting normally closed switches in series between the RPO
connection pins.Activating (opening) any of the series switches will causes the UPS to shut off its output.
Table 2. Installation Data
Ambient temperature 32°F to 104°F (0 °C to 40C°)
Relative humidity (non condensing) 90%
Environment Controlled (i.e.Office or equivalent)
Max. altitude 3280 ft. above sea level (1000 m.a.s.l.)
Cable inlet Rear Center
Air inlet Front and Sides
Air outlet Rear
Table 3. Fuses or Circuit Breakers
Description 4 & 6 kVA 8 & 10 kVA
Input: Fusible Disconnect/Breaker 40 Amps 70 Amps

Installation
ONEAC Sinergy SE II Series UPS User Manual 9
Connections
WARNING:
Confirm that all circuit breakers/switches feeding power to UPS are “Open” and locked out
per lock-out/tag-out procedures.
Fig. 6: Sinergy SE Series UPS Rear View
1. Open UPS input breakers (Main 1 & Bypass), Fig. 6.
2. Remove maintenance bypass switch safety cover.
3. Set maintenance bypass switch to “Bypass,” Fig. 6
4. Remove terminal area safety cover, Fig. 6.
NOTE:
If the UPS is fitted with an optional PDU, remove cover from PDU.
In order to gain access to the external electrical connections the rear wiring box protection panel of the
UPS must be removed. All wiring must be placed in proper conduits, and all cabling must be strain
relieved per local and national codes. See Table 4, “Cable Sizes,” on page 12.
Bypass Switch
Input Breakers
Terminal Area Safety Cover

Installation
10 ONEAC Sinergy SE II Series UPS User Manual
Fig. 7: Side view
WARNING:
Connect the ground cable first.
WARNING:
Ensure that the UPS is isolated from ALL AC & DC sources before removing panels.
Connecting Power Cables
(Refer to section titled Table 4, “Cable Sizes,” on page 12)
5. Connect loads to “Output” terminals.
ATTENTION:
If using separate inputs for Mains and Bypass, it is imperative that the inputs be in phase.
Failure to correctly recognize and adhere to this requirement will cause serious damage to the UPS.
6. Connect mains to the corresponding input terminals. UPS can utilize a single input (using same input
for both Mains and Bypass inputs) or two separate inputs (from same transformer and using same
phases, for separate Mains and Bypass inputs)
- If the UPS is supplied by a single source, connect jumpers from JL1 to BL1 and from JL2 to
BL2. Input is connected to Main Line (ML1 & ML2) terminals. See Figure 8.
- If the bypass input is supplied separately, connect bypass line to the Bypass (BL1 & BL2)
terminals. Input is connected to Main Line (ML1 & ML2) terminals. Do not connect jumpers to
JL1 or JL2. See Figure 8.
7. If UPS is to be operated as single unit connect a jumper between S1 and S2. See Figure 8.
8. If UPS is to be operated as parallel unit ensure that no jumper is connected between S1 and S2.
Fig. 8: Terminal Block
Rear Panel
Rear Wiring Box Protection Panel
Cable Entry

Installation
ONEAC Sinergy SE II Series UPS User Manual 11
NOTE:
Once installation has been completed, the vertically adjustable feet on the UPS must be used to
fix it in position.
Rear Panel
Fig. 9: Rear View
Ports for Parallel Operation
Maintenance Bypass Switch
Input Circuit Breaker for Main Input
Input Circuit breaker for Bypass Input
Input and Output Terminal Block
COM 3 Interface
ESD/RPO Contacts
Slot Interface COM (optional)
Fans
External Battery
Receptacle

Installation
12 ONEAC Sinergy SE II Series UPS User Manual
Cable Sizes and
Current
The following table indicates the recommended sizes of conductors in accordance with the NEC
®
. (Air
temperature surrounding the conduits not greater than 104°F (40°C).)
NOTE:
Cable sizes are suggested and based on standard configurations. Installers should verify correct
conductor sizes pursuant to NEC
®
and/or state or local codes. If the installation requires long conductor
runs, consult NEC
®
and/or state or local codes to account for electrical losses.
Table 4. Cable Sizes
Term ID Description
6 kVA (4 kVA) 10 kVA (8 kVA)
main wire
gauge (awg term torque
(in-lbs) min wire
temp (°C)
*
main wire
gauge (awg term torque
(in-lbs) min wire
temp (°C)*
JMP JL1 Line 1 (Jumper)
‡
8 22 90 6 22 90
JL2 Line 2 (Jumper)
‡
8 22 90 6 22 90
MAIN
ML1 Line 1 (Main) 8 22 90 6 22 90
ML2 Line 2 (Main) 8 22 90 6 22 90
E/G Chassis Ground ** 22 90 ** 22 90
BYPASS
BL1 Line 1 (Bypass) 8 22 90 6 22 90
BL2 Line 2 (Bypass) 8 22 90 6 22 90
E/G Chassis Ground ** 22 90 ** 22 90
OUTPUT
‡‡
X1 Output Term 1 10 22 90 6 22 90
X2 Output Term 2 10 22 90 6 22 90
X3 Output Term 3 10 22 90 6 22 90
E/G Chassis Ground 10 22 90 6 22 90
X4 Output Term 4 10 22 90 6 22 90
X5 Output Term 5 10 22 90 6 22 90
X6 Output Term 6 10 22 90 6 22 90
‡ Wire between JL1 & BL1 and between JL2 & BL2 if only single input power source is used.
‡‡ Output voltage available at output terminals dependent on specific model. See Table 5 - 7 on page 13 for details.
* Use insulated copper wire rated 90°C minimum
** Must be no smaller than wire connected to L1 and L2
NOTE: For installation per IEC regulations
: If installing units per regulations IEC-287 and DIN VDE 0298, 6 kVA model
should be wired (inputs and outputs) with 6 mm
2
cable torqued to 2.5 nt-m; and 10kVA model (inputs and outputs) should be
wired with 10 mm
2
cable torqued to 2.5 nt-m. (Based on 90°C cable and ambient of 40°C)

Installation
ONEAC Sinergy SE II Series UPS User Manual 13
OutputTerminal
Voltage
ATTENTION:
*X2 & X3 are wired together, and X5 and X6 are wired together to provide full nameplate
rated current at 120V (50 A for 6 kVA model and 83 A for 10 kVA model). However, each terminal can supply
only 1/2 of the total current and both terminals MUST be connected to the load in order to provide full power
.
ATTENTION:
*X2 provides only 1/2 of nameplate rated current power (25 A for 6 kVA model and 40 A
for 10kVA model. User must provide over current protection (fuse or circuit breaker) of proper size
.
ATTENTION:
*X2 & X3 are wired together, and X5 and X6 are wired together to provide full nameplate
rated current at 100V (50 A for 6 kVA model and 83 A for 10 kVA model). However, each terminal can supply
only 1/2 of the total current and both terminals MUST be connected to the load in order to provide full power.
Table 5. 120/208/240 Output Terminal Voltage Configurations
X1 X2 X3 E/G X4 X5 X6
Terminal Voltage (-)120 0 0 - 88 (+)120* (+)120*
120 Volts (from X2 and X3 to
X5 and X6)
208 Volts (from X1 to X4)
240 Volts (from X1 to X6)
Table 6. 120/208/230/240 Output Terminal Voltage Configurations
X1 X2 X3 E/G X4 X5 X6
Terminal Voltage 0 120* - - 208 230 240
Table 7. 100/200 Output Terminal Voltage Configurations
X1 X2 X3 E/G X4 X5 X6
Terminal Voltage (-)100 0 0 - - (+)100* (+)100*
100 Volts (from X2 and X3 to
X5 and X6)
200 Volts (from X1 to X6)

Installation
14 ONEAC Sinergy SE II Series UPS User Manual
External Battery
Installation
Fig. 10: Connecting External battery Cabinets
For unpacking the battery cabinets, see “Unpacking” on page 4. See page 7 to page 8 for installation
considerations.
NOTE:
The battery cabinet should be placed close to the UPS while still allowing the UPS adequate
ventilation.
NOTE:
Due to the weight of each battery cabinet, see “Appendix A: Features and Specifications” on
page 32 to ensure the area chosen is capable of supporting the total weight.
Battery cabinets (1 or 2 units) can be connected to the UPS.A cable used for connecting the batteries to
the UPS (or battery cabinet to battery cabinet as shown in Figure 10) is provided with each battery cabinet.
NOTE:
External battery cabinets can be replaced during “normal operation” of the UPS. However, care
should be taken not to install or remove battery cabinets during an inputAC power failure or during “On
Battery” operation (UPS is in the status “AC Fail = On Battery”)
NOTE:
The unit indicates an alarm condition when the battery is not connected.
To connect an external battery cabinet:
1. Insure that the circuit breaker on the back of the external battery cabinet is in the “OFF” position.
2. Using the supplied keyed cable, plug one end of cable into the back of the battery closest to the UPS.
3. Plug the other end of the keyed cable into the UPS battery sockets.
4. Turn the external battery cabinet’s circuit breaker to the “ON” position.
NOTE:
Ifyour UPS has an integratedbattery, acompensating current may occurduring connection when
the circuit breaker is put in the “ON” position.
To connect an additional battery cabinet:
1. Insure that the circuit breakers on each battery cabinet are in the “OFF” position.
2. Using the supplied cable, plug one end of the cable into the back of the additional battery cabinet.
3. Plug the other end of the cable into the first battery cabinet, see Figure 10 above.
4. Turn all the external battery cabinet’s circuit breakers to the “ON” position.
WARNING:
The installation of the UPS may only be carried out by qualified technical personnel
according to local and national electric codes such as NEC.
NOTE:
Oncethe battery cabinets are physically connected to the UPS, the operatorwill need to configure
the battery string following set-up menu table on page 21.

UPS Operation
ONEAC Sinergy SE II Series UPS User Manual 15
UPS Operation
In use, the UPS is connected between theAC input power and the load.The operation of this UPS is based
on the on-line principle in which the inputAC power is first converted to DC, and secondarily converted
back to a sine wave of a fixed frequency and voltage to supply controlled power to the load. This UPS
topology is used to isolate the critical load (e.g. servers, switches, routers, etc.) from a variety of power
line problems, including the total loss of inputAC power.
Bypass Mode In the unlikely event of a component failure within the UPS or a brief overload, the electronic bypass will
be activated to continue supplying the load directly from the input line.
Battery Mode In the event of a mains failure, the batteries will continue to provide an uninterrupted supply of energy to
the load. In practice, most mains failures are of relatively short duration. Therefore, the energy stored in
the UPS’s batteries is, in most cases, sufficient to ensure continuous operation of the connected systems
until the mains power is reestablished. In the event of a long lasting mains failure, the UPS can be utilized
with shutdown software to enable a controlled shutdown of connected systems.
The most reliable method for determining the estimated battery runtime is the application of MopUPS®
software or a ManageUPS network card. With this software, the estimated remaining battery capacity is
indicated before and during an AC power failure. These products also allow for automated shutdown
procedures that can shut down the attached devices after safely closing open application programs and the
operating system. After return of the mains voltage, the UPS automatically restores power to the
connected equipment.
Fig. 11: Block Diagram (120/208/240 Volt output)– Typical for models with A in the part number
UPS Mode

UPS Operation
16 ONEAC Sinergy SE II Series UPS User Manual
Fig. 12: Block Diagram (120/208/230/240 Volt output)–Typical for models with I in the part number

UPS Operation
ONEAC Sinergy SE II Series UPS User Manual 17
Fig. 13: Block Diagram (100/200 Volt output)–Typical for models with J in the part number
This manual suits for next models
12
Table of contents
Other ONEAC UPS manuals

ONEAC
ONEAC ON Series User manual

ONEAC
ONEAC ON Series Operator's manual

ONEAC
ONEAC ONm 300 I Operator's manual

ONEAC
ONEAC ONE404AG-SE Operating instructions

ONEAC
ONEAC S07KXAU User manual

ONEAC
ONEAC Sinergy Series User manual

ONEAC
ONEAC ON Series Operator's manual

ONEAC
ONEAC ON Series Operator's manual

ONEAC
ONEAC ONePlus Series Operator's manual