4Oneida Air Systems
Assembly Instructions
THE WALL BRACKET SHOULD BE MOUNTED TO A STURDY, REINFORCED WALL E.G. CONCRETE WALL,
WOODFRAMED WALL, ETC. WALL ANCHORS CAN BE USED IF MOUNTING ON DRYWALL. THE INCLUDED
TEMPLATE INDICATES THE PROPER DRILL HOLES AND THE FULL, ASSEMBLED SIZE OF THE WALL
BRACKET.
Wall
Hose
Reel
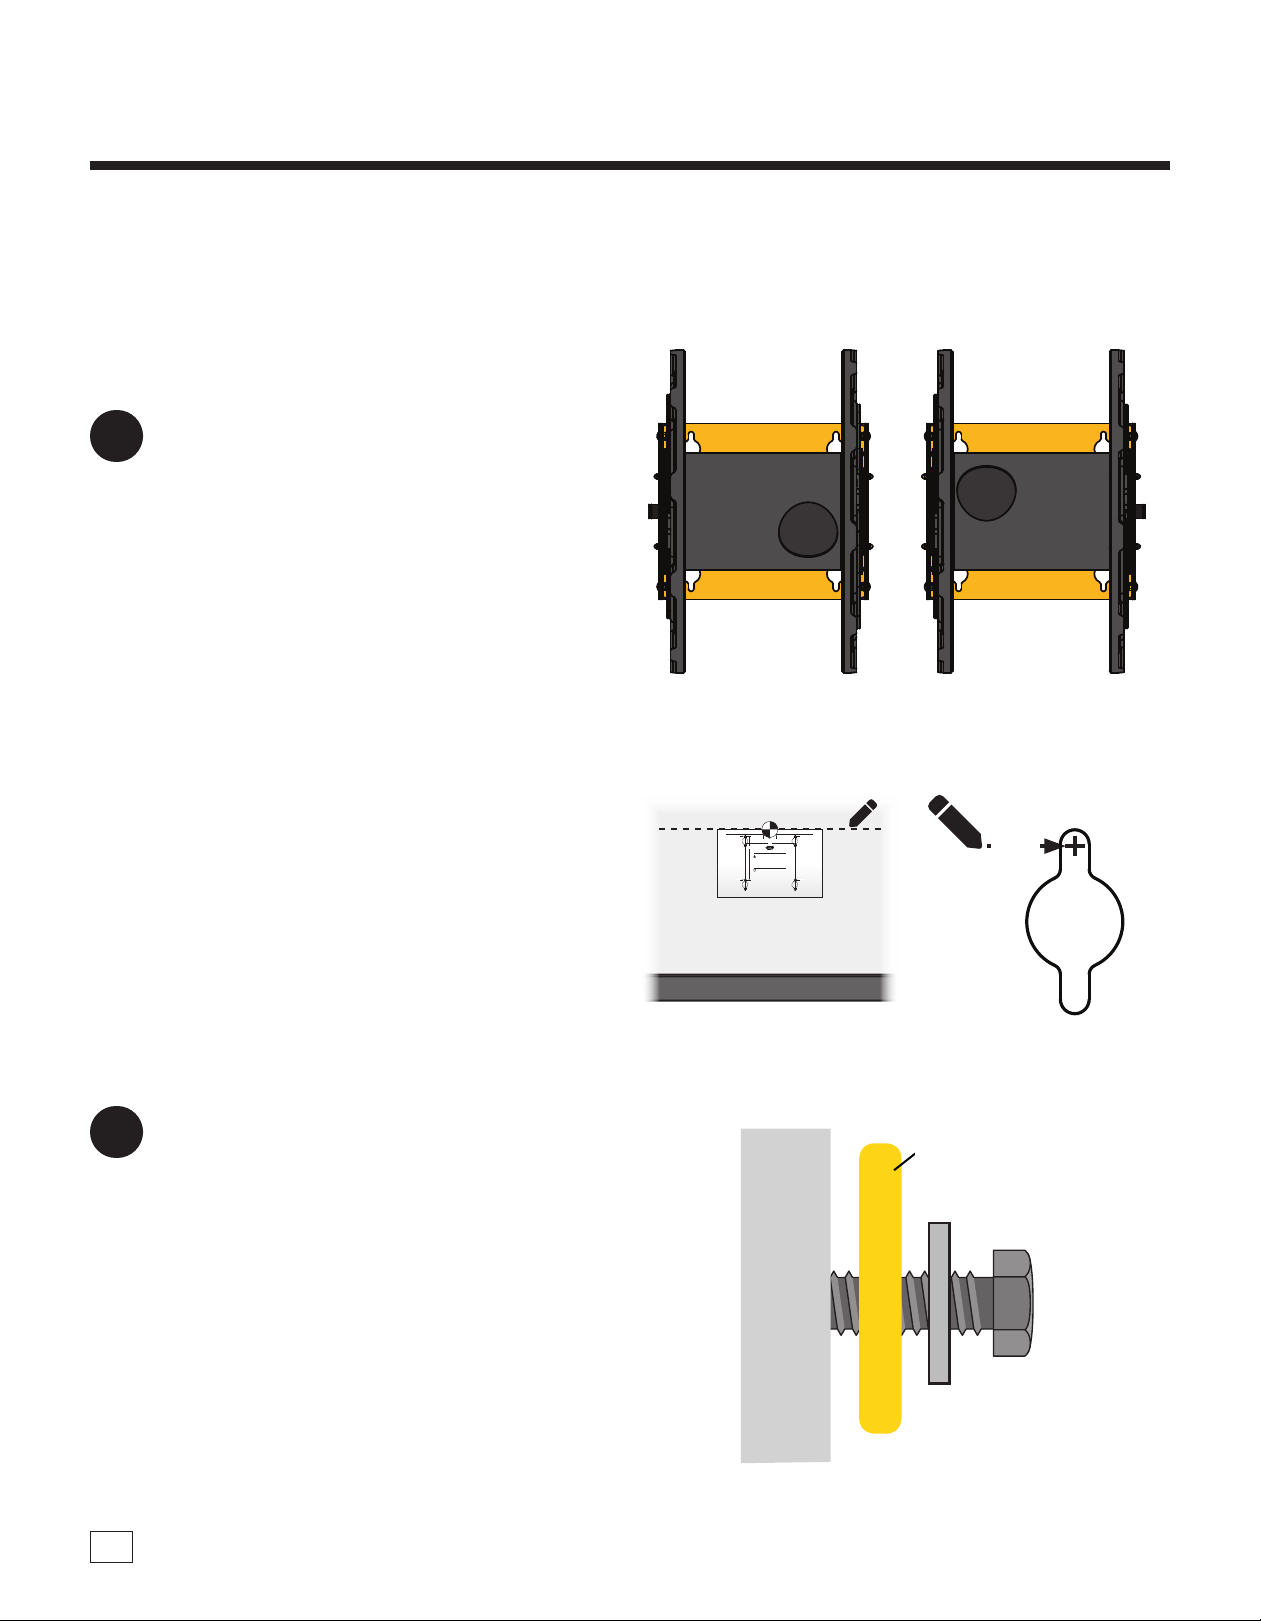
3 Identify where you will install the Hose Reel
in your shop and how the hose reel will be
oriented [FIG. 3a].
Mark a straight level line. Align the top of the
template with the marked line and temporarily
secure the template to the wall with a tack or
non-marking tape [FIG. 3b].
Place a mark through the template's paper at
each indicated crosshair (four bi-directional
keyway holes), then remove the template from
the wall [FIG. 3c].
Note: DO NOT FLIP THE TEMPLATE! e
dimensions of the template are accurate to
either orientation of the Hose Reel. TheHoseReel should be mounted to a sturdy, reinforced wall (e.g.
concretewall,brick wall, wood-framed wall, etc.) Wall anchors can
beusedif mounting on drywall. This template indicates the proper
drillholesand the full, assembled size of the Hose Reel.
HoseReel Template
8-1/2"
216mm
9-3/4"
248mm
HoseReelTemplate
#ZBT000003
DrillHere
DrillHereDrillHere
DrillHere
LEVELTHIS LINE
TheHoseReel can be mounted so that the Handle is on either side
asthekeyholes are bi-directional. This does not require rotating the
templlate.Decidehow you want your Hose Reel oriented during
installationtobest meet your shop’sneeds.
HoseReel Mounting Positions
Rev:B20230314LL
FIG. 3b
FIG. 3a
FIG. 4
Mark
Here
Handle on
the left
Handle on
the right
Front View Front View
FIG. 3c
4 Using appropriate fasteners for the wall type
you are installing your system onto, drill into
and install fasteners into the wall at all marked
locations.
a. Maximum Fastener Size: 3/8" diameter
b. Maximum Washer Size: 5/8" outside
diameter
Place washers onto each fastener and thread
the fasteners into all four holes, leaving at least
1/2" outside of the hole to t the Hose Reel
Assembly [FIG. 4].