Optex ELITE PRO User manual

Preface Installation Settings Troubleshooting Specications
5932261 FEB 2023
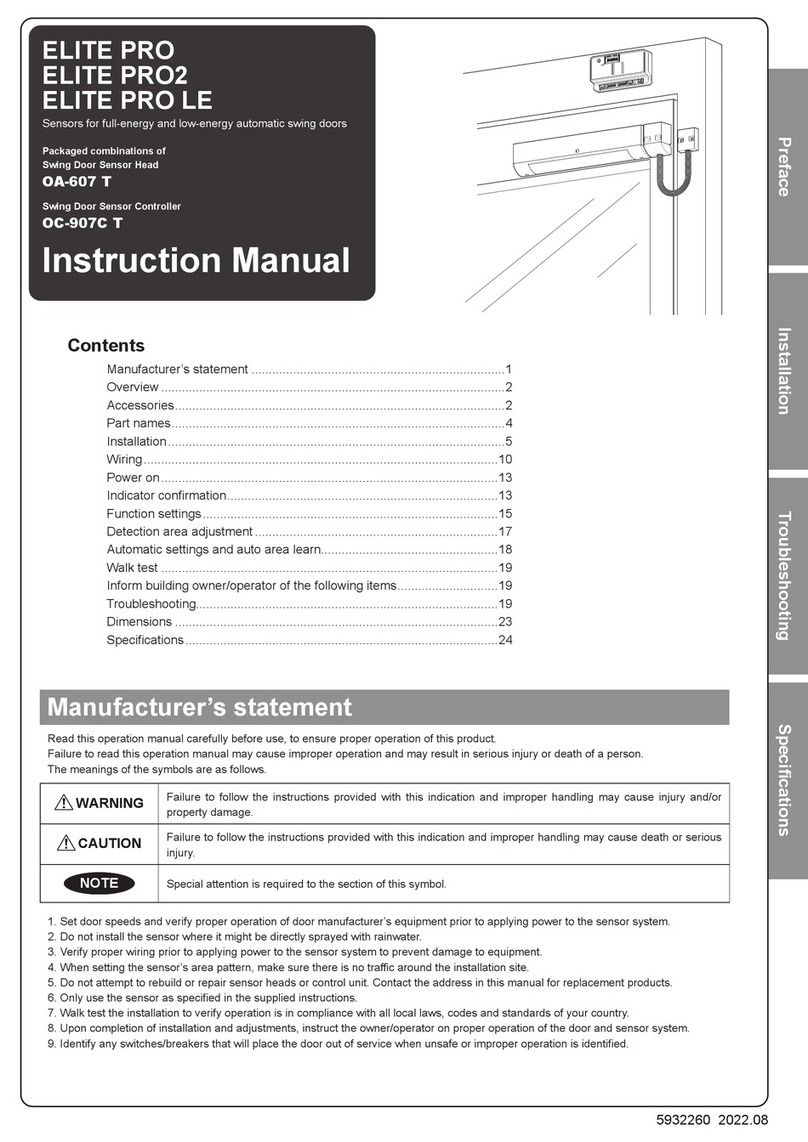
ELITE PRO
ELITE PRO2
ELITE PRO LE
Sensors for full energy and low energy automatic swing doors
Packaged combinations of swing door sensor head
OA-607 T
Swing door sensor controller
OC-907C T
Instruction manual
Manufacturer’s statement
Read this instruction manual carefully before use, to ensure proper operation of this product.
Failure to read this instruction manual may cause improper operation and may result in serious injury or death of a person.
The meanings of the symbols are as follows.
WARNINGWARNING
Failure to follow the instructions provided with this indication and improper handling may cause injury and/or
property damage.
CAUTIONCAUTION
Failure to follow the instructions provided with this indication and improper handling may cause death or serious
injury.
NOTE Special attention is required to the section of this symbol.
1. Set door speeds and verify proper operation of door manufacturer’s equipment prior to applying power to the sensor system.
2. Do not install the sensor where it might be directly sprayed with rainwater.
3. Verify proper wiring prior to applying power to the sensor system to prevent damage to equipment.
4.Whensettingthesensor’sareapattern,makesurethereisnotracaroundtheinstallationsite.
5. Do not attempt to rebuild or repair sensor heads or control unit. Contact the address in this manual for replacement products.
6.Onlyusethesensorasspeciedinthesuppliedinstructions.
7. Walk test the installation to verify operation is in compliance with all local laws, codes and standards of your country.
8. Upon completion of installation and adjustments, instruct the owner/operator on proper operation of the door and sensor system.
9.Identifyanyswitches/breakersthatwillplacethedooroutofservicewhenunsafeorimproperoperationisidentied.
Contents
Manufacturer’s statement..........................................................................1
Overview ...................................................................................................2
Accessories...............................................................................................3
Part names................................................................................................4
Installation .................................................................................................5
Wiring ......................................................................................................10
Power ON................................................................................................13
Indicatorconrmation..............................................................................13
Settings ...................................................................................................15
Automatic settings and auto area learn ............................................................15
Dipswitch settings.............................................................................................16
Detailed settings ...............................................................................................16
Reset ................................................................................................................17
Detection area adjustment ......................................................................18
Walk test .................................................................................................19
Inform building owner/operator of the following items.............................19
Troubleshooting.......................................................................................19
Dimensions .............................................................................................22
Specications ..........................................................................................22

Preface Installation Settings Troubleshooting Specications
2
Overview
Thisproductisareactivationandsafetysensorwhichusesactiveinfraredreectiontoprovideprotectionforswingtypefullenergyand
low energy doors. OA-607 T is the sensor head. OC-907C T is the sensor controller.
■Model
The lineup and names are as below.
Model name Conguration
ELITE PRO Package of OC-907C T × 1 and OA-607 T × 2
ELITE PRO2 Package of OC-907C T × 1 and OA-607 T × 4
ELITE PRO LE Package of OC-907C T × 1 and OA-607 T × 1
Door type and connection pattern support are as below.
(Illustrations show the door from above.)
■For double swing door
(including double egress door)
• Full energy doors
Connection pattern
OA-607 T
OA-607 T
OA-607 T
OA-607 T
OC-907C T
Model name ELITE PRO2
• Low energy doors
Connection pattern
OA-607 TOA-607 T
OC-907C T
or
OA-607 T
OC-907C T
OA-607 T
Model name ELITE PRO
■For single swing door
• Full energy door
Connection pattern
OA-607 T
OA-607 T
OC-907C T
Model name ELITE PRO
• Low energy door
Connection pattern
OA-607 T
OC-907C T
Model name ELITE PRO LE
For standard accessories for each model, see “Accessories” in the next section.

Preface Installation Settings Troubleshooting Specications
3
Accessories
Numberdiersbypackage.
(1) (2) (3) (4)
(5)
(6) (7)
No.
Part name Appearance Description
Number per package
ELITE
PRO
ELITE
PRO2
ELITE
PRO LE
(1) Loop harness For connecting OC-907C T and OA-607 T
(via door loop), length 7'3" (2200 mm). 221
(2) Pass-through harness For connection between door front/back
(inner/outer) OA-607 T, length 8" (210 mm). 120
(3)
Door loop
Door loop cover
Door loop cover through which the loop
harness passes. The loop harness is connected
from there on the side of OA-607 T.
221
(4) Jamb cover
Installed on the jamb side, this cover conceals
the loop harness takeout hole from the jamb side
while the harness is run through.
221
(5) Corrugated tube
2'4 (700mm)
1' (300mm)
The loop harness runs through this tube between the
jamb cover and the door loop cover.
The following two lengths are included.
• 2'4"(700 mm): Intended for standard concealed wiring.
• 1'(300 mm): Intended for exposed wiring.
2 2 1
(6) I/O harness Signal line for connection between door controller and
OC-907C T, length 4'3" (1300 mm). 221
(7) Power harness Power line for connection between door controller
and OC-907C T, length 3' (920 mm). 1 1 1
-Mounting
screws
For OA-607 T Silver 482
For door loop cover
or jamb cover
Black 884
-Mounting
templates
For OA-607 T
Templates for OA-607 T mounting holes, door leaf
front/back through holes, and door loop cover.
Set of door leaf (R) and (L).
221
For jamb cover Template for jamb cover. 2 2 1
-
T-tap connector
(male/female)
Avoltagelinebranchconnectorforconrmingwhether
there is output voltage from the door controller to the
connected motor.
442
Hook-and-loop fastener Double-sided tape for mounting OC-907C T. 1 1 1

Preface Installation Settings Troubleshooting Specications
4
Part names
■OA-607 T
• With cover
• Without cover
(1) (2)(5)
(6) (7) (9)(10) (8)
(4)(3) (1) (5)
• When combined with door loop
Jamb cover
Door loop cover
Door loop
Corrugated tube
Pass loop harness from OC-907C T
through from the jamb cover to the
door loop cover.
This is a standard parts set for connecting
OC-907C T to OA-607 T via the door jamb.
■OC-907C T
(1)
(6) (7) (6) (8)
(5) (2) (3)
(4)
Activation output
Stall output
Knowing act input
Motor/BG input
Close switch input
No. Name
(1) Reset switch
(2) Dipswitches
(3) Operation indicator
(4) Interface indicator
(5) Wi-Fi status indicator
(6) Sensor connector
(7) Door controller connector
(8) Power connector
No. Name
(1) Connector
(2) Dipswitches
(3) Operation indicator
(4) Function switch
(5) Mounting holes
(6) Threshold area angle screw
(7) Threshold area angle gauge
(8) Swing area angle screw
(9) Swing area angle gauge
(10) Detection window

Preface Installation Troubleshooting SpecicationsSettings
5
Installation
Install in the order of OC-907C T, OA-607 T, door loop.
BelowisacongurationexamplewiththeELITEPRO.
Loop harness
7'3" (2200 mm)
OC-907C T
OA-607 T
Step 2) Installing OA-607 T
■ Drill the following holes
• OA-607 T mounting holes
• Door loop cover mounting holes
• Through hole
Step 3) Installing the door loop
■ Drill the following holes
• Jamb cover mounting hole
• Wiring hole (concealed)
Side view
Step 6) Fitting the cover on OA-607 T
To power
To the door controller
Step 1) Installing OC-907C T and
connecting the loop harness
■ Connect the loop harness connector
to the OC-907C T.
Step 4) Connecting the door front/back
OA-607 T
Step 5) Setting the OA-607 T dipswitches
and adjustment of detection angle
Step 7) OC-907C T and door controller I/O
wiring and OC-907C T power wiring
Prepare the tools required in advance.
Example:
(1) (2) (3) (4) (5) (6) (7) (8)
(1) #1 phillips head screwdriver
(2) #2 phillips head screwdriver
(3) Flat head screwdriver
(4) Crimping tool
(5) Pliers
(6) Drill
(7) 1/8" drill bit
(8) 3/8" drill bit
WARNINGWARNING
Danger of electric shock
Before starting the procedure, make sure that the power is turned OFF.
When passing the cable through the hole, do not tear the shield otherwise it may cause electric shock or breakdown of the sensor.

Preface Installation Troubleshooting SpecicationsSettings
6
■Step 1) Installing OC-907C T and
connecting the loop harness
1Using the hook-and-loop fastener included as
standard, attach OC-907C T in the header.
2Connect the larger loop harness connector to the
OC-907C T sensor connector.
For double doors, connect another
sensor connector as well.
NOTE
With regard to the sensor connector, for single swing door
the OA-607 T can be connected to either the right/left
sensor connector. For double swing doors, the OA-607 T
installed on right/left doors can be connected to either
the right/left sensor connector (note that right/left must be
aligned for the door controller connector).
Loop harness 7'3" (2200 mm)
To OA-607 T
To OC-907C T
Smaller
connector
Larger
connector
3Pass the loop harness through the transom and jamb.
To do so, drill a 3/8" (10 mm) hole in the transom.
* Later (see “Step 3-3”), a hole will be drilled in the jamb
for the loop harness to emerge.
■Step 2) Installing OA-607 T
1Decide in advance which side of the door (swing side
or approach side) to install the door loop on.
2Positioning the door template
Position the template edge at the door edge.
Mounting templates
For OA-607 T (R)
If through holes are required,
the height of both front/back
templates should be roughly
adjusted.
The door front/back through hole position should match on
both sides of the door.
Door front/back through hole since the holes here are
penetrated on both sides, the height of the both templates
should be roughly adjusted.
3Apply the door template to the door panel.
The template top should be between 6'7" (2.0 m) and 8'2"
(2.5 m) from the ground.
When the template is accurately positioned, align the 3/8"
(10 mm) through hole so that it matches on both sides of
the door.
4Drill 1/8"(3.2 mm) left and right mounting holes for
OA-607 T on each side of the door leaf (in accordance
with the mounting template).
5If through holes are required, drill a 3/8"(10 mm) cable
door through hole.
The approach side template hole must be perfectly aligned
with the swing side template hole.
6(Only on the door loop mounting door side)
Drill 1/8"(3.2 mm) holes at the door loop cover right
and left (in accordance with the door template) (one
side of the door leaf only).

Preface Installation Troubleshooting SpecicationsSettings
7
Removing the cover.
Insert a athead screwdriver into the right/left holes
on the cover bottom and push up to remove.
7Remove the template.
8With two of the four mounting screws included as
standard, mount the Silver mounting screws loosely.
× 2
Silver mounting screws for OA-607 T sensor head
Silver
9 After xing OA-607 T to the door, tightly fasten the
Silver mounting screws.
10 Position OA-607 T on the other side of the door as
well.
■Step 3) Installing the door loop (only on the
door loop mounting door side)
1Apply the jamb cover template on the jamb.
Mounting template
for jamb cover
2Drill two 1/8"(3.2 mm) mounting holes in the jamb for
the jamb cover (in accordance with the template).
For concealed wiring, drill an additional 3/8"(10 mm)
cable exit hole in the middle.
For exposed wiring, the 3/8"(10 mm) holes are not
necessary.
3For general concealed wiring, bring the smaller loop
harness connector through from the jamb 3/8"(10 mm)
cable hole.
Loop harness

Preface Installation Troubleshooting SpecicationsSettings
8
For exposed wiring, use the jamb cover knockout.
Wrap the wiring in the longer corrugated tube included
as standard.
Knockout
4Pass the loop harness taken out through the longer
corrugated tube included as standard.
5Open and close the door and adjust the protruding
loop harness and corrugated tube length.
Loop harness
Cut the corrugated tube so that the door loop itself does
not enter the detection area, and at the same time put the
excess loop harness back into the jamb.
When the door loop is mounted on the swing side, make
sure that it will not contact the door panel while the door
is moving.
6Pass the door loop cover through the corrugated tube
along with the loop harness.
Door loop cover
Insert the corrugated tube along the guide of the loop
cover.
Wrap the loop harness around
the door loop cover.
Wind the harness around
the door loop cover until it
matches the length here.
NOTE
Asinthegureabove,wraptheloopharnessaroundthe
door loop cover to adjust its length.
7Fasten the door loop cover securely to the door leaf
with two Black mounting screws.
× 2
Black
8Connect the loop harness to the side of OA-607 T.
Loop harness
*Inserttheconnectorrmlytothebase.Iftheinsertionis
loose, a communication error with OA-607 T may result.
When a communication error is generated, the sensor
operation indicator will blink Orange twice.
9After adjusting the protruding loop harness and
corrugated tube length, prepare the jamb cover to be
mounted to the jamb.
Loop harness
Jamb cover
Insert the corrugated tube along the guide of the loop cover.
10 Fasten the jamb cover securely to the jamb with two
Black mounting screws.
× 2
Black

Preface Installation Troubleshooting SpecicationsSettings
9
■Step 4) Connecting the door front/back
OA-607 T
1Connect the pass through harness to the left end of
the door front OA-607 T and pass it through the 3/8"
(10 mm) hole.
Connect the pass through harness to the right end of
the door back OA-607 T.
Pass-through harness 8" (210 mm)
*Inserttheconnectorrmlytothebase.Iftheinsertionis
loose, a communication error with OA-607 T may result.
When a communication error is generated, the sensor
operation indicator will blink Orange twice.
■Step 5) Setting the OA-607 T dipswitches
and adjustment of detection angle
Make the following settings for OA-607 T.
•Dipswitches(→see“Settings”.)
•Detectionangle(→see“Detection area adjustment”.)
NOTE
Make sure that the detection angle is +5°.
If the detection angle needs to be changed, see “Detection
area adjustment”.
■Step 6) Fitting the cover on OA-607 T
1 Put the cover on from above and t it in.
Notch
Pass the loop harness through the notch on the cover
side.
* Be careful not to disconnect the cable with the cover.
2Install the remaining sensors similarly.
■Step 7) OC-907C T and door controller I/O
wiring and OC-907C T power wiring
1Connect I/O harness between the OC-907C T door
controller connector and the door controller.
For double doors, connect the other
I/O harness connector as well.
NOTE
With regard to the door controller connector, for single
swing door the door controller can be connected to either
the right/left sensor connector. For double swing doors,
the door controller installed on right/left doors can be con-
nected to either the right/left connector (note that right/left
must be aligned for the sensor connector).
WARNINGWARNING
Wireinaccordancewiththedoorcontrollerspecications.
2Connect harness wiring to the OC-907C T power
connector.
NOTE
The power connector is connected to 12 to 30 VDC with a
power harness.

Preface Installation Troubleshooting SpecicationsSettings
10
Wiring
CAUTIONCAUTION
Do not turn the power on while wiring. Otherwise, electric shock or device damage may result.
• Power harness
Name Color Specications
1Power (*) Orange 12 to 30 VDC
2 Brown
*1: Polarity free.
• I/O harness
Name Color I/O Specications
1
Activation output Yellow Output
Form A relay 50 V, 0.3 A (resistance load)
At power OFF: Open
At stand-by: Open, at detection: Close
2
3None - - -
4
5
Stall output Green Output
Form A or B relay 50 V, 0.3 A (resistance load)
Set form A or B with the setting app.
When setting N.O.
At power OFF: Close
At stand-by: Open
At detection: Close
When setting N.C.
At power OFF: Close
At stand-by: Close
At detection: Open
6
7Test input Pink Input Optocoupler voltage 5 to 30 VDC, current 6 mA max. (30 VDC) (polarity free)
8
9Motor/BG input Red Input Optocoupler voltage 5 to 160 VDC, 5 to 120 VAC, 60 Hz (polarity free)
10
11 None - - -
12
13 Knowing act input Purple Input Dry contact input
Connect push plate, etc.
14
15 Close switch input White Input Dry contact input
Connect a device recognizing fully closed status (a magnet switch, etc.).
16

Preface Installation Troubleshooting SpecicationsSettings
11
■Wiring door operators from various manufacturers
• Wiring example for double swing door
Polarity free for all wiring
Door 1 Door 2
Power 12 to 30 VDC
Purple Purple
Red
Yellow
Green
Pink
White
Door controller
Test output
Stall input
Activation input
Electric strike
Motor
* 1
* 3
* 2
* 4
* 4
Red
BG output Red
Yellow
Green
Pink
White
Door controller
Test output
Stall input
Activation input
Electric strike
Motor
* 1
* 3
* 2
* 4
* 4
Red
BG output
Activation sensor
Push plate
PUSH
TO OPEN
OR
OR
Knowing act
input
Relay 1
output
Relay 2
delayed output
Time delay module
Electric lock
Knowing act device
(e.g.,Push plate)
Red
Door controller
Motor
* 1 : Do not wire for non monitored door.
* 2 : How to connect motor voltage signal. (Red wire)
* 3 : Connect the dry contact signal that is output when the door is fully closed.
* 4 : For stable sensor operation, connection to only one of BG input (recommended),
motor voltage input, or close switch input is recommended.

Preface Installation Troubleshooting SpecicationsSettings
12
• Wiring example for single swing door
Polarity free for all wiring
Power 12 to 30 VDC
Purple
Red
Yellow
Green
Pink
White
Door controller
Test output
Stall input
Activation input
Electric strike
Motor
* 1
* 3
* 2
* 4
* 4
Red
BG output
Activation sensor
Push plate
PUSH
TO OPEN
OR
OR
Knowing act
input
Relay 1
output
Relay 2
delayed output
Time delay module
Electric lock
Knowing act device
(e.g.,Push plate)
Red
Door controller
Motor
* 1 : Do not wire for non monitored door.
* 2 : How to connect motor voltage signal. (Red wire)
* 3 : Connect the dry contact signal that is output when the door is fully closed.
* 4 : For stable sensor operation, connection to only one of BG input (recommended),
motor voltage input, or close switch input is recommended.

Preface Installation Troubleshooting SpecicationsSettings
13
●Using the T-tap connector (male/female) included as standard
1Put the wire in the connector. 4
Insert the wire into the
terminal and crimp it down
to secure the wire.
2Use the pliers to fold the
connector over the wire. 5Plug the terminal directly
into the connector.
3Squeeze the connector
together until it locks.
Power ON
Turn on power of 12 to 30 VDC to the OC-907C T.
Indicator conrmation
■OA-607 T indicator
Operation indicator
●Operation indicator
Procedures Color Indicator diagram Status Meaning
Before initial setup Orange Blinking
(0.5 s intervals) Congurationerrorwithinsettingerror
During initial setup
Orange Blinking fast
(0.1 s intervals) Autocongurationstart
Green Solid Autocongurationnormallycompleted(stand-by)
Orange Blinking
(0.5 s intervals) Autocongurationabnormallycompleted
During auto area
learn See “Settings - Automatic settings and auto area learn”
During normal
operation
Green Solid Stand-by
Red Blinking fast
(0.1 s intervals) 1st row detection
Red Solid 2nd/3rd row detection
Error or warning
generated See “Troubleshooting”
Sensor setting via
Wi-Fi See “Settings - Detailed settings”

Preface Installation Troubleshooting SpecicationsSettings
14
■OC-907C T indicator
Operation indicator Interface indicator
Activation output
Stall output
Knowing act input
Motor/BG input
Close switch input
Wi-Fi status indicator
NOTE
In both the operation indicator/interface indicator, the left column
corresponds to the left-side connector and the right corresponds to
the right-side connector.
●Operation indicator
Procedures Color Indicator diagram Status Meaning
Before initial setup Orange Blinking
(0.5 s intervals) Congurationerrorwithinsettingerror
During initial setup
Orange Blinking fast
(0.1 s intervals) Autocongurationstart
Green Solid Autocongurationnormallycompleted
Orange Blinking
(0.5 s intervals) Autocongurationabnormallycompleted
During auto area
learn See “Settings - Automatic settings and auto area learn”
During normal
operation
Green Solid Door fully closed
Orange Solid Door closing
Red Solid Door fully opened
Red Blinking fast
(0.1 s intervals) Door opening
Error or warning
generated See “Troubleshooting”
Sensor setting via
Wi-Fi See “Settings - Detailed settings”
●Interface indicator
Indicator name Color Indicator diagram Status
Activation output Solid Orange Outputting
Stall output Solid Green Outputting
Motor/BG input Solid Red Door fully closed
Knowing act input Solid Yellow Inputting
Close switch input Solid White Door fully closed
●Wi-Fi status indicator
Indicator name Color Indicator diagram Status
Wi-Fi status Solid Blue Wi-Fi ON

Preface Installation Settings Troubleshooting Specications
15
Settings
■Automatic settings and auto area learn
NOTE
Please check the dipswitch settings and detection area before executing.
•Dipswitch(→see“Dipswitch settings”)
•Detectionarea(→see“Detection area adjustment”)
Execute the following with the function switch on the OA-607 T front or with the setting app.
Auto conguration :ELITEPROhasanadvancelearningsystemthatcanrecognizethefollowingsystemcongurationandstatusandset
the related parameters properly and automatically for easy and quick settings.
After parameter settings, it automatically starts auto area learn to setup the area for each OA-607 T sensor heads to
completeautoconguration.
▪Testinput(Enable/Disable)
▪Testinputpolarity(High/Low)
▪Stalloutput(N.O./N.C.)
▪Sensorside(Approach/Swingside)
▪Hingeside(RightHand/Lefthand)
Auto area learn :OA-607Thasalearningsystemthatchecktheconditionofoorsurfacefordooropeningangles.
Function switch
Check in advance that the door is fully closed.
WARNINGWARNING
The door opens and closes automatically, so move away from it after starting.
Procedure
Conditions
for
operation
Operation
Result
Operation OA-607 T
operation indicator
OC-907C T
operation indicator
During initial
setup
Door fully
closed
Hold down the
function switch
(more than 2 s)
Autocongurationstart Blinking fast in Orange (0.1 s intervals)
=Autocongurationstart
Executeautoconguration
The door will open and close two or
three times automatically (*1).
Solid Green after normal completion
= Setup complete (stand-by)
Upon failure, after checking the
wiring,executeautoconguration
again.
If there is no problem with the wiring,
manual setting from a smart device is
also possible.
After installation is complete, leave
the power on for at least 30 min in
order to achieve stable operation
during use.
Upon failure:
Blinking Orange (0.5 s intervals)
(= Setting error)
When
adjusting
the angle
or changing
the settings
after auto
conguration
None in
particular
Brieypressthe
front function switch
(more than 0.3 s, no
more than 2 s) once
Start auto area learn only Blinking fast in Yellow (0.1 s intervals)
= Start auto area learn only
Execute auto area learn only Solid Green after normal completion
= Setup complete (stand-by)
Upon failure, before execution, check
that there are no obstacles to the
door and execute auto area learn
again.
Aswell,thepowermustnotgoo
immediately after auto area learn
completion (before auto-saving the
settings).
If the door is prevented from opening
by an obstacle or the power is cut just after
auto area learn is complete:
blinking alternately Yellow and Red
(0.1 s intervals)
= Incomplete
*1: Twice or three times in accordance with the door controller signal input setting (combination of stall signal and test signal, etc.) during auto
conguration.
NOTE
Beforeexecutingautoconguration,theconnectionbetweenthedoorcontrollerandtheOC-907CTsensorcontrollermustbecomplete.
Autocongurationmustbestartedwiththedoorfullyclosed.Otherwise,asettingerrorwillbegenerated.

Preface Installation Settings Troubleshooting Specications
16
■Dipswitch settings
For automatic settings, check the “ *** ” mark below for the dipswitch settings for the OC-907C T and OA-607 T.
●OC-907C T
Dipswitches
Factory default settings
SW Function Setting
NOTE
When the OC-907C T dipswitch 1 is OFF, the setting in the
“*** ” is enabled.
1 Priority setting Dipsw App
2 Wi-Fi OFF ON
3Knowing act *** Disable Enable
4Test output (activation) *** Disable Enable
5 to 8 Mandatory OFF ON
●OA-607 T
Dipswitches
Factory default settings
SW Function Setting
NOTE
When the OC-907C T dipswitch 1 is OFF, the setting in the
“*** ” is enabled.
1 Door width 36" 42"/48"
2 Not used OFF ON
3Sensitivity *** Normal Low
4Immunity *** OFF ON
5 to 8 Not used OFF ON
■Detailed settings
Detailed settings can be done from a smart device browser.
Set the OC-907C T dipswitch 1 (priority setting) to ON (setting app priority) and the dipswitch 2 (Wi-Fi setting) to ON (using Wi-Fi communication).
1 From the Wi-Fi setting screen, nd the Wi-Fi name (ELITEXXXXXXXX) and connect.
For iOS
Settings
Wi-Fi
Wi-Fi
NETWORKS
ELITE22222222
For Android
Internet
Connected / 4G+
Wi-Fi
ELITE22222222
NOTE
XXXXXXXX is the serial number of the OC-907C T.
The initial password is 12345678. The password must be changed at
initial connection.

Preface Installation Settings Troubleshooting Specications
17
2After connection, read the code below or connect to http://192.168.3.3/ via the web browser. This enables access to the
setting screen.
3The indicator status is as below.
Color Indicator diagram Status Meaning
OA-607 T operation indicator OC-907C T operation indicator
Green/Blue Blinking among colors
(0.5 s intervals) Sensor setting via Wi-Fi
NOTE
Thespecicationshereinaresubjecttochangewithout
prior notice due to improvements.
●Setting items
Item Value Dipswitch setting possible
OA-607 T dipswitch OC-907C T dipswitch
1st row sensitivity 0 (Low) / 1 / 2 / 3 / 4 (Middle) / 5 / 6 / 7 (High)
-
2nd row sensitivity 0 (Low) / 1 / 2 / 3 / 4 (Middle) / 5 / 6 / 7 (High)
3rd row sensitivity 0 (Low) / 1 / 2 / 3 / 4 (Middle) / 5 / 6 / 7 (High)
Immunity ON/OFF
Area setting Independently adjustable None
Sensor side Approach side / Swing side None
Hinge side Right hand / Left hand None
Snow mode Snow / Normal None
Presence timer 15 s / 30 s / 60 s / 120 s None
Operation indicator ON / OFF / Stand-by OFF None
Knowing act Enable / Disable
-
Test output (activation) Enable / Disable
Wi-Fiotimer 10min/30min/1h/3h/Innity None
Stall reray contact N.O. / N.C. None
Stall output hold time 0.5 s to 10 s (0.5 s step) None
Test input Enable / Disable None
Test input polarity High / Low None
External input Motor or BG input / Close switch input / None None
External input polarity High / Low None
■Reset
Reset switch
Function Operation Operation indicator
Password reset Hold down the reset switch for 2 s. When the operation is complete, the operation indicator
willturnoandreturntonormaloperation.
Reset settings to factory defaults Hold down the reset switch for 10 s. When the operation is complete, the operation indicator
will blink and return to before initial setup.

Preface Installation Settings Troubleshooting Specications
18
Detection area adjustment
The 1st row from the door (row in diagonal line) is called the threshold area and the 2nd and 3rd rows the swing area; the depth angle for each
can be set separately.
With the angle adjustment screws for the threshold and swing areas on the OA-607 T front, each area’s depth angle (angle seen from side) can
be independently adjusted between -5 and +5° (respectively shallow and deep).
NOTE
Recommended detection angle setting: +5°
CAUTIONCAUTION
Adjust the areas in accordance with ANSI 156.10.
■OA-607 T
Threshold area angle screw
Threshold area angle gauge
Swing area angle screw
Swing area angle gauge
Threshold area (1st row) Swing area (2nd,3rd row)
Side view
-5°+5° 0°
Charts show the values in the following angle adjustment settings ;
Threshold area (1st row) : +5°
Swing area (2nd,3rd row) : +5°
H
J K
L
N
B
C
D
E
F
G
I
M
O
A
Threshold area
(1st row)
Swing area
(2nd,3rd row)
[feet,inch (mm)]
A 6'7" (2000) 7'6" (2300) 8'2" (2500)
B 7" (186) 8" (214) 9"(233)
C 1'2" (360) 1'4" (414) 1'6"(450)
D 6" (152) 7" (175) 7"(190)
E 2'9" (840) 3'2" (966) 3'5"(1050)
F 5'5" (1650) 6'2" (1898) 6'9"(2063)
G 10" (252)
H 1'11" (593) 2'1" (645) 2'3"(678)
I 3" (89) 6" (141) 7"(174)
J 3' (911) 3'4" (1010) 3'6"(1076)
K 1'4" (407) 1'8" (506) 1'11"(572)
L 4'2" (1275) 4'8" (1428) 5'(1531)
M 2'6" (770) 3' (924) 3'4"(1027)
N 5'6" (1684) 6'3" (1900) 6'8"(2042)
O 3'10" (1180) 4'7" (1395) 5'1"(1538)
NOTE
When the sensor system performs an initial setup to its operating environment detection areas may vary slightly from this chart.

Preface Troubleshooting SpecicationsInstallation Settings
19
Walk test
1The approach side sensor detects entrance into the area while the door is fully closed, fully open, or opening/closing and
checks that the door is open or will open again.
2The swing side sensor detects entrance into the area while the door is fully closed or opening and checks that the door
stops or creeps.
Uponfailure,conrmthefollowing
•Detectionarea(→see“Detection area adjustment”)
•Doorcontrollerwiring(→see“Wiring”)
•Settings(dipswitchesorsmartdevice)(→see“Settings”)
•Backgroundlearningagain(→see“Automatic settings and auto area learn”)
Inform building owner/operator of the following items
1When turning the power ON, stay clear of detection area for a minimum of 10 s, and then conduct a walk test in detection
area to ensure proper operation.
2Always keep the detection window clean. If dirty, wipe the detection window with a damp cloth (do not use any cleaner or
solvent).
3Do not wash the sensor with water.
4Do not disassemble, rebuild or repair the sensor yourself, otherwise electric shock may occur.
5Contact your installer or the sales engineer if you want to change the settings.
6 Do not place an object that moves or emits light in the detection area. (ex. plant, illumination etc.)
7Do not paint the detection window.
Troubleshooting
■OA-607 T
Operation indicator
■OC-907C T
Operation indicator
●Operation indicators in the event of trouble
Indicator
diagram Symptom Procedures Possible cause Possible countermeasure
Orange
blinking
(0.5 s intervals)
Conguration
error
(System setting)
Power ON
Before initial setup
Executeautoconguration
Changed sensor composition after auto
conguration
Start auto
conguration
Executedautocongurationexceptthe
door fully close Executeautocongurationatfullycloseposition
After door fully
closed
Abnormal sensor position Verify proper install the sensor
Failure sensor position recognition Adjust door open/close speed or set by setting app

Preface Installation Troubleshooting SpecicationsSettings
20
Indicator
diagram Symptom Procedures Possible cause Possible countermeasure
Red/Yellow
blinking fast
(0.1 s intervals)
Area learning
error
Power ON Detection area has not been saved Execute auto area learn
Setting by app Change the sensor position
Auto area
learning
Improper wiring of activation output
(Yellow wires) Verify proper wiring
Improper wiring of door equipment
ON/OFF/HOLD switch Verify proper wiring of ON/OFF/HOLD switch
Not complete the door cycle within a
certain time Adjust door open/close speed
Improper stall relay contact of OC-907C T Verify proper setting
Abnormal door position recognition Verify proper wiring and replace sensor as needed
Green
blinking
(0.5 s intervals)
* Only
OC-907C T
Initializing Power ON Initializing Wait a while the door position is stable without
detection
Green
blinking
(0.5 s intervals)
* Only
OA-607 T
Signal
saturation Operation Signal saturation
Removehighlyreectingobjectsfromthedetection
area
Lower the sensitivity
Adjust threshold and swing area angles
Green
blinking fast
(0.1 s intervals)
Sensor failure Any
Sensor failure(self-monitoring) Contact your installer or service engineer
Sensitivity too low
Higher the sensitivity
Adjust threshold and swing area angles
Orange/Green
blinking
(0.5 s intervals)
Position error Operation
Door opened to opposite side
Back to fully close position and wait a while
Door opened over fully opened angle
Abnormal door position recognition Verify proper wiring and replace sensor as needed
2 times
0.7 s
Twice Red
blinking
(0.1 s interval)
(0.7s unlit)
Wiring error
Auto
conguration
(at start)
Executedautocongurationexceptthe
door fully close Executeautocongurationatfullycloseposition
Improper wiring of motor/BG input
(Red wires)
Verify proper wiring
Auto
conguration
(at end)
Improper wiring of activation output
(Yellow wires)
Improper wiring of stall output
(Green wires)
Improper wiring of test input
(Pink wires) For monitored door in ANSI 156.10
Not match setting between sensor and
door controller
Verify test output (activation) setting as needed
Verify self-diagnosis setting of the door controller
Door start opening while stall is output Adjust door open/close speed or set by setting app
Not complete the door cycle within a
certain time Adjust door open/close speed or set by setting app
Abnormal door position recognition Verify proper connection and replace sensor as
needed
No connection of motor/BG input (Red
wires) or close switch input (White wires)
Not abnormal, but the operation may stable if it is to
connect
Operation
Improper wiring of motor/BG input
(Red wires) Verify proper wiring
Improper of setting either motor/BG input
or close switch input Verify proper settings
2 times
0.7 s
Twice Orange
blinking
(0.1 s interval)
(0.7s unlit)
Communication
error Any Improper wiring loop harness or pass
through harness
Verify proper connection of loop harness or pass
through harness and replace sensor as needed
Other manuals for ELITE PRO
1
This manual suits for next models
4
Table of contents
Other Optex Door Opening System manuals