manuals.online logo
Brands
  1. Home
  2. •
  3. Brands
  4. •
  5. Optex
  6. •
  7. Safety Equipment
  8. •
  9. Optex GENIO ST User manual

Optex GENIO ST User manual

GENIO Basic Command
Thank you for choosing OPTEX GENIO to protect your facilities.
This guide will help you to command the basic features of the system.
Control Panel – GENIO ST/ GENIO Advance
Basic Features:
•Away Arm – Arm all the
devices. This is used
whenever you want all
detectors to detect burglars
to prevent burglars coming
from all direction.
•Home Arm – This is used
when users are in facility,
and want to arm particle
places of the facility.
•Disarm – This mode is
used to open all Armed or
Home Armed areas, and
allows human/things to
come in and go through the
facility.
To activate each mode, please
enter your 4-degits PIN code,
before pressing the button you
may want to activate.
QUICK MENU
You can access quick menu to TEMPORARY BYPASS
device, or turn on/off power switch.
This function can be enabled or disabled in Panel
Setting.
Steps: 1. Press then key to enter quick menu.
2. Select Bypass to temporary bypass
sensors or PSS Control to turn on/off
Power Switches.
*For Temporary Bypass, please refer the right
box.
*For PSS Control, please contact your OPTEX
representatives.
GENIO Essential Features
TEMPORARY BYPASS
The Bypass function allows you to deactivate a
device temporarily for one arming/disarming period.
When a bypassed sensor or accessory is triggered,
the panel will ignore the signal from the sensor or
accessory and will not raise alarm.
To activate bypass, access the QUICK MENU
and refer the steps below:
Steps:
1. Select Bypass, press OK to confirm. The
screen will display your device list:
2. Select the sensor you want to bypass and
press OK. The sensor will be marked with a
+to indicate it is bypassed. You can also
remove the bypass condition by selecting
the sensor and press OK again.
Steps:
1. Enter to the USER MENU.
2. Select Alarm memory or Fault Display, press ‘OK’
to enter the menu.
3. Press ‘UP & DOWN Button’ to display the menu.
The screen will display as:
4. Press down key to scroll through the fault events.
When all fault events are
displayed, the screen will show:
5. You can press Up key to scroll back through the fault
events or press OK key to exit fault display.
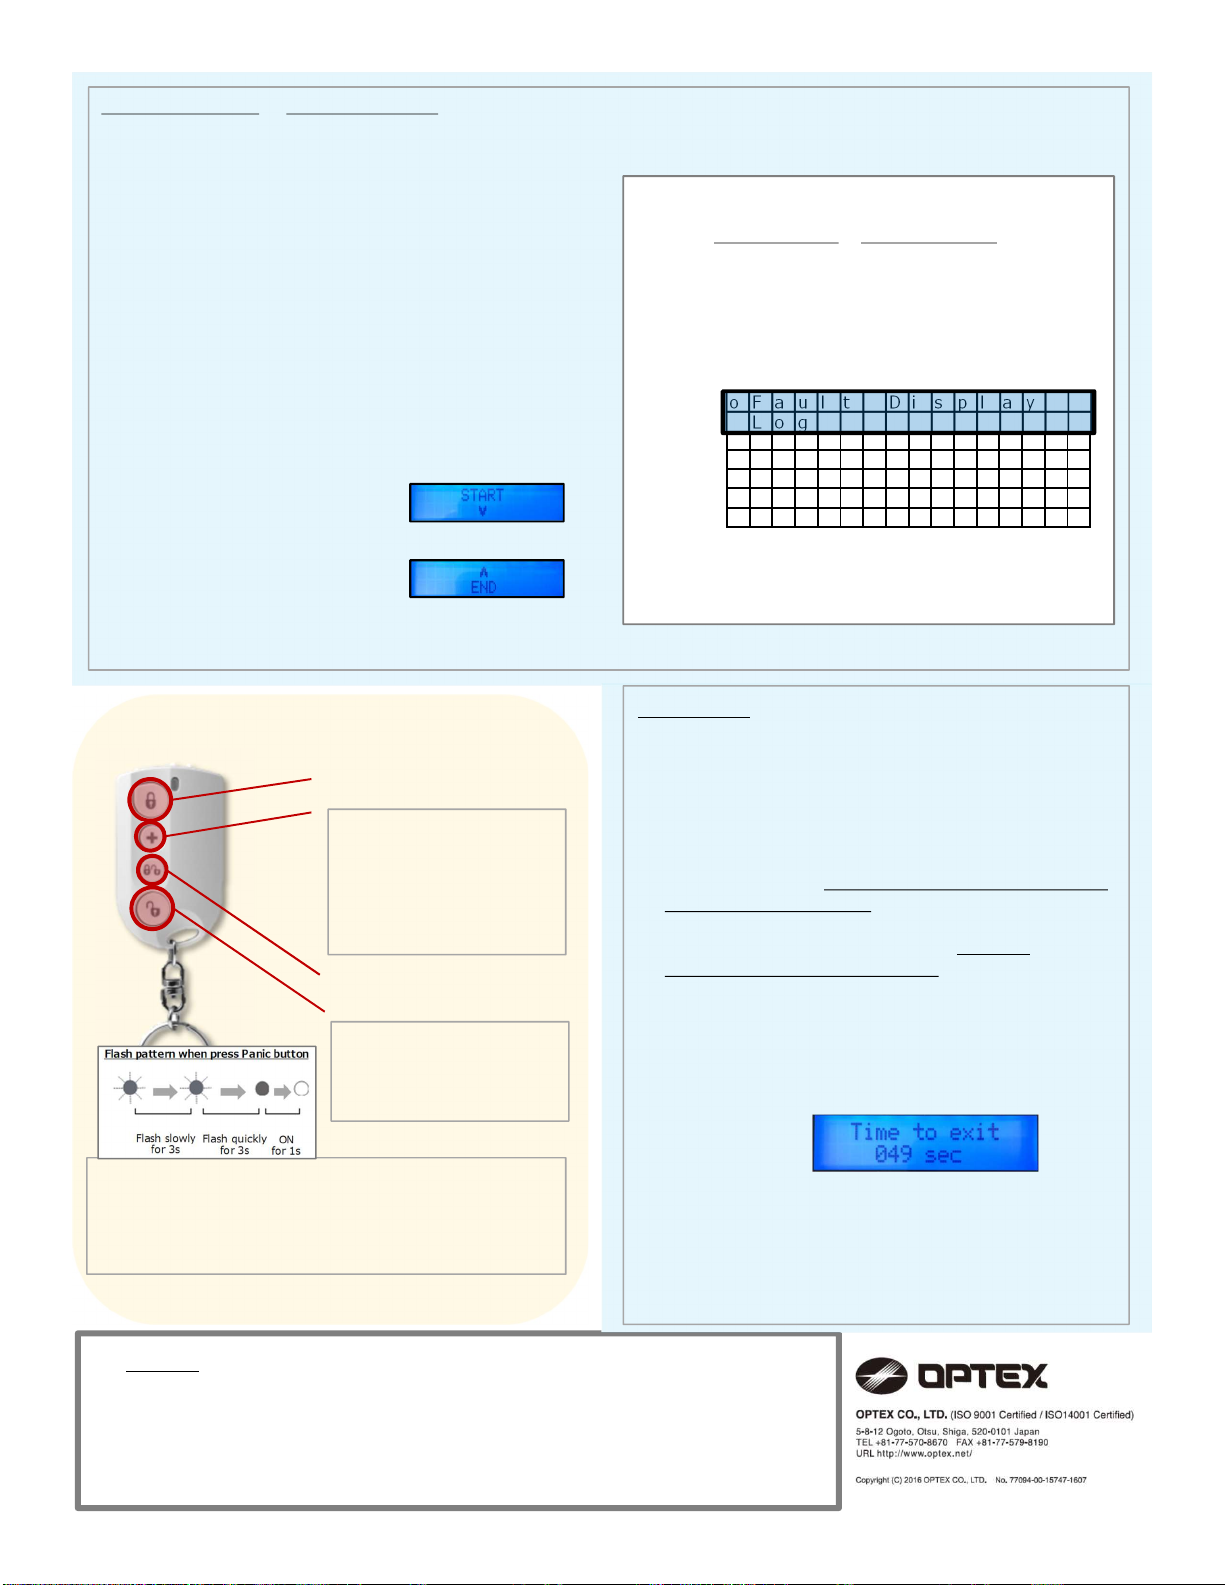
Away Arm Button
Disarm Button
Partial Arm Button
Panic Button
Press and hold for 3
seconds will send a panic
signal, regardless it is
Armed or Disarmed.
*If it is less than 3
seconds, panic signal will
not be sent.
Press this button will
disarm the system. If the
alarm is sounding, press
this button will stop the
alarm.
The LED will flash quickly when the Full Arm, Partial Arm
and Disarm buttons are pressed.
When the Panic button is pressed, at first the LED will
flash slowly for 3 seconds, then flashed quickly for 3
seconds and turn on for 1 second as left.
Remote Controller
MEMO:
FORCE ARM
When you arm the system, if any fault event exists in
the system, the arming action will be prohibited.
Display will show ‘Fault Event’ and you can choose
the action as below.
you can either rectify all of the problems and clear
the Fault Display. The Control Panel will be able
to be armed normally.
If you want to arm the system *without
correcting the fault situation, follow the steps
below to Forced Arm the Control Panel.
Steps:
1. When fault events are displayed, press again
arm key.
2. The Control Panel will begin Exit Delay Timer
countdown The screen will display as:
3. When the timer expires, the Control Panel will
enter selected arm mode accordingly.
*FORCE ARMED ZONE BYPASS
When fault event exists in accessory device within force armed, the faulty device
will be bypassed in the arm mode and will not activate alarm when triggered.
The bypass condition lasts until system is disarmed.
ALARM MEMORY & FAULT DISPLAY
Alarm Memory will show the previous alarm history.
Fault Display option is for you to view the fault events such as:
Control Panel Low Battery
Control Panel Battery Missing
AC Power Fail
Sensor Out-of-order
Sensor Low Battery
Device and Panel Tamper
Interference Detection
GSM-Related Failure
Network and PSTN failure
How to Display the ‘USER MENU’
*To view FAULT DISPLAY & ALARM MEMORY, you are
required to enter to USER MENU first.
1. To access, please confirm the system are in Disarm
mode, and enter a valid 4-digits user code. (default
PIN code: 1234)
2. Display will be shown as in order below;
You will find Fault Display, Alarm Memory and other
menu from this screen.
o F a u l t D i s p l a y
L o g
A l a r m M e m o r y
B y p a s s
A p p l y S c e n e
A w a y A r m
H o m e A r m

This manual suits for next models

1

Popular Safety Equipment manuals by other brands

Potter RA-6075 Installation

Potter

Potter RA-6075 Installation

Whelen Engineering Company Traffic Advisor TANF85 installation guide

Whelen Engineering Company

Whelen Engineering Company Traffic Advisor TANF85 installation guide

Mustang Survival MD3157 owner's manual

Mustang Survival

Mustang Survival MD3157 owner's manual

IKAR HAS 9 Log book and instructions for use

IKAR

IKAR HAS 9 Log book and instructions for use

Spanset PowerForce Original operating instructions

Spanset

Spanset PowerForce Original operating instructions

PDS WorkSafe AZ 700 Series instruction manual

PDS

PDS WorkSafe AZ 700 Series instruction manual

Datalogic SG4 FIELDBUS Series instruction manual

Datalogic

Datalogic SG4 FIELDBUS Series instruction manual

CMC Rescue RANGER HARNESS instructions

CMC Rescue

CMC Rescue RANGER HARNESS instructions

Petzl I'D S Series quick start guide

Petzl

Petzl I'D S Series quick start guide

Roberts Gorden Vantage HE-40 Installation, operation & service manual

Roberts Gorden

Roberts Gorden Vantage HE-40 Installation, operation & service manual

MSA SSR 30/100 Instructions for use

MSA

MSA SSR 30/100 Instructions for use

Kapriol 32560 Instruction and Information Manual

Kapriol

Kapriol 32560 Instruction and Information Manual

Viking FIRECYCLE III-OH quick start guide

Viking

Viking FIRECYCLE III-OH quick start guide

IRUDEK CTA Instructions for use

IRUDEK

IRUDEK CTA Instructions for use

Climbing Technology TORSE instruction manual

Climbing Technology

Climbing Technology TORSE instruction manual

ERGODYNE 3198 manual

ERGODYNE

ERGODYNE 3198 manual

Silverline 868887 manual

Silverline

Silverline 868887 manual

VSPL viraj SECURE FIRST SF-FBRL-2301 User instructions

VSPL

VSPL viraj SECURE FIRST SF-FBRL-2301 User instructions

manuals.online logo
manuals.online logoBrands
  • About & Mission
  • Contact us
  • Privacy Policy
  • Terms and Conditions

Copyright 2025 Manuals.Online. All Rights Reserved.