manuals.online logo
Brands
  1. Home
  2. •
  3. Brands
  4. •
  5. Optimus
  6. •
  7. Fan
  8. •
  9. Optimus F-7508 User manual

Optimus F-7508 User manual

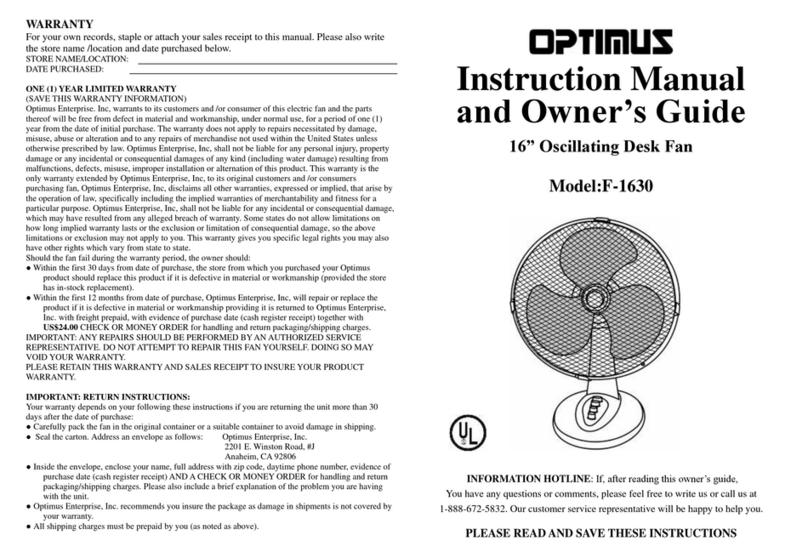
Instruction Manual
and Owner’s Guide
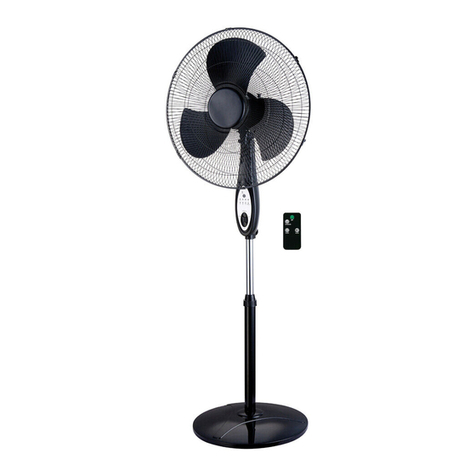
Digital Oscillating Stand Fan
Model: F-7508
INFORMATION HOTLINE: If, after reading this owner’s guide,
You have any questions or comments, please feel free to write us or call us at
1-888-672-5832. Our customer service representative will be happy to help you.
PLEASE READAND SAVE THESE INSTRUCTIONS
IMPORTANT INSTRUCTIONS:
PLEASE READAND SAVE THESE IMPORTANT SAFEGUARDS
Thank you for choosing an Optimus fan. To ensure the best performance from your Fan,
please read and save the following instructions.
WHEN USING ELECTRICALAPPLIANCES, BASIC PRECAUTIONS SHOULD
ALWAYS BE FOLLOWED TO REDUCE THE RISK OF FIRE, ELECTRIC SHOCK
AND INJURY TO PERSONS, INCLUDING THE FOLLOWING:
•Read all instructions before using this product.
•Use this fan only as described in this manual. Any other use not recommended by the
manufacturer may cause fire, electrical shock or injury to person, and may void the warranty.
•Always unplug the unit before assembling, disassembling or cleaning.
•Always unplug unit when not in use, when moving from one location to another and
before cleaning.
•To disconnect, grip the plug and pull it from the wall outlet. Never yank the cord.
•The use of attachments not recommended or sold by the appliance manufacturer may cause
hazards.
•Avoid contact with moving parts.
•DO NOT operate this fan with a damaged cord or plug, after a malfunction, or is dropped or
damaged in any manner. Return the unit to Optimus Enterprise, Inc. for examination, electrical
or mechanical adjustment, or repair.
•Do not operate this fan in the presence of explosive and/or flammable fumes.
•Do not place the fan or any parts near an open flame, cooking or other heating appliance.
•Extreme caution is necessary when fan is used by or near children or invalids and whenever the
fan is left operating and unattended.
•This product is intended for household use only and not for commercial or industrial use. Do not
use outdoors.
•Always use on a dry level surface.
•Do not operate if the fan housing is removed or damaged.
•A loose fit between theAC outlet and plug may cause over heating of the plug. Have a qualified
electrician replace the outlet.
•DO NOT run cord under carpeting. Do not cover cord with throw rugs, runners or like. Arrange
cord away from traffic area and where it could be tripped over.
•This fan is equipped with a polarized alternating current line plug (a plug having one blade
wider than the other). This plug fits into the power outlet only one way. This is a safety feature.
If you are unable to insert the plug fully into the outlet, try reversing the plug. If the plug should
still fail to fit, contact an electrician to replace the obsolete outlet. Do not defeat the safety
purpose of polarized plug.
•NEVER connect the fan to any power sources other than a 120 volt alternating current polarized
outlet.
•WARNING: To reduce the risk of electric shock. DO NOT use this fan with any solid-state
speed control and DO NOT insert finger or any object into grill.
CLEANING/MAINTENANCE INSTRUCTIONS:
During Season Care:
•Before cleaning, be sure to turn off and unplug the unit.
•Keep the fan clean. Carefully wipe the unit with a soft, damp cloth. Please be very cautious near
the motor.
•DO NOT immerse the fan in water and never allow water to drip into the Motor Housing.
•Never use gasoline, benzene or thinner. This will damage the surface of the unit.
•After cleaning, be sure to completely dry the unit with a cloth or towel.
After Season Care:
•Your fan can be stored in the off-season.
•Before putting the fan in storage, clean it thoroughly, cover it with a vinyl bag, and store it in a
cool and dry place. We recommend using the original (or appropriately sized) box.
User Servicing Instructions:
This plug is a safety feature. It contains a safety device (fuse) that should not be removed. Discard
the product if the attachment plug is damaged. To reduce the risk of fire, electric shock and personal
injury, DO NOT remove, replace, repair or tamper with the originally supplied plug. If the fan does
not function properly, it may be due to the safety device incorporated in this plug. If the fuse fails, it
is generally due to a short circuit or circuit overload. Replace the fuse as per the instructions below. If
the replacement fuse fails, immediately unplug the unit and contact our technical support department
for assistance.
Fuse Replacement:
1. To replace the fuse, first turn the unit off and unplug it from the wall. Locate the door on top of the
plug. Figure 1.
2. Slide the door on top of the plug towards the blades. Figure 2.
3. Carefully remove the fuse from the clips holding it on the top and bottom. Figure 3. 4. Gently push
the fuse back into the pins that will hold it in place.
Note: If the fuse is not seated properly, the unit will not function.
5. Slide the door back over the fuse box in the plug.
FAN ASSEMBLY:
1. Remove the L-shaped screw and metal ring from the telescopic pole by turning the L-shaped screw
counter clockwise. (Figure 4)
2. Insert the telescopic pole into the top of the base. Install the L-shaped screw and metal ring back
into the threaded hole at the bottom
of the telescopic pole to secure the pole to the base. (Figure 4)
3. Turn the base back upright.
4. Grasp the telescopic pole firmly and loosen the height adjustment knob. (Figure 5)
5. Raise the inner pole to desired height and tighten the height adjustment knob. (Figure 5)
6. Remove the set screw near the bottom of the fan assembly, and slide the fan assembly onto the
inner pole until it rests on the top of the pole, and then tighten back the set screw. (Figure 6)
7. Fix the remote control bracket onto the arm of the fan assembly. (Figure 7)
OPERATING
INSTRUCTIONS:
FAN OPERATION:
•Plug cord into any standard120 volt
AC outlet.
•The fan can be controlled by using the
remote control or the buttons on the
control panel on the fan body. (Figure
8)
FUNCTIONS OF THE KEYS AND SYMBOLS:
ON/OFF Button - Press the "ON/OFF" button once, the fan will start at lowspeed. Press again to
switch the fan off.
Speed Button - Select the speed by pressing the "Speed" button which will adjust the fan speed to
Low, Medium and High. The LED screen on the control panel will indicate the fan speed selected.
Timer Button - This fan is equipped with an automatic shut off feature. To select desired length of
operation, press the "Timer" button a number of times until the LED indicates the desired operation
time (from 1 hour to 7 hours, in 1-hour increments).
Mode Button - Press "Mode" button to choose the wind type, meanwhile the corresponding light
will be lit.
"Normal": Wind blow based on Low/Medium/High speed.
"Natural": Imitates the natural fluctuations in speed of wind.
"Sleeping": If the current speed setting is at high speed, in the _rst half an hour, the fan runs at high
speed, and then it changes to medium speed in the second half an hour. After that, it changes to low
speed until the end of preset time. If the current speed setting is at medium speed, in the _rst half an
hour, the fan runs at medium speed, and then it changes to low speed until the end of preset time. If
the current speed setting is at low speed, the fan will keep running at low speed until the end of preset
time.
Osc Button - To activate the Left/Right oscillation feature of the fan assembly, press the "Osc"
button once. Press again to cancel.
Louver Button - Press this button, the front grill of this fan will rotate. Press again to cancel.
REMOTE CONTROL (Figure 9)
The remote control must be directed at the infrared port on the fan body. If the remote control does
not operate well, please check the inside batteries _rst, and change with new batteries if needed. Your
remote control uses two (2) “AAA” batteries (not included) for operation.
Note: Change the batteries with new and same types if the remote control
does not operate well, otherwise your remote control may not operate properly. Remove the batteries
out of the remote control if you won't use the remote control for a long time. Remaining batteries
may damage your remote control.
Note: Do not mix old and new batteries. Do not mix alkaline, standard (carbon-zinc), or
rechargeable (nickel-cadmium) batteries. Battery Disposal - Please dispose of the used battery
per municipal or provincial law.
CAREAND MAINTENANCE:
•Always unplug the appliance before cleaning.
•Do not immerse the fan in water or other liquids and never allow water to drip onto the
motor housing.
•Use only a soft, damp cloth to gently wipe the outer surfaces of the fan.
•To clean the interior:
oFirst, turn the cap counter-clockwise to remove the cap from the fan. (Figure 10)
oLightly push the bottom of the front guard and pull out the guard from the top.
(Figure 11)
oWipe the blades and guard with a soft damp cloth and mild detergent.
oWipe all parts dry with a dry cloth.
oAttach the front guard back to the fan head and tighten with the cap by turning the
cap clockwise.
IMPORTANT: The front guard MUST be re-installed and tightened before operating the fan.
•To clean between grills, we recommend using a pipe cleaner, flexible dust wand, vacuum
cleaner or compressed air to gently remove dust.
•Do not use gasoline, paint thinner or any other corrosive cleaning solutions.
•If the fan will not be in use for an extended period of time, you may leave the fan
assembled. Cover to protect from dust. Store in a cool, dry place.
SERVICE INSTRUCTIONS:
•Do not attempt to repair or adjust any electrical or mechanical functions on this unit. Doing so
will void the warranty.
•If you have any questions regarding this unit’s operation or believe any repair is necessary,
please call 1-888-672-5832 to speak with a Customer Service Representative. Or e-mail us at
[email protected]. You will be able to get a faster response through email.
•If you need to exchange the unit, please return it, in its original carton with a sales receipt
enclosed, to the store where you purchased it. If you are returning the unit more than 30 days
after the date of purchase, please see the enclosed warranty.
•If you have any other questions or comments, feel free to write us:
Optimus Enterprise, Inc.
Customer Service Department
2201 E. Winston Road, Unit #J
Anaheim, CA 92806
Tel: (714) 956-1300
E-mail: [email protected]
WARRANTY
For your own records, staple or attach your sales receipt to this manual. Please also
write the store name /location and date purchased below.
STORE NAME/LOCATION:
DATE PURCHASED:
ONE (1) YEAR LIMITED WARRANTY
(SAVE THIS WARRANTY INFORMATION)
Optimus Enterprise. Inc, warrants to its customers and /or consumer of this electric fan and
the parts thereof will be free from defect in material and workmanship, under normal use,
for a period of ONE (1) year from the date of initial purchase. The warranty does not apply
to repairs necessitated by damage, misuse, abuse or alteration and to any repairs of
merchandise not used within the United States unless otherwise prescribed by law.
Optimus Enterprise, Inc, shall not be liable for any personal injury, property damage or any
incidental or consequential damages of any kind (including water damage) resulting from
malfunctions, defects, misuse, improper installation or alternation of this product. This
warranty is the only warranty extended by Optimus Enterprise, Inc, to its original
customers and /or consumers purchasing fan, Optimus Enterprise, Inc, disclaims all other
warranties, expressed or implied, that arise by the operation of law, specifically including
the implied warranties of merchantability and fitness for a particular purpose. Optimus
Enterprise, Inc, shall not be liable for any incidental or consequential damage, which may
have resulted from any alleged breach of warranty. Some states do not allow limitations on
how long implied warranty lasts or the exclusion or limitation of consequential damage, so
the above limitations or exclusion may not apply to you. This warranty gives you specific
legal rights you may also have other rights which vary from state to state.
Should the fan fail during the warranty period, the owner should:
•Within the first 30 days from date of purchase, the store from which you purchased
your Optimus product should replace this product if it is defective in material or
workmanship (provided the store has in-stock replacement).
•Within the first 12 months from date of purchase, Optimus Enterprise, Inc, will repair
or replace the product if it is defective in material or workmanship providing it is
returned to Optimus Enterprise, Inc. with freight prepaid, with evidence of purchase
date (cash register receipt) together with US$45.00 CHECK OR MONEY ORDER for
handling and return packaging/shipping charges.
IMPORTANT: ANY REPAIRS SHOULD BE PERFORMED BYAN AUTHORIZED
SERVICE REPRESENTATIVE. DO NOTATTEMPT TO REPAIR THIS FAN
YOURSELF. DOING SO MAY VOID YOUR WARRANTY.
PLEASE RETAIN THIS WARRANTYAND SALES RECEIPT TO INSURE YOUR
PRODUCT WARRANTY.
IMPORTANT: RETURN INSTRUCTIONS:
Your warranty depends on your following these instructions if you are returning the unit
more than 30 days after the date of purchase:
● Carefully pack the fan in the original container or a suitable container to avoid damage in
shipping.
●
Seal the carton. Address an envelope as follows:
Optimus Enterprise, Inc.
2201 E. Winston Road, Unit #J
Anaheim, CA92806
● Inside the envelope, enclose your name, full address with zip code, daytime phone
number, evidence of purchase date (cash register receipt) ANDACHECK OR
MONEY ORDER for handling and return packaging/shipping charges. Please also
include a brief explanation of the problem you are having with the unit.
● Optimus Enterprise, Inc. recommends you insure the package as damage in shipments is
not covered by your warranty.
● All shipping charges must be prepaid by you (as noted as above).

Other Optimus Fan manuals

Optimus F-5280S User manual

Optimus

Optimus F-5280S User manual

Optimus F-6121 User manual

Optimus

Optimus F-6121 User manual

Optimus F-1888 Configuration guide

Optimus

Optimus F-1888 Configuration guide

Optimus F-4122 User manual

Optimus

Optimus F-4122 User manual

Optimus F-7585WH User manual

Optimus

Optimus F-7585WH User manual

Optimus F-6212A User manual

Optimus

Optimus F-6212A User manual

Optimus F-7345WH User manual

Optimus

Optimus F-7345WH User manual

Optimus F-4182 User manual

Optimus

Optimus F-4182 User manual

Optimus F-0600C User manual

Optimus

Optimus F-0600C User manual

Optimus F-4205 User manual

Optimus

Optimus F-4205 User manual

Optimus F-7348WH-F User manual

Optimus

Optimus F-7348WH-F User manual

Optimus F-6218 User manual

Optimus

Optimus F-6218 User manual

Optimus F-1672WH User manual

Optimus

Optimus F-1672WH User manual

Optimus F-8449-F User manual

Optimus

Optimus F-8449-F User manual

Optimus F-1672BK-F User manual

Optimus

Optimus F-1672BK-F User manual

Optimus F-1030 User manual

Optimus

Optimus F-1030 User manual

Optimus F-1230S User manual

Optimus

Optimus F-1230S User manual

Optimus F-7200 User manual

Optimus

Optimus F-7200 User manual

Optimus F-1630 User manual

Optimus

Optimus F-1630 User manual

Optimus F-4184 User manual

Optimus

Optimus F-4184 User manual

Optimus F-0610C User manual

Optimus

Optimus F-0610C User manual

Optimus F-4202 User manual

Optimus

Optimus F-4202 User manual

Popular Fan manuals by other brands

Ebmpapst G2E108-AA01-01 operating instructions

Ebmpapst

Ebmpapst G2E108-AA01-01 operating instructions

Ebmpapst M3G112-GA43-52 operating instructions

Ebmpapst

Ebmpapst M3G112-GA43-52 operating instructions

Comfort Zone CZST161BTE owner's manual

Comfort Zone

Comfort Zone CZST161BTE owner's manual

Ebmpapst A2D200-AA04-29 operating instructions

Ebmpapst

Ebmpapst A2D200-AA04-29 operating instructions

HAMPTON BAY Miramar owner's manual

HAMPTON BAY

HAMPTON BAY Miramar owner's manual

Super Vac F124E user guide

Super Vac

Super Vac F124E user guide

System air AJR Series Installation and operating instructions

System air

System air AJR Series Installation and operating instructions

Ebmpapst 3950 M operating manual

Ebmpapst

Ebmpapst 3950 M operating manual

Ebmpapst D4E160-FH12-05 operating instructions

Ebmpapst

Ebmpapst D4E160-FH12-05 operating instructions

Ebmpapst A2E250-AN49-06 operating instructions

Ebmpapst

Ebmpapst A2E250-AN49-06 operating instructions

Comfort Zone CZPF402AS2-EC owner's manual

Comfort Zone

Comfort Zone CZPF402AS2-EC owner's manual

Ebmpapst K3G310-RR18-R8 operating instructions

Ebmpapst

Ebmpapst K3G310-RR18-R8 operating instructions

HAMPTON BAY Carrolton owner's manual

HAMPTON BAY

HAMPTON BAY Carrolton owner's manual

HOMEDEPOT B552QI-BN Use and care guide

HOMEDEPOT

HOMEDEPOT B552QI-BN Use and care guide

HOME NETWERKS SmartVent 7146-80-MS manual

HOME NETWERKS

HOME NETWERKS SmartVent 7146-80-MS manual

Ebmpapst R3G220-AE70-01 operating instructions

Ebmpapst

Ebmpapst R3G220-AE70-01 operating instructions

HAMPTON BAY PALM BEACH III 48-PBH Use and care guide

HAMPTON BAY

HAMPTON BAY PALM BEACH III 48-PBH Use and care guide

Ebmpapst A4S250-AA02-01 operating instructions

Ebmpapst

Ebmpapst A4S250-AA02-01 operating instructions

manuals.online logo
manuals.online logoBrands
  • About & Mission
  • Contact us
  • Privacy Policy
  • Terms and Conditions

Copyright 2025 Manuals.Online. All Rights Reserved.