Optus Optus CG3000-1STAUS User manual

Cable Modem
Installation Guide.
IMPORTANT: Please follow these instructions carefully and do not attempt the procedures outlined
in this guide during thunderstorm activity in your area or in the event of a mains power outage.
1379876 0411 164391.indd 1 13/04/11 9:38 AM

2
DISCONNECT YOUR EXISTING MODEM.
1. Identify the power point(s) that supplies power to the computer, plus any
connected hardware such as a printer or router and your cable modem.
At this time also identify the leads connecting your modem to the computer
(ethernet cable) and the modem to the wall plate (coaxial cable).
2. Switch the modem’s power off at the power point and remove cord from the wall
socket. Shutdown your computer and connected hardware, switch the power off
at all the power points and remove cords from the wall socket.
3. Position the modem so you can see the rear view of your cable modem.
You should be able to see the cables going in to your modem (illustrated
and labelled in example right).
4. Remove the power cable and the USB/ethernet cable and telephone cable
(if applicable) from the rear panel of your cable modem.
5. Use the provided spanner to remove the coaxial cable from the rear panel of
the cable modem.
6. Whilst holding the cable modem with one hand, rotate the spanner
anti-clockwise to loosen the connection. Once the connector is loose, it can be
unscrewed and removed by hand.
7. As all cables have now been removed, the cable modem and its power supply
can now be packed away. You will no longer need this and do not need to
return to Optus.
Rear view of ports on your
existing cable modem.
Note: Depending on the model
of your modem, ports may differ
slightly than pictured.
Coaxial Cable
Telephone Cable
Power Cable
USB port
Ethernet Cable
1379876 0411 164391.indd 2 13/04/11 9:38 AM

5. Use the provided spanner to remove the coaxial cable from the rear panel of
the cable modem.
6. Whilst holding the cable modem with one hand, rotate the spanner
anti-clockwise to loosen the connection. Once the connector is loose, it can be
unscrewed and removed by hand.
7. As all cables have now been removed, the cable modem and its power supply
can now be packed away. You will no longer need this and do not need to
return to Optus.
Example of coaxial cable being
removed from modem and
ports with cables removed.
3
1379876 0411 164391.indd 3 13/04/11 9:38 AM

4
CONNECT YOUR NEW MODEM.
1. The diagram (as shown on the right) will assist you to identify the key areas
of your new cable modem needed to complete your installation and the steps
overleaf will guide you through this.
2. The first cable to attach to your new modem is the coaxial cable
(refer to diagram right).
3. Whilst holding the cable modem with one hand, connect the coaxial cable to
the relevant port using your fingers and turn the nut clockwise until it cannot
be rotated any more by hand (ensuring it is not cross threaded) then, using
the supplied spanner, tension the nut a quarter turn to ensure it will not
come loose.
Rear view of your new modem.
Note: Depending on the model
of your modem, ports may differ
slightly than pictured.
Coaxial Cable
Telephone Cable
Power Cable
Ethernet Cable
Note: If the coaxial cable is too loose there is a chance that the modem will not work.
1379876 0411 164391.indd 4 13/04/11 9:39 AM

2. The first cable to attach to your new modem is the coaxial cable
(refer to diagram right).
3. Whilst holding the cable modem with one hand, connect the coaxial cable to
the relevant port using your fingers and turn the nut clockwise until it cannot
be rotated any more by hand (ensuring it is not cross threaded) then, using
the supplied spanner, tension the nut a quarter turn to ensure it will not
come loose.
5
Coaxial cable being attached to modem.
Note: If the coaxial cable is too loose there is a chance that the modem will not work.
1379876 0411 164391.indd 5 13/04/11 9:39 AM

6
4. Plug your new cable modem power adapter into a power point. Connect the
adaptor power plug into the cable modem and turn the power point on.
The cable modem will commence the synchronisation sequence which may
take up to 30 minutes to complete.
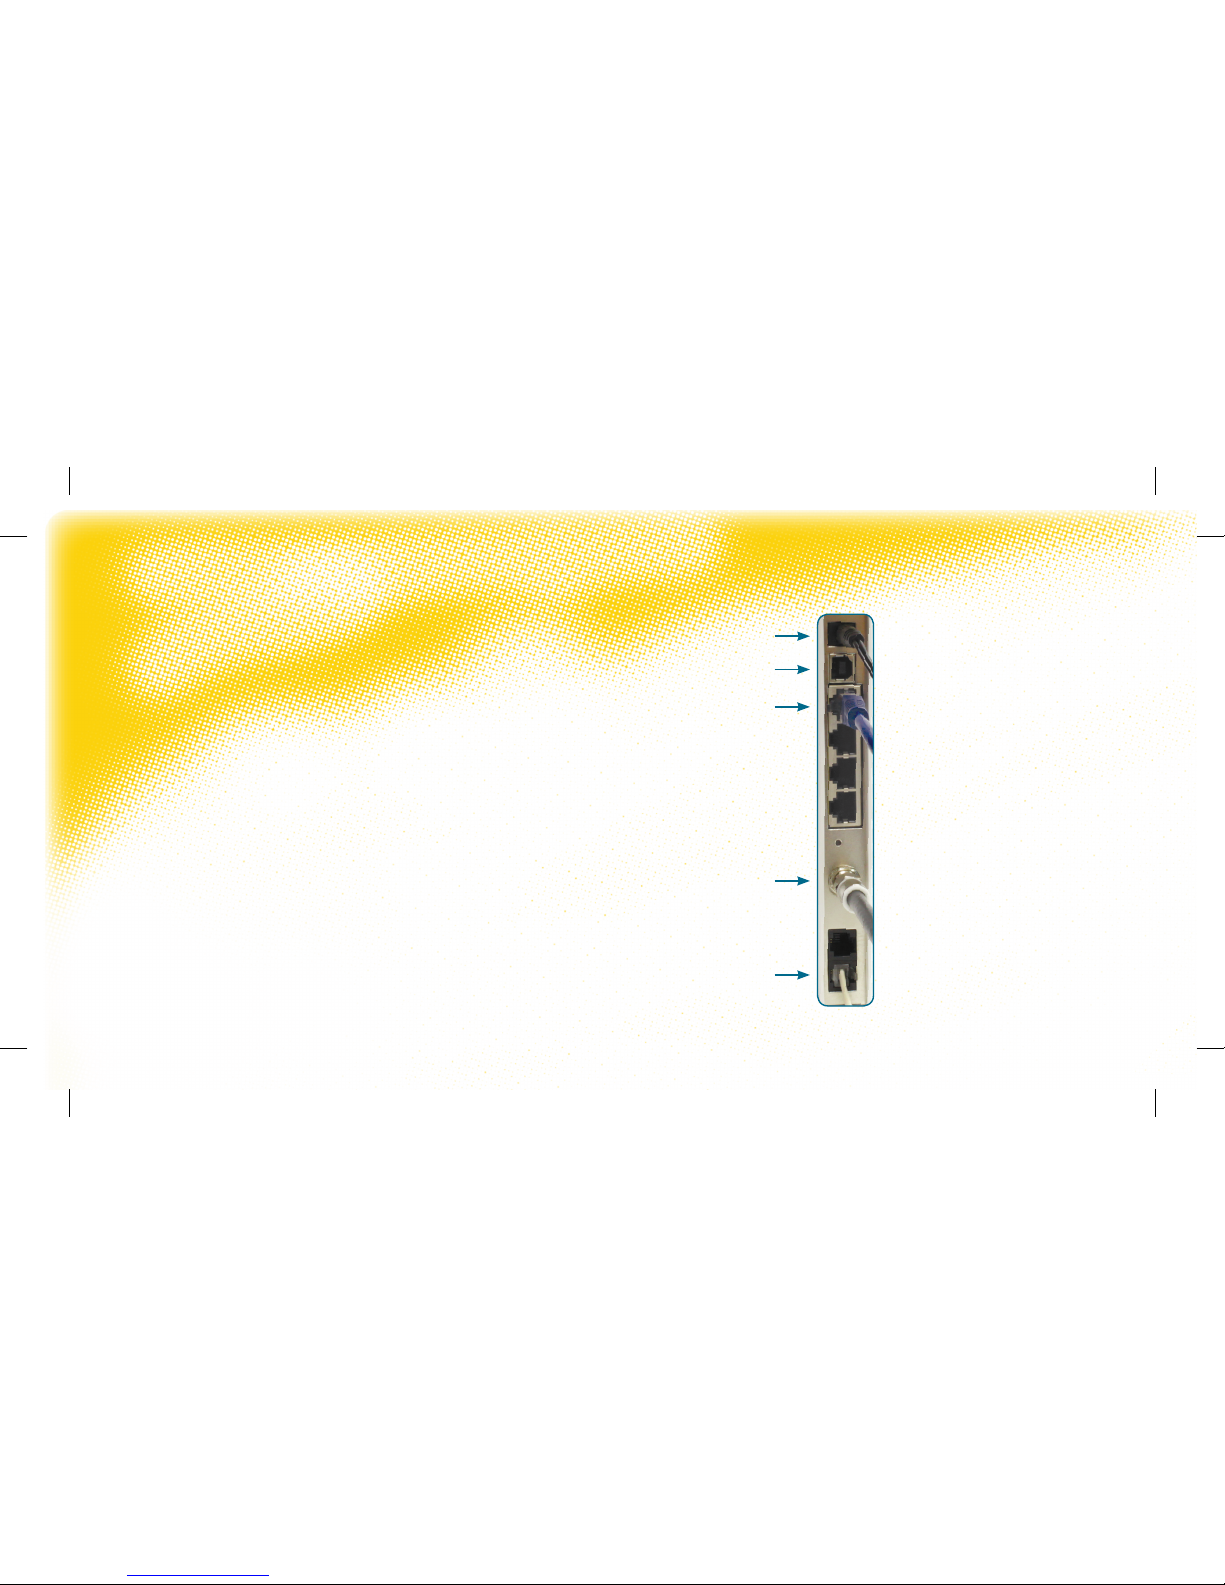
5. Finally, connect the Ethernet cable and telephone cable (if applicable) into
the rear panel of your new cable modem. (Refer to diagram page 4). You can
keep the extra Ethernet & USB cable that comes with your new modem as a
spare or to connect other devices to your computer in future.
6. Plug the computer and all connected hardware back into the corresponding
power point(s), turn the power on at the power point and then turn the
computer on.
7. To activate your new modem, launch your web browser and go to
newmodem.optuszoo.com.au You will be asked to login with your Optusnet
username and password, Please follow the steps online to activate your
new modem.
8. If unsuccessful, reboot the cable modem by removing the power plug from the rear
panel of the cable modem, wait 10 seconds, and then plug it in and try again. Allow the
modem to complete the synchronisation sequence again.
9. If at any time you receive an error message, or if your modem has failed to come online
after 2 attempts, you will need to contact Cable Technical Support on 1300 300 693 to
activate your new modem.
Note: IMPORTANT FOR OPTUS PREMIUM SPEED PACK CUSTOMERS.
If you’ve purchased an Optus Premium Speed Pack with your broadband service and use Windows XP, please go
to http://help.optuszoo.com.au/help/cable/connected/windows for instructions on downloading and using our
Premium Speed Pack Optimiser tool. This will improve your computer’s performance for use with the Premium
Speed Pack. Computers with the Macintosh operating system or other versions of Windows will not need to do this.
1379876 0411 164391.indd 6 13/04/11 9:39 AM

8. If unsuccessful, reboot the cable modem by removing the power plug from the rear
panel of the cable modem, wait 10 seconds, and then plug it in and try again. Allow the
modem to complete the synchronisation sequence again.
9. If at any time you receive an error message, or if your modem has failed to come online
after 2 attempts, you will need to contact Cable Technical Support on 1300 300 693 to
activate your new modem.
7
Note: IMPORTANT FOR OPTUS PREMIUM SPEED PACK CUSTOMERS.
If you’ve purchased an Optus Premium Speed Pack with your broadband service and use Windows XP, please go
to http://help.optuszoo.com.au/help/cable/connected/windows for instructions on downloading and using our
Premium Speed Pack Optimiser tool. This will improve your computer’s performance for use with the Premium
Speed Pack. Computers with the Macintosh operating system or other versions of Windows will not need to do this.
1379876 0411 164391.indd 7 13/04/11 9:39 AM

1379876 04/11
For any connection problems or further
assistance, please contact:
Cable Technical Support 1300 300 693
Note: Please refer to the included WiFi Cable Modem user guide
for details on configuring WiFi connections.
1379876 0411 164391.indd 8 13/04/11 9:40 AM
Other manuals for Optus CG3000-1STAUS
1
Table of contents
Other Optus Modem manuals