ORBILOC DOG DUAL User manual
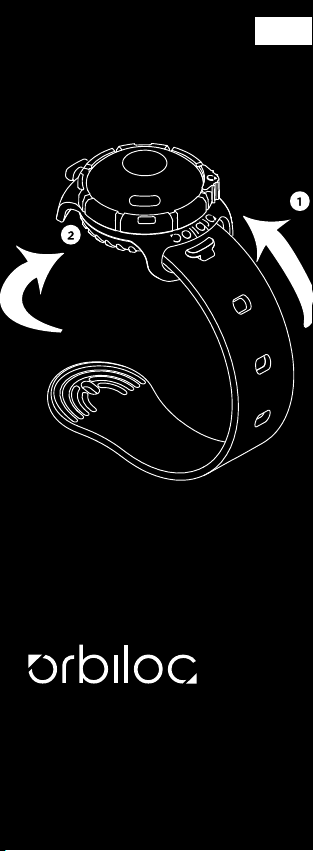
TIGHTEN, ATTACH,
GO
Register for your 3-year warranty
at orbiloc.com/warranty/
DOG DUAL
USER MANUAL
THE SAFETY LIGHT
MADE IN DENMARK
EN

INTRODUCTION .................04
BASIC PRINCIPLES ...............06
WARRANTY .....................07
GETTING STARTED. . . . . . . . . . . . . . . 08
ON / OFF / STEADY / FLASH ......09
ORBILOC ACCESSORIES ..........10
ORBILOC MAINTENANCE.........10
ORBILOC SERVICE KIT............11
CHANGE BATTERY AND O-RING ...12
CHANGE MODE SELECTOR RING...13
ORBILOC MOUNTS. . . . . . . . . . . . . . . 14
CHANGE MOUNT ................16
QUICK MOUNT ADJUSTABLE .....17
ORBILOC BUCKLE MOUNT .......18
ORBILOC VELCRO STRAP .........18
ORBILOC RUBBER STRAP.........19
ORBILOC CLIP MOUNT ...........20
ORBILOC ARMBAND .............21
ORBILOC CARABINER MOUNT ....22
APPENDIX ......................23

© 2021 Orbiloc™. All rights reserved.
The Orbiloc name and logo are
among the trademarks of Orbiloc,
registered in the U.S., EU, NO and CN.
Our three-year warranty applies to the
Orbiloc Dog Dual. Please visit:
orbiloc.com/warranty/
To get the most out of your new high-
quality Orbiloc Dog Dual Safety Light™,
please read the User Manual carefully.
Congratulations on your new
Orbiloc Dog Dual™
Safety Light

4
INTRODUCTION
Orbiloc Dog Dual
Orbiloc Dog Dual is a high-quality,
lightweight LED Safety Light designed
to keep both you and your dog safe.
The Orbiloc Dog Dual Safety Light
ensures that both you and your dog are
visible to others when out and about in
the dark, and drastically reduces the
risk of accidents and other dangerous
situations.
What Safety Brings
To Orbiloc, “what safety brings” means
increased visibility of the user of the Or-
biloc lights, along with ease-of-use and
the comfort, exibility and freedom to
be active.
Powerful and lightweight lights
adapted to the needs of the outdoor
enthusiasts give you a sense of safety.
When you feel safe, you are free to
celebrate your favourite outdoor
activities along with your canine com-
panion.
Everything about the Orbiloc Safety
Lights is designed to allow you to have
fun and feel free; from the variety of
colours and the dierent mounting
options to the wide range of accessories.
5
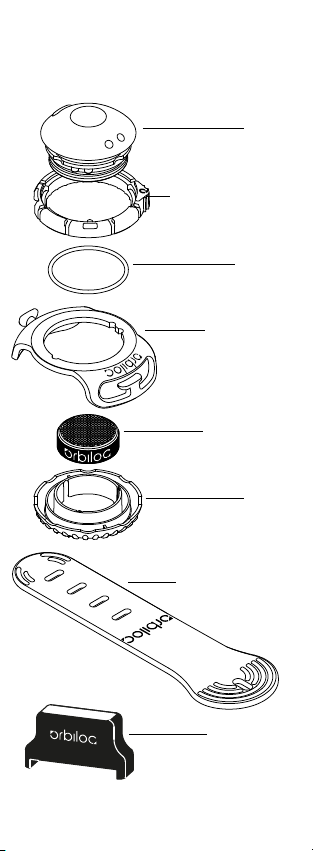
LENS (1)
MODE SELECTOR RING (2)
O-RING (3)
QUICK MOUNT (4)
BATTERY PACK (5)
2 x CR2032
BASE (6)
ADJUSTABLE STRAP (7)
SERVICE TOOL (8)

6
Please take good care of your new
Orbiloc Dog Dual™ and accessories.
Read the specic recommendations for
each product in this User Manual, also
available at orbiloc.com/user-manual/.
If the Orbiloc Dog Dual gets muddy or
exposed to seawater on a regular ba-
sis, please rinse the outside of the light
with running water while turning the
Mode Selector Ring (2). Do not open or
disassemble while rinsing the light.
Remove the battery pack (5) for long-
term storage of the light, and store the
batteries in a dry, well-ventilated area,
out of direct sunlight.
Please note, that in order to be covered
by warranty, only Orbiloc must modify
or repair your Orbiloc Dog Dual.
Orbiloc is not responsible for any injury
or damage, whether direct, indirect or
accidental, resulting from the use of its
lights or accessories.
BASIC PRINCIPLES

7
Orbiloc Dog Dual lights are manufac-
tured to the highest standards of quality
and technology, which is why we oer
a three-year warranty – absolutely free!
Simply register your Orbiloc Dog Dual
within 30 days of purchase at orbiloc.
com/warranty/.
Terms and Conditions
The Orbiloc warranty does not aect
your statutory rights.
The warranty covers the lens (1) and
the electronic parts inside of the
lens. The warranty does not cover re-
placement parts and accessories. It
is only valid with the use of original
Orbiloc replacement parts. The use
of other accessories and replace-
ment parts will render the warranty
of the Orbiloc Dog Dual invalid. Other
exclusions include normal wear and
tear, oxidation, modications or altera-
tions, incorrect storage, poor mainte-
nance, negligence, and using the light
for purposes for which it is not designed.
Warranty matters are always handled
according to our current conditions of
warranty. See the full warranty terms
and conditions at orbiloc.com/war-
ranty/.
WARRANTY

8
GETTING STARTED
Register for your three-year warranty at
orbiloc.com/warranty/.
(See page 5 for illustration references.)
Use the Service Tool (8) to tighten the base
(6) and you are ready to use your Orbiloc
Dog Dual.
Orbiloc Dog Dual gives you the freedom to
engage in your outdoor activity with your
canine companion while being safe.
We help you stay safe out there!

9
ON / OFF / STEADY / FLASH
The Orbiloc Dog Dual is very user-friendly;
just turn the Mode Selector Ring (2) to the
left or right.
The triangle indicates the desired
function.
Flashing ( ) and Steady-on ( ) symbols
are found on the top of the Lens (1).
FLASHING
STEADY-ON

10
ORBILOC ACCESSORIES
Versatile use and maintenance is the name
of the game for a long-lasting Orbiloc
experience – and our common contribution
to a sustainable world.
With our custom range of maintenance
products and mounts, you can take care of
your Orbiloc Safety Light for a lifetime and
adapt it to your specic needs.
See the accessory range at:
orbiloc.com/product/orbiloc-dual-acces-
sories/
ORBILOC MAINTENANCE
The Orbiloc Safety Light appeals to
anyone who rejects“buy and throw away”
behaviour.
You can help prolong the lifetime of your
Orbiloc Safety Light with our maintenance
products:
• Orbiloc Service Kit
• Orbiloc Mode Selector Ring
• Orbiloc Mode Selector Ring PRO
Other manuals for DOG DUAL
4
Table of contents
Other ORBILOC Pet Care Product manuals


