ORBILOC DOG DUAL User manual

DOG DUAL
USER MANUAL
THE SAFETY LIGHT
MADE IN DENMARK
Register for your 3-year warranty
at www.orbiloc.com/warranty

INTRODUCTION .................04
BASIC PRINCIPLES ...............06
WARRANTY .....................07
UK/US ..........................08
DE..............................12
FR ..............................16
ES ..............................20
IT ..............................24
DK..............................28
SE ..............................32
NO .............................36
FI ..............................40
NL ..............................44

© 2015 The Orbiloc® name and logo
are among the trademarks/registered
trademarks owned by Orbiloc®.
Our three-year warranty applies to the
Orbiloc Dog Dual. Please visit:
www.orbiloc.com/warranty
To get the most from your new high
quality Orbiloc Dog Dual Safety Light,
please read the User Manual carefully.
Congratulations on your new
Orbiloc® Dog Dual
Safety Light

INTRODUCTION
Orbiloc Dog Dual
Orbiloc Dog Dual is a high quality LED
Safety Light designed to keep both you
and your dog safe.
The Orbiloc Dog Dual Safety Light
ensures that both of you are visible to
others when out and about in the dark,
drastically reducing the risk of being
involved in an accident or dangerous
situation.
Stay Safe and Visible
With Orbiloc Dog Dual, other road
users will be able to spot you from a
distance of up to ve kilometres, which
leaves them plenty of time to react.

LENS (1)
MODE SELECTOR
RING (2)
O-RING (3)
BATTERY
SHEET (4)
BUCKLE (5)
BATTERY PACK
2 x CR2032 (6)
BASE (7)
RUBBER STRAP (8)

6
Please take care of your new Orbiloc
Outdoor Dual and accessories. Read
the specic recommendations for each
product in our User Manual, available at
www.orbiloc.com.
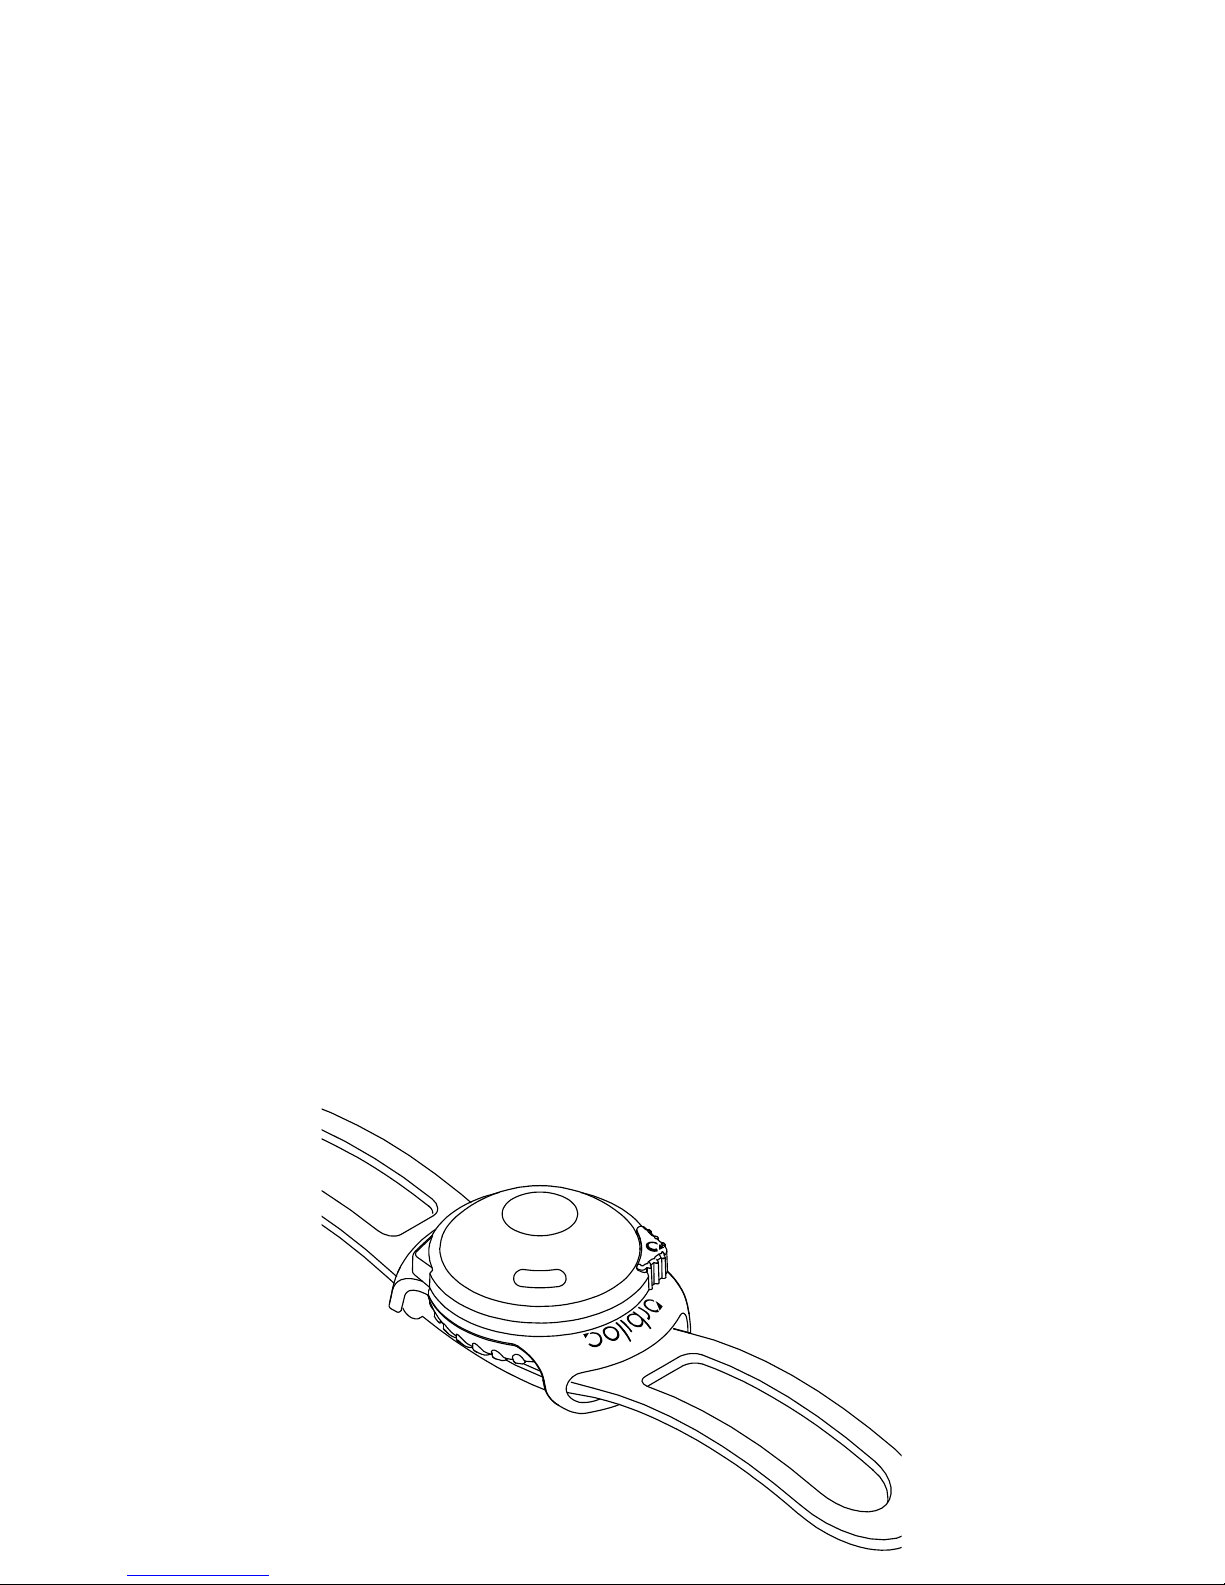
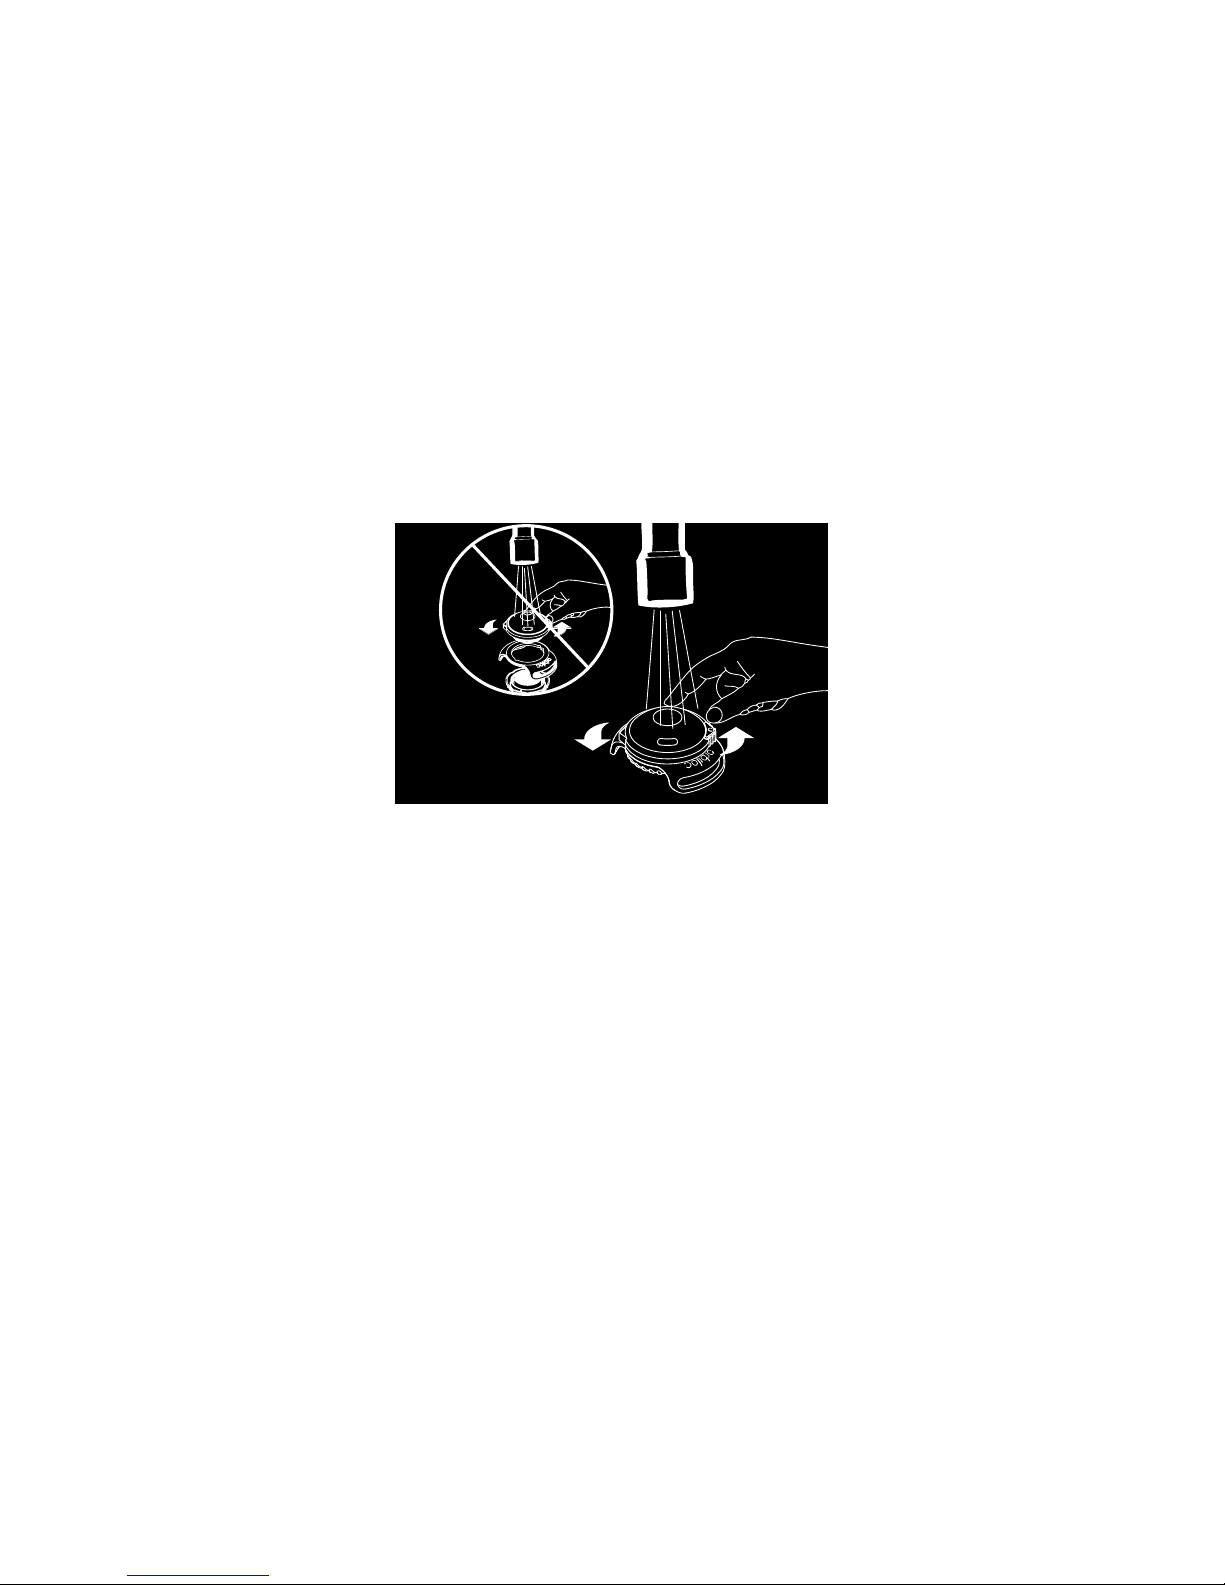
If the Orbiloc Outdoor Dual Light gets
muddy or exposed to sea water, please
rinse the outside of the Light with run-
ning water while turning the Mode
Selector Ring (2). Do not open or
disassemble while rinsing.
Remove the Battery Pack (6) for long-
term storage of the Light, and store the
batteries in a dry, well-ventilated area,
out of direct sunlight.
Please note that unless your Orbiloc
Outdoor Dual Light is modied or re-
paired by Orbiloc, your warranty will
become invalid. This does not apply to
replacement parts.
Orbiloc is not responsible for any injury
or damage, whether direct, indirect or
accidental, resulting from the use of its
Lights or Accessories.
BASIC PRINCIPLES

7
Orbiloc Dog Dual Lights are manufactu-
red to the highest standards of quality
and technology, which is why we oer
a three-year warranty – absolutely free!
Simply register your Orbiloc Dog Dual
within 30 days of purchase at:
www.orbiloc.com/warranty
Terms and conditions
The Orbiloc warranty does not aect
your statutory rights.
The warranty period applies to the
Orbiloc Dog Dual. Accessories are
not covered by the warranty. Other
exclusions include normal wear and
tear, oxidation, modications or altera-
tions, incorrect storage, poor mainte-
nance, negligence, and using the Light
for purposes for which it is not designed.
Warranty matters are always handled
according to our current conditions of
warranty. See the full warranty terms
and conditions at:
www.orbiloc.com/warranty
WARRANTY

8
GETTING STARTED
Remove the Battery Sheet (4).
Tighten the Base (7) and you are ready to
use your Orbiloc Dog Dual.
ON / OFF / STEADY / FLASH
The Orbiloc Dog Dual is very user-friendly;
just turn the Mode Selector Ring (2) to the
left or right.
The triangle indicates the desired
function.
Flashing ( ) and Steady-on ( ) symbols
are found on the top of the Lens (1).
ORBILOC BUCKLE
Slide your collar, which cannot be more
than 24 mm wide and 4 mm thick, through
the two holes in the Orbiloc Buckle (5).

9
ORBILOC RUBBER STRAP
Put the Orbiloc Rubber Strap (9) through
the two holes in the Orbiloc Buckle (5).
Place the Orbiloc Dog Dual on your object.
Pull and thereby stretch to double length
one end of the Orbiloc Rubber Strap (9)
under your object and all the way over the
Lens (1) and place it in the designated gap
of the Orbiloc Buckle (5). While pulling the
Orbiloc Rubber Strap (9) over the Lens
(1), the other end of the Orbiloc Rubber
Strap (9) must pass through the gap in the
Orbiloc Rubber Strap (9).
Repeat the above by pulling and stretching
the other end of the Orbiloc Rubber Strap
(9) under your object and all the way over
the Lens (1) and place it in the designated
gap of the Orbiloc Buckle (5).
NB! Each end of the Orbiloc Rubber Strap
(9) must make a complete tour around the
light. Don´t be afraid to stretch the Orbiloc
Rubber Strap (9).
UK
A B
B
B
A

10
ORBILOC SERVICE KIT
The Orbiloc Service Kit makes maintaining
your Orbiloc Dog Dual quick and easy. The
Orbiloc Service Kit contains a Lithium Bat-
tery Pack (6) (2 x CR2032) and an O-ring (3)
lubricated with silicone.
CHANGE BATTERY AND MAINTAIN
Unscrew the Base (7) of the Orbiloc Dog
Dual and replace the old O-ring (3) with a
new from the Orbiloc Service Kit.
Replace the old Battery Pack (6) with a
new Battery Pack (6) (with the +symbol
facing down) in the Base (7) of the Orbiloc
Dog Dual.
Make sure that the Mode Selector Ring (2)
is clicked rmly to the Lens (1). Please note
that the part with the small magnet has to
be placed in one of the four semi-circles on
the Lens (1), and that the Orbiloc Buckle
(5) is placed in the designated guide pins
on the Lens (1).
Screw the Lens (1) and Base (7) of the
Orbiloc Dog Dual together again.

11
ADDENDUM
WARNING
Orbiloc Lights are not toys. Keep away from chil-
dren. They may contain small parts which present
a choking hazard for children or pets. Individuals
with photosensitive epilepsy should avoid use of
this product. Do not open batteries, charge, or heat
above 75°C , or burn. Keep both battery and con-
tents dry.
CE MARKING
The Orbiloc Light complies with the re-
quirements for CE marking.
EMC and RoHS; Hereby Orbiloc declares that
the Orbiloc Light is in compliance with the es-
sential requirements and other relevant provi-
sions of the EMC and RoHS Directive. The dec-
larations can be found at www.orbiloc.com.
WEEE DIRECTIVE
This symbol on the Orbiloc Light or its
packaging indicates that this product
shall not be treated as household waste.
In line with the EU Directive 2002/96/EC
for Waste Electrical and Electronic Equipment re-
cycling (WEEE), the Orbiloc Light or its spare parts
must not be disposed of as unsorted municipal
waste. Please dispose the Orbiloc by returning it to
the point of sale or to your local municipal collec-
tion point for recycling.
THIS DOCUMENT
Constant product development may mean that
some information is not entirely up-to-date. The
information in this document is subject to change
without notice. Orbiloc shall not be liable for techni-
cal or editorial errors or omissions contained herein;
nor for incidental or consequential damages result-
ing from the performance or use of this material.
This document contains information protected by
copyright. No part of this document may be pho-
tocopied or reproduced in any form without prior
written consent from Orbiloc.
MODEL: Orbiloc Dog Dual
UK

12
SO NEHMEN SIE IHR ORBILOC DOG
DUAL IN BETRIEB
Entfernen Sie zunächst das Schutzpapier
der Batterie (4). Schrauben Sie Deckel (1)
und Boden (7) fest zusammen, da vom
Werk nur locker aufgeschraubt.
BLINKEND / DAUERLICHT / AUS
Das Orbiloc Dog Dual ist sehr benutzer-
freundlich. Sie wählen zwischen Dauerlicht
und blinkendem Licht. Dazu stellen Sie den
Bedienungsring (2) auf die
entsprechende Markierung: blinkend ( )
oder stetig ( ).
Nicht in die Augen leuchten. Blendgefahr!
BEFESTIGUNG DES ORBILOC
...DIREKT AM HALSBAND
Halsbänder mit einer Breite von max. 24
mm und 4 mm Stärke können Sie direkt
durch die seitlichen Halterungen ziehen.

13
DE
DER ORBILOC RUBBER STRAP
Ziehen Sie den Orbiloc Rubber Strap (9)
durch die zwei Löcher der Orbiloc Buckle (5).
Legen Sie das Orbiloc Dog Dual auf Ihren
Gegenstand. Nun ziehen Sie das eine Ende
des Orbiloc Rubber Strap (9) zur doppelten
Länge unter den Gegenstand und über das
Deckel (1) und platzieren es in der gezeigten
Önung der Orbiloc Buckle (5).
Während der Orbiloc Rubber Strap (9)
über das Deckel (1) gezogen wird, muss
das andere Ende des Orbiloc Rubber Strap
(9) durch die Önung des Orbiloc Rubber
Strap (9) gelegt werden.
Wiederholen Sie den oben beschriebenen
Vorgang, indem Sie das andere Ende des
Orbiloc Rubber Strap (9) unter Ihren Ge-
genstand und über das Deckel (1) ziehen
und es in die Önung der Orbiloc Buckle
(5) platzieren.
NB! Jedes Ende des Orbiloc Rubber Strap (9)
muss ganz um das Licht herum gelegt werden.
Sie brauchen nicht vorsichtig sein beim Aus-
strecken des Orbiloc Rubber Strap (9)!
A B
B
B
A

14
ERSATzBATTERIEN UND O-RING
Mit dem Orbiloc Service Kit halten Sie Ihr
Orbiloc Dog Dual immer funktionsfähig.
Es enthält Lithium-Ersatzbatterien (6)
(2 x CR2032) und einen Silikon-gefetteten
O-Ring (3).
BATTERIEWECHSEL UND WARTUNG
Schrauben Sie Boden (1) und Deckel (7)
des Orbiloc Dog Dual auseinander.
Tauschen Sie den O-Ring (3) aus und
wechseln Sie die Batterien (6) (+Zeichen
zeigt nach unten).
Stellen Sie sicher, dass Leuchtkörper (1)
und Ringe (2) wieder perfekt miteinander
verbunden werden. Der kleine Magnet am
Ring (2) muss an einer Einkerbung positio-
niert werden.
Dann Boden (1) und Deckel (7) wieder
zusammenschrauben.

15
DE
ANHANG
WARNHINWEIS
Der Orbiloc Leuchte ist kein Kinderspielzeug.
Halten Sie es von Kindern fern. Es enthält kleine
Teile, die Kinder und Haustiere in Erstickungsgefahr
bringen können. Personen, die an lichtempndli-
cher Epilepsie leiden, sollten das Produkt meiden.
Batterien dürfen nicht geönet, aufgeladen, über
75 °C erhitzt oder verbrannt werden. Bewahren Sie
die Batterien trocken auf.
CE KENNZEICHNUNG
Der Orbiloc Leuchte erfüllt die Anforder-
ungen der CE Richtlinie.
Restriction of Hazardous Substances - RoHS - Be-
schränkung gefährlicher Substanzen Electromag-
netic Compatibility
EMC - Elektromagnetische Verträglichkeit Der Or-
biloc Leuchte erfüllt die Bestimmungen von RoHS
und EMC. Die Deklarationen benden sich auf
www.orbiloc.com.
WEEE RICHTLINIE
Waste Electrical and Electronic Equipment
Directives - Dieses Symbol auf der Orbiloc
Leuchte oder der Verpackung zeigt an,
dass dieses Produkt nicht in den Hausmüll
gehört. Gemäß EU Direktive 2002/86/EC über Elek-
tromüll müssen Orbiloc Leuchten und - Ersatzteile
bei der Recycling Station entsorgt werden.
DIESES DOKUMENT
Aufgrund von Produktweiterentwicklungen könn-
ten Angaben nicht ganz auf dem neuesten Stand
sein. Informationen in diesem Dokument können
ohne Ankündigung geändert werden. Für enthal-
tene technische oder redaktionelle Fehler sowie
Auslassungen ist Orbiloc nicht haftbar. Orbiloc
haftet auch nicht für zufällige Schäden oder Fol-
geschäden, die beim Gebrauch entstehen. Diese
Informationen unterliegen dem Copyright. Das
Dokument darf ohne vorherige Erlaubnis durch
Orbiloc nicht fotokopiert oder reproduziert werden.
MODELL: Orbiloc Dog Dual

16
DÉMARRAGE
Retirez la Languette de la Batterie (4).
Serrez la base (7) ; votre Orbiloc Dog Dual
est prêt à l’emploi.
MARCHE / ARRÊT / CONTINUE / FLASH
L’Orbiloc Dog Dual est très simple d’utili-
sation. Tournez simplement la molette de
Sélection de Mode (2) vers la gauche ou
la droite.
Le triangle indique la fonction choisie.
Les symboles Flash ( ) et Continu ( )
se trouvent au sommet de la Lentille (1).
ORBILOC BUCKLE
Faites glisser votre collier, dont la largeur
et l’épaisseur ne doivent respectivement
pas dépasser 24 et 4 mm, à travers les deux
ouvertures dans la Boucle Orbiloc (5).

17
ORBILOC RUBBER STRAP
Placer le ruban en caoutchouc (ergo vers
le bas) dans les 2 inserts de votre lampe
Orbiloc
Positionner votre lampe Orbiloc Dog Dual
sur votre objet.
Tirez et étirer vers le dessous de votre objet,
un coté du ruban jusqu’a l’autre extrémité
du ruban en caoutchouc Orbiloc (9).
L’objectif est de le placer dans l’insert op-
posé (espace désigné gure B).
Répéter l’opération en tirant et étirant
l’autre extrémité du bracelet en caou-
tchouc Orbiloc (9) sous votre objet. Placer
le caoutchouc dans l’insert opposé (5).
NB! Chaque extrémité du bracelet en caou-
tchouc Orbiloc (9) doit faire le tour complet
de la lampe. N’ayez pas peur d’étirer le
ruban en caoutchouc Orbiloc (9).
FR
A B
B
B
A

18
ORBILOC SERVICE KIT
Le Kit d’entretien Orbiloc vous permet
d’entretenir facilement et rapidement votre
Orbiloc Dog Dual. Le Kit d’entretien Orbiloc
contient un Pack de Piles (6) lithium (2 x CR2032)
et un Anneau (3) lubrié avec du silicone.
CHANGEMENTDELAPILEETENTRETIEN
Dévissez la Base (7) de l’Orbiloc Dog Dual
et remplacez le vieil Anneau (3) par le
nouveau du Kit d’entretien Orbiloc.
Remplacez la vieille Pile (6) par la nouvelle
(en mettant le signe +vers le bas) dans la
Base (7) de l’Orbiloc Dog Dual.
Assurez-vous que la molette de Sélection
de Mode (2) est fermement attachée à la
Lentille (1) (la partie avec le petit aimant
doit être placée dans un des quatre demi-
cercles de la Lentille (1)) et que la Boucle
Orbiloc (5) est placée dans les broches de
guidage de la Lentille (1).
Vissez ensemble le Sommet (1) et la Base
(7) de l’Orbiloc Dog Dual.

19
FR
AJOUT
AVERTISSEMENT
Orbiloc Lights ne sont pas des jouets. Gardez-les
à distance des enfants. Elles peuvent contenir des
petites pièces qui peuvent présenter des risques
d’étouement pour les enfants et les animaux de
compagnie. Les personnes sourant d’épilepsie
photosensible ne doivent pas utiliser ce produit.
N’ouvrez pas la pile, ne la chargez pas, ne la chauez
pas à plus de 75°C, ne la brûlez pas. Conservez la
pile et les pièces au sec.
MARQUE CE
Orbiloc Light est conforme aux normes
de marque CE.
EMC RoHS; Par la présente Orbiloc déclares que
Orbiloc Light est conforme aux normes essentielles
et aux autres dispositions applicables de la direc-
tives EMC RoHS. Les déclarations sont disponibles
sur www.orbiloc.com.
DIRECTIVE DEEE
Ce symbole sur l’Orbiloc Light et son
emballage indique que ce produit ne
doit pas être traité comme un déchet
ménager. En conformité avec la Directive
de l’Union Européenne 2002/96/CE sur les Déchets
d’équipements électriques et électroniques (DEEE),
l’Orbiloc Light et ses pièces détachées ne doivent
pas être jetés sans être triés. Jetez l’Orbiloc en le
rapportant au votre centre local de recyclage.
CE DOCUMENT
Certaines informations peuvent ne pas être à jour
du fait du développement constant du produit. Les
informations du présent document sont sujettes à
changement sans avis préalable. Orbiloc n’est pas
responsable des erreurs techniques ou éditoriales
ou des omissions du présent document, ni des
préjudices conséquents ou secondaires des perfor-
mances ou de l’utilisation de ce matériel. Le présent
document contient des informations protégées
par droit d’auteur. Aucune partie du présent docu-
ment ne peut être photocopiée ou reproduite sous
une quelconque forme sans accord préalable écrit
d’Orbiloc.
MODÈLE: Orbiloc Dog Dual

20
PARA COMENzAR
Quitar la Lámina de la Batería (4).
Ajustar la Base (7) y podrá comenzar a usar
su Orbiloc Dog Dual.
ENCENDIDO / APAGADO
CONTINUO / INTERMITENTE
Orbiloc Dog Dual es realmente fácil de
usar, solamente se debe girar el Anillo
Selector de Modo (2) hacia la izquierda o
la derecha.
El triángulo indica la función deseada.
Los símbolos Intermitente ( ) y Continuo
( ) se encuentran en la parte superior de
la Óptica (1).
ORBILOC BUCKLE
Deslizar su collar, que no podrá tener más
de 24 mm de ancho y 4 mm de espesor, por
las dos ranuras de la Hebilla Orbiloc (5).
Other manuals for DOG DUAL
4
Table of contents
Languages:
Other ORBILOC Pet Care Product manuals