Orbit baby helix plus User manual

‘CLICK’


‘CLICK’
‘CLICK’


‘CLICK’


Helix Plus Double Stroller
Upgrade Kit for Stroller
®
®
Scan this code with your
mobile phone to access the
most updated manual and
see other helpful videos.

2 – ENGLISH – Manual Text Booklet – Orbit Baby Helix Plus Upgrade Kit

Manual Text Booklet – Helix Plus Upgrade Kit – ENGLISH – 3
Important: Read these instructions carefully before use and keep them for future
reference. Your children's safety may be affected if you do not follow these instructions.
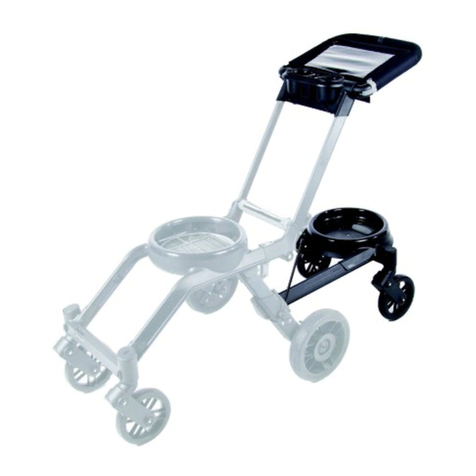
The Orbit Baby Helix Plus Double Stroller Upgrade Kit is made up of eight parts, the Helix
SmartHub Attachment, the Helix handlebar, two stroller frame leg connectors, two sets of
stroller rear wheel disks, a stroller basket and a ShadePad.
Using this Instruction Manual:
Each step is described in both text in this booklet, and illustrations in the manual foldout. Numbers like
in this booklet refer to the related sections in the manual foldout. Boxes like in this booklet refer
to individual steps illustrated in sections of the manual foldout.
Letters like Ⓐrefer to the product parts identified on the labeled illustrations located both in this
booklet and in the manual foldout.
Some generic product names may differ by country. Stroller may be called pushchair. Bassinet may be called
carry cot. Bassinet on a stroller frame may be called pram. Rocker may be called stand.
In this manual, the word seats refers to all Orbit Baby products that can be docked into that particular SmartHub position.
For example, seats, when referrring to the rear SmartHub, refers to the bassinet, stroller seat and infant car seat.
All product specifications subject to change.
ShadePad
Helix handlebar
Helix SmartHub Attachment
stroller rear wheel disks
stroller frame leg connectors
stroller basket

4 – ENGLISH – Manual Text Booklet – Orbit Baby Helix Plus Upgrade Kit
twist grip
lock Ⓒ
ShadePad™ Ⓐ
thumbscrews Ⓑ
fold lock Ⓔ
front
SmartHub™ Ⓕ
Ⓖ release cap
Ⓗ swivel lock
twist grip Ⓓ
Ⓘ handlebar
Ⓛ stroller basket
handle
Ⓜ plastic handles
Ⓝ release lever
Ⓞ curb step
Ⓟ rear SmartHub™
Ⓡ Helix SmartHub
Attachment wheels
Ⓠ wheel release
button
Ⓤ tie rod bolt
Ⓥ brake levers
Ⓣ stroller frame leg
connectors
Ⓢ rear leg
Ⓧ wheel disk
Ⓦ wheel disk cap
Ⓚwater
bottle tray
Ⓙhandlebar
levers

Manual Text Booklet – Helix Plus Upgrade Kit – ENGLISH – 5
⚠ WARNING ⚠
FAILURE TO FOLLOW THESE WARNINGS AND THE INSTRUCTIONS COULD RESULT IN
SERIOUS INJURY OR DEATH
◦ Do not let others use the Orbit Baby Helix Plus Double Stroller Upgrade Kit or other
connected Orbit Baby products unless they understand how to properly use them.
◦ Do not use the stroller if any parts are damaged, broken or missing. If the instruction
manual is missing or you need replacement parts or assistance, see the contact
information included with this manual.
PREVENT SERIOUS INJURY OR DEATH
◦ NEVER leave your child unattended.
◦ Always provide the supervision necessary for the continued safety of your child.
◦ Stroller must be fully erected and locked in position prior to use.
◦ Maximum child weight for the seat on the front SmartHub is 40 lbs (18 kg) when using the
Stroller Frame G2 and 50 lbs (23 kg) with the Stroller Base G3. Maximum child weight for
the seat on the rear SmartHub is 40lbs (18 kg). Maximum child height for the seat on the
rear SmartHub is 34 in (86 cm). Note that 34 in (86 cm) is a reduced height limit for the
stroller seat when using it on the rear SmartHub.
◦ Never use any Orbit Baby Toddler Car Seat on the rear SmartHub. Use any Orbit Baby
Toddler Car Seat only on the front SmartHub.
FALL HAZARD: Avoid serious injury from falls or tipover.
◦ Always make sure the Helix SmartHub Attachment is securely locked into the stroller frame
leg connectors before placing your child into the stroller or starting to stroll. Pull backwards
on the Helix SmartHub Attachment and check that the red stripes on both sides are NOT
visible.
◦Adult control required. Do not allow your child to stand on, sit on or play with the Helix
SmartHub Attachment. It is not a toy.
◦Never let your child climb into or out of a seat unassisted.
◦Always make sure the stroller seat, infant car seat or bassinet on the Helix SmartHub
Attachment is locked in the forward-facing position before strolling. Side-facing locked
positions are for stationary use only.

6 – ENGLISH – Manual Text Booklet – Orbit Baby Helix Plus Upgrade Kit
⚠ WARNING ⚠
FALL HAZARD: Avoid serious injury from falls or tipover.
◦ Always remove or adjust the topmost seat to avoid loss of control. Always rotate the seat
to the side before lifting to remove it from the stroller. If not rotated, seats can overlap,
interfering with removal and possibly cause a loss of control and the seat to be dropped.
◦DO NOT use stroller on stairs or escalators with children in it.
◦DO NOT lift or carry stroller by the water bottle tray or Helix SmartHub Attachment.
PREVENT STROLLER TIPOVER AND CHILD'S SUDDEN CONTACT WITH STROLLER:
◦ Use caution when maneuvering curbs and irregular surfaces. Use curb breaks whenever
possible. If one is not available, move over the curb slowly with the stroller perpendicular to
the curb. To lift the stroller onto the curb, pull back on the handlebar and push forward with
one foot on the Helix Attachment curb step to lift the stroller onto the curb. Do not allow the
stroller to drop off the curb.
PREVENT STROLLER TIPOVER:
◦ Do not place parcels or accessory items in the stroller unless made by or specifically approved
by Orbit Baby. Added parcels or accessory items can make the the stroller become unstable.
◦ Do not place more than 1 lb (0.5 kg) in the water bottle tray. Excessive weight may cause a
hazardous unstable condition to exist.
◦ Do not place more than 1.5 lb (0.7 kg) in the ShadePad. Excessive weight may cause a
hazardous unstable condition to exist.
AVOID BURN INJURY:
◦Never use the water bottle tray to hold hot liquids. These liquids may splash and spill onto
you or your children and cause injury.
AVOID LOSS OF CONTROL OF THE STROLLER:
◦ Always use front wheel swivel locks when pushing the stroller on uneven terrain.
◦ Use caution when pushing stroller on uneven terrain or hills.
◦Always lock the parking brake when the stroller is stopped.
◦ NEVER leave the stroller unattended on a hill or incline even when the stroller brake is locked.

Manual Text Booklet – Helix Plus Upgrade Kit – ENGLISH – 7
AVOID PINCH INJURY:
◦Keep fingers clear of stroller when folding and unfolding the stroller.
◦Keep your children's hands and fingers clear of moving parts when adjusting the stroller or
handlebar.
◦Keep your children's arms, legs and feet clear when rotating seats and adjustng seat
recline.
◦ Use caution when pushing stroller near traffic or in highly congested areas.
Getting Started
Remove all the parts from the box. You should have received a Helix SmartHub Attachment, two
(2) Helix SmartHub Attachment wheels, a handlebar, two (2) stroller frame leg connectors, two (2)
sets of stroller rear wheel disks, a stroller basket, a ShadePad and a Phillips screwdriver tool. These
parts are illustrated in your manual foldout. Note that the fasteners needed for installation are loosely
screwed into the various parts to help you keep track of where they go. You will need to remove
these fasteners before installing each part.
⚠ WARNING ⚠
PINCH HAZARD:
◦ Avoid injury from pinching or finger entrapment. Keep children away when unfolding the
stroller. Keep your hands clear of moving parts when folding and unfolding the stroller.
◦ Stroller must be fully erected and locked in position prior to use. Listen for the audible
CLICK to confirm that it is fully deployed.
◦ Use care when removing the thumbscrew snap rings as they can fly through the air.
Remove children from the area where you are working and wear proper eye protection.
Account for both snap rings and properly dispose of them as they can pose a choking
hazard for children.

8 – ENGLISH – Manual Text Booklet – Orbit Baby Helix Plus Upgrade Kit
Removing your old handlebars
Start with your stroller frame open and erect. Completely unscrew both thumbscrews Ⓑunder the
Orbit Baby Stroller G2 water bottle tray.
Remove the old water bottle tray by pulling up firmly. Remove the stroller strap.
Using the included Phillips screwdriver tool, remove the screw that holds the left water bottle
bushing and handlebar in place. Then remove the screw on the other side in the same manner.
Push down on the left handlebar button and pull up on the handlebar to remove it from the stroller
frame. Remove the right handlebar in the same manner.
Remove the thumbscrews by taking off the small snap rings that hold them in place. Insert the tip
of the included Phillips screwdriver tool or a ballpoint pen into the small openings in the snap ring
and lever outward.
⚠ WARNING ⚠
◦ Proper assembly is required. Check that handlebar is properly installed and fasteners are tight.
Installing your new handlebar
Remove the two loose Phillips screws in the bottom of the handlebar assembly. Install the new
handlebar assembly by sliding the water bottle tray Ⓚonto the exposed aluminum handlebar
tubes. Push the water bottle tray down until it covers the square cross tube and cannot be pushed
down further.
Using the included Phillips screwdriver tool, install the two screws through the square cross tube
and thread them into the silver fittings in the handlebar assembly. Tighten completely.
⚠ WARNING ⚠
◦ Proper assembly is required. Check that wheel disks are properly installed and fasteners are
tight. Shake rear wheels after installation to ensure neither the disk nor the cap move or rattle.
Installing your wheel disks
Remove both rear wheels from the stroller frame by pulling down on the bent metal tab behind the
wheel and pulling the wheel outwards. Remove the three Phillips screws that are loosely fastened

Manual Text Booklet – Helix Plus Upgrade Kit – ENGLISH – 9
into the wheel disk using the included Phillips screwdriver tool. Insert a wheel disk Ⓧ into the
inside of each wheel, lining up the spokes and slots in the wheel disk. Insert the wheel disk cap Ⓦ
on the outside of each wheel lining up the screw holes with the bosses on the wheel disk. Using
the included Phillips screwdriver tool, fully tighten the three mounting screws to secure the wheel
disks and caps to the rear wheels. Check your installation by shaking the rear wheel and ensuring
neither the disk nor the cap move or rattle.
⚠ WARNING ⚠
◦ Proper assembly is required. Check that leg connectors are properly installed and fasteners
are tight. Pull on leg connectors to confirm they are secure.
Attaching the stroller frame leg connectors
Open one of the stroller frame leg connector Ⓣ assemblies by removing the two Phillips screws
that are loosely threaded into the connector using the included Phillips screwdriver tool. Position
each leg connector against its corresponding rear stroller frame leg, so that the triangular Helix
SmartHub Attachment openings are on the inside of the rear leg Ⓢ. Slide the open leg connector
over the rear leg and around the tie rod bolt Ⓤ.
Close the leg connector over the rear stroller frame leg. Using the Phillips screwdriver tool, fully
tighten the two mounting bolts to secure the connector in place. Check your installation by
twisting on the connector to ensure it does not move. Repeat with the other connector.
Attaching the stroller basket
Insert the stroller basket handle Ⓛinto the rail on the underside of the front SmartHub. You will
hear a CLICK when it locks in place.
Expose the plastic handles Ⓜ through the opening in the basket fabric and then fix the front of the
stroller basket to the stroller frame by inserting the plastic handles one at a time into the openings
on the front part of the stroller frame.

10 – ENGLISH – Manual Text Booklet – Orbit Baby Helix Plus Upgrade Kit
⚠ WARNING ⚠
PINCH HAZARD:
◦ Avoid injury from pinching or finger entrapment. Keep children away when inserting the
Helix SmartHub Attachment. Keep your hands clear of moving parts when inserting and
removing the Helix SmartHub Attachment.
FALL HAZARD:
◦ Always check that the Helix SmartHub Attachment is securely locked into the stroller frame
leg connectors before placing your child into stroller or starting to stroll. Pull backwards
on the Helix SmartHub Attachment and check that the red stripes on both sides are NOT
visible.
Assembling and attaching the Helix SmartHub Attachment
Insert the two Helix SmartHub Attachment wheels Ⓡ. You will hear a CLICK when they are locked
in place.
Grasp the Helix SmartHub Attachment with one hand while holding the stroller frame with
your other hand. Pull on the release lever Ⓝand guide both tube ends into the stroller frame
leg connectors Ⓣuntil they are fully inserted. You will hear a CLICK when the Helix SmartHub
Attachment is locked in place.
Attaching the ShadePad
Grasp the ShadePad Ⓐby its sides and slide it over the handlebar while pulling it wide open, until
the ShadePad lines up with the end of the foam grip. Ensure that the clear window faces upward
and the flap with two snaps faces the handlebar.
Attach the strips of hook and loop fastener on the underside of the ShadePad. Make sure that in
doing so the upper two elastic bands remain covered.
Snap both corners of the ShadePad to the water bottle tray Ⓚ.
Assembly of the Orbit Baby Helix Plus Double Stroller Upgrade Kit is now complete.

Manual Text Booklet – Helix Plus Upgrade Kit – ENGLISH – 11
Using your Orbit Baby seats with the Helix Plus Double Stroller Upgrade Kit
⚠ WARNING ⚠
FALL HAZARD: Avoid serious injury from falls or sliding out.
◦ Restraint harness use is required for all use modes when harness is present on the
product. Always secure your child to avoid serious injury from falling or sliding out. Always
use both the shoulder and lap portions of the harness.
◦ Never let your child climb into or out of a seat unassisted.
STRANGULATION HAZARD:
◦ Children have STRANGLED in loose or partially buckled harness straps. Fully restrain the
child at all times.
PINCH HAZARD:
◦ When docking or adjusting your seats, keep hands and fingers, especially those of children,
clear of moving parts and the SmartHubs.
◦ Keep SmartHub areas clean. Keep all metal and plastic parts clear of objects, debris and
liquids to allow proper and safe functionality.
◦ Listen for audible CLICK which indicates that seats are locked into the SmartHubs.
◦ Always check that the Orbit Baby seats are securely locked into the SmartHubs by tugging
upwards and turning.
◦ Lock the stroller wheels and check stability of the stroller before placing your children in or
removing your children from seats.
◦ Always make sure that the seat is locked in forward-facing position [front and rear
SmartHubs] or rear-facing position [front SmartHub] before strolling. Side-facing locked
positions are for stationary use only. Do not rotate seats when the stroller is in motion.
◦ Lock the parking brakes and check stability when the stroller is stationary.

12 – ENGLISH – Manual Text Booklet – Orbit Baby Helix Plus Upgrade Kit
Loading your child into the rear SmartHub seat
Rotate the infant car seat by pulling one or both levers and rotating the seat into the sideways
loading position. Rotate the stroller seat or bassinet by pulling both levers and rotating the seat to a
sideways loading position.
Place your child in the seat and secure according to the seat’s instruction manual. Rotate the seat
forward-facing to begin strolling.
Restrictions on the double stroller frame
Never use both stroller seats in the position shown in the diagram; a child’s feet could become
pinched between the footrests. Avoid injury to the child in rear seat from kicking or contact with
footrest on stroller seat; only use footrest adjustment position 1 when stroller seat is rear-facing on
the front SmartHub.
The Orbit Baby bassinet, infant car seat, stroller seat or toddler car seat can be used on the front
SmartHub. The bassinet, infant car seat and toddler car seat will lock in four rotational positions.
The stroller seat will lock in two rotational positions (front and rear-facing).
The Orbit Baby bassinet, infant car seat or stroller seat can be used on the rear SmartHub. The
seats must face forward for strolling but may be positioned to the side for loading.
Maximum child weight on either SmartHub (front or rear) is 40 lbs (18 kg). Maximum height for the
rear SmartHub is 34 in (86 cm). Note that 34 in (86 cm) is a reduced height limit for the
stroller seat when used on the Helix SmartHub Attachment.
Using Your Double Stroller
⚠ WARNING ⚠
AVOID PINCH INJURY:
◦ Keep hands and fingers clear of moving parts when adjusting the handlebar.
◦ Always maintain control of the handlebar after opening the handlebar levers to avoid
contact with the child in the rear seating positon.
Other manuals for helix plus
1
Table of contents
Other Orbit baby Stroller manuals

Orbit baby
Orbit baby O2 User manual

Orbit baby
Orbit baby G2 User manual

Orbit baby
Orbit baby Double Stroller Kit User manual

Orbit baby
Orbit baby Orbit User manual

Orbit baby
Orbit baby G2 Installation and operation manual
Orbit baby
Orbit baby G5 User manual
Orbit baby
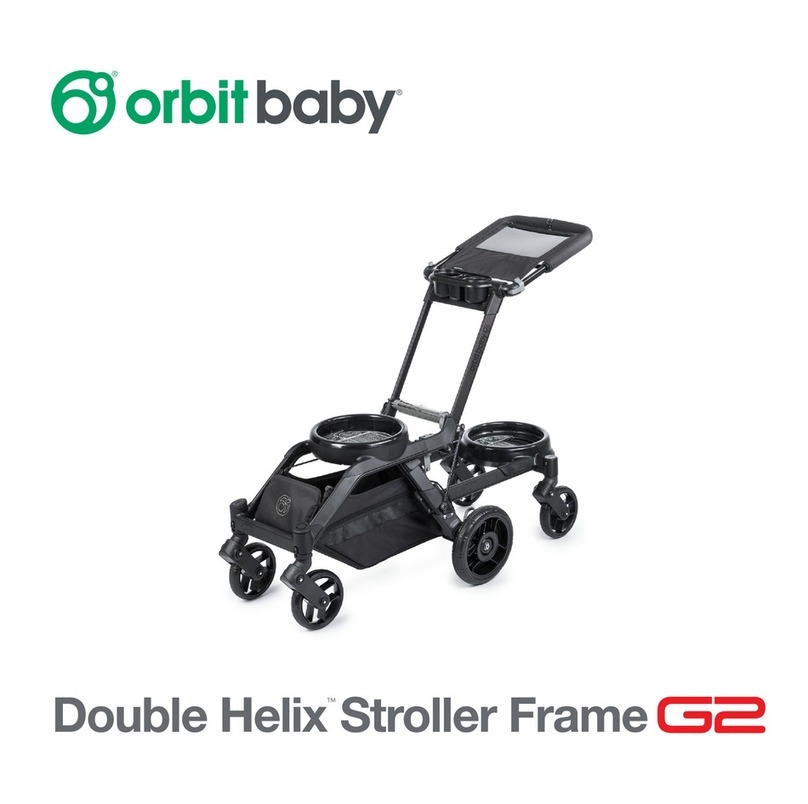
Orbit baby Double Helix G2 User manual