manuals.online logo
Brands
  1. Home
  2. •
  3. Brands
  4. •
  5. Orbit
  6. •
  7. Lawn And Garden Equipment
  8. •
  9. Orbit 470228 Guide

Orbit 470228 Guide

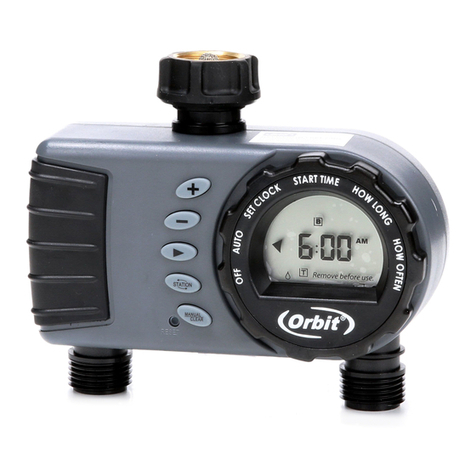
The manual outlet of the timer gives access
to the hose faucet without interrupting the
programmed cycle of the digital port.
1. Open the valve in the port by pulling the lever
away from the timer (see drawing)
2. Close the valve by pushing the lever towards
the timer (See drawing)
PROGRAMMING THE TIMED OUTLET
NOTE: This section only relates to the timed outlet. The
manual outlet cannot be programmed.
SET CLOCK
1. Turn dial to SET CLOCK.
2. Using the +/- buttons, set the time of day,
including AM and PM.
3. Turn dial to save changes.
START TIME
1. Turn dial to START TIME.
2. Using the +/- buttons, set your start time,
including AM and PM.
3. Turn dial to save changes
DIAL—Rotate the dial to customize your
watering schedule
RESET—Press to clear all programming
MANUAL/CLEAR—Press to water manually or to
clear programming within a specific program
+/- BUTTONS—Use these buttons to adjust time
and system setup
WATERING TIMER
TIMER FEATURES
AUTO—Timer waters according to your
customized schedule
SET CLOCK—Set the time of day
START TIME—Select what time you would like
watering to start
HOW LONG—Determine how long to water
HOW OFTEN—Choose how often you will water
OFF—Turn off all watering
QUICK START
INSTALLING THE BATTERIES
1. Remove the tray on the back of the timer by
sliding or pulling it out.
2. Insert two AA (1.5V) alkaline batteries
(included) and replace the tray.
WHEN EXPECTING FREEZING TEMPERATURES,
TIMERS SHOULD BE REMOVED FROM THE
HOSE FAUCET AND STORED INDOORS TO AVOID
POTENTIAL FREEZE DAMAGE.
ITM. / ART. 470228
CARE & USE INSTRUCTIONS
IMPORTANT, RETAIN FOR FUTURE REFERENCE:
READ CAREFULLY
FILTER TRAPS DIRT PARTICLES,
PROLONGING LIFE OF TIMER. CLEAN FILTER
REGULARLY BY REMOVING IT FROM THE
HOSE TAP CONNECTION USING YOUR THUMB
AND RUNNING THROUGH COLD WATER. IF
WORN, REPLACE WITH A NEW FILTER FROM
YOUR NEAREST HARDWARE STORE.
HOSE TAP
CONNECTION
+/-
BUTTONS
MANUAL/
CLEAR
MANUAL
LEVER
FILTER
DIAL
RESET
CAUTIONS
BATTERIES INSTRUCTIONS
• Always purchase the correct size and grade of
battery most suitable for the intended use.
• Always replace the whole set of batteries at one
time, taking care not to mix old and new ones, or
batteries of different types.
• Clean the battery contacts and also those of the
device prior to battery installation.
• Ensure the batteries are installed correctly with
regard to polarity (+ and -).
• Remove batteries from equipment which is not
to be used for an extended period of time.
• Remove used batteries promptly.
For recycling and disposal of batteries to protect
the environment, please check the internet or your
local phone directory for local recycling centers
and / or follow local government regulations.
MANUAL OUTLET
Lever closed Lever open
AM
AM
MANUAL
OUTLET
TIMED
OUTLET
AM
Printers are responsible
for meeting print
production requirements.
Any changes must be
approved by Orbit®.
Printed piece must meet
designated specifications
on this form.
© 2014 Orbit Inc.
This work is the property
of Orbit®, and cannot be
used, reproduced or
distributed in any way
without their express
permission.
Dieline
PMS
0000
Fold
PMS
0000
Product
Coverage
PMS
0000
Dims./
Callout
PMS
0000
∙
∙
∙
∙
Orbit®
1.801.299.5555
orbitonline.com Glue
Folded Flat Additional Information
PRIN TERS ARE
REQUIRED TO MATCH
ALL SP ECIFIED
PMS COLORS.
K
DATE: 09/1/2015
DESIGNER: NK MARKETING: SW
SOFTWARE: Adobe Indesign CS6
ARTWORK №: 56865-24E rA L:
W:
H:
000.000" W:
H:3.0"
3.0"
12.0"
6.0"
56865-24E rA
HOW LONG
1. Turn dial to HOW LONG.
2. Using the +/- buttons, select watering
duration from 1 to 240 minutes
3. Turn dial to save changes.
HOW OFTEN
1. Turn dial to HOW OFTEN.
2. Using the +/- buttons, set your watering
frequency. You can choose to water every 6
hours, 12 hours, or from 1 to 7 days.
NOTE: 1 is every day, 2 is every other day, etc.
3. Turn dial to save changes.
Congratulations! Your timer is now programmed.
Turn your dial to AUTO to allow your timer to
water according to programmed time, station,
duration, and frequency.
ADDITIONAL FEATURES
RAIN DELAY
HRS
Rain delay allows you to postpone watering for
a set period of time. To access the rain delay,
follow the steps below.
1. With the dial on AUTO, press the + button to
select a delay of 24 hrs, 48 hrs, or 72 hrs.
2. Screen will flash between clock and hours
remaining before programmed cycle
resumes.
3. To remove rain delay, turn dial to OFF
and then back to AUTO.
MANUAL/HAND WATERING
This feature allows you to water without
interrupting your set schedule for your timed
outlet. To access this feature, follow the steps
below.
1. With the dial on AUTO, press the
MANUAL button.
2. Use the + and – buttons to select watering
time, from 1 to 240 minutes.
NOTE: There may be a slight delay between the time
the manual button is pressed and when watering begins.
To stop manual watering, turn the dial to OFF.
Turn the dial back to AUTO to resume your
programmed watering schedule.
Turning the dial to the OFF position at any time
during the day will reset the timer’s internal
timing. This will cancel all scheduled watering
MANUAL
MINUTES
times for the day until the next programmed
START TIME. This means if you turn the dial
back to AUTO the timer will not water until the
next day; beginning at your desired programmed
START TIME.
Example:
You have a 6:00 AM START TIME with HOW
OFTEN 6 hour intervals. If you turn the dial to
OFF at 10:00 AM today the timer will not water
until tomorrow at 6:00 AM. The 12:00 PM, 6:00
PM, and 12:00 AM watering times have been
cancelled for the day.
TROUBLESHOOTING
NOTE: Please make sure you are using the timed outlet. The
manual outlet can only be opened using the side lever.
WATER DOES NOT COME ON AT DESIRED TIME.
CHECK IF:
• Clock is set to correct time,
including AM and PM.
• Start time is set to desired time, including AM
and PM.
• Rain Delay is on. Clear if necessary.
TIMER DOES NOT WATER.
CHECK IF:
• Timer is set to AUTO.
• Hose faucet is on.
• Batteries are low.
DAYS
• Clock is set to correct time,
including AM and PM.
• Rain Delay is on. Clear if necessary.
WATER WON’T TURN OFF.
CHECK IF:
• HOW LONG is set to desired time.
WORKING WATER PRESSURE
Minimum: 25 psi
Maximum: 100 psi
WORKING TEMPERATURE
Maximum: Do not exceed 120°F
Minimum: Keep from freezing
WARNINGS
For outdoor use with cold water only.
MINUTES
Orbit® Irrigation Products, Inc.
North Salt Lake, UT 84054 USA
1.801.299.5555
orbitonline.com
M-F, 7 AM - 5 PM MSDT
English
United States, Canada, Mexico
© 2015 Orbit Irrigation Products, Inc.
All rights reserved. All trade names are
registered trademarks of respective
manufacturers listed.
Customer Service
1-801-299-5555
orbitonline.com
Other Orbit Lawn And Garden Equipment manuals

Orbit B-hyve User manual

Orbit

Orbit B-hyve User manual

Orbit WaterMaster series User manual

Orbit

Orbit WaterMaster series User manual

Orbit 24723 User manual

Orbit

Orbit 24723 User manual

Orbit 56041 User manual

Orbit

Orbit 56041 User manual

Orbit 56417 User manual

Orbit

Orbit 56417 User manual

Orbit 56041 User manual

Orbit

Orbit 56041 User manual

Orbit b-hyve WT24E User manual

Orbit

Orbit b-hyve WT24E User manual

Orbit 56905 User manual

Orbit

Orbit 56905 User manual

Orbit ArizonaMist 20030 User manual

Orbit

Orbit ArizonaMist 20030 User manual

Orbit 56905 User manual

Orbit

Orbit 56905 User manual

Orbit 56544 User manual

Orbit

Orbit 56544 User manual

Orbit eco-LOCK User manual

Orbit

Orbit eco-LOCK User manual

Orbit 20050 User manual

Orbit

Orbit 20050 User manual

Orbit Yardworks 62015 User manual

Orbit

Orbit Yardworks 62015 User manual

Popular Lawn And Garden Equipment manuals by other brands

Simplicity 2636 Illustrate parts list

Simplicity

Simplicity 2636 Illustrate parts list

Altrad ATIKA HSC 40-600 Assembly and operating  instruction sheet

Altrad

Altrad ATIKA HSC 40-600 Assembly and operating instruction sheet

Makita EE400MP Original instruction manual

Makita

Makita EE400MP Original instruction manual

EINHELL GE-SC 35/1 Li Original operating instructions

EINHELL

EINHELL GE-SC 35/1 Li Original operating instructions

Tiger TWR-180 Operator's manual

Tiger

Tiger TWR-180 Operator's manual

Stihl MF-MM instruction manual

Stihl

Stihl MF-MM instruction manual

Sunjoy Davis Pavilion Assembly instructions

Sunjoy

Sunjoy Davis Pavilion Assembly instructions

Mantis 5265 quick start guide

Mantis

Mantis 5265 quick start guide

Simplicity 2392 Illustrated parts list

Simplicity

Simplicity 2392 Illustrated parts list

Worx WG430 instructions

Worx

Worx WG430 instructions

SuperCloset SUPERROOM instruction manual

SuperCloset

SuperCloset SUPERROOM instruction manual

Gardena V1 Operator's manual

Gardena

Gardena V1 Operator's manual

IXOM Medora GridBee SN10 owner's manual

IXOM

IXOM Medora GridBee SN10 owner's manual

COSMO Bully TSS Series User Maintenance Manual and Spare parts

COSMO Bully

COSMO Bully TSS Series User Maintenance Manual and Spare parts

Oase Lunaqua 35 operating instructions

Oase

Oase Lunaqua 35 operating instructions

juwel Profiline 20577 Assembly instructions

juwel

juwel Profiline 20577 Assembly instructions

Echo SHC-260 Operator's manual

Echo

Echo SHC-260 Operator's manual

hillvert HT-COSTIGAN-50X12S01 user manual

hillvert

hillvert HT-COSTIGAN-50X12S01 user manual

manuals.online logo
manuals.online logoBrands
  • About & Mission
  • Contact us
  • Privacy Policy
  • Terms and Conditions

Copyright 2025 Manuals.Online. All Rights Reserved.