1. Glass Enclosure
2. PC Board Assembly (1 or 3)
3. PC Board Screws (4 or 12)
4. Cable Jumpers (Triple Only)
5. Cylinder Assembly (1 or 3)
6. Standard Cushion (1 or 3)
7. AC Adapter
8. Warranty Registration
9. Instruction Book
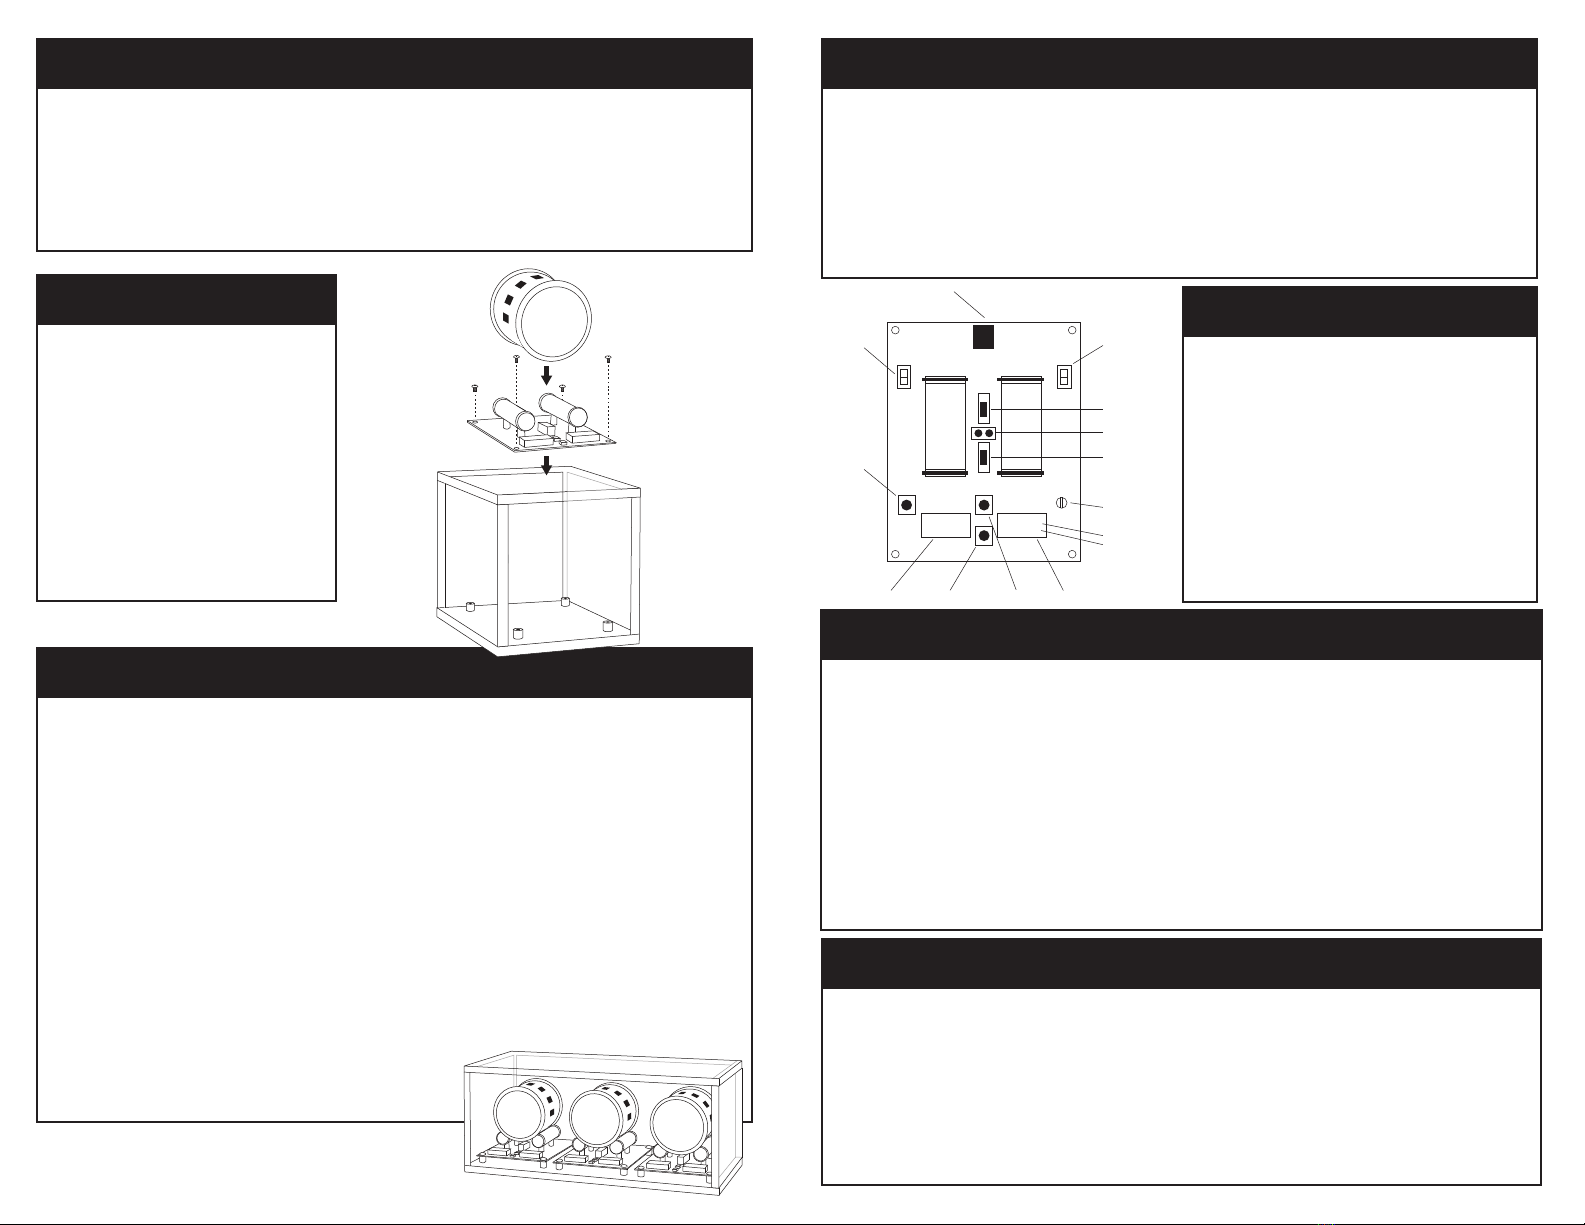
Assembly
1. Carefully remove the PC board from the static sleeve and position on the
board supports.
2. Remove the 4 Phillips head screws and screw into the board supports.
3. For the Tourbillon 3, plug the cable jumpers into “B” jack on PC board.
4. Using switch “D”, you can choose the desired Turns Per Day (TPD) for
your watch.
5. Using switch “F”, you can choose clockwise (CW) or counter clockwise
(CCW) rotation.
6. Plug the AC adapter into the power jack “C” and then plug into the wall.
(See Optional Settings for more information)
7. Mount watch on cushion and slide cushion into cylinder.
8. Place the cylinder on top of the support
rollers.
Included In This Box
Operating the Tourbillon Watch Winder
Programmed Operation
Tourbillon Watch Winder
Getting Started
Before you mount your watch, plug the supplied AC/DC adapter into any
convenient wall outlet. Then, plug the cord end into any input jack “C” at the
rear of the winder. The left display “G” will then read “t 10” and the right display
“K” will read “7”. After a 5 second delay, the left display will shut off and the
right display will begin flashing. Now you can set the time using buttons “H”
and “J”. Be sure to set the clock for either AM or PM (for 24 hour time, see
“Optional Settings”). Repeat the procedure for multiple units.
Optional Settings
You can easily program your winder
to suit your preferences. To do so,
remove the power plug from the jack
and then reinsert it. Immediately
depress button “A” and hold it down
until the left display “G” show “LL1”
and the right display “K” shows “12H”.
Then release button “A”. Now you
can change the following defult
settings.
Optional Settings
LED Lighting - The 4 blue LED lights on your winder provide an attractive
visual effect. However, they can be turned off if desired or the flash rate can
be changed. Flash rate is viewed on the left display. To change the setting,
depress button “H” repeatedly. “O” is off, “I” is the fastest flash rate and “2” to
“7” are increasingly slower flash rates.
Time Mode - The right display will normally show 12 hour time mode
(AM/PM) which is the factory defult. If you wish to us 24 hour time mode,
depress button “J” one time to toggle the setting (12H to 24H). When optional
programming is complete, simply press the “A” button once to save the
changes. Now you can set the time using the “J” or “H” buttons.
Congratulations!
The Tourbillon user guide will help take you though the initial set up and
programming of your new watch winder. The Tourbillon is our most advanced
PC board offered and uses photocell technology to automatically count the
Turns Per Day (TPD). Read carefully and enjoy your new Orbita.
The winding program has been preset for you at the factory to provide 800
TPD and clockwise (CW) rotation. However, you can select other programs.
Using switch “D”, you can choose the desired TPD for your specific watch.
Using switch “F”, you can select watch rotation direction, clockwise (CW) or
counter clockwise (CCW). Please note: The (REV) position is disabled and
not to be used. Not sure what setting you need? Check the watch database
on our website www.orbita.com.
236 11:30:
B
D
E
F
L
PM
AM
B
C
A
GHJK


